Keywords: Triggers, Trigger, Triggers overview, automation.
Overview
This article gives an overview of Triggers (Version 3).
To learn more about the specific Trigger Types and Actions that are compatible with your CRM or data source, please first review this article in full, then click here.
Triggers allow the user to create rules that, given certain conditions, perform a certain action. For example an email send can be triggered by a recipient clicking a link.
Click here for Triggers FAQ
Contents
How to enable Triggers
If triggers are not enabled in your system please contact your Account Manager who can enable them through:
- "Admin.System.Triggers.Triggers Enabled" and
- "Admin.System.Versions.Triggers Version 3" and
- "Admin.Roles.Enable Email Triggers Version 3"
Please Note: If you are not on Triggers Version 3, this functionality will not work for OnePlace, Salesforce, or MsDynamics.
Where can I find Triggers?
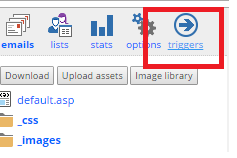
Triggers are associated to campaigns. You can access the Triggers for a certain campaign by selecting the option in the campaign menu.
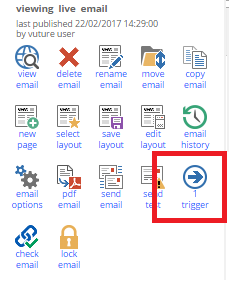
There's also a Triggers button on the menu for each page in the campaign which shows how many Triggers are related to that email or page.
Trigger List
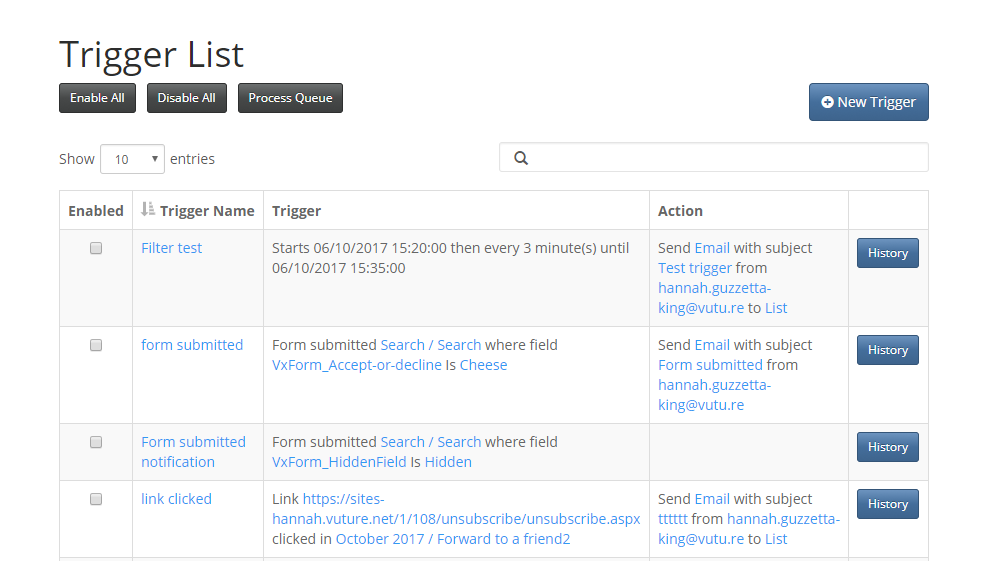
While on the Triggers screen, you are presented with the list of Triggers associated with the current email campaign.
Trigger Commands
While still on the Trigger List screen (see screenshot above), you'll notice three buttons in the top left of the screen: Enable All, Disable All, and Process Queue.
Enable All
Start all Triggers (note that certain kinds of Triggers can only fire once, so even enabled they won't fire again if they have a history value of 1)
Disable All
Stop all Triggers
Process Queue
Process all Triggers right away without waiting for the Trigger Service. This can be used for testing. The Trigger Service is configured by your system administrator to check for Triggers periodically (default is every 5 minutes).
Trigger List Fields
While still on the Trigger List screen (see screenshot above), you'll notice the field names for each trigger in your email campaign.
Enabled
Shows if the Trigger is enabled or disabled
Trigger Name
Trigger's name given by its creator
Trigger
Description of the condition that has to be met for the Trigger to fire
Action
Action that will be performed by the Trigger if the conditions are met
History
How many times the Trigger has already fired.
Creating a Trigger
When you click on the New Trigger button in the triggers screen, you're sent to the Edit Trigger screen where you can create a new trigger or edit an existing one.
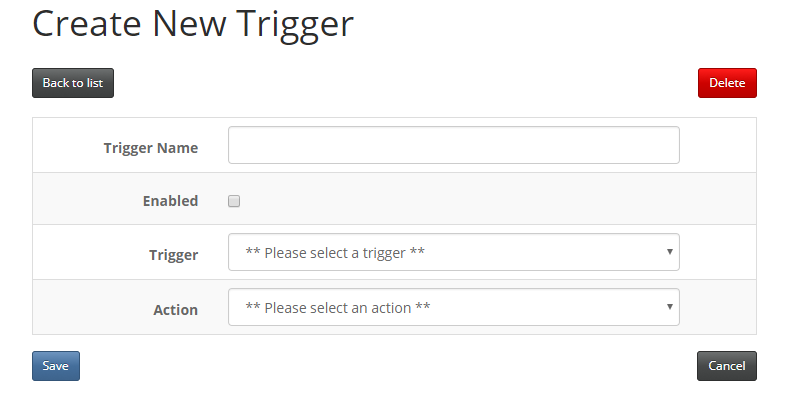
You're presented with 4 items you need to choose to create a Trigger:
Trigger Name
A name so you can easily distinguish the trigger among the others in the trigger list
Enabled
Determines if the Trigger is started or stopped
Trigger
Defines the condition that has to be met in order for the trigger to fire, for example, the date
Action
Action that is performed when the Trigger fires, for example, Send an email.
Trigger Types
Please note: Not all Trigger Types are compatible with all CRMs. To find Trigger Types and Actions for your CRM, please click here.
Below is the full list of Trigger Types included in Version 3.
Date Trigger
The "Date" Trigger is fired when the specified date is reached.
Recurring Trigger
The "Recurring" Trigger is fired on its starting date as well as every x number of days, hours or minutes until it reaches its end date. An example of how you would use this trigger is to "sweep" a marketing list daily to see if anyone new has been added to the list. If they have, the trigger would send an email to them.
Please make sure you enter an end date at which the trigger should stop firing. If you want the trigger to run for a extended period of time, you can add a date far ahead in the future.
Note: If you set a Send Email recurring trigger to fire every 25 minutes, it will check to see if an email needs to be sent at 25 minute intervals. This will continue all day and all night and over the weekend, until you have indicated the trigger should stop. This means you could receive Email Send Confirmation emails every 25 minutes. See the note here about the new option to either switch off these notification emails or to only receive a notification when the trigger finds a new recipient to send to.
Email Opened Trigger
Fires when the chosen email is opened. You also have the choice of specifying that the Trigger will only fire x days after the email is opened, and at a certain time.
Please note, for this trigger to work your Account Manager must enable the email open queue at "Admin.System.Email.Recordemailopenqueue"
Link Clicked Trigger
The "Link Clicked" Trigger fires when a chosen link, inside a chosen email, is clicked. Like the "Email Opened" Trigger, you also have the choice of defining that the Trigger will only fire x days after the email is opened, and at a certain time.
Please note, the One Click Registration snippet is not compatible with the Link Clicked Trigger.
The "Form Submitted" Trigger fires when a certain form is submitted and a certain field meets a certain condition. The condition will depend on the field type. An example of how you would use this trigger is: "If a contact submits the RSVP form, and the RSVP field value is Yes, then send the confirmation email".
Please note: If you do not see any forms in the drop-down when selecting the "Form Submitted" trigger, please navigate to each of your forms and remove any RSVP field that was there by default from the template. Then go to the "Add a new field" tab and add back in the RSVP field.
Like the "Email Opened" Trigger, you also have the choice of defining that the Trigger will only fire x days after the email is opened, and at a certain time. This is so you can allow a period of time for the contact to read the landing page and perhaps click to download the calendar file before triggering the confirmation email to arrive in their inbox.
When using the "Add to list" or "Remove from list" trigger actions against this condition, the form must be Prefilled. If you would like to Add a contact to a list following a form submission, you can do this by using an additional field specific to that list.
Email Not Opened Trigger
The "Email Not Opened" Trigger fires when a an email has not been opened by a time defined by the user. For example if the email is not opened by next Tuesday, choose to resend the mail. This trigger type must have a specified date for the time defined, as it does not accommodate a time range (e.g. 2 weeks)
Link Not Clicked Trigger
The "Link Not Clicked" Trigger fires when a specified link within a selected email has not been clicked by a defined date.
The "Form Not Submitted" Trigger fires if a form has not been filled in by a specified time and date.
Warning: The Form Not Submitted trigger will email everyone on the list connected to the form who has not submitted the form even if you have not emailed them. You should therefore ensure that you only use this trigger when you have mailed the same full list as set up in the trigger, without filtering.
The mailing list selected in this trigger must be the same list that you originally mailed and linked through to the form. For this reason this trigger will NOT work for Blank Forms since they are not connected to a list and all contacts on the list in the trigger will end up being mailed.
URL Visited Trigger (requires Web Tracking)
The "URL Visited" Trigger fires when a chosen URL, with web-tracking enabled, is visited. This trigger will allow certain actions to be made against the person who has visited the website, within a specified period of time, for example: Add them to a named marketing list.
Important: To make use of this trigger you must have the Web-tracking component enabled.
Trigger Completed Trigger
The Trigger Completed trigger enables you to fire a new email once a previous "Date -> Send Email" trigger has been fired and finished sending. This trigger forms part of the A/B Testing process and will allow you to send an email to a portion of a list only after a previous trigger has sent an email to a different portion of that list.
This trigger currently only works when a previous Date -> Send Email trigger has completed.
Email Sent Trigger
This trigger was known during development as the Wait Trigger. There is a full description here.
Trigger Actions
Please note: Not all Trigger Actions are compatible with all CRMs. To find Trigger Types and Actions for your CRM, please click here.
Below is the full list of Trigger Actions included in Triggers Version 3.
Add to List Action
This action adds the user to an email list. You will have to provide the list source (a Vuture list or an external CRM like InterAction) and the list name.
Remove from List Action
Does the opposite to "Add to List". It removes the user from a defined email list. You have to provide the list source (Vuture list or an external system like InterAction) and the list name.
Redirect To Action
Redirects the user to a certain page, defined by its URL. An example of how you would use this is: "If the contact clicks link x then redirect them to page xx".
Send Email Action
Sends an email to a list which can also optionally have a filter applied before the send. This is available for both Date and Recurring triggers. You will need to specify the email to be sent, the From address, the Subject, the list source and list name and the content type. You can optionally specify that the send uses a personalised From, the Reply To address and a filter. The personalised from will use the Name and Email of the FROM user.
If you need to create a new filter for use in this trigger you can now go directly to the filter creation screen by clicking on "create new filter".
Please note, the email selected should be published before the trigger is set to fire. If it isn't published at the point of triggering, the trigger will stop, the email will not be sent. You will receive an email prompting to publish the email and restart the trigger.
Send Email to Matches Action
This action sends an email to the person whose email address is matched by the Trigger (e.g. the person that opened a certain email). This only works for Triggers that have that information, i.e. they must be on a email list that you sent to.
If you need to send a trigger for a form submission not connected to an email send, e.g. a blank form or a website form, then you should use the Send Notification Trigger action). You must also provide the email to be sent, the person from whom the email should come and the subject of that email.
Please note, the email selected should be published before the trigger is set to fire. If it isn't published at the point of triggering, the trigger will stop, the email will not be sent. You will receive an email prompting to publish the email and restart the trigger.
Send Notification Action
Important: Send Notification trigger needs to be enabled in "Admin.System.Triggers.Send Notification Enabled". Please contact Vuture Support or your Account Manager to enable this.
This trigger action allows you to send an email based purely on a Blank form submission and does not require that the person submitting the form clicked through to it from a link in an email send.
The email is sent when a matching Blank form submission trigger occurs. You can choose the email to be sent along with its From address, Subject and Reply-to address.
The email will be sent to the email address field added to the form submission.
The email can be personalised with the fields {First Name}, {Last Name} and {Company} which will be pulled directly from the form submission rather than from the CRM.
Send notification action will not move the email over to the sent folder. If you need to know whether the email was sent, you can use the Trigger history.
Update Field Action (InterAction only)
Important: To make use of this trigger you must have InterAction CRM.
This action adds a value to an additional field within an email list for the contact. You will have to provide the list source (InterAction), list name, additional field and value.
Publish Page Action
This action publishes a selected page. The user must provide the page to publish when creating the trigger.
Move Page Action
It moves a selected page to a different folder in the campaign. The user must provide the page to be moved as well as destination when creating the trigger.
Send to Set Recipients Action (For A/B Testing)
This trigger action allows you to send a mailing to a randomised section of a list rather than to the whole list. You can choose whether to send the mailing to a set number of recipients from the list or to a certain percentage of the list.
The selection of recipients will be randomised and it will suppress any unsubscribes. You can select this action only when the condition is either "Date" or "Trigger Completed".
This trigger action is part of the A/B testing functionality.
Send Email with Higher Conversion Rate Action (For A/B Testing)
Triggered by Date or Trigger Completed actions, you can use this trigger to complete your A/B testing and send one of the two (or more) linked emails which has the highest engagement. Selecting an email from the "Comparison Email" drop down list, the system will compare the metrics in only the emails previously linked to this email (see: Link Email Pages) and deduce a highest engaged email for you, based on either the number of Opens or Links Clicked
Enable Triggers / Disable Triggers Action
This enables or disables all the Triggers in the campaign.
These two Actions allow you to set up a series of triggers in advance, leave them all disabled, and then enable them all - based on a date in the future (for example). So you wouldn’t have to remember to go back in and switch them all to enabled on a given date.
Trigger Types & Actions specific to your CRM or Data Source
To learn more about what Trigger Types and Actions work specifically for your CRM, please click through to the appropriate article for more information.
Saving Triggers To A Template
When you select a template whilst creating a new campaign you may choose one which includes saved triggers. These will be located in the “Triggers” section and will be disabled, until you adapt the settings to your requirements and enable them.
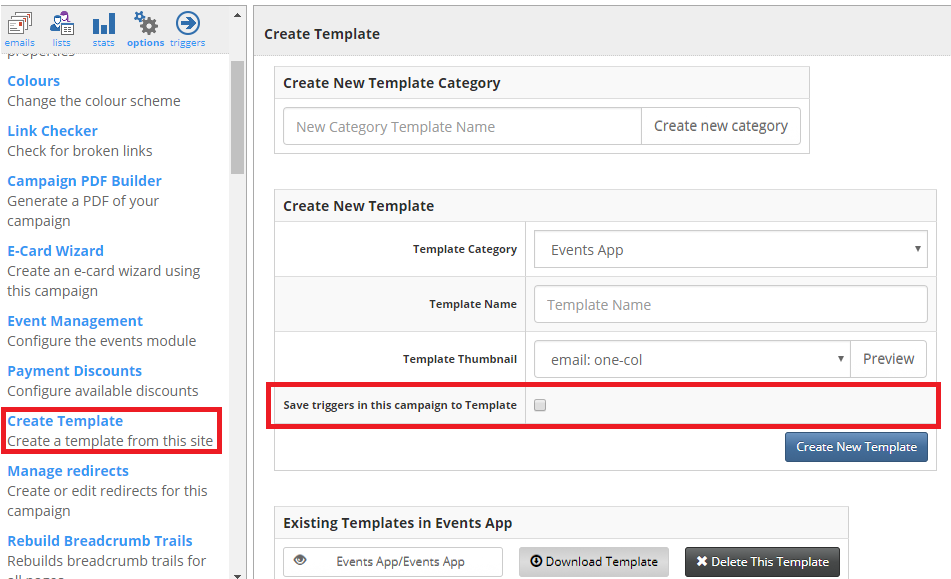
You are able to save triggers to a template by checking the “Save Triggers in this campaign to Template” option within “Options.CreateTemplate”
The “Save triggers in this campaign to Template” option will only show if Version 3 triggers are enabled and if there are existing triggers for that campaign
Triggers Version 2
Please contact your Account Manager so that they can switch your instance to Triggers Version 3. Vuture will not be supporting future developments in Triggers Version 2.
The trigger action "Send Report" has been disabled. To schedule reports, you must do so from the report you are interested in, see this article for more information.
