Keywords: Triggers, Trigger, A/B Testing, AB Testing, a b testing.
Please Note: This feature is available for Vuture with the following CRM integrations: InterAction, OnePlace, Salesforce, Dynamics and Vx Lists
Overview
There is an article introducing A/B testing in general, offering explanations and ideas for different elements to test. You can read it here. You may also watch the video below.
Combining the correct triggers and using the Sitepage Link functionality, you can use Vuture to create an automated A/B test. Please note, you will require to have Triggers enabled in your instance and for your role.
You can use triggers to first send an email to either a specified number, or a percentage of a list, then, having copied the email and made a change to one element such as the Subject Line or a CTA, send that second email to a further specified number or a further percentage of the list. Vuture will choose different people automatically for these test sends, and will honour unsubscribes as usual. Additionally, A/B Testing requires more than one email being sent out to work as intended.
Select a parameter to measure Engagement success (number of links clicked or number of opens) using which the emails will be compared, and then a trigger will send the more highly engaged email to the remaining contacts in the list.
Contents
Step by Step Instructions
Follow the steps below to create your A/B test:
Create the emails. Decide which factor you are going to change (for example, change the wording in the Subject Line, or change the colour and position of the RSVP button). Copy the email and make the changes to the second version.
Link the two email pages together using Email Options: Navigate to More Options, Email Options and then Linked Site Pages to choose the page to link to your currently selected page. This will ensure that Vuture understands they are both part of the same mailing, and will allow Vuture to use the Send More functionality to prevent anyone receiving the same email twice. Linked emails will be identifiable since they have paperclip icons beside them. Here is an article on linking emails together.
Note: The emails do not have to be called Email A and Email B, this is just for the example pictured below. Use a good page name (the equivalent of the email Subject Line) when naming the emails.
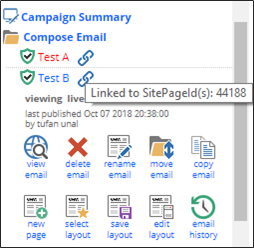
Image showing previous Campaign Editor Options
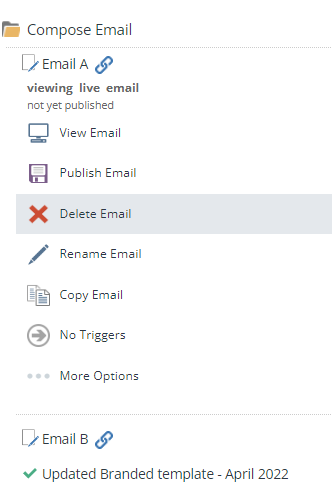
2024 Campaign Editor Options
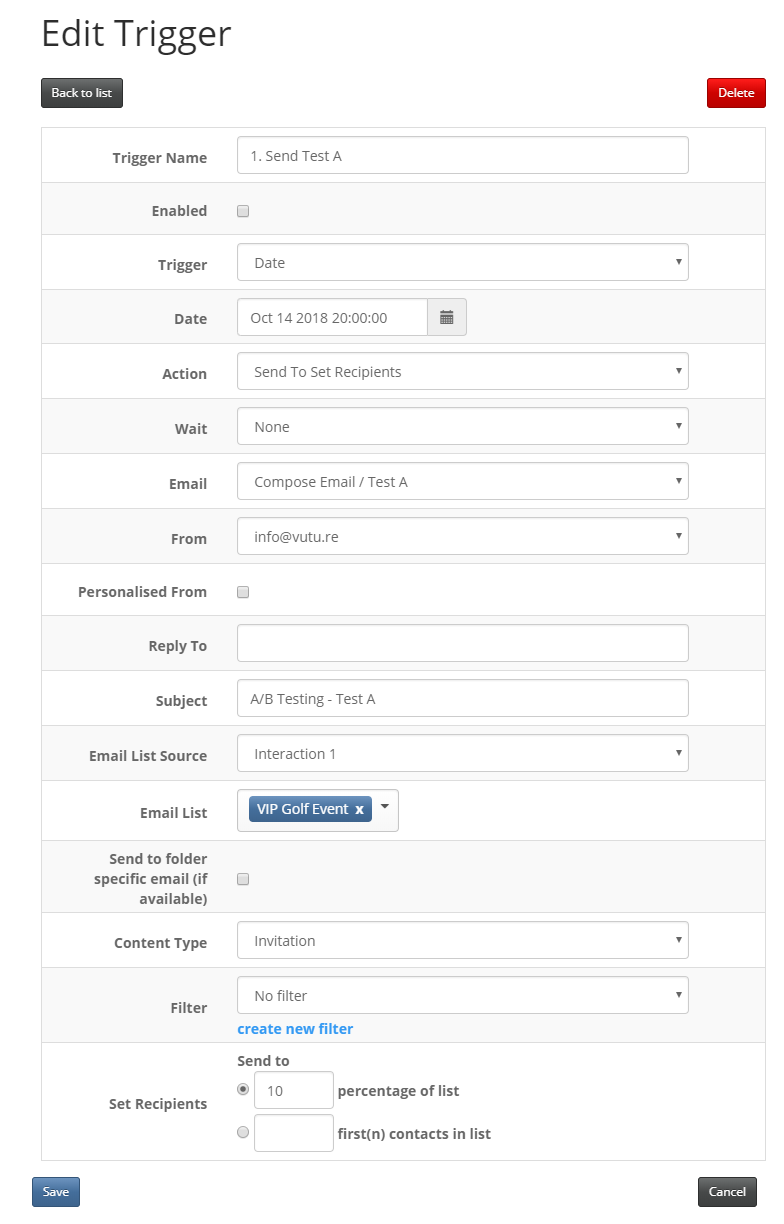
Set up the following 3 triggers (see images of the setup for the triggers below):
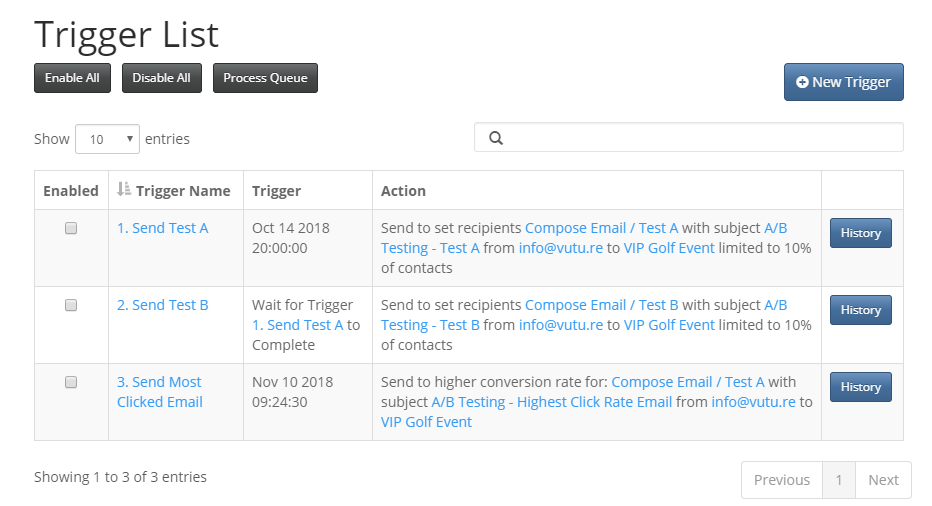
- First Trigger: Trigger by Date, action is Send to Set recipients. Select your first email (Email A), the list you are sending to, and the quantity of recipients, this could be a set number (e.g. 30 contacts) or a percentage (e.g. 10% of contacts). Click here to learn about the Send to Set recipients trigger
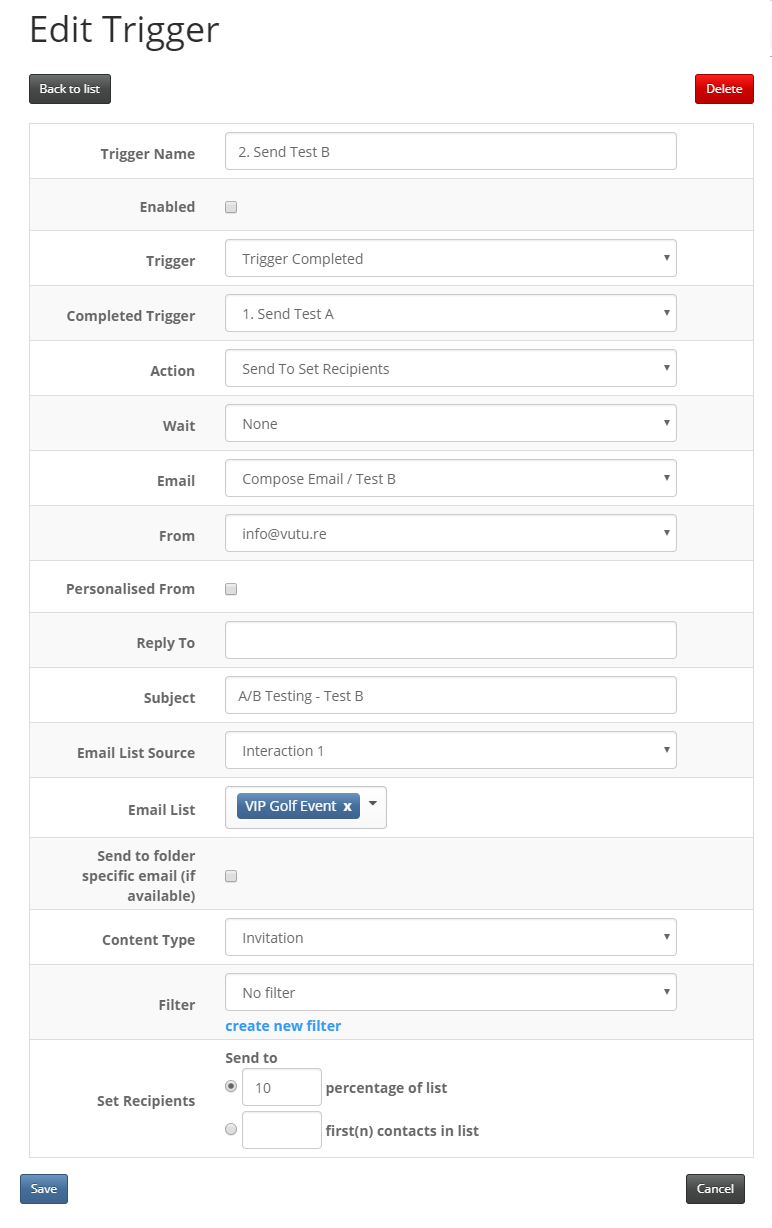
- Second Trigger: Trigger by Trigger completed, action is Send to Set recipients. Select the previously created trigger as the trigger to be completed and then select your second email (Email B) to be sent. This Trigger Completed trigger simply allows the first trigger to finish before sending the second batch of emails. You can select the list you are sending to, and the quantity of recipients, this could be a set number (e.g. 30 contacts) or a percentage (e.g. 10% of contacts). Click here to learn about the Trigger Completed action
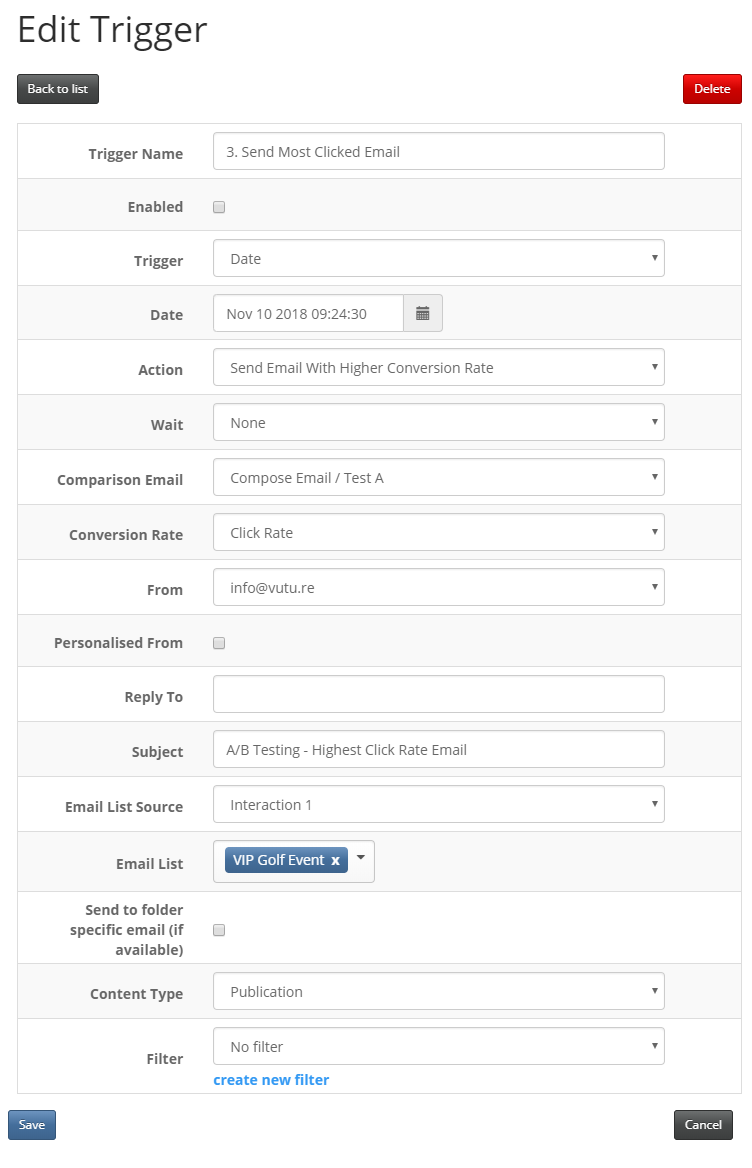
- Third Trigger: Trigger by Date, action is Send Email with Higher Conversion Rate. Selecting an email from the "Comparison Email" drop down list, the system will compare the metrics in only the emails previously linked to this email (see first step) and deduce a winner for you, based on either the number of Opens or Links Clicked. Note: if all linked emails in the campaign are part of the A/B test, then it doesn't matter which of the emails you choose at this point - they will all be compared. Click here to learn about the Send Email with Higher Conversion Rate action
Note: Work with two emails and change only one element at a time, to understand exactly which change has made the difference in engagement. When setting up and linking two emails to compare against each other, bear in mind the size of your mailing lists and the need for sufficient numbers to send to, in order to get meaningful results. See this article for more best practice advice.
How is the "Percentage of the list" Determined?
When you specify, for example, 10% of the list to receive the first email and 10% to receive the second, Vuture examines the list (usually presented alphabetically by surname in most CRMs) and takes the first 10% with valid emails, who are subscribed. Vuture then takes the second 10% of emails which are valid and subscribed. It will skip over any invalid or unsubscribed emails until it gets to 10% of the remainder.
Saving Triggers To A Template
When you select a template whilst creating a new campaign you may choose one which includes saved triggers. These will be located in the “Triggers” section and will be disabled, until you adapt the settings to your requirements and enable them.
You can save triggers to a template by checking the “Save Triggers in this campaign to Template” option within “Options > Create Template”.
Note: The “Save triggers in this campaign to Template” option will only show if version 3 triggers are enabled and there are existing triggers for that campaign.
Seeing and Reporting the scores
To view the results of each test mailing go to the Email Sent History screen. This will show you the Opens and Clicks for each version of the email sent.
This is for your interest only. You will not need to manually select the email with the higher conversion rate - the third trigger will do this for you.

Naming the Emails
You do not need to literally name the emails A and B (even though the image above has this example). It is recommended that you name the emails with the subject line. You can see the results of the first and second send by checking the First Sent and Last Sent columns in the Email Sent History screen.
AB Testing Using a Varied Subject Line
When creating an AB Test which is testing for Subject Line, you will be asked to enter the subject line when creating the third trigger. To achieve this, rename both your email Pages with the respective subject lines. When creating the trigger use the variable {vx:Page Name} in the subject line field – this will then automatically pick up and use the winning subject line in the main send.
Note: This feature is available for Vuture with the following CRM integrations: InterAction, OnePlace, Salesforce, Dynamics and Vx Lists
