Overview
Email lists can be created by uploading a CSV file of contacts.
Contents
Creating a List
If you are using the Contacts Module, please reference this article instead.
Click into the email campaign you wish to add a list to by clicking the email campaign thumbnail from the home screen.
Click on the "lists" link at the top of the left panel to view existing lists. Note this displays all lists available in the current container.
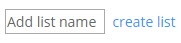
To create a new list type in the name of the list in the box and click "create list":
Select the list you want to add contacts to and click "import emails" in the right hand window:

Click "Select CSV" to choose the CSV file you wish to upload.
Your CSV file needs to be a in a particular format - use the "click here for a sample link" to download an example CSV file:
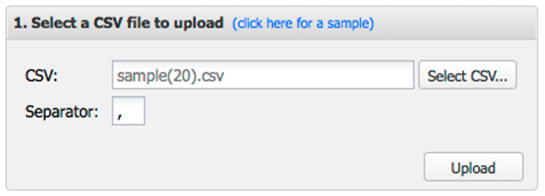
Enter the Separator character used in the file. This is usually , (comma) but can be ; (semi-colon) in countries such as France that use comma as a decimal separator.
Please note, the following fields are mandatory in the CSV (although all, except email, can be left blank, so only the headers are required): First Name, Last Name, Company and Email.
Optionally, if enabled, choose the required characters set from the Language drop-down (see below).
Click "Upload" to upload the file.
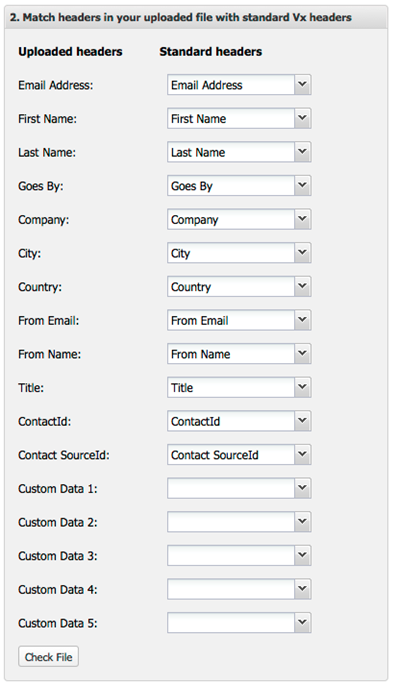
Match the headers in your file to the standard Vx headers. Any header in your file which is not matched will be imported as a custom field.
Click "Check File" to check for errors and duplicates in your file.
Review the error report, if any, which will indicate rows that will not be imported.
The error report will provide a list of errors by row number with the following errors messages:
- Email address appears more than once in file (duplicate email addresses in your CSV file)
- Invalid email address (the email address is not in a valid format)
- Email addresses cannot be more than 500 characters (maximum size limit for email addresses)
- Email address already exists in the list (the list your are importing into already has this email address and duplicates cannot be imported)
Note that if you use a column called "Date Created", this is a special column that expects the date to be either in universal date format (e.g. 2015-12-01) or in the date display format specified in your user preferences. You will receive an error message if the any values are found in this column do not match either of these two formats.
Click "Process" to complete the upload of the contacts in the file.
Choosing a Language Format for Uploading CSV Files
By default the system expects CSV files that are saved in the Windows-1252 character set. Usually they are saved in ANSI format which can cause issues when uploading CSV files with accented characters.
Contact Vuture Support to enable CSV Language Options if you have problems with characters and symbols when uploading CSV files.
This option is enabled under Admin.Settings.Emails.CSVImportLangugeDropDownEnabled
This option allows you to choose the character set of the file and gives the following options:
- ANSI (default)
- UTF-8 (select this if you are using non-European character sets and have saved your CSV file in UTF-8 format)
- Greek (select this for Greek character set)
- Russian (select this for Russian character set)
If you need a character set that is not listed here please contact Vuture Support.
Saving Excel Files in UTF-8 CSV format
Unfortunately, Excel does not support saving Excel files as a CSV file in UTF-8 format.
There are two workarounds:
1. Use Google Spreadsheets
- You need a free Google account
- Go to https://docs.google.com/spreadsheets
- Create a new spreadsheet and upload your Excel file by clicking "File" > "Import" or copy and and paste your data
- Click File, Download As, Comma Separated Values (CSV)
- This file will be a CSV in UTF-8 format that you can upload
2. Save as Unicode Text from Excel
- This is more complex but doesn't require Google
- From Excel goto "File" > "Save As" and choose "Unicode Text (*.txt)" from the "Save as type" dropdown and then save the file
- Open the file in a Notepad
- It has been saved as tab separated and we need to replace the tabs with commas
- Select a tab character, right-click and choose Copy (or press CTRL+C)
- Press CTRL+H to open the Replace dialog box and press CTRL+V in the "Find what" field
- Type a comma into the "Replace with" field
- Click "Replace all"
- Click "File" > "Save as" and change the encoding to UTF-8 and save the file with extension .csv
- This file will be a CSV in UTF-8 format that you can upload
Global Lists
To make your uploaded list a global list, navigate to the list by clicking on the "lists" icon in an email campaign.
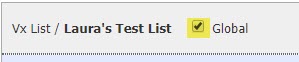
Click on the list you wish to make global under "Vx Lists" on the left hand side. Then tick the box that says "Global" next to your list name.
Personalisation Fields
The standard CSV upload fields can be used as personalisation fields in your email. These can either be selected from the drop-down in the text editor or manually entered into the email:
{Email}
{First Name}
{Last Name}
{Goes By}
{Company}
{Job Title}
{From Name}
{From Email}
{From Job Title}
{Title}
{Date}
Any custom fields that you imported can also be used as personalisation fields in the format.
{Custom Field Name}
CSV Upload FAQ
1. The system hangs at the check file stage. What should I check?
Open the CSV file in a text editor such as Notepad ++ and check there are no unprintable characters in the file. Remove these, save the file and retry the upload.
When uploading a .csv list to the Lists area or to Contacts Module, there are some requirements which will ensure you achieve a successful load.
Ensure that the columns in your csv spreadsheet include First Name, Last Name, Email and Company - as a minimum.
Ensure that, if you include a Sponsor Name or Partner Name, you also include a sponsor or partner Email.
2. Can I add contacts without an email address?
By default, Vuture standalone lists will not allow contacts to be added without an email address.
If you would like to be able to add a contact without an email address to a list, you will need to contact your account manager. They will enable the "Admin.System.Emails.Allow blank email addresses" setting and update your CSV upload in "Admin.System.Versions.CSV Upload Version 3".
Contacts will be de-duplicated based on joining up First Name, Last Name and Company.
Please note, as this is a system wide setting, once enabled it will allow contacts with blank email address fields to be added to any list throughout your instance.
3. Is it possible to import a CRM-referenced CSV file with personalized data that does not exist in the CRM - that way once the CRM list is selected during a send, the personalize data can be pulled through into as custom fields in the email?
No, the best practice is to send a CRM list to a CRM-connected form OR send a CSV list to a form that is not connected to a CRM.
