This solution works for InterAction and standalone.
Customise and Personalise
The data held in Additional Fields can be included in emails and landing pages by inserting a placeholder variable.
InterAction
For example, if it is an InterAction additional field you would insert {IA:858993532}, where the number is the InterAction field ID.
Standalone
If you were to insert a Vuture list additional field you would insert the field name, or column name, for example, {Sponsor}.
Examples of customising using Vuture fields from Standalone lists
When building your email, you have the choice between using standard fields contained in the drop down menu in the text editor, or additional fields added to your .csv list. If you have the Contacts Module you can easily add data to these fields in the Contacts Module. If not, you will usually add the field headers, and the data, in Excel, before saving as a .csv and uploading to Vuture. It is also possible to edit a list in the lists area of Vuture.
The following personalisation fields are available in the drop down list in the text editor:
Dear {First Name}
Last Name is {Last Name}
Goes By is {Goes By}
Company is {Company}
Job Title is {Job Title}
From Name {From Name}
From Email {From Email}
From Job Title {From Job Title}
Plus, you have the additional fields you may have added to the .csv list. In this example I have added 3 additional fields:
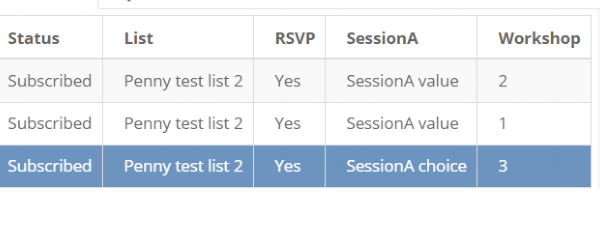
On the email page in the Vuture campaign it looks like this:
Your RSVP response was {RSVP}
Your choice for SessionA was {SessionA}
Your workshop choice was {Workshop}
The resulting email when sent to the middle record in the list (the contact who chose Workshop 1) would look like this:
Your RSVP response was Yes
Your choice for SessionA was SessionA value
Your workshop choice was 1
Having created custom fields in your email campaign, send it (to the same list) and it will fill in the custom details for each contact.
Use Additional Field Variables
This functionality supports using additional field variables to personalise:
1. Links: You could include a contact-specific code in a link to your website to provide personalised content.
For example, if you are organising an event in three cities - London, Birmingham and New York and you want to send out one mailing which will direct the contacts to the right page depending on their location, you could do the following:
- Create an additional field called "Location" on your mailing list, populated with values such as "New-York" "London or "Birmingham" for each one of your contacts (hyphenating New-York so the link doesn't break later)
- Make sure the three URLs are the same, with the exception of the location names
- When inserting the link into your page, replace the city name with the placeholder {Location}, like this:
- When you send your mailing, the placeholder {Location} will swap for the location value per contact and will direct them to the correct web page.
2. Images: You could personalise an email by showing an image pertinent to the recipient.
For this solution, you need to have access to the html of your pages. This is potentially dangerous for the integrity of your email unless you understand html, and for this reason we ask that you are competent in html before we allow you access to the html.
If you want to send an email showing the profile picture of each contact's sponsor, personalised to them, you could do the following:
- Make sure the images are named consistently. For example: David-Brady for David's image and Penny-Sargent for Penny's image. It doesn't matter if you upload them into Vuture or store them in your own website.
- In your contact list, add a column for "Sponsor" where the values are the sponsor names, based on how you've saved the wording in the images. For user X the sponsor value would be "David-Brady" or "Penny-Sargent"
- Insert an image snippet on your page. Go to the HTML for that snippet and edit the image link to match the link of your image, this can be a link to the Vuture image or the URL of the website. You will find the image link URL in Vuture via the image in your campaign, click Preview and then find the URL at the top of your screen.
Alternatively, in the Image Library module, double click the image. (Note, if you double click an image you get an extra piece in the URL which you should not copy - ignore the piece which says ?thumbnail=large).

- Replace the name of the sponsor with {Sponsor}

- When you send your mailing, the placeholder {Sponsor} will swap for the image value, per contact, for the image of their sponsor, Penny or David.
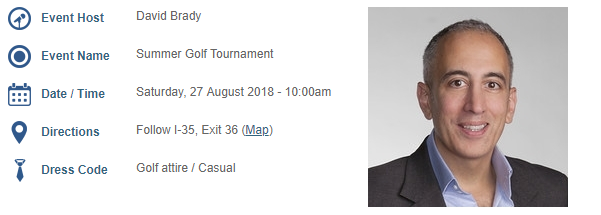
3. Dynamic and personalised variables: To update information shown on the page based on a contact's InterAction additional field values, such as their sponsor's first name and signature block. For more information on dynamic variables and InterAction please click here.
To use this functionality please contact your Account Manager. They can enable it by checking the system configuration: "Admin.System.Emails.NestedVariableReplacement".
If you are an InterAction user they should also enable "Admin.System.InterAction{InterActionId}.Replacement on IA custom fields"
Important:
Remember, the wording must be the same in the field values as in the websites or images
**Make sure you send the mailing to the list which contains the additional fields
