Keywords: confirmation email; personalised; rsvp choices; personalized; standalone; CSV; Contacts Module
Overview
Personalised registration confirmation emails can be sent automatically to every guest who registers for your event, containing a record of all the choices they made on your RSVP form.
They can be used to give your guest the reassurance that they have definitely registered for your event, that they have answered all the questions you posed on the RSVP form, and can work as a reminder of the choices they made.
Personalised registration confirmation emails can also work as a Personal Agenda for each guest, removing some of the questions to your Events Team such as “where am I supposed to be now?” and “Which workshop did I sign up for again?”
Important Note: The format #{} as described below, only works when an email confirmation is sent using form notifications. It does not work when using send the notification action via triggers. This is on both blank and prefill forms.
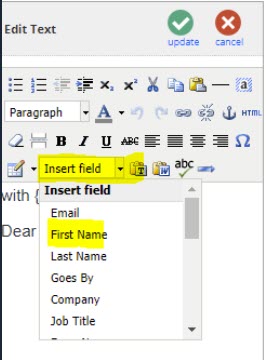
For triggered notifications, use normal personalisation methods, for example by selecting the field from the drop down list:
How To Create Personalised Confirmation Emails
You will need:
- An Invitation email, which contains a link to the Pre-filled RSVP Form.
- RSVP forms (Prefilled & Blank), which contain all the fields/questions you want to ask the registrants.
- A Confirmation email, which contains a space for each answer, where you will provide the registrant's response to each question.
- Other pages around the event are useful too – such as a Thank You Accept page which has the usual thank you message on it, a link to the iCalendar file, and also a comment about “A personalised agenda email will be sent to you shortly” or similar wording.
Step 1: Setting up your RSVP Form(s)
In the RSVP Prefilled Form, create all the fields/questions you want to ask the client using Add a Field and selecting the fields from the list of Vx Fields:
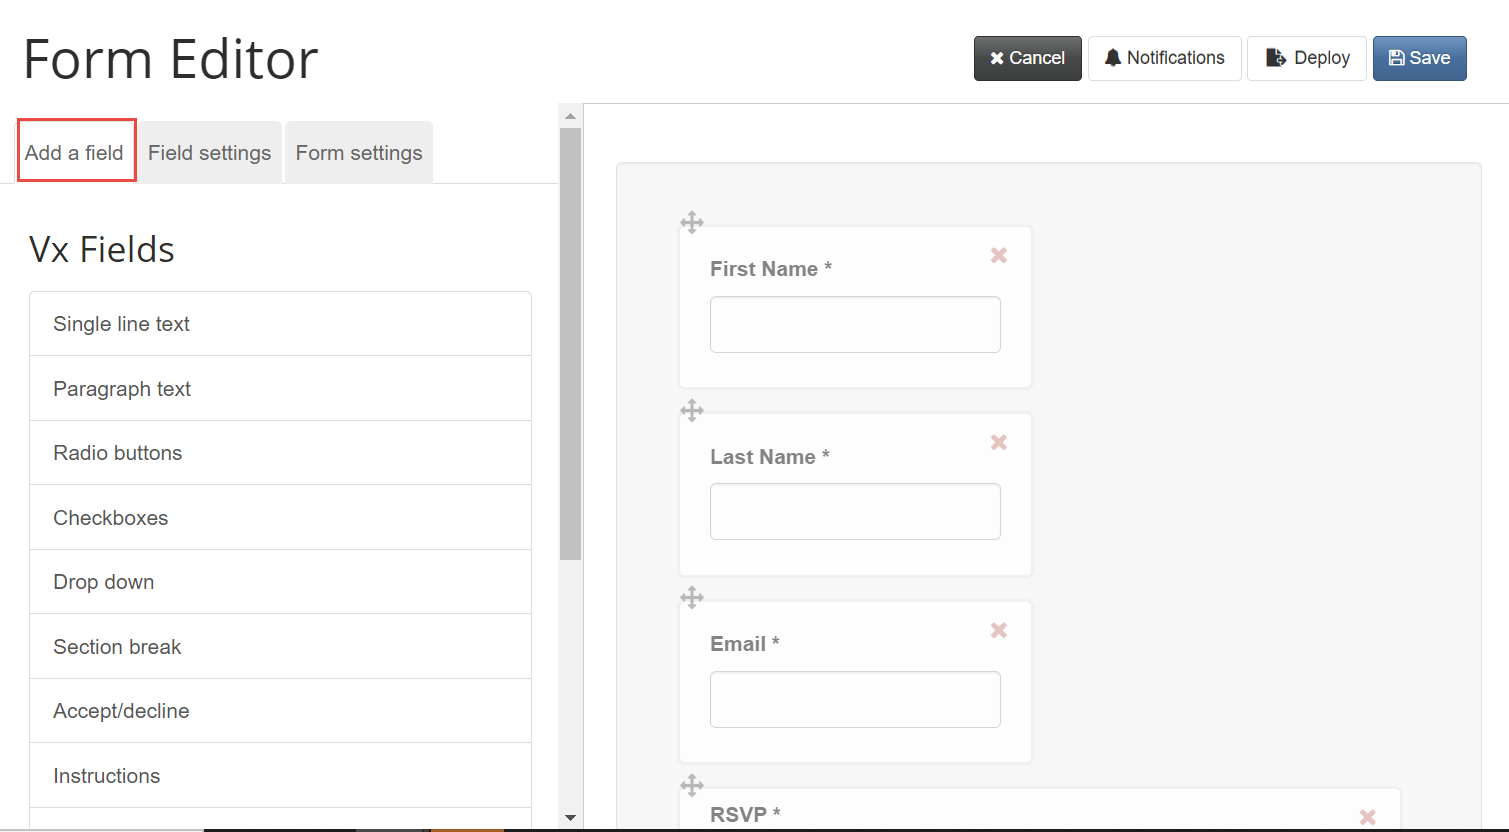
Start with Accept/decline because you will always need that field for filtering later, and then add the other fields you need to ask the client, such as Workshop choice or Bringing a Guest Yes/No?
In the example above, the Accept/decline field has been made “hidden” and prechecked with the Accept option. This means that anyone submitting the form will automatically be marked as RSVP = Accept, but they don’t have to click that option or even see it.
Radio buttons will allow the client to choose one option; Check boxes will allow the client to choose several options from the list.
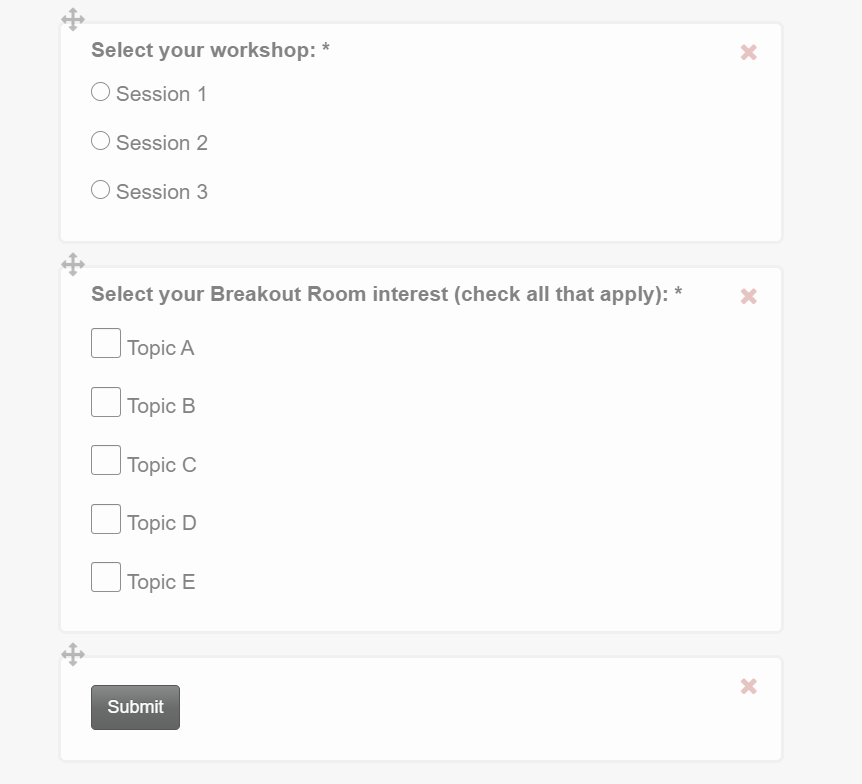
As you create the fields, click on each field and check the Field Name in Field Settings. The Field Name will be your reference on the Confirmation email in the next stage of this process. It needs to be unique on the form, and a single word or with an underscore or hyphen between the words, that is, no spaces.
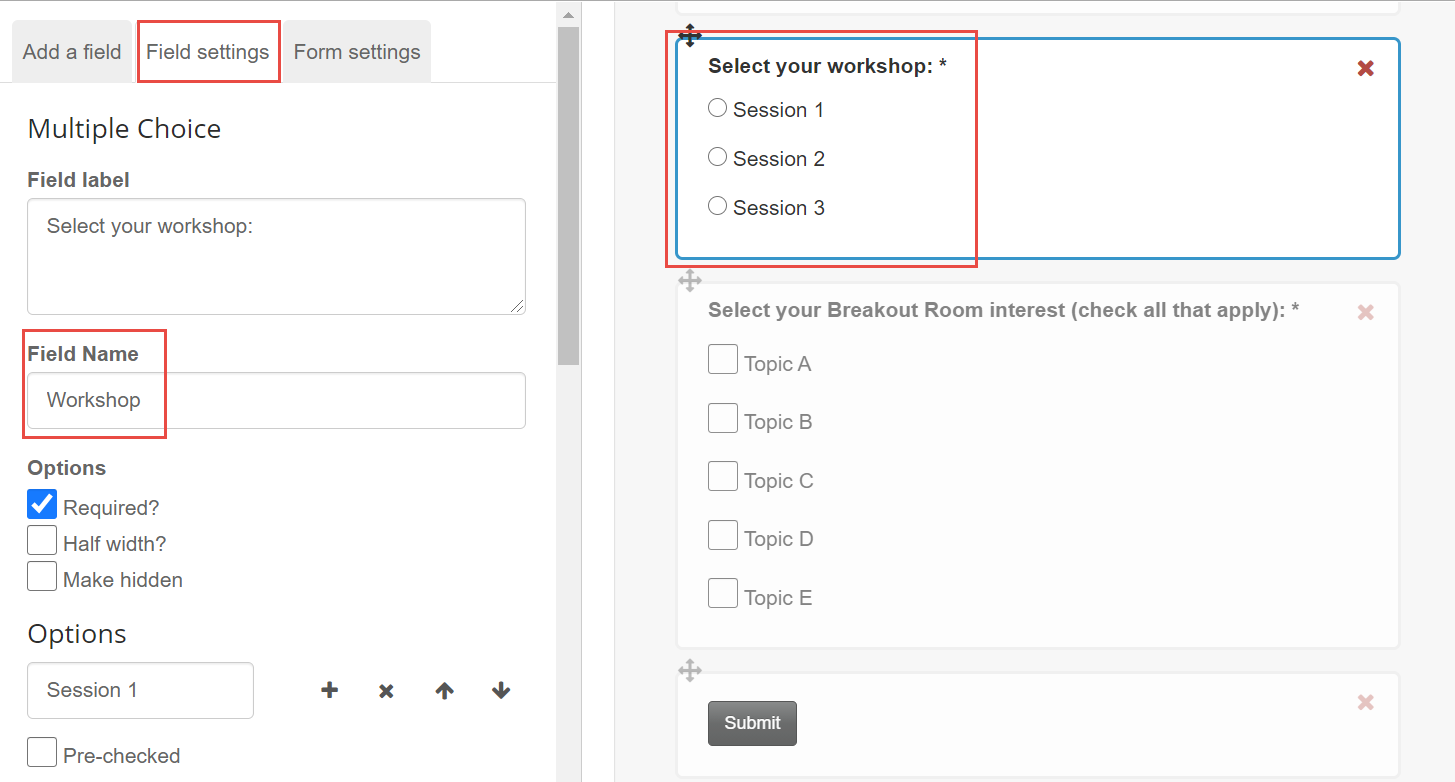
Once you have created all the necessary fields in the RSVP Form(s), copy and paste each Field Name into a plain text document (i.e. Notepad). You will need to reference these Field Names (exactly as they are typed) within your confirmation email. Then click Save in the top right, then Publish and Publish Now to fully save out your RSVP Form(s).
Step 2: Update your Confirmation Email
If you have not already done so, please create a Confirmation email. You could do this by copying the Invitation, removing the Register button (in Edit Layout mode) and tweaking the wording to say something like “Thank you for registering for xyz event. We look forward to welcoming you. To help you on the day, here is a reminder of the options you chose on our Registration form.”
You will then need to add in the reference for each response on your form, using the Field Names you copied and pasted into your plain text document (i.e. Notepad) in the following format:
#{VxForm_FieldName} where FieldName is the name of the field on the Vx form.
For example, if we want to reference the registrant's choice for the Workshop they've chosen and the Field Name for this field is 'Workshop' (please see screenshot above for reference), we would type in
#{VxForm_Workshop}. Once someone receives the Confirmation email, they will then see their Workshop choice displayed.
Here is an example of the body of a Confirmation Email page:
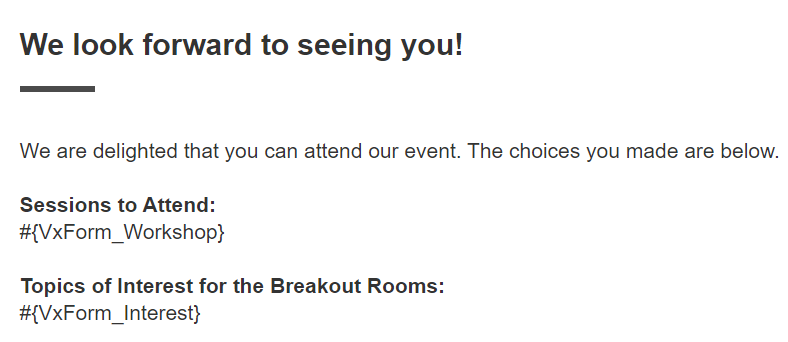
Continue referencing any Field Names you wish to display on this Confirmation email in the format of #{VxForm_FieldName}. Then Publish > Publish Now.
Step 3: Turn your Confirmation Email into a Notification Template
Once you have created the Confirmation email, you need to turn it into a Notification.
Please follow the instructions for creating Notification emails here and setting up your RSVP form to send the notification here. Note: Make sure this is done for both your RSVP Prefilled and RSVP Blank forms.
Step 4: Test your RSVP Form(s) to Receive the Personalised Confirmation Email
Test the RSVP Form(s) and the automatic personalised confirmation by sending a Send Sample email to a Test List.
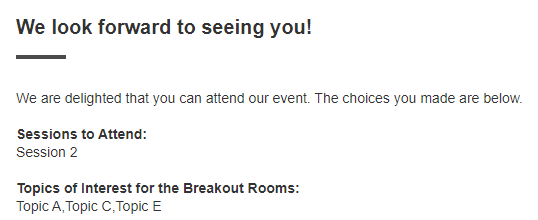
The Registration Confirmation email example above looks like this when it arrives in the inbox. Note, that the Workshop choice and Topics of Interests are filled in with what the registrant chose on their submitted RSVP form.