This article shows instructions for the Connector Version of ContactEase forms.
The difference you will notice as a user will be that when you choose to Add a new field the process is clearer and simpler.
Make sure your instance is using the correct version of the form editor and ContactEase. Get in touch with your Account Manager who will go to:
-
Admin>System>Versions> Forms Editor and enable Version 2
-
Admin>System>Versions>CRMformfill module and enable Version 2
-
Admin>System>ContactEase>ContactEase and enable ContactEase Connector
-
Admin>System>Forms and enable Display Instance Dropdown
Make sure Form editor V2 is also enabled for your role in Admin>Roles.
Note: For Vuture-only, more technical information, please see this article.
Contents
What are forms?
Creating a form
Editing forms
Field settings
Add a hidden field
Add file upload button
Form settings
Add Email Types and Unsubscribe Options
As part of Vuture’s landing page functionality you can create forms either for use as a Vuture email landing page or embed a form on your website. These forms can synchronize directly with ContactEase or with Vuture’s Contact fields. You can use forms for:
- Event RSVPs
- Preference management
- Additional data capture or data enrichment
- Surveys or feedback
As part of your Vuture template we will create default RSVP forms for events. Typically we will create a Prefilled Form and a Blank Form for you. You can use these default forms as a starting point which will speed up the overall setup of your event process.
You can also create your own forms, starting from a new page in the Landing Pages folder.
- To create a new form, click into the campaign where you wish to create your form.
- Click on landing pages from the menu on the left
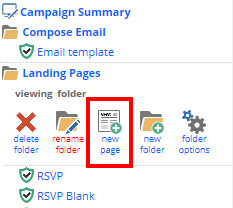
- Click on new page to create a new form
- Enter a name for your page.
- Select the layout you wish to use. As part of your Vuture setup we will include default page layouts you can use.
Adding a ContactEase Sub-category into a form
You can add any ContactEase Sub-category as a field into Vuture forms. By doing this, when a contact submits a form, they will be added into the correct Sub-category as a reflection of the value they have entered. You will have to create Sub-categories in ContactEase before they are available in the form editor.
To open the Form Editor click on any data field in the form itself. You will see that they’ll grey out as you hover over them.
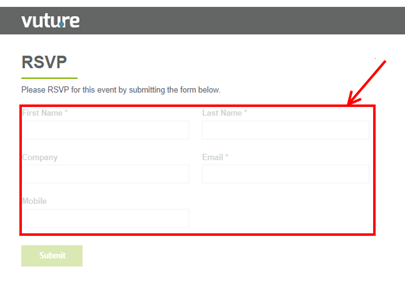
Depending on which layout you choose you may see some contact fields already in your form.
To add a ContactEase field choose your CRM Source on the "Select instance" dropdown on the menu on the left hand side, For example "ContactEase 1". Then select your list from the "Select list/entity" dropdown. In this example we have chosen the "Summer Event" list/category.
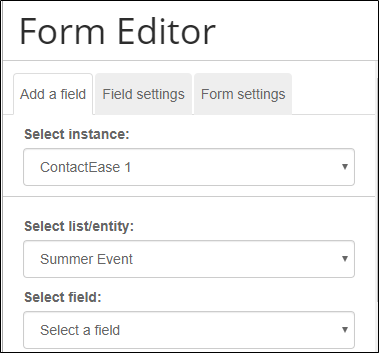
- In the "Select field" dropdown you will find the Subcategories of your parent category (list) as fields.
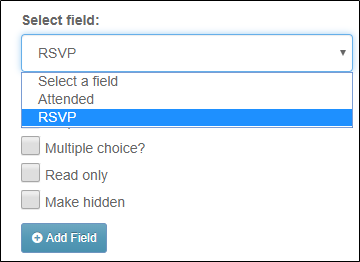
- Select one any one of these. For example: RSVP
- Click Add Field and it will add the field to the bottom of the form.
- To remove any fields currently in the form, click on the red X on the top right of each box.
- To reorder or move any field, click on the black cross on the top left of the data field and drag it into a different position.
When you click on any of the fields the field settings will automatically appear on the left with details for that specific field. We cover this further down this article.
You can also add Additional Fields from Vuture, however, these will not write back to the CRM or the Connector. You can find any submitted values in Vx Fields by looking at the form submission reports in the "View Stats" page.
Vx Fields can be used for extra information that you would like to collect, but which you do not want to store in your CRM. It will write back to the View Stats report and can be available to any Vuture user who has access to the campaign (or to the downloaded report) but not generally available to all users of the CRM.
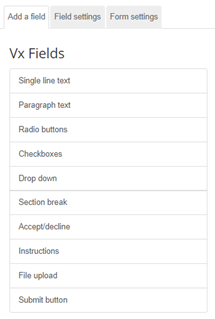
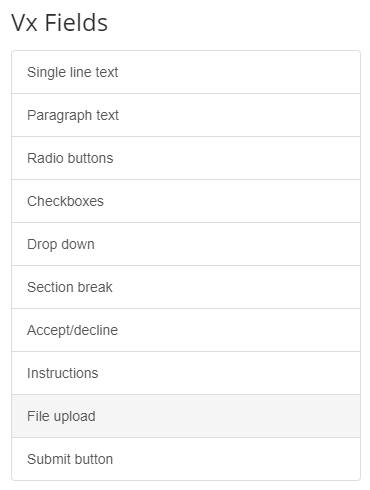
To add Vx Fields to your form:
Click on one of the Vx Fields.
Single line text
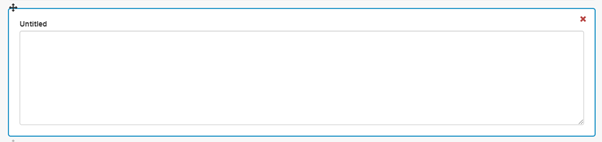
This type of field is a free-form text field. Your contacts can put any text into this box.

Paragraph text
This type of field is a free-form text field. It differs from a single line text in that it allows your contact to type more information on multiple lines.
Radio Buttons
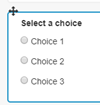
This type of field has predefined options. Your contacts can only select one answer from the options given. The checkboxes are round.
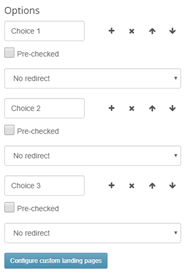
If you click on the field you can specify the options you want to display, as well as the order of the different choices. You can also pre-check one of the options. If you press the x button it will delete the option. If you press the + you can add an additional option directly underneath the one you selected. The up and down arrows move the items up and down the list.
Checkboxes
This type of field has predefined options. Your contacts can select multiple options from those given. The checkboxes are square.
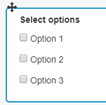
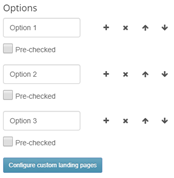
If you click on the field, you can specify the options you want to display as well as the order of the different choices. You can also pre-check one of the options. If you press the x button it will delete the option. If you press the + you can add an additional option directly underneath the one you selected. Use the up and down arrows to move the items up and down in the list.
Drop down
This type of field has predefined options. Your contacts can only select one from the options in the drop down.
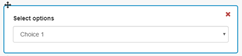
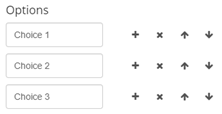
As with radio buttons and checkboxes you can edit the options in your drop-down. You cannot preselect options with this
Section break
This allows you to create a new section for your form, to break up the page or start a new area. It’s a free-flowing text box. This is useful if you want to provide some further information about the form or the subsequent sections.

Section label
This option allows you to add a label to the different sections of your form.
Accept/decline
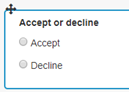
You will not typically use this field when using ContactEase. This is because you will typically want to put the RSVP sub-category on the page. It is available because some clients do not have a CRM at all.
When you use an accept or decline field you can also redirect your contact to a landing page when they respond. For an event this will typically be a thank you page. If you click on the question the settings will appear on the left.
Click on the drop-down where it says No redirect to select the correct landing page.
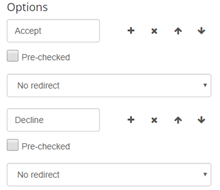
This means that you can have two different thank you pages depending on whether the contact can or cannot attend.
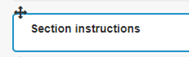
Instructions
This option allows you to add additional text as information for the person completing the form.
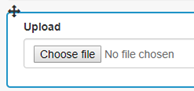
File upload
This option allows a contact to upload a file to the form. Any uploaded file will be sent to the email address given under the Form Settings tab on the form.
Submit button
This will add a Submit button to your form. The Submit button is necessary for every form to send the responses back to ContactEase and to Vuture.

Field settings
Once you’ve added your additional fields click on any field and it will bring up further options for you to complete.
-
Field Label: This is the text that we display to the contact, next to the form field.
-
Field Name: If you are using a field from ContactEase this box will display the name of this field as it is in your ContactEase instance. In this scenario we will grey out the field name as it is a system field which you can’t edit.
-
Options: This shows you the options you set on this field when you first added it to the form. You will see check marks against the relevant options. If you need to make changes you can change the options for this field:
-
Required: The contact has to complete this field before they can submit the form.
-
Read Only: This field is visible, but the contact can’t change the details. This is useful, if you prefill your form, to prevent the contact overwriting the data you hold on ContactEase.
-
Half width: If you select this the field will take up half the width of the screen. It allows you to fit two fields in one row.
-
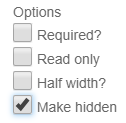
Make hidden: Hides the field from the contact but still submits data in the background. This can be used, for example, to pre-check an RSVP field as Yes, when you have already used the language "I Accept" on the email. Talk to your Account Manager if this option is not enabled for you. They can enable it here: Admin>Roles>Forms>Hide Form Fields
When you pull any contact field from ContactEase into your form, if a contact completes the form and either adds new data or changes existing data, Vuture will write back that change to ContactEase through the Connector in real time.
-
Predefined Value: You can specify a predefined value for a field. We will automatically display this when your contact loads the form.
-
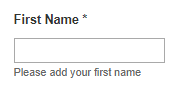
Instructions for user: If you add some instructions for this field, we will display them directly under the field name.
-
Conditional Field Name: This relates to form logic. Please click here to read more about form Logic.
Add a hidden field
You can add hidden field in your ContactEase forms. These hidden fields will not be visible to the person completing the form but will submit data against their record into Salesforce.
When you hide a field, both the field and the label will be hidden.
- To hide a field, select the relevant ContactEase field from the form editor and select Make hidden.
If you want to set a predefined value:
- Click on the form field
- Select Field Settings
- Type in your value in the Predefined Value box.
You can give your contacts the option to upload a file (for example, their photograph) alongside the rest of the data they submit in a form. There is a 10Mb limit to the upload. All common file types are supported.
- Click to edit your form
- Click File upload under Vx Fields
Important: We will only send these uploaded files as attachments via email. We will not save them in the Vuture system. We do not scan any attachments for Viruses so please make sure that you have the necessary checks in place.
If you test your form and you don't receive a notification please get in touch with Vuture support and we can check your queue settings.
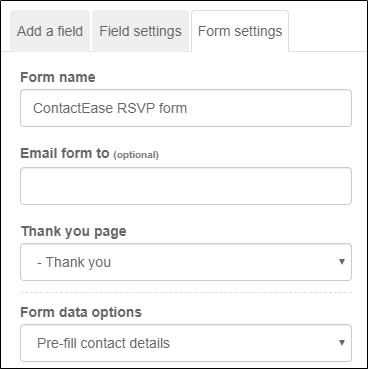
While the Field Settings tab covers the options for each field individually, the Form Settings tab covers options for the Form as a whole.
Form Name
If you fill in the Form name, we will use this as the subject line if we email you that someone has submitted the form. If you have copied your form from another campaign make sure that you change the name. Typically, clients leave this name as either RSVP Prefill or RSVP Blank but it is a good idea to add the name of the event. Make sure that the name of each form or landing page is unique within the campaign.
Email form to (optional) When a contact submits this form you can have the completed form details emailed to the email address you put in this field. If you want to add multiple emails simply separate them with a semi-colon e.g. info@vuture.co.uk; news@vuture.co.uk. This is also the address that any uploaded file will be sent to. Warning: if you put your email address in this field you will receive a copy of every submitted form!
Thank-you page
This is the default thank you that will be used if you do not select an RSVP Yes or No redirect. It is commonly only used when the form is being used as a survey – where there isn’t a yes / no option. Typically this page will say something like: Thank you for completing our form.
Form data options
Pre-fill contact details
Blank form, disconnect from contact
This option specifies whether you wish to prefill your form or leave this blank. If you prefill your form and a contact clicks through to this landing page from an email their contact details will already appear in the form. This is useful for quick RSVPs, saving the contact from typing out their details again.
It helps you comply with GDPR by revealing the data you are holding about a client, and (if you don’t make the contact fields Read Only) it allows the contacts to update the information you are holding about them.
When a prefilled form is opened the contact will see their CRM data (Name, Job title, additional fields, etc). When a form is blank, this data will not show, even if the contact is known. Blank forms are useful for when you want to collect new contacts, for example from web pages.
When a contact fills in a blank form, their details will be updated or created in ContactEase following the process below:
- When the contact details submitted in the blank form are new, they will be created as a new contact in ContactEase
- When the contact exists but details (such as Company) change, the Company details will be changed in ContactEase for the existing contact.
Add Email Types and Unsubscribe Options
To add email type unsubscribes (for example Send No Newsletters) and global unsubscribe categories into a form, you will have to follow the steps in the Editing forms section. However, for these to count as Unsubscribe options, they first need to be added into Vuture as such. Your account manager must do this in your CRM Data Manager.
Please note, after a field is added into a form or your Account Manager adds it through the CRM Metadata Manager, you/they must "Refresh list from CRM" in the Contacts module. This way, any pre-existing values for that field will be brought forwards into the connector and forms.
