Keywords: Container structure, restructure, update, merging containers, migrating containers
Overview
As you use Vuture overtime, you may decide to restructure your Containers in a way that better serves meeting your business objectives or to evolve with the structure of your firm/business.
For example, your Containers may currently be setup with only the Mailing Type (i.e. Alerts, Events, Webinars, etc.), where all email campaigns with that Mailing Type are stored. However, you may wish to break these Mailing Type containers out into the specific Practice Areas for more flexibility within your Vuture reporting (i.e. Alerts > Practice Area Name; Events > Practice Area Name; Webinars > Practice Area Name).
This article summarizes key considerations to keep in mind and how best to execute a container restructuring within your Vuture platform.
Contents
Key Considerations
Please keep the following considerations in mind when thinking about restructuring your Containers:
Mapping out your New Container Structure
First, you'll need to decide how best to break out your new container structure. There are many considerations to keep in mind (outlined here), but from a reporting perspective, we outline the best approach here.
Once you've agreed on a new container structure, it is recommended to create an Excel Doc or Google Sheet with your master plan. This will make it much easier for when you are ready for implementation.
Please see the below example of what to include in your 'Master Plan':
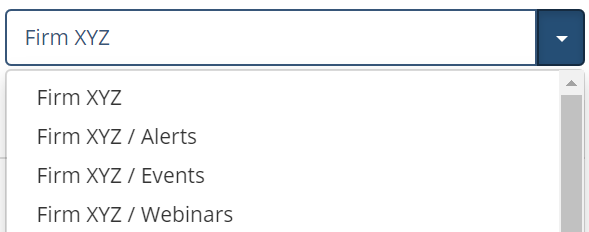
In this example, our old container structure only had Mailing Types (i.e. Alerts, Events, Webinars), and our new container structure breaks down each Mailing Type by Practice Area (i.e. Alerts > Practice Area Name; Events > Practice Area Name; Webinars > Practice Area Name).
Old Structure:
Master Plan of New Structure:
| Old Main Container | New Main Container | New Sub Containers |
| Alerts | Alerts | Banking |
| | | Cyber Security |
| | | Energy |
| Events | Events | Banking |
| | | Cyber Security |
| | | Energy |
| Webinars | Webinars | Banking |
| | | Cyber Security |
| | | Energy |
Best Practice Tip: You can then add on to this Master Plan with the Sub-Template Categories and any container specific Variables that should correspond with this new container structure. You may wish to add a column for Internal Notes, too (i.e. renamed this Container to...). This will make it easier when implementing these changes.
Sub-Templates & Template Categories
If you have any specific Sub-Template Categories that need to be mapped to the new containers, make sure to note these on your Master Plan. For example, you may have an 'Events' Template Category that holds all of your Event Sub-Templates. You'll want to make sure to note this against any new 'Event' specific containers.
This way, you can double check your Template Categories for each of the new containers and make sure your users will be able to access the appropriate Sub-Templates for those containers.
Example of Template Categories: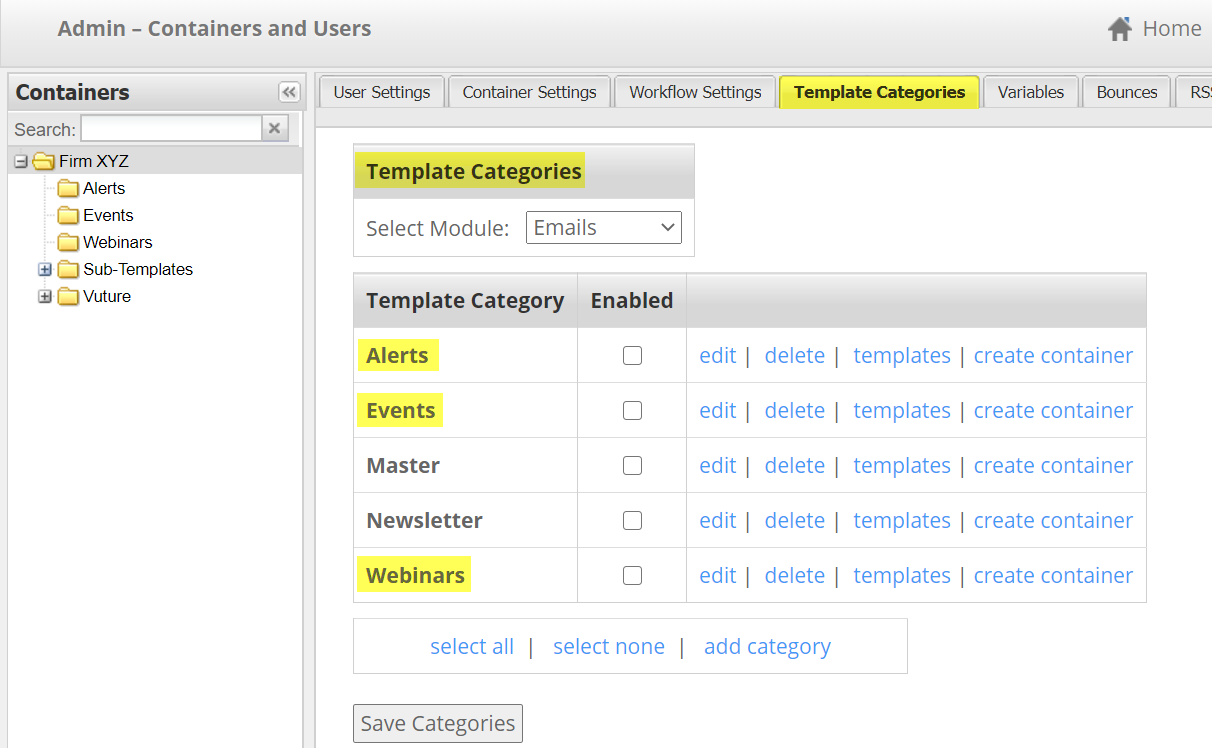
Master Plan of New Structure with Sub-Template Categories:
| Old Main Container | New Main Container | New Sub Containers | Template Categories |
| Alerts | Alerts | Banking | Alerts |
| | | Cyber Security | Alerts |
| | | Energy | Alerts |
| Events | Events | Banking | Events |
| | | Cyber Security | Events |
| | | Energy | Events |
| Webinars | Webinars | Banking | Webinars |
| | | Cyber Security | Webinars |
| | | Energy | Webinars |
Container Variables
All Global Variables will remain in any new or existing container you create. However, you'll need to keep in mind that Container Variables are tied to that specific Container and/or Sub-Containers. If you are creating any new top level containers, you may need to create or recreate variables that are specific to that container.
This may not be the case for every client, but it is worth mentioning. To keep this organized, you may wish to add a column to your Master Plan for any Container Variables that will need to be created/recreated, before deleting the old container.
Example of Container Variables:
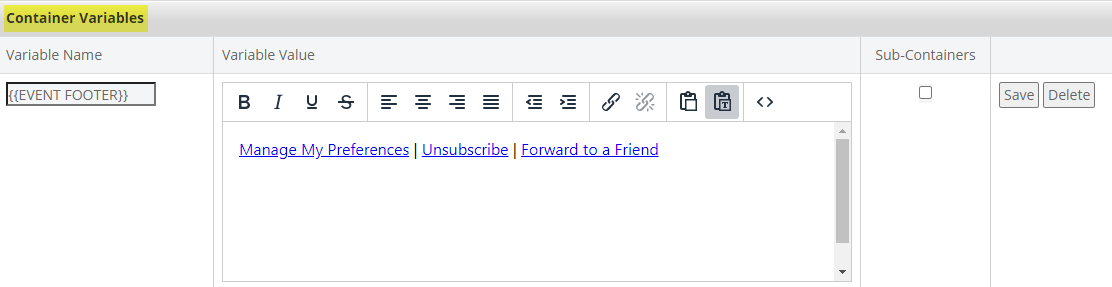
Master Plan of New Structure with Container Variables:
| Old Main Container | New Main Container | New Sub Containers | Template Categories | Container Variable |
| Alerts | Alerts | Banking | Alerts | |
| | | Cyber Security | Alerts | |
| | | Energy | Alerts | |
| Events | Events | Banking | Events | {{EVENT FOOTER}} |
| | | Cyber Security | Events | {{EVENT FOOTER}} |
| | | Energy | Events | {{EVENT FOOTER}} |
| Webinars | Webinars | Banking | Webinars | |
| | | Cyber Security | Webinars | |
| | | Energy | Webinars | |
Images within your Container Image Libraries
Keep in mind that when an email campaign is moved from one container to a different container, only the images that are part of this campaign come along with it.
To make available any Container Image Library from an old container, in the new container, there are a couple of options:
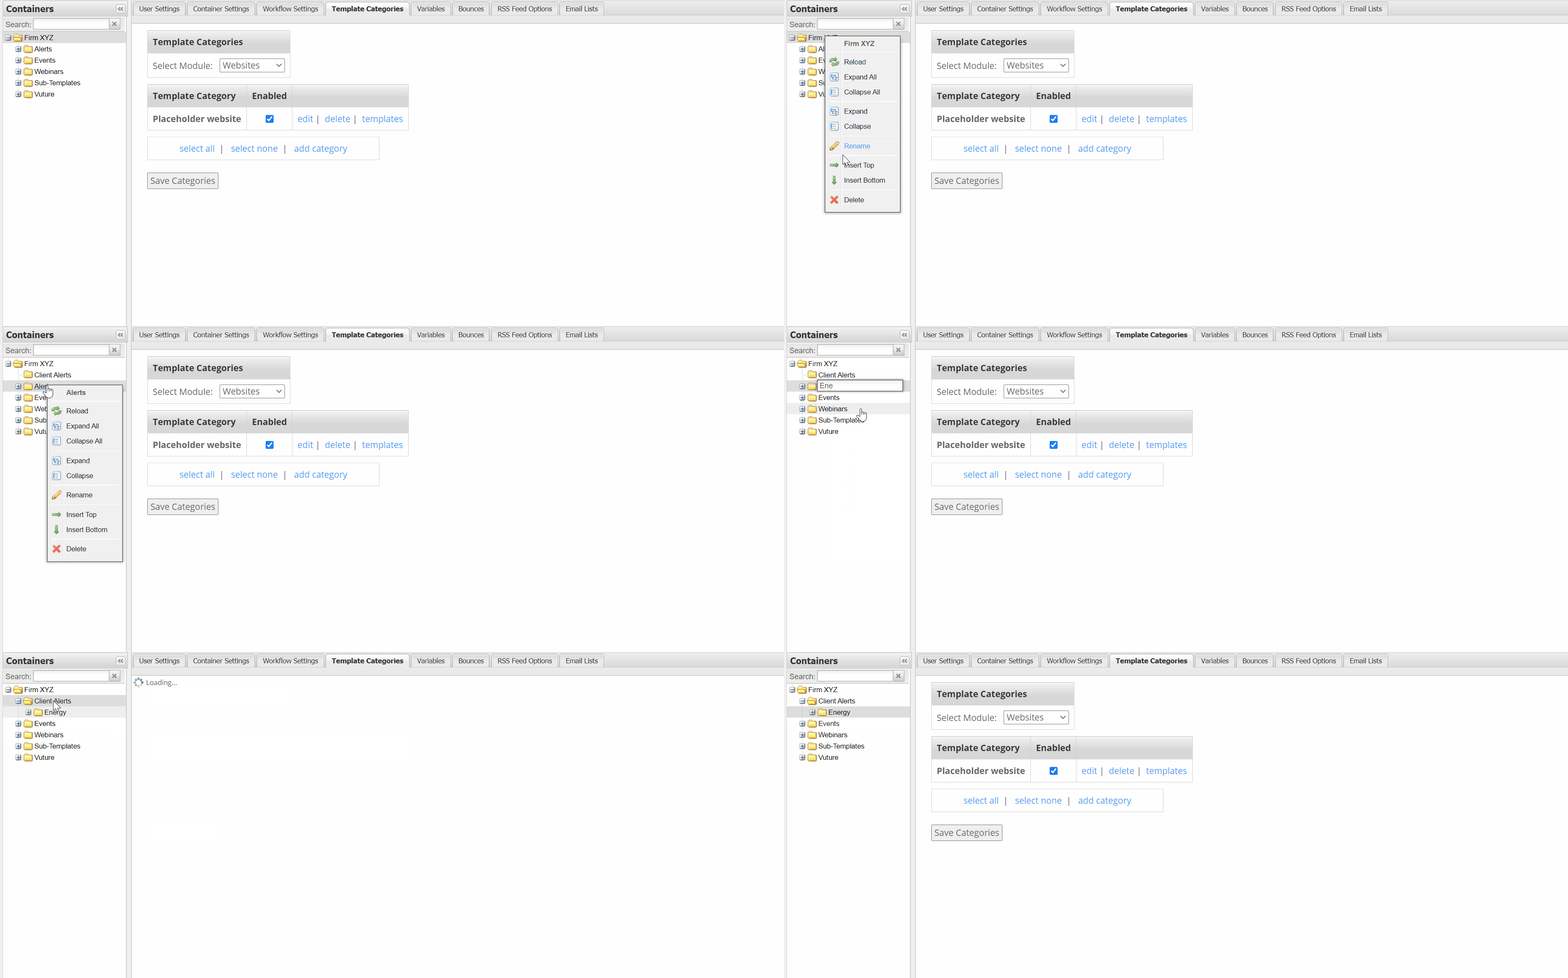
- Instead of deleting the old container (where this Container Image Library exists), rename this container and move it to the desired location in your new container structure. This will retain the Container Image Library. You may want to make a note in your Master Plan that this container was renamed and/or where to move this container.
- For example, most of the images in my Alerts Container may be associated with the Energy Practice Area. I could then create a new container called Client Alerts, rename 'Alerts' to 'Energy' and move this renamed container into the new structure. This will retain the Container Image Library (formerly called Alerts) in the 'Energy' container, so that I do no need to re-upload these images.
-
Re-upload your most recent or relevant images into the new container, if renaming the old container is not possible.
User Access
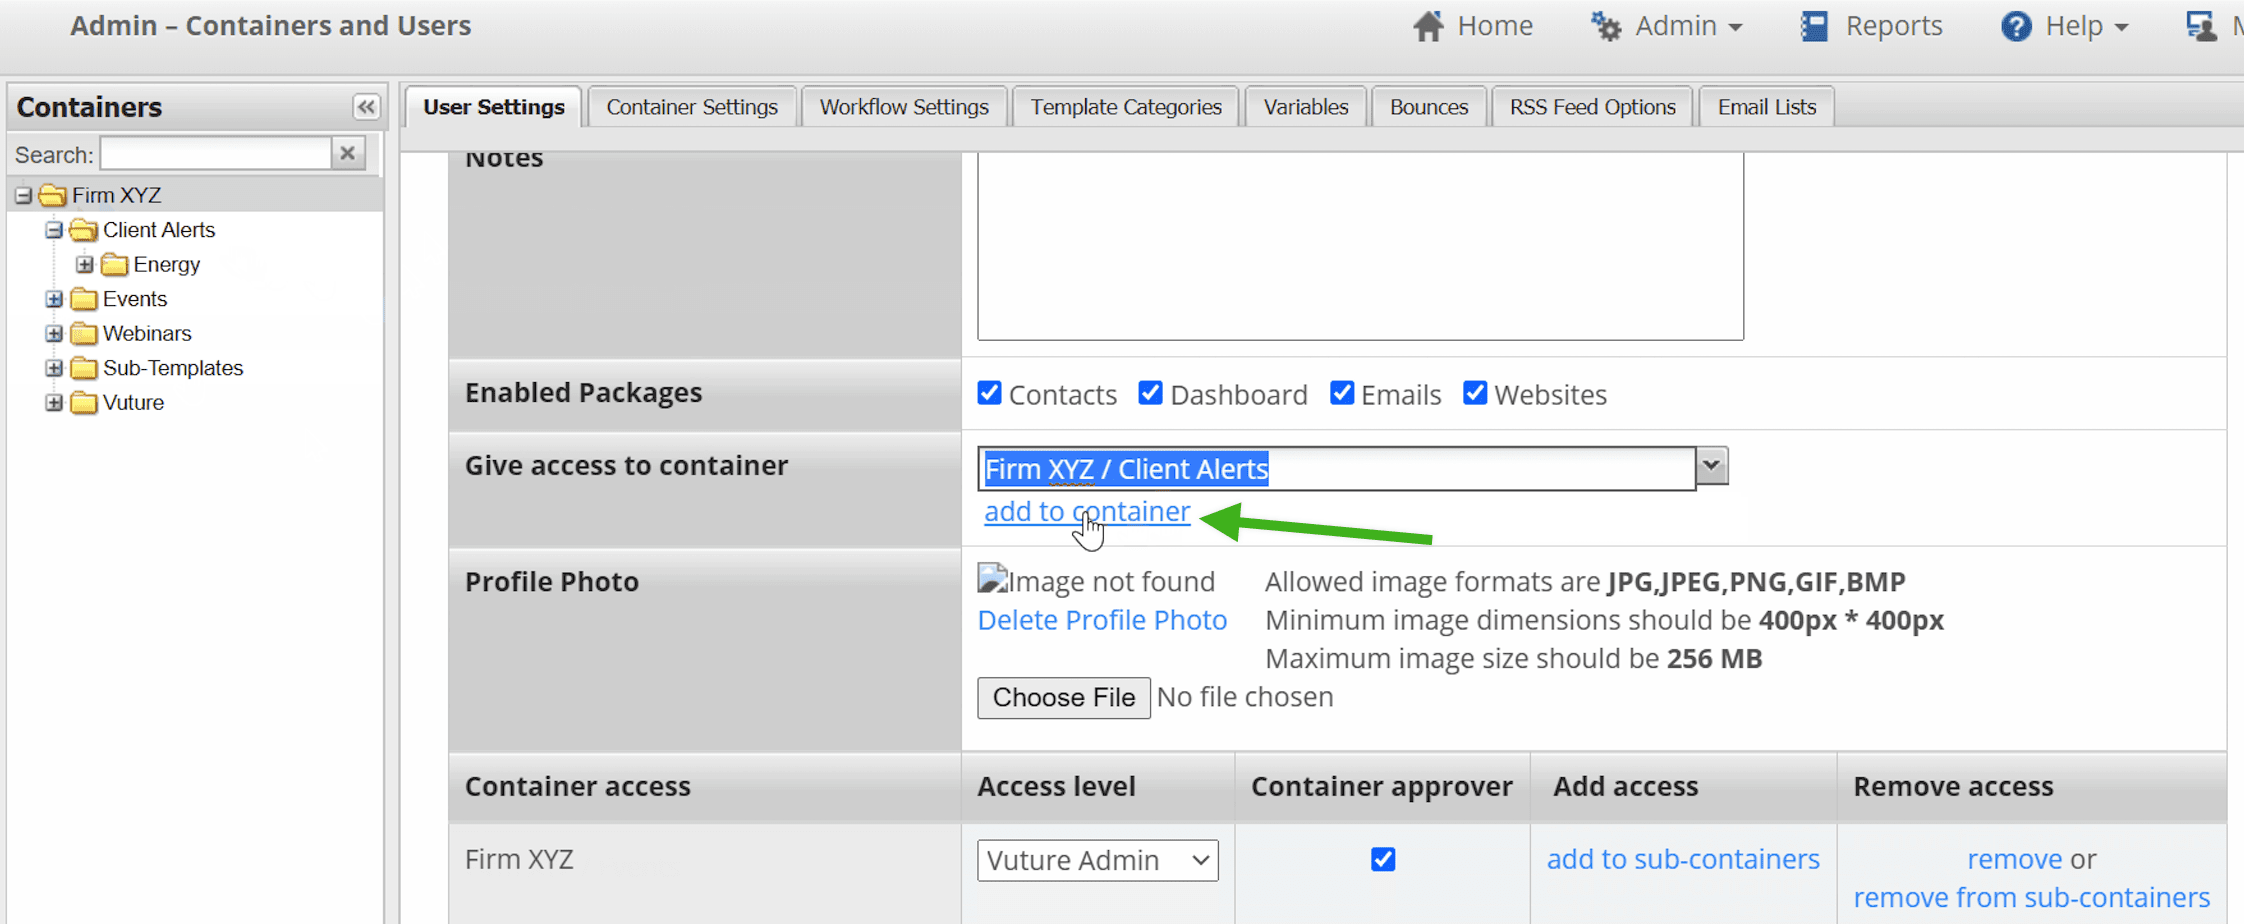
Keep in mind that when new containers are created, not all users may have access to them. You may need to go into the user accounts to give access to the newly created containers.
How Best to Execute a Container Restructure
Please use the below checklist as a guide to make the transition from your old container structure to your new container structure as seamless as possible.
1. Have your 'Master Plan' document completed and ready
To make sure everything is organized and well thought out before implementing your new container structure, map our your new structure taking into account the main key considerations. (Explained in detail here)
2. Create the new containers
Now that you've decided on your new container structure, go ahead and create your new containers. For more details on how to do this, please refer to this article.
3. Assign your Template Categories to the new containers
Make sure your new containers are referencing the right Template Categories. This way, your users will have access to the right Sub-Templates to quickly get started within these new containers. For more details on how to do this, please reference this article.
4. Create/Recreate Container Variables for the new containers (if applicable)
Create or recreate any Container Variables for your new containers. For example, you may wish to display a different footer for your Event Containers (i.e. without the Forward to a Friend link). This can be controlled using a Container Variable and referencing it within your Event Sub-Template(s).
5. Upload Images into New Container(s) OR Rename an Old Container
Depending on the changes you're making, decide how best to handle your Container Image Libraries. If its possible to rename the old Container, this will retain the Image Library (See more details here). Otherwise, you may wish to start fresh within each Container and only uploading the most recent images.
6. Request your campaigns to be moved to the new container
Please review this article to request a move for your campaigns to their new location.
7. Confirm your campaigns were moved
Make sure your email campaigns were successfully moved by double checking your old containers.
8. Delete your old containers
Once its confirmed that all your email campaigns were moved from these old containers to the new containers, you may delete all of your old containers from your Vuture Instance.
If you accidentally delete a container, not to worry! Contact Support and they will find instructions on how to restore your deleted container here.
9. Check to make sure any User Accounts that need access to these new containers have permission to see them
Keep in mind that when new containers are created, not all users may have access to them. You may need to go into the user accounts to give access to the newly created containers. For more information on the User Account Settings (i.e. Give access to container), please review this article.
