Keywords: Create new user account, Account Not Setup, Edit users, Add/Remove users from containers, Reset password, Re-enable locked account.
Note: there is a Vuture-only method available to bulk upload multiple new users and assign them to containers to which they should have access. See the article here.
Overview
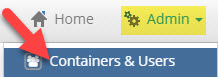
To manage your users navigate to Admin>Containers and Users. You can add, remove and edit users from this screen.
Contents
Creating a new user account
Follow the below steps to create a new user in your Vuture platform.
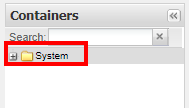
- On the left-hand side, click on the top most level container (the root folder)
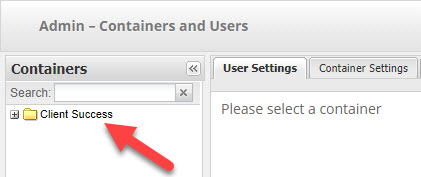
- Click 'add user'

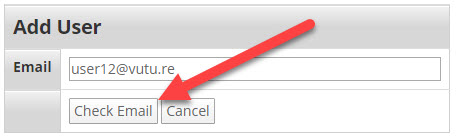
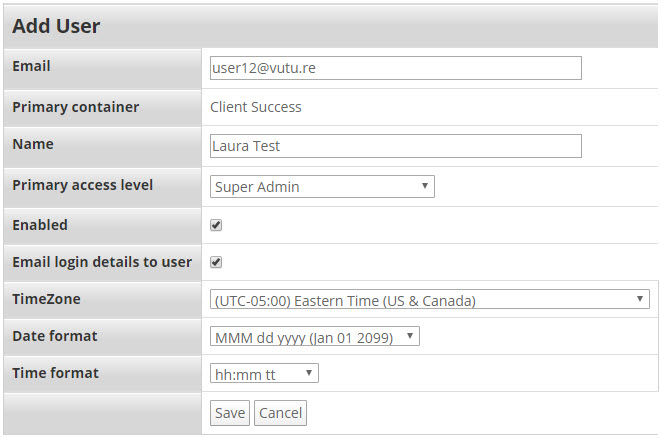
- Enter in the email address of the new user account and click on 'Check Email'. This will check to see if this email address is currently being used with a user account in Vuture.
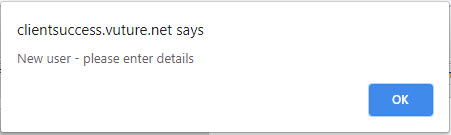
- If there is email address associated with a user account in Vuture, you will see the following pop-up:
- Next, you will need to enter the following:
- Name: The user's full name.
- Primary access level: Select whether this user should be a Super Admin (giving them the same permissions you have) or an Admin. An Admin will not have access to 'Admin > Containers & Users' and will not be able to edit/maintain Sub-Templates. Please note that only Super Admins can assign users the full range of access levels; users with lower levels cannot assign higher access levels to other users.
- TimeZone: This sets the timezone of this particular user.
- Date format: Here you can set the specific date format for the user.
- Time format: Here you can set the time format for this user.
- Then click Save.
- IMPORTANT: Upon hitting Save, you will still need to complete the following for your new user (at a bare minimum). If you'd like to review other optional settings, please see the 'Editing users' section for a full list of the user account settings.
- Change Password at next login: When you create a new user, for security reasons its a good idea to force them to change their password when they first login. By default we will tick this item when you create a new user. But you can also manually force a user to change their password.
- External Systems: Lists the name of the External systems connected to your instance of Vuture. You will need to give users access to your CRM. Depending on what CRM is integrated with Vuture, you may wish to copy the 'Account Name' from your user account.
- Enabled Packages: You can give access to different modules using this option. You may not want every user to have access to every module. Please note: A user must have at least one module enabled (i.e. Emails, Dashboard, etc.) or they will receive an 'Account not setup' error message.
- Give Access to container: Here you can select which containers this user should have access to.
- Container access: Lists all the containers the user has access to. You can remove access by clicking on 'remove'.
- Then click 'Save'. Your new user account is now setup and the user should receive an email from Vuture with a temporary password to log-in.
Important - If your new user logs in and sees 'Account Not Setup'. This is because nothing is ticked off in 'Enabled Packages'. At least one module must be checked off here (i.e. Emails, Dashboard, etc.).
Editing users
If you click on edit users you are given a number of different options. The list below details what each setting means, ordered from top to bottom on the 'User Settings' screen:
- Default Container: This is the default container that we take the user to when they log in. It's useful to set this to be the container they are most likely use.
- Name: The user's full name
- Email: The user's email address
- Enabled: If a user leaves your company you can disable them. If the user also types in their password incorrectly multiple times they will be disabled and they'll need to be re-enabled either by a Super Admin. For full step-by-step instructions, click here.
- Send Password: If a user forgets their password you can resend them a forgotten password email so that they can reset it.
- Change Password at next login: When you create a new user, for security reasons its a good idea to force them to change their password when they first login. By default we will tick this item when you create a new user. But you can also manually force a user to change their password.
- Vx User: Tick this box to allow a user to login to Vx as a "hands on" user of the platform. Untick this box to allow a user to only login to websites created with Vx (for example visitors to secure websites such as Alumni sites).
- Vx List Access: Ticking this box gives the user access to the Lists area, via any campaign in the Email module. If un-ticked, the user will not be able to select a Vx list on the Send screen.
- Redirect to to Last Visited URL: If this option is ticked, when a user logs into Vuture they will automatically be redirected to the last URL they were on the last time they logged in.
- External Systems: Lists the name of the External systems connected to your instance of Vuture. You will need to give users access to your CRM.
- Default approver: If you have approval workflow enabled and this option is ticked then that user is an approver for their containers.
- Default access level: Here you can set the default role for this user if you add them to a container. Decide whether this user should be a Super Admin (giving them the same permissions you have) or an Admin. An Admin will not have access to 'Admin > Containers & Users' and will not be able to edit/maintain Sub-Templates.
- TimeZone: This sets the timezone of this particular user.
- Date format: Here you can set the specific date format for the user.
- Time format: Here you can set the time format for this user.
- Notes: If you want to add notes for other users to see.
- Enabled Packages*: You can enable or disable modules using this option. You may not want every user to have access to every module. Please note: A user must have at least one module enabled or they will receive an 'Account not setup' error message.
- Give access to container: Here you can add users to containers they should have access to.
- Profile Photo: You can upload photos here for each user.
- Container access: Lists all the containers this user has access to. You can remove access by clicking on 'remove' or 'remove from sub-containers'.
Adding multiple user accounts
Is there a limit on the number of user accounts we have in our Vuture instance?
Q. Are there any possible performance issues or other things to keep in mind if an instance has a large number of users? For example, if a client goes from 30 to 100 users is there anything that needs to be changed on the Vuture platform to accommodate this?
A. No. There is usually no issue on the Vuture side if a client wishes to add further users to their Vuture platform. There are no settings to change. There will not normally be any performance impact.
Having said that, there are a few things to think about if Vuture is integrated to a CRM and you plan to add hundreds or even thousands of new users:
- Speak to your Account Manager first to double check your allotted user accounts in your contract. We can then advise you more helpfully on next steps.
- More users will typically mean more emails being sent. If this is the case it might put an increased load on your CRM so it would be worth speaking to your CRM team.
- If the new users were running very large, multi-year Vuture reports, with thousands of lines in each report, this would add a load to the Vuture system. Again, talking to your Vuture Account Manager first will help.
Searching for users
If you have lots of containers and users it might be tricky to find users manually. You can search for users by their email or their name using the search.
- Select the root container on the left hand side
- Type your search term and click go.
- Vuture will filter the list of users to find the one you are looking for
If you don't see the user you are looking for click show users in sub containers checkbox, then Search.

Adding a new user to container(s)
Add a user to a single container
- Select the root container on the left hand side
- Navigate to the container you wish to add the user to.
-
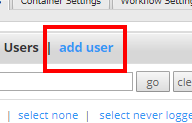
Click add user
-
Type in the user's email address
-
Click Check Email. This will check whether the user is already in the system. If the user is already in the system you will see a warning message asking you whether you want to add the user to this particular container.
-
If the user isn't in the system you'll see a warning messaging asking you to enter their details. Click Ok.
-
Add their details and be sure to select the access level of the user. This is covered further down this article.
-
Click save.
Add a user to multiple containers
There are two ways you can add users to multiple containers.
Method 1
- Follow the previous steps to add a user to a single container.
- Click on the container and tick the user

- Click add users to container
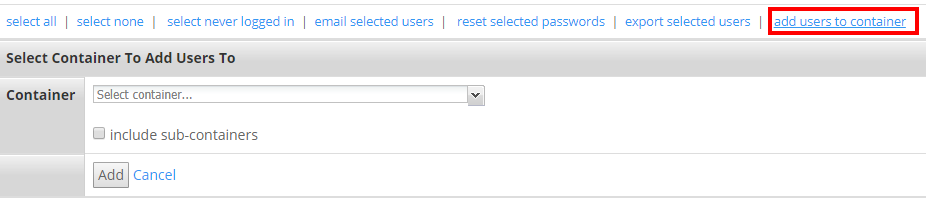
- Select the container drop-down and select the container you want to add the user to.
- Tick include sub-containers if you want to also add them to all the sub-containers
- Click Add.
- Repeat this step for any further containers.
Method 2
- Once you have added a user to the first container, click edit user.

- Scroll to the bottom of the screen until you get to Give access to container

- Click on the drop-down and select the container you want to give that user access to. This will only display containers they do not currently have access to.
- Click add to container.
- That container will then appear under Container access further down the screen.

- If you also want to give that user access to all the sub-containers simply find the container you just added them to.
- Click add to sub-containers.
- You'll then see all the sub-containers appear.
Removing a user from container(s)
There are two ways to remove users from containers
Method 1
- From the Admin>Containers and Users screen
- In the menu on the left hand side, find the container you want to remove the user from.
- Tick the user
- click on remove users from container

- Check that it shows the correct container.
- Tick include sub-containers if you also want to remove them from the subcontainers
- Click remove
Method 2
- Find the user using the search bar
- Click edit user against the user you want to remove
- Scroll to the bottom of the user screen to the Container access
- Find the container you want to remove the user from
- Under Remove Access, click remove if you just want to remove them from the one container. Click remove from sub-containers if you want to keep them in this container but remove their access from the container's sub containers.
Reset a user's password
Within Admin>Containers and Users:

- Find the user whose password needs to be reset
- Click Edit User
- Click reset password
- Save
Re-enable a locked out user account
If the user is disabled because they had too many failed log-in accounts when trying to log-in to Vuture:
- Find the user who needs to have their account enabled
- Click Edit User
- Tick Enabled
- Click Reset Password then click Save.
This will send the user a new temporary password and they will be able to log in and change it.
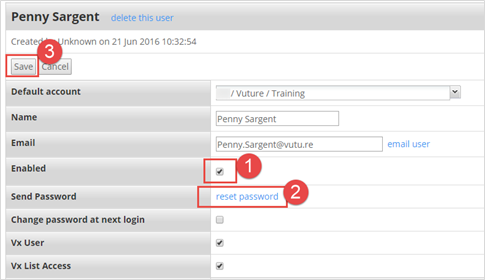
For more detailed instructions on re-enabling a user account, click here.
You may also like to watch this video on re-enabling an account and resetting the password:
Adding an affiliate
In the scenario you would like to add an affiliate to your instance, please note that we cannot guarantee the affiliate will be completely isolated from your main company's data.
For example, running some reports, such as the Company Activity Dashboard, the entire instance's data may become visible. It's not guaranteed that all reporting will be restricted according to container access.
