Overview
This Help Desk Article outlines the different date & time formats for a user's settings. Each user can have their own choice of data display format which determines how dates and times are displayed in the system.
This article also covers how to set this for a user or how a user can adjust these settings themselves.
Contents
The possible options for date display are in the following UK and US date formats:
UK
- dd-MM-yyyy (31-01-2099)
- dd/mm/yyyy (31/01/2099)
- dd MMM yyyy (01 Jan 2099)
US
- MM/dd/yyyy (01/31/2099)
- MM-dd-yyyy (01-31-2099)
- MMM dd yyyy (Jan 01 2099)
The possible options for time display format are either using a 24-hour clock or a 12-hour clock:
24-hour clock
HH:mm
HH:mm:ss
12-hour clock
hh:mm tt
hh:mm:ss tt
Where:
HH = The hour, using a 24-hour clock from 00 to 23
mm = The minute, from 00 through 59
ss = The second, from 00 through 59
hh = The hour, using a 12-hour clock from 01 to 12
tt = The AM/PM designator
Examples:
Any user who would like to use the 24 hour clock to display times as 18.30 would choose HH:mm
Any user who would like to use the 12 hour clock to display times as 6.30 pm would choose hh:mm tt
How to set the date display format for a user
In order to edit user settings your role needs to have the "Admin.User Settings" feature enabled. If you are a Super Admin, this should already be enabled for your Account. If you are not a Super Admin, you may edit your settings here.
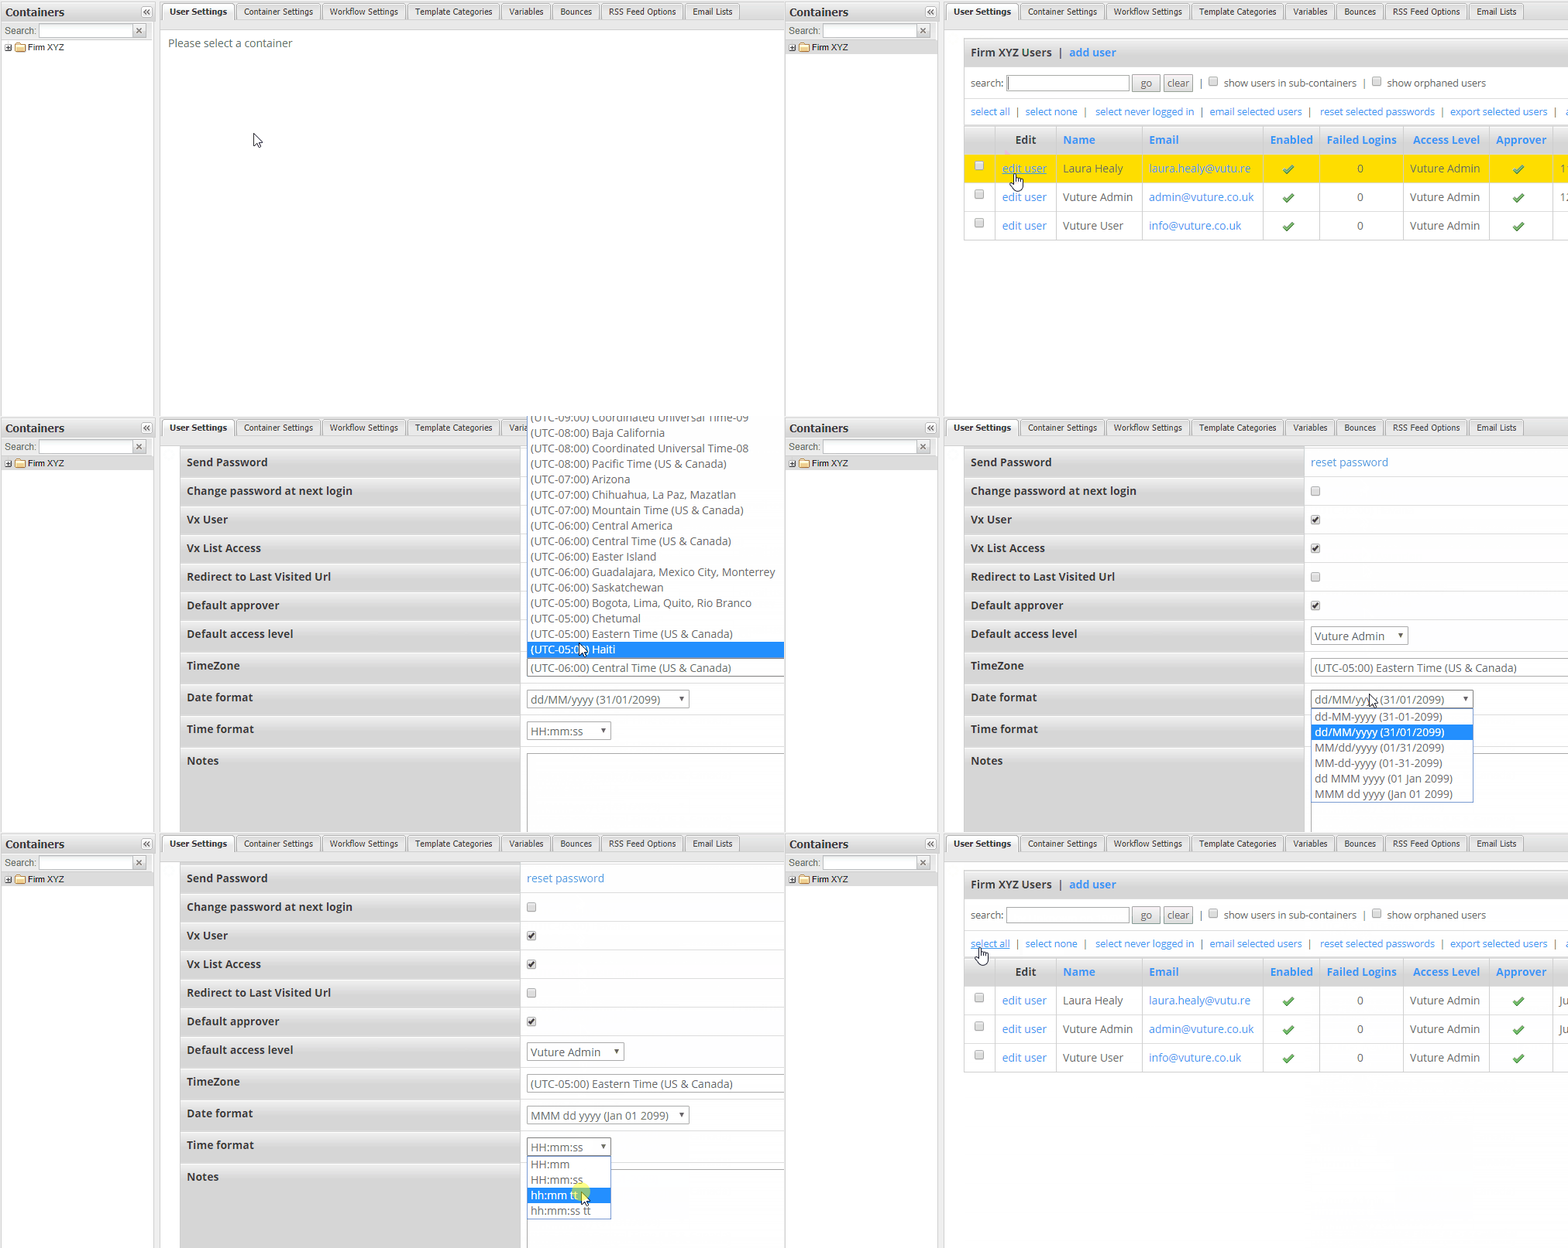
From the top menu, click on "Admin" > "Containers and Users", then click into your top most level Container (e.g. Firm XYZ). Select a user to edit which will take you to the "User Settings" screen. You will then see settings called "Date format" and "Time format" which allow you to choose the format for that user. Select the required formats and click "save".
If you need to make mass changes to these settings please contact your Account Manager or Vuture Support who can assist with this, using the user upload function under import users.
How a user can adjust their date/time settings
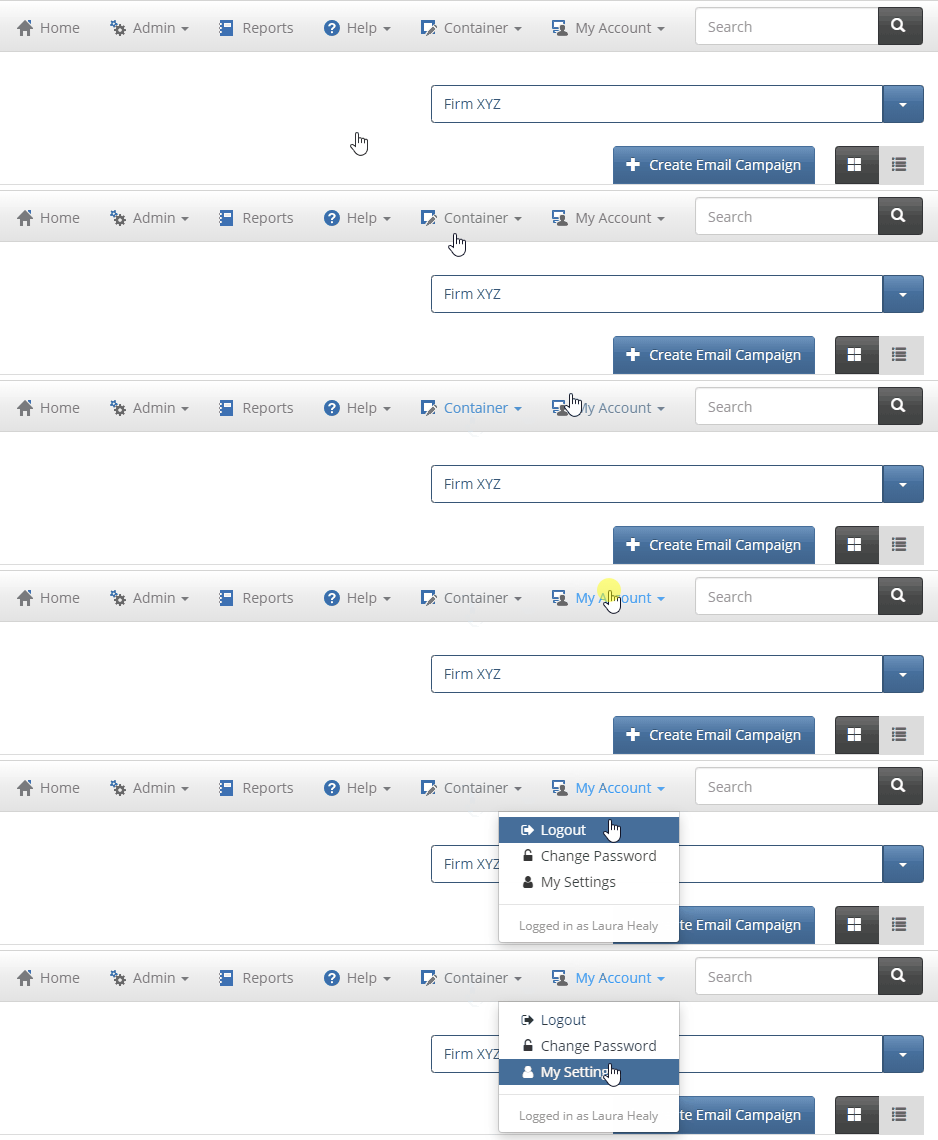
Users can also change these settings for themselves, from the Home screen, by clicking on "My Account" > "My Settings".
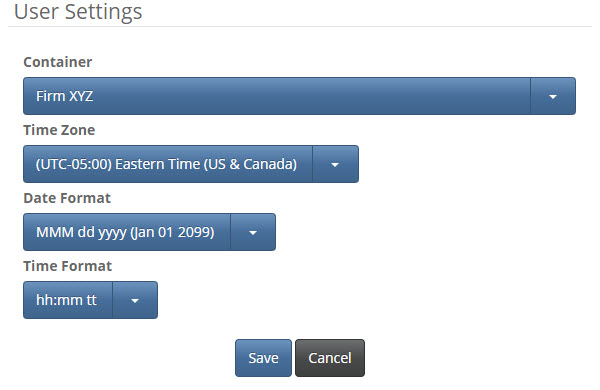
Upon clicking on "My Settings" a popup will appear (See screenshot below). Please make your changes then click on "Save". These changes will take effect on your next login.