Overview
The Vuture Events App simplifies the running of an event, making delegate registration easier and less time-consuming. You can run it on a variety of devices such as a laptop, tablet or cell phones.
Contents
Introduction
The Vuture Events App can manage:
- The Attendees list
- The Check In list at the event
- Cancellations
- Walk ins
- Emails to your sponsors letting them know their guest has arrived (optional)
- Delegate Badges
- Marking arriving delegates on InterAction as “attended” to write an Activity to the contact record, based on their attendance status
The purpose of this set up is to deploy an Event App URL. In this URL, you configure the settings Vuture requires to manage the values that will be written back to your marketing list within InterAction. Settings include what your events list is called, the RSVP value you are using (Yes or Accept or Accepted), other values such as Attended in your IA, and whether you want to notify lawyers when guests arrive. You can set all this up in advance, and then just Start the event on the day.
Deploying the Events App URL
To deploy the Events App URL, use the Campaign Summary view in your chosen campaign.
- In the Campaign for the event, click the Campaign Summary

- In the Event App section click Configure Event App
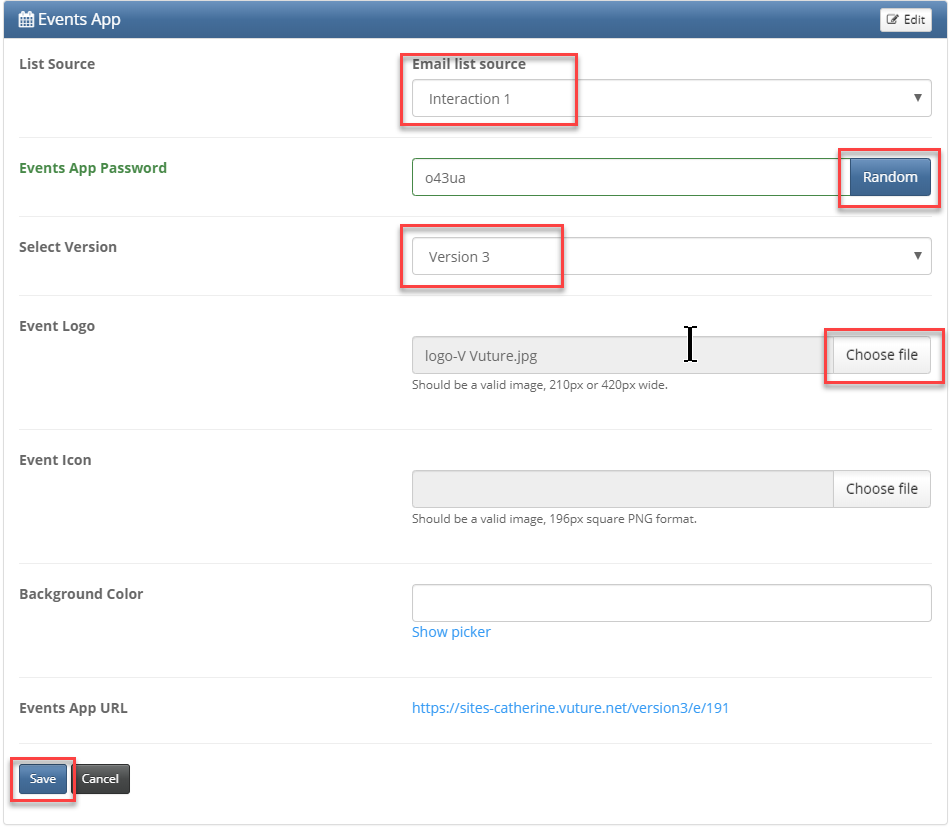
- Click Configure Event App
- Select the ListSource InterAction
- Click Random to create a password, or type one of your own
- Select Version 3
- If desired, click the Event Logo and select the desired JPG
- If desired, click the Event Icon and select the desired JPG
- Click Save
The Successfully deployed confirmation message will display at the top right of the screen.
Once you have deployed the Events App you can use the URL to log into the App Dashboard and configure the event.
Configuring the Event
Using the URL you will be taken to a Dashboard where you can configure the Events App to create the event, map the values to the Attendance additional fields and choose other options. This creates the different values used in the event when registering delegates. Vuture recommends that you create a naming convention which includes the event date – to keep titles unique.
- In the Campaign Summary, click on the password to copy it to your clipboard

- Click onto the Event URL
- Click Login (bottom left of the screen)
- Paste or type the password into the Login screen and click Login
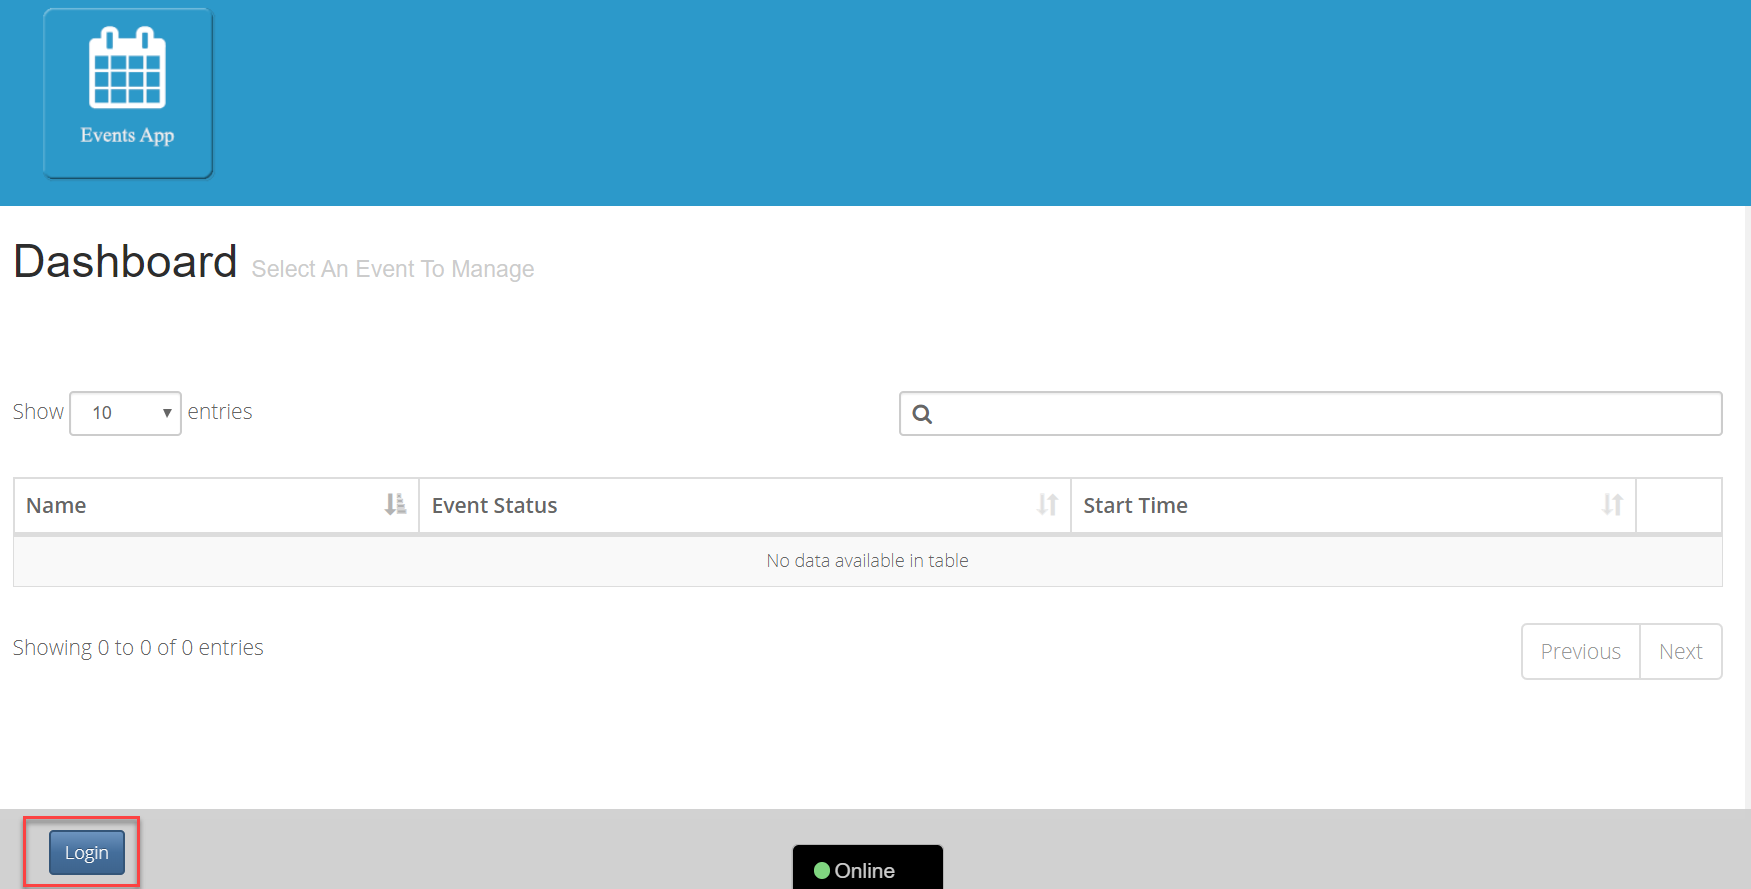
- At the Dashboard screen click Create new event
- Type the Event name then click Create Event
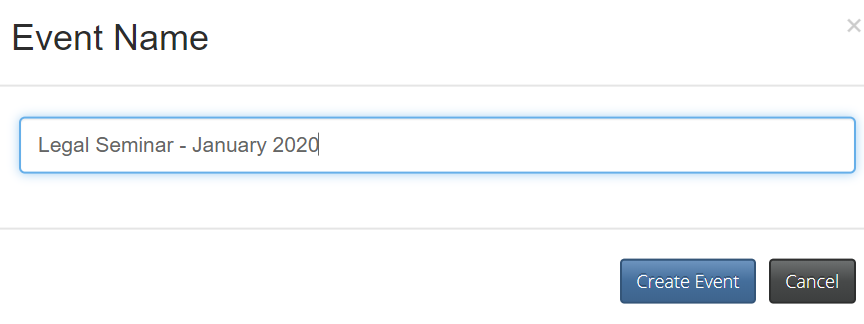
Note: The Event names must be unique. We recommend including the event date.
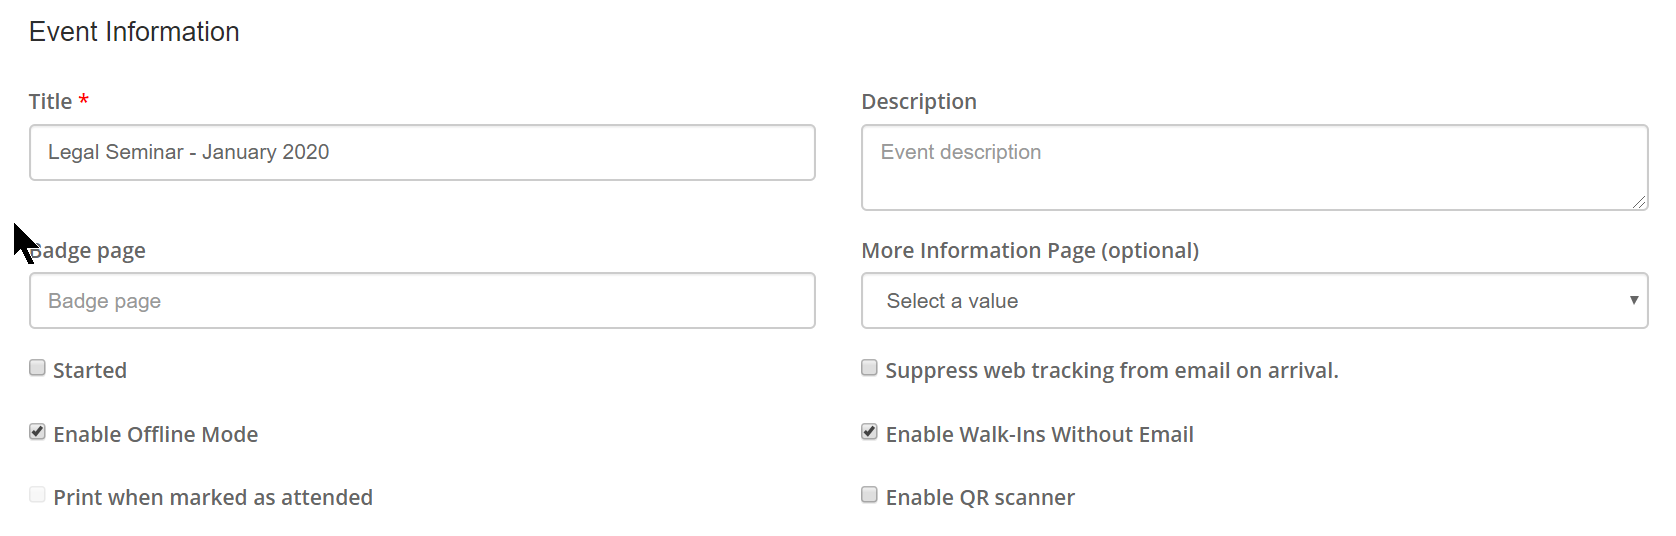
- At the Edit Event screen if necessary, edit the Event Title
- If using badges, select the template from Badge page
- Select to Enable offline mode if you know you'll be in an area with spotty WIFI. This ensures you will still be able to mark people as arriving should you lose WIFI connection at the venue.
-
More Information Page: A more information page allows you to include a single landing page from the same campaign in the Event App. When enabled a "More Info" link is displayed next to each contact, clicking on that link opens the chosen landing page, with the content populated for the selected contact.
Any landing page can be used to view and update any extra information for the contact, or you could create a read-only landing page with personalised fields. This could be used to view and update whether a contact has paid for the event; you could add a note against the contact to record the guest they have brought; or you could display the sessions they have subscribed to.
To create a More Information Page - in your event campaign, create a new landing page. If it is a form, make it prefilled. Add any additional fields connected to your contacts and Save. During the event, clicking the the More Info link next to a contact's name will display their details, prefilled, with the information contained in the additional fields you need to see. You can add any missing information at this point (Consent for example) and click Submit.
-
Suppress web tracking from email on arrival: only used if web tracking is enabled to prevent a Fee-earner receiving information on all the web activity of an arrival, should email on arrival also be enabled.
-
Print when marked as attended: would print a badge of the attendee when marked as arrived.
-
Enable QR scanner: Not generally used; only if QR enabled. Please note if you enable the QR Scanner you will need to install the scan app on your IOS device, this is a 3rd party tool not supported by Vuture. Visit this Help Desk Article for best practice.
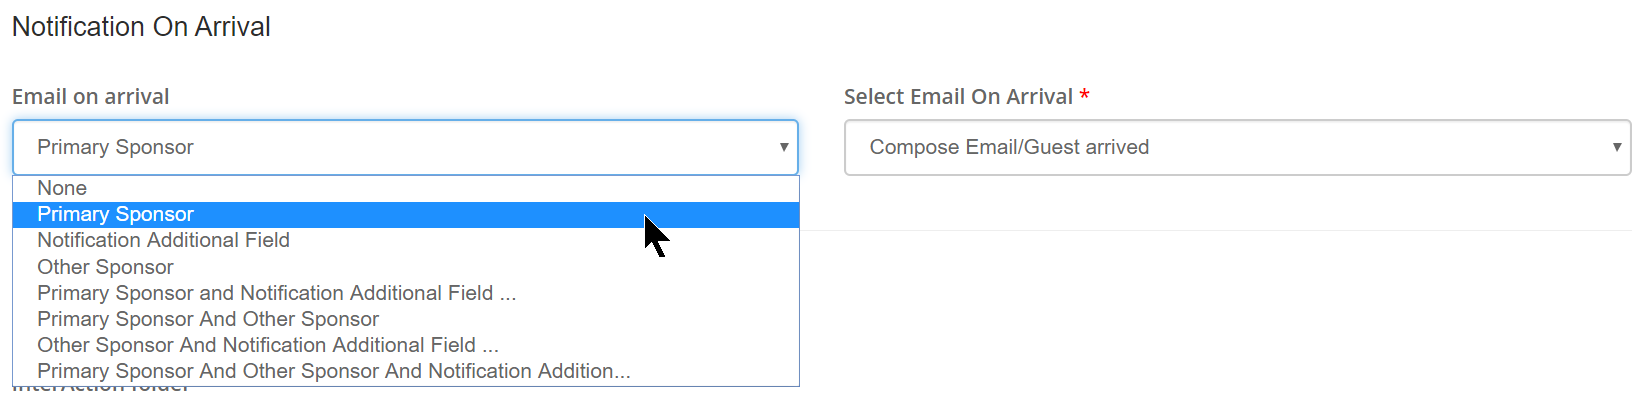
- Primary Sponsor: this is the primary sponsor of the contact
- Other Sponsor: this is all of the additional sponsors of the contact
-
Notification Additional Field: you must set up a notification additional field on the list in InterAction (this should be a text field with Multiple Values. The values are email addresses, separated by a comma.) The field could be called something like Notify Lawyer. If you put an email value in this field, that email will get notified. You could choose therefore to only notify lawyers when their most important contacts arrive.
Note: This email must be configured as a Notification Template, by clicking email options, and select a Notification Template, then clicking Save Metadata, then Publish the email.
For more information on Sponsor Notification Email Personalisation click here.
-
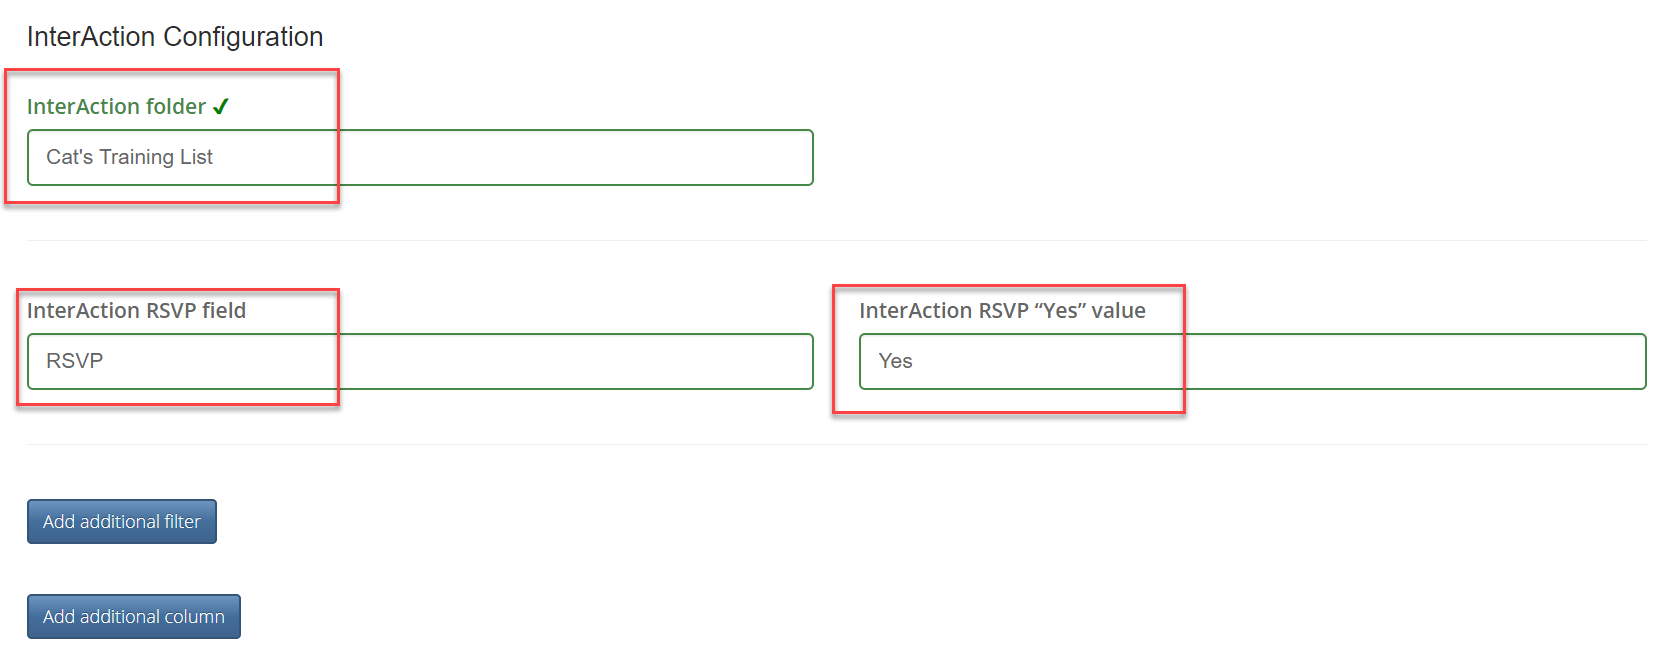
InterAction Configuration
- Select the InterAction folder (the Marketing List for the event) and click Select
- Select the InterAction RSVP field and click Select
- Choose the RSVP “Yes” value from the drop-down list and click Select
-
Add additional filter: When using the Events App and InterAction CRM you can filter your guest list on one or more additional fields and dynamically change the way the Check In screen appears. This will filter the names that are displayed on the Check In list. This can be used for Table numbers, Seminar names or Event Location using an additional field.
You can only use an additional field once when adding filters. If you want to look at different values of a particular additional field you can either:
-
- Create separate events in the events app and apply the additional field filter for each value of the additional field
- Use the additional column feature to display the additional field value and sort or search on it
-
Will show you extra information such as Table number. For InterAction only, you can add one or more additional columns to display attendee information from any IA additional field that is part of your attendee list. For example, you could add a "Food preferences" additional field column, allowing you to view the attendee's food preference directly from the Events App registration screen or a Workshop column to see the attendee's chosen workshop.
Please ask your account manager to enable the system configuration "Admin.System.Events.Enable Additional Column on Events App"
Once enabled you can select multiple additional columns you would like to view on the attendee list from the event configuration page. You can then select which columns to show at any particular time on the Event App registration screen.
Note that if you are using the Sponsor feature this column is also available to show/hide.
-
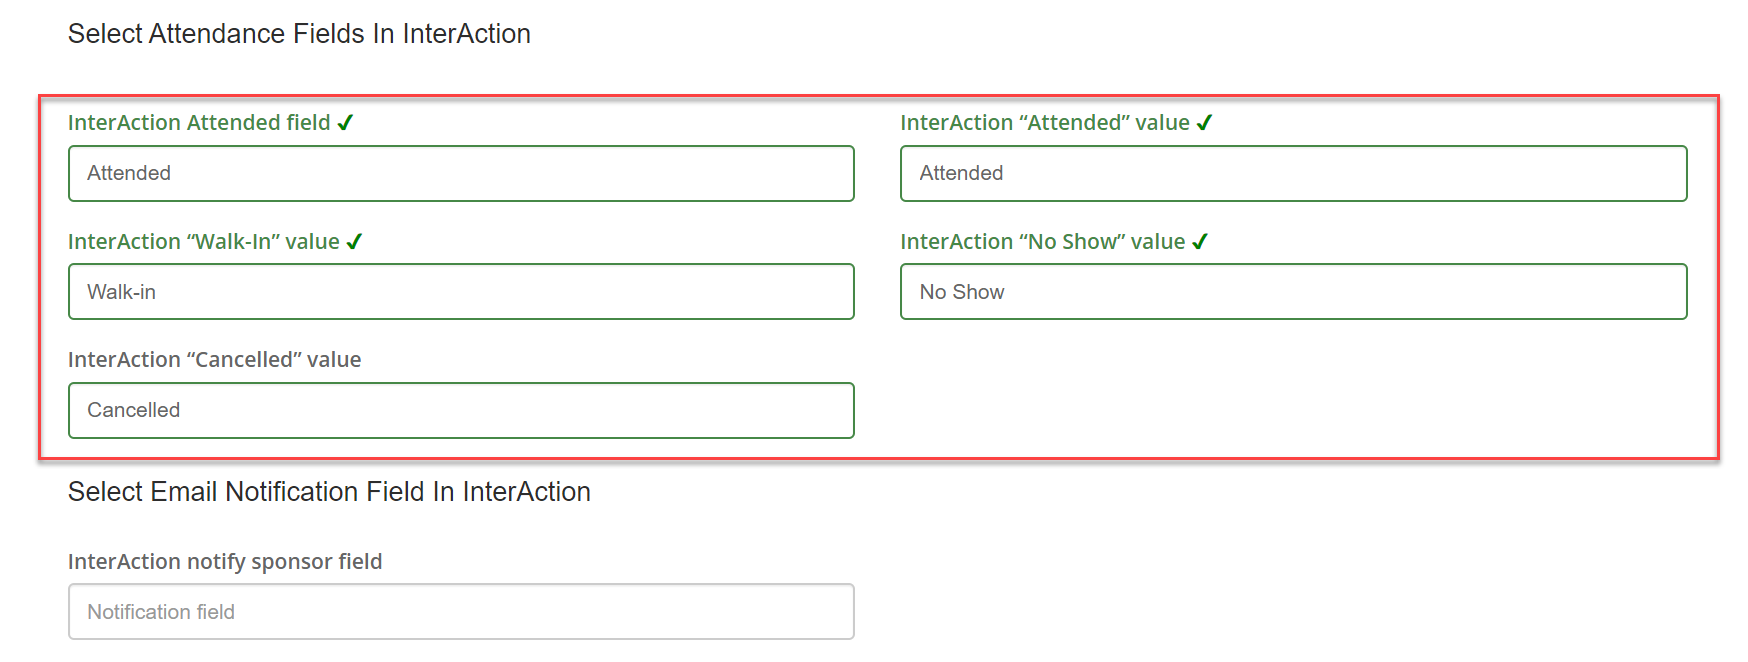
Select Attendance Fields in InterAction
- Choose the Attended field then click Select
- Choose the values for Attended, Walk-In, NoShow and Cancelled
-
Contact Types: uses Additional InterAction fields and can be used to print different types of Badges. These are not InterAction Contact Types but part of an additional field you set that may include Staff, Delegate and Presenter. There is a separate article covering how to print varying badges for different types of attendee here.
Event App Additional Tabs
Tabs can be populated by you, using any page you choose from your campaign, by selecting the pages in the Event App configuration screen.
The data on the tabs is mainly for the use of your firm's team member holding the laptop or iPad. You could potentially include:
- Pictures of the speakers, with their biographies.
- A map of the location of the event.
- The Agenda with timings for each section of the event.
- Forms, using them to gather extra information from attendees
- Report snippet data to keep track of acceptances.
You can have as many extra tabs as you like, but bear in mind that only 4 to 6 will fit across some screens, depending on the size of screen you are using.

- In the Configure tabs area, click Add Tab, then click into Page and select the desired email or Landing Page from the drop down list.
- Type a Tab name to be displayed in the Event App
-
Repeat for any other required tabs.
For more information of Event App Additional tabs click here.
- Click Save
Note: If using Badges, scroll up and select Generate Badges
The Event App URL and password displayed in the Campaign Summary can then now be made available to the devices that will be used at the event.
At the Event, using a mobile device or laptop
The event app works in both online mode and offline mode, without the need for WiFi during the event. Events App Offline Mode allows you to use the Events App to register attendees for your event or add walk-ins even if there is no WiFi connection. Please see this article to learn more on how to set this up.
Note: Logging in is to protect your IA data in case you leave your iPad lying about at the venue. Also, the App will auto-sleep / lock if left unattended for 10 minutes
- Using the URL and password in the browser you will arrive at the Dashboard screen.
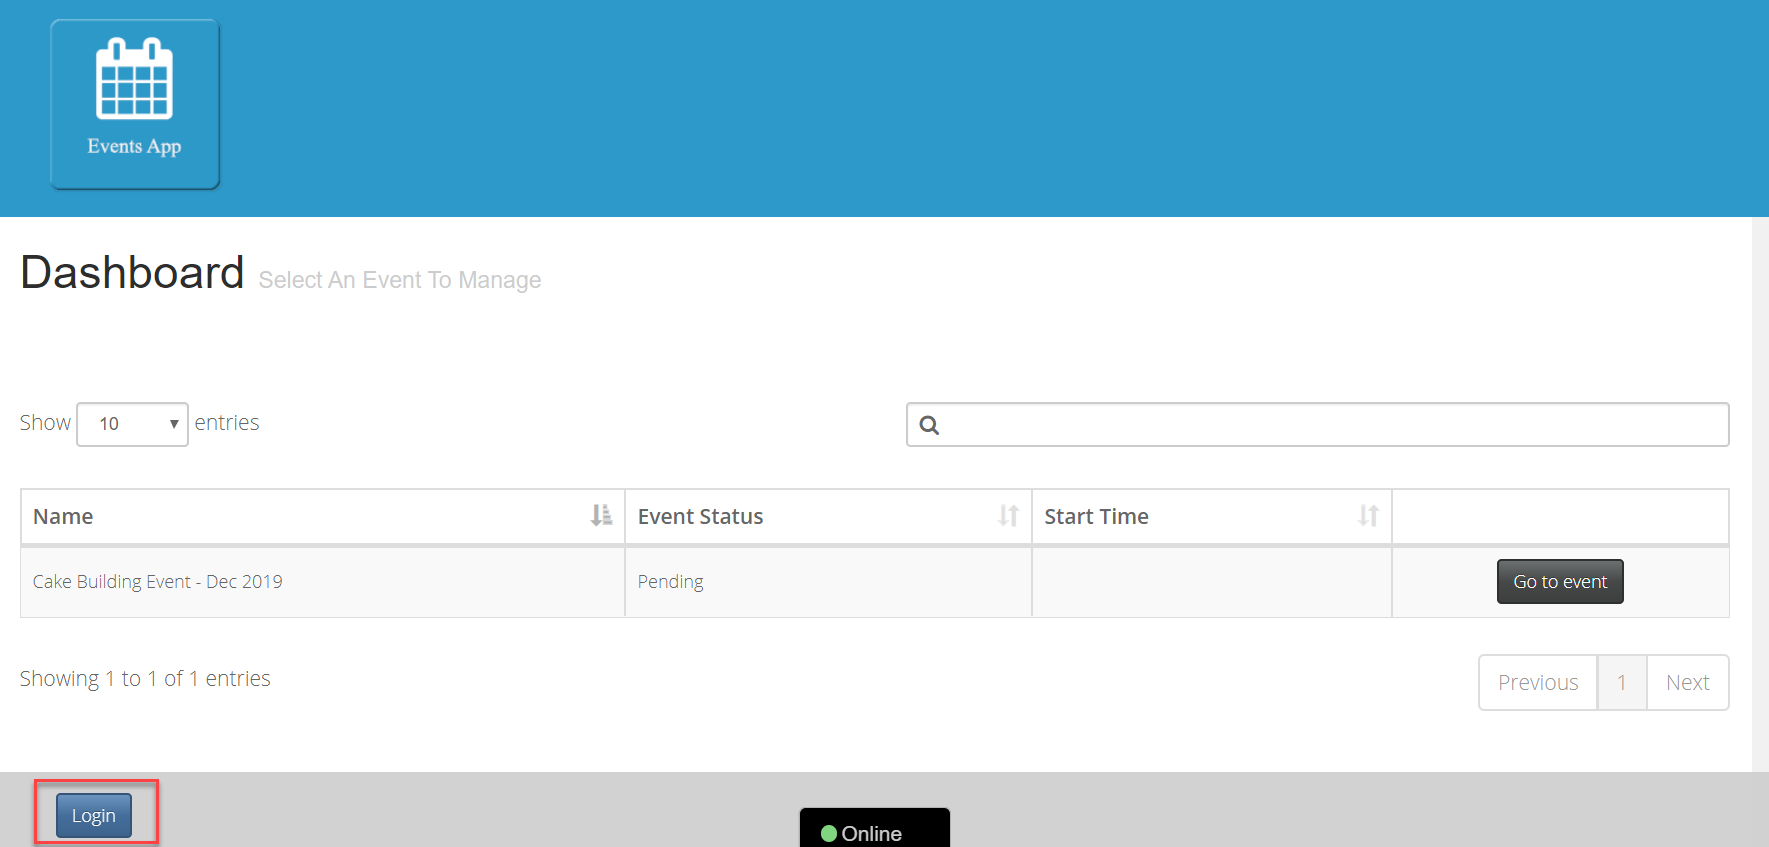
- Click Login and type or copy your password.
- To Start the Event click the Go to event beside the Event name.
- The first person will then click Start Event. Additional devices will automatically be in the Event as it has already begun.
This will open the list from InterAction, displaying only those contacts who have RSVP’d Yes (unless you have set additional filters).
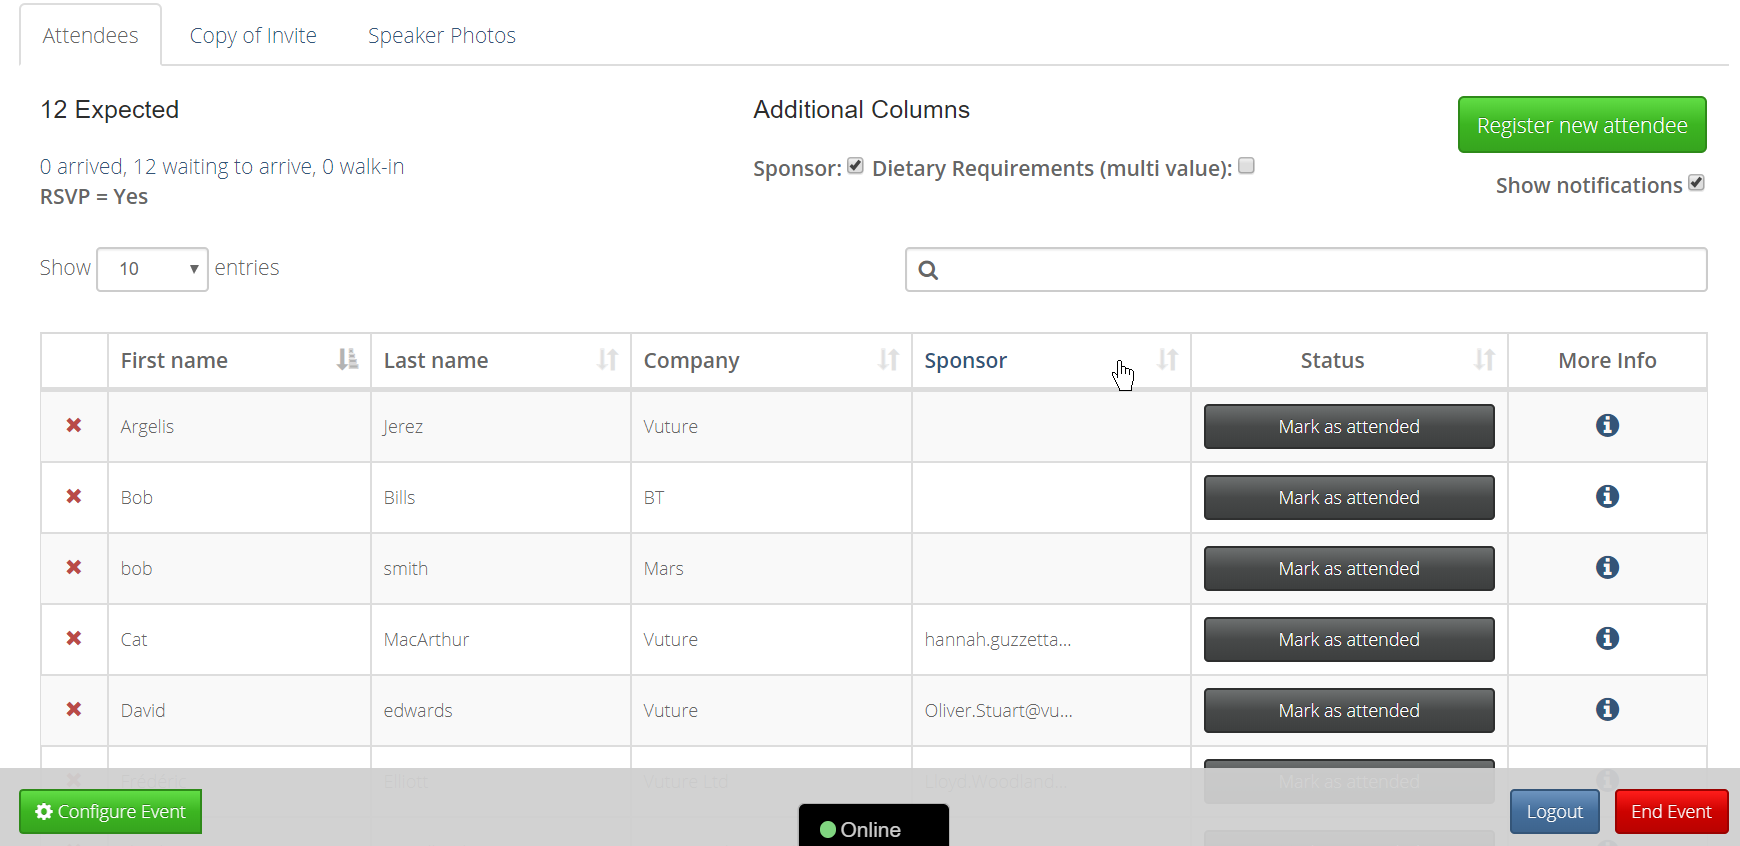
Additional tabs you have set up are displayed along the top.
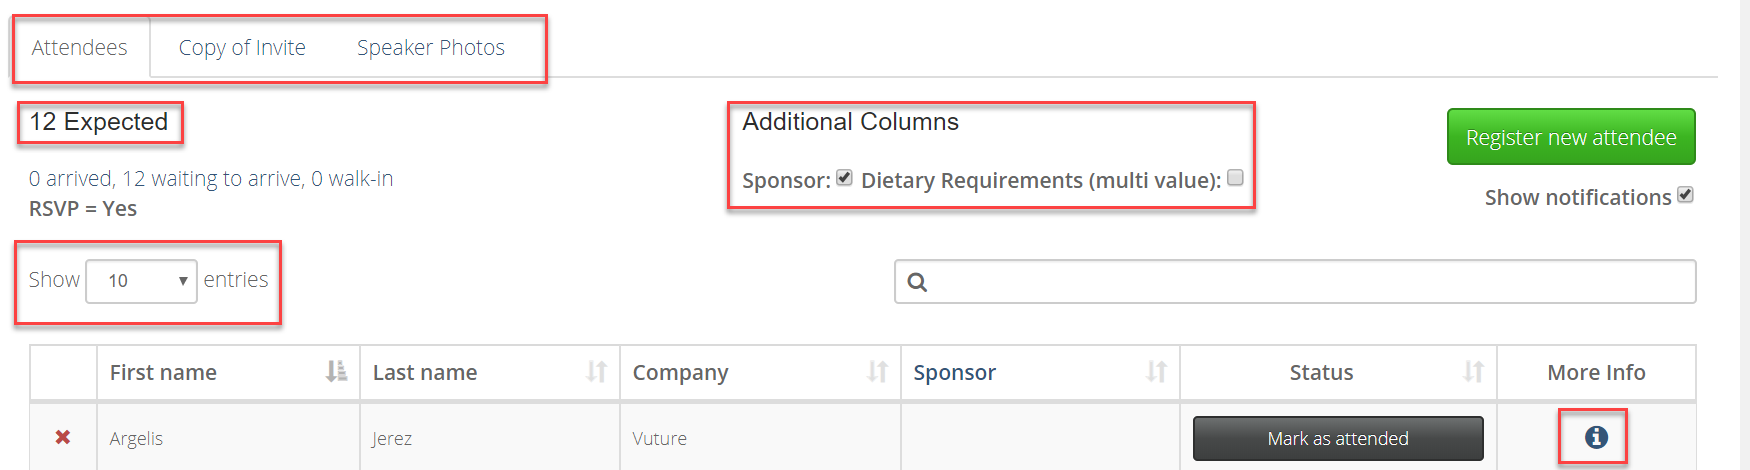
- View a summary, at the top left-hand side, to see how many guests are expected, how many have already arrived and how many have yet to arrive.
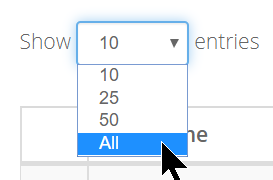
- Click the drop down arrow beside Show entries, to change the display from 10, to 25, 100 or All.
- Click the check mark beside Additional Columns (if included in the configuration) to show or hide that information.
- Click the 'i' in the More info column, to view more information (if included in the configuration), to display that information,
-
Sort: Click any column heading to sort by that column. Click again to sort in reverse order.
-
Search: Click into the search across all columns by typing. Click the red 'x' to clear the search.
- To view Additional Tabs (if created in the configuration) click the tab across the top, such as a copy of the invite.
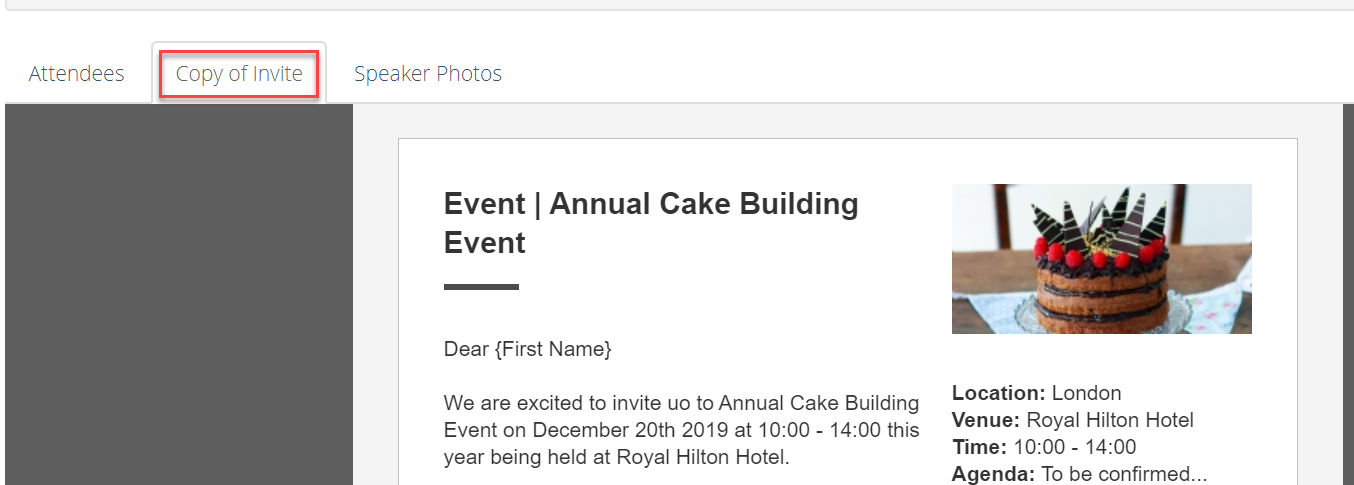
- Click back on the Attendees tab to view the list of attendees.
Registering delegates
- As delegates arrive, click Mark as attended.
When marking someone as Attended, Vuture will automatically notify any lawyers who have requested a notification email or the partner in the Primary/Initial Sponsor field if you selected the option to notify and will automatically mark the contacts as Attended in InterAction.
- For walk-in attendees, click Register new attendee.
- Add their details to the form.
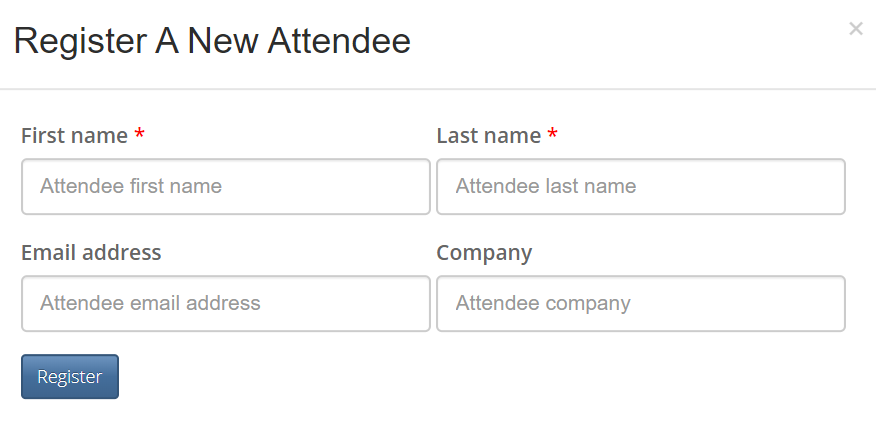
- To cancel a delegate, click the red x next to their name.
Filtering the list
- Click the filter beside the Number expected to Filter to list view either arrived, still waiting to arrive or walk-ins.
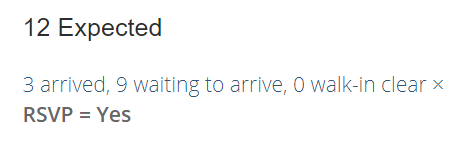
- Click Clear to view all Attendees
Note: For walk-ins, existing contacts in InterAction will be added to the events list, marked as a walk-in and an Activity added in InterAction. If they are not already a contact in InterAction it will do a look up, add them as a new contact to the events list, and follow the New Contact procedure in place at your firm.
At the end of the event
Once the event is over, scroll down to the foot of the page and click on the red End Event button. This will mark any contacts who RSVP'd Yes but did not arrive as Not Attended or as a No Show in InterAction, so only begin this process once you are certain that no more attendees are going to arrive.
Walk Ins without email addresses
The configuration allows you to select Allow walk ins without email address. If you have selected this option, and have had walk ins without email addresses, when you close the event, those registered will be listed.
You can choose to add them or delete them.
- To include them type the email address, and then click Add Email.
- Click Remove, to delete them from the list and not having them added to your CRM.
- Once completed for all Walk-ins click Send data to CRM.
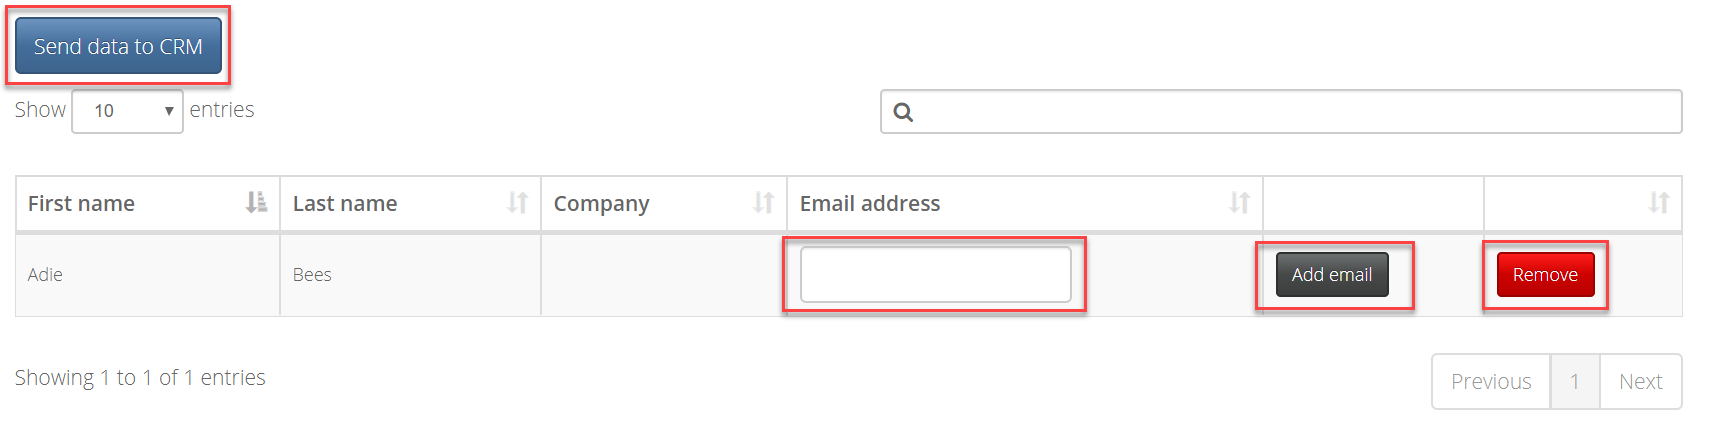
The walk-ins are added to the CRM and the event closed, returning you to the Dashboard screen.
To Restart the event
- Should you need to restart the event due to a late arrival, if still at the Dashboard screen click Start Event, alternatively log back into using the original URL and password then click Start Event.
Anyone who had not yet attended are now displayed as a No Show.
- Register the new attendees., once done again close the event.
FAQs
Q. If I receive a client’s response over the phone and manually update their RSVP in InterAction, will they still appear on the Check In list at the beginning of the event?
A. Yes. Any client who has RSVP = Yes (or Accept or Accepted) on their record for the event will be included in the Check In list. The App does a live look-up to IA when you click on the button to Start Event.
Q. If a client previously declined the invitation they will not appear on the Check In list at the beginning of the event. What should I do if they walk in after all?
A. Mark them as a Walk In. Take their name and enter it as if they were not invited. InterAction will identify that they are already a contact in the system. InterAction will mark them as Attended so they can receive the request for feedback email or any other follow up emails you send.
Q. Can I have more than one event on the App at the same time?
A. Yes. You can have as many events on the App as you need – perhaps several in preparation and one started and running. Each event (which must have a unique name) will be held on a separate line in the table in v2.
Q. What should I do if a client arrives, as invited, and tells me his colleague, also invited and accepted, cannot now attend?
A. Click the little red x to the left of that person’s name. This x will only show up if you have set up the Attended field on InterAction to have the options Cancelled and No Show as well as Attended and Walk In. The App will strike through the name, indicating Cancelled (as different from simply a No Show) and InterAction will be updated with Cancelled for that person.
Q. Will the App help me to report on attendance figures?
A. During or before the event you can use the App to check numbers for Arrived, Waiting to Arrive and Walk-ins. After that we suggest you use InterAction reporting.
Q. My screen is filling up with old event tiles. Can I delete them once they are done?
A. Yes. Click on a event tile. Choose Configure, then click Delete at the top left of your screen, and confirm deletion.
