It is possible to upload a file to your campaign for use as an attachment to an email.
However, if you subsequently make changes to that file and upload the newly saved version you need to rename the new file and ensure that you do not confuse the two versions or break any existing hyperlink to the file.
There is a feature for simple uploading and replacement of files to the email campaign. The icon is called Replace Asset.
If you do not see the Replace Asset icon in your campaigns, ask your Account Manager to add this feature to your Role under Roles > Web pages > Replace uploaded assets.
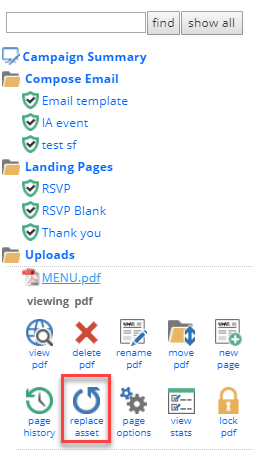
1. In the campaign, click on the uploaded file you wish to replace
2. Click on Replace Asset
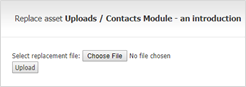 3. Click on Choose File
4. In your pc, select the edited, saved, replacement file
5. Click on Upload
The old file will be replaced by the new one, with the same name, and there will be a Success message.
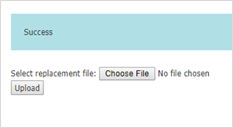
Note: If the original file upload does not work you will get an error message. If this happens, it is recommended to delete the Uploads folder, recreate the folder (open the Landing Pages folder and click on the New Folder icon), name the new folder to be Uploads and try the file upload again.
