Overview
This covers setting up the Registration form and adding RSVP fields.
Contents
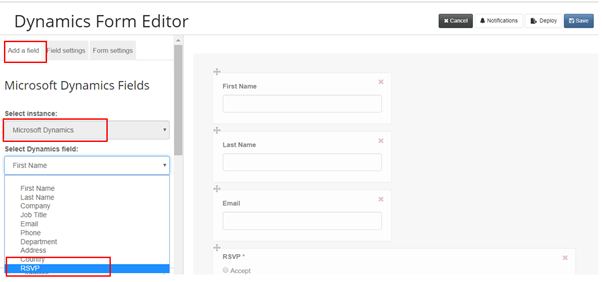
- Click any field in the form to open the Form Editor
- Choose Add a field tab and from Select instance: select Live Peppermint
- From the Select Dynamics field list the desired Additional field: RSVP
- Select other Options as necessary, such as Required or Read only
- Click Add Field
Note: The values for Additional fields may be edited in the Form Editor without affecting the values in Dynamics. For example, the name of the field could be “Diet” the Label on the form may read “Do you any dietary restrictions?”
Editing the RSVP field
Add the RSVP field to get the client to update their Accept or Decline option. You can redirect the form submitter to Thank You Accept or Thank You Decline landing pages using the Field Settings Options section.
You will be moved to the Field settings section.
- Click onto the RSVP field and scroll down to the Options section.
- From the pre-set RSVP field use the below buttons to modify as required:

| Deletes an unnecessary option | 
| Moves an option up |

| Adds a new option | 
| Moves an option down |
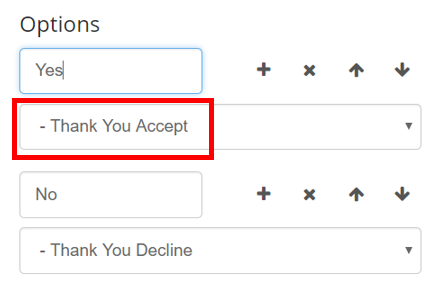
- Set up the redirect options; for example, redirect Yes to Thank You Accept
- If activated, select the Pre-checked box next to the arrows. This is typically only used for the Yes or Accept option.
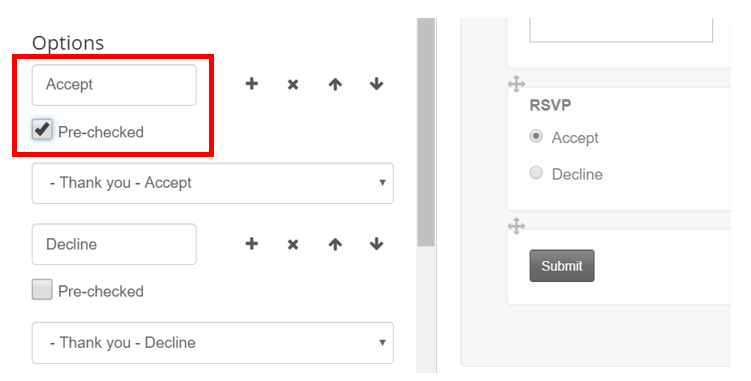
- Once complete click Save in the top right.
Note: If using the RSVP Prefill form, the above steps will need to be repeated for the RSVP Blank form.
