Overview
There are many options available when sending an email, from sending a Sample email first, doing a full send, sending the email to newly added contacts on the list, to re-purposing the sent email to create new emails for followup and reminders.
Contents
To Send a Test Email
Before sending out an email communication it is recommended you send a test to yourself and a few colleagues internally.
This test does not use your DealCloud list contact information (so a Prefilled form will not appear populated), nor will it write back any information to DealCloud. It allows you to test all the internal links in your campaign and review the layout, wording etc. If you'd like to fully test an event invitation and RSVP forms, please use a Send Sample for testing.
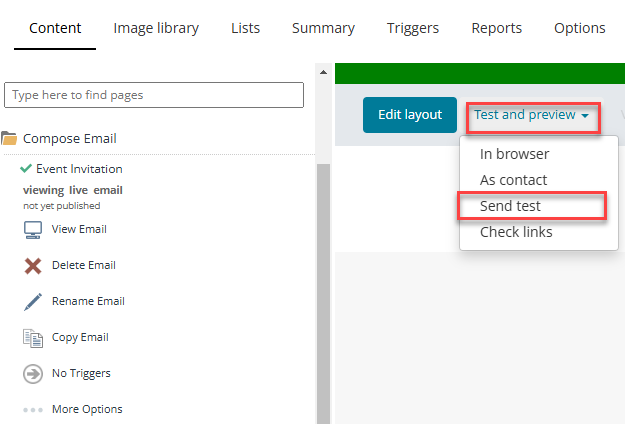
- In your campaign publish the email you are going to test click Send Test.
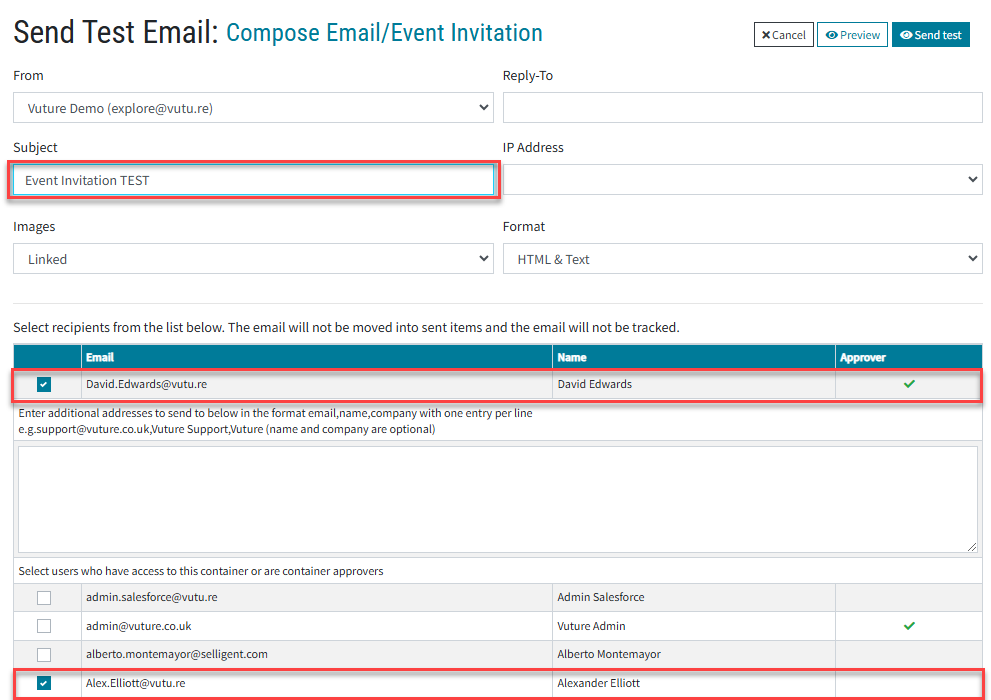
- In the Send Test Email window enter select a valid email address from the From drop‑down list.
- In the Subject line, add TEST to the subject line.
- If required, type any non-Vuture users to the additional address box, for example the Head of Department you may wish to approve the content of the email.
Note: the names displayed below are the people who have access to this container in the Vuture platform, this send is not attached to your marketing list.
- Click Send Test in the top right corner
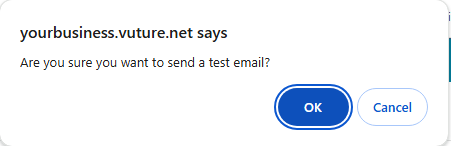
- At the prompt to confirm the send click OK.
Note: Test emails will not be counted as part of your monthly send numbers.
To Send a Sample Email
Recommended for an event.
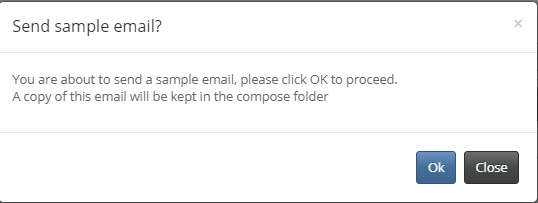
Sending a sample email is the final test before sending out a campaign. It allows you to send an email as if it is a “live” send, mirroring the client experience and writing back results to DealCloud. The maximum number of sample emails that can be sent is 10.
It is recommended you delete the sample send to remove any statistics which might otherwise skew your results on click-throughs and emails opened reports etc.
Warning: The delete cannot remove activities or responses that write back to DealCloud. You should do this manually.
- In the Published email click send email.
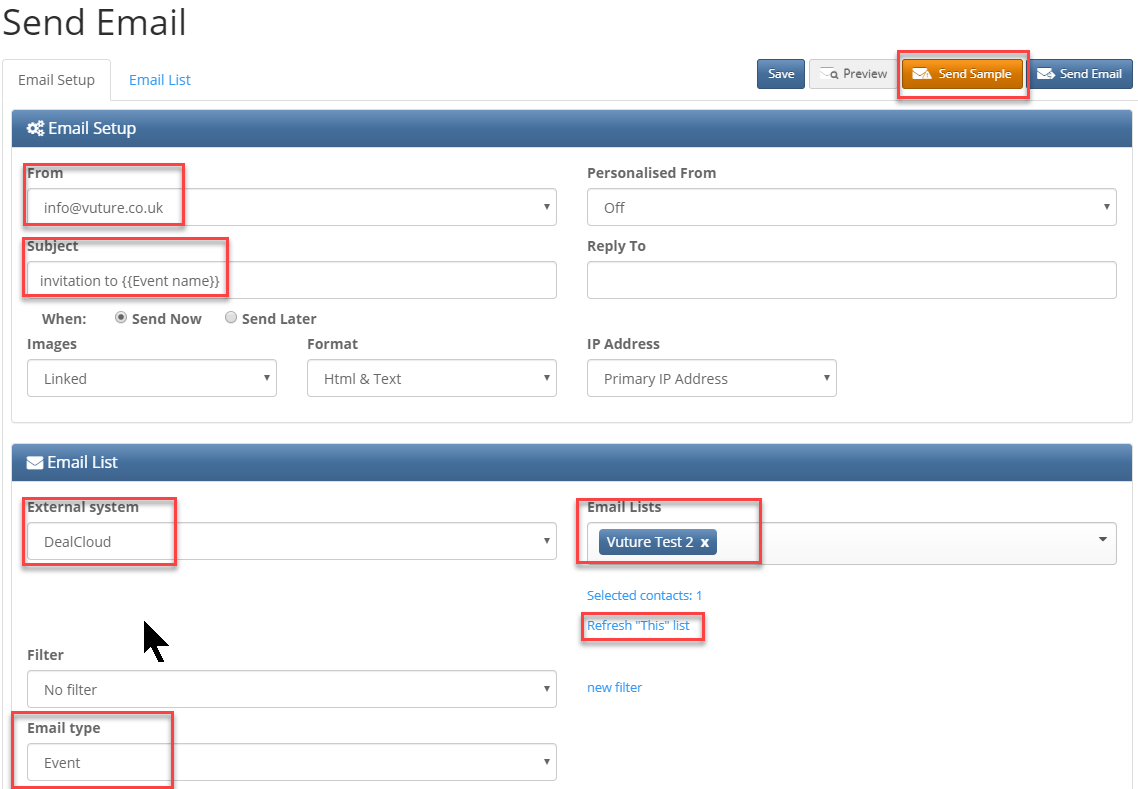
- From the Email Setup tab:
From
|
The name that will show in the client’s inbox. You can use the format “Partner Name (secretary email)” to prevent Out of Office messages going back into the partner’s inbox. You can also use the Reply-To box for the secretary’s email address.
Warning: Each email platform such as Outlook or Apple Mail will make its own decision whether to honour that Reply To address. Some may ignore it which means that some automatic replies may find their way to a Partner’s Inbox. To prevent this, use the Partner Name (Secretary email address) option in the Container Email options.
|
Personalised From
|
Used with sponsored lists where the email of the sponsor will be used if available.
Any contact on the list with no sponsor will use the generic From.
|
List Source
|
Depends on your own set up. It will typically be your day to day DealCloud system.
Selecting a list will give you the option to uncheck some people from the list or build a Filter (more on that later)
|
Email Type
|
Tells Vuture which Unsubscribe or Suppression lists to check before mailing, and what type of Activity to write back to the data source
|
- Enter the From: email address
- Type the Subject line of the email
- From the External system select DealCloud
- From the List Source select the required Marketing List
- From the Email type select the Email type
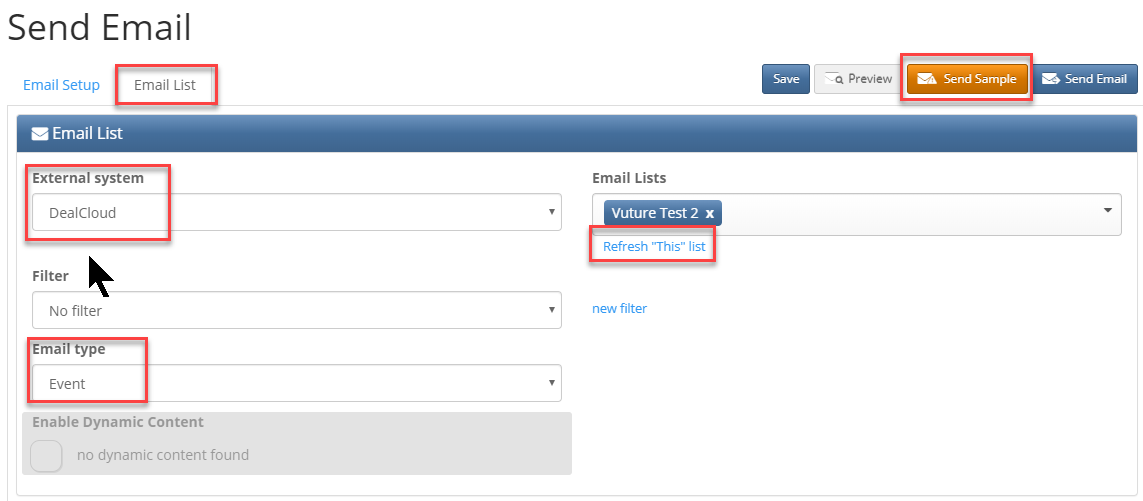
- Click the Email List tab
As the maximum number of sample emails that can be sent is 10, you will need to deselect all users, and select who the sample is to be sent to.

The Send Sample Email Screen displays how many emails have been sent and to whom. You can run reports on the click-throughs and responses to the messages you have sent.
The email is sent to the selected receipts, and copied to a sent item folder with the current Month and Year.
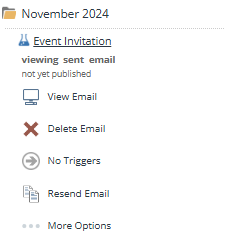
From here you can view the open and click-throughs in real time, as people open and click on links within in the email, this information will be displayed in real time. You may need to refresh to screen.
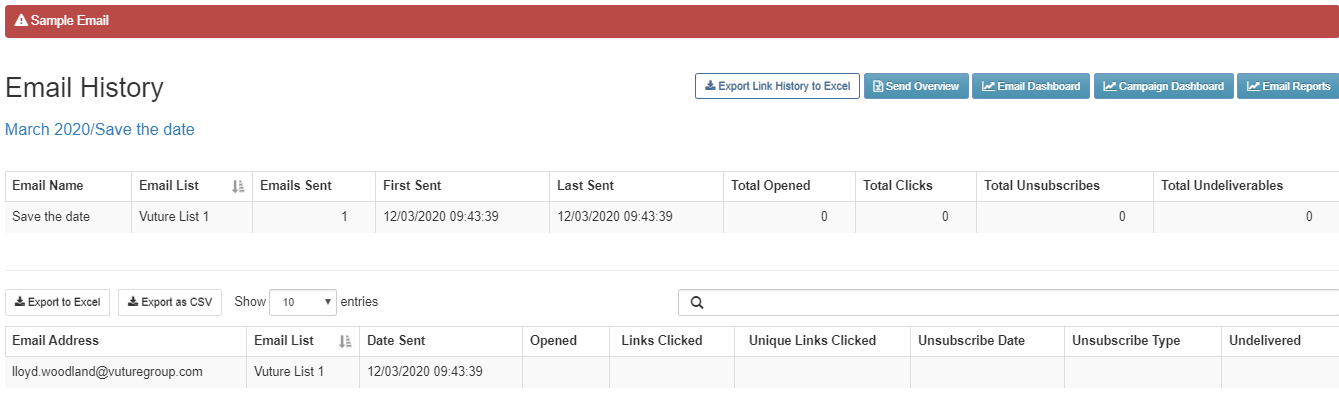
Note: Once complete to ensure your reporting is accurate when you do a full send, you need to delete the sample mail from the sent items folder.
- To delete the sample email in the sent items folder (with the month and year) click the red 'X'.
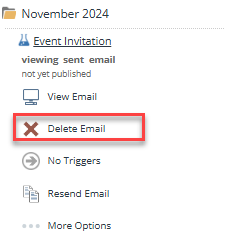
The statistics will return to being '0' values. The folder can remain in the campaign, as it would be recreated once the Live send is completed, if sent in the same month.
Sending the Live Email
From the Send Email screen, you can specify the recipients or list your email/campaign is sent to using the various options available to you.
- In the Published email click Send Email
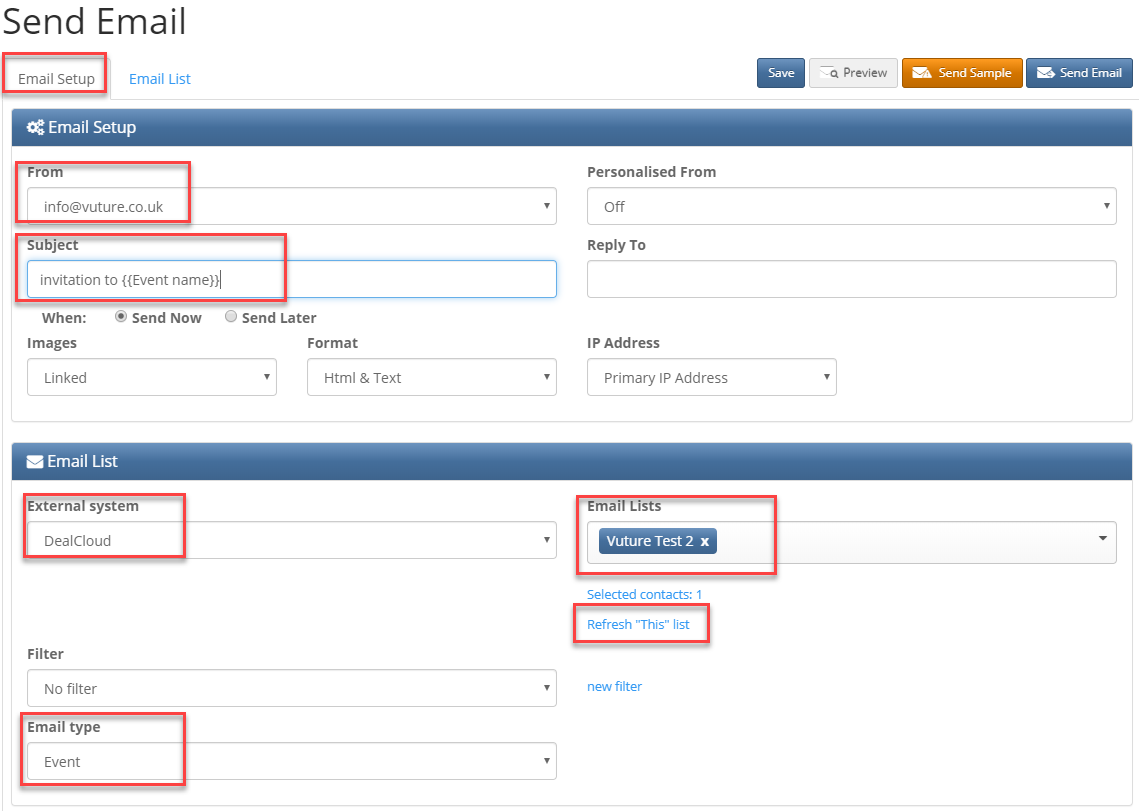
- Enter the From: email address
- Type the Subject line of the email
Note: If you are using Campaign Variables, they can be used in the Subject line of emails: For example;
"Invitation to {{Event name}}"
- From the List Source select DealCloud and search for a list by name
- Click Refresh "This" list to ensure any updates from DealCloud list is synchronised with your Imported list in Vuture
- From the Email type select the Email type, for example 'Event'
- Click Send Email.
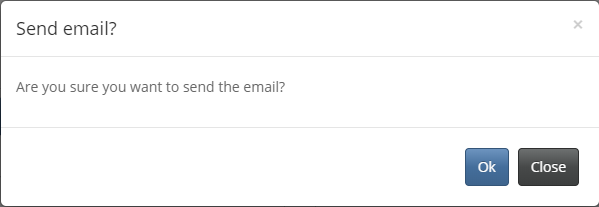
- At the prompt to confirm the send click OK.
Once you are ready to send your email/campaign click the "send email" button and you will be prompted to confirm the send. Once you click "Ok”, your email/campaign will be sent.
Send Later
If you wish to schedule a send for a later time and date you will be able to do so by selecting on the Send Later option beside When. From here the Send Date and Select Timezone icons are displayed.
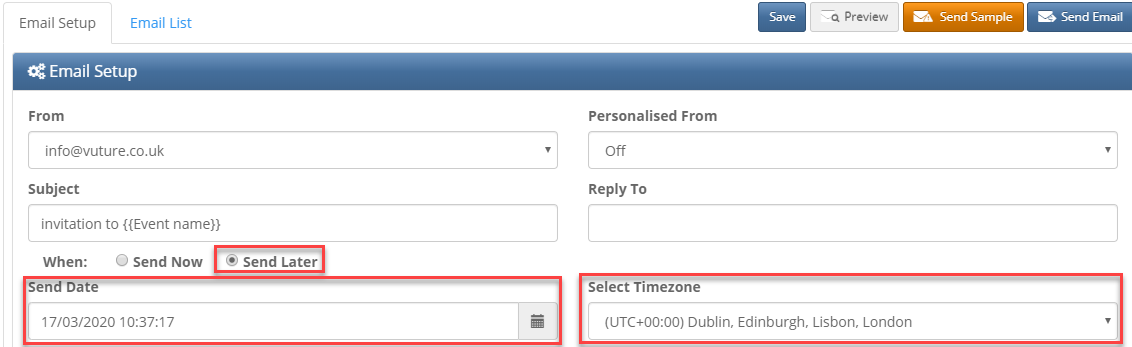
Once you have selected the time and date, as well as the From Address and appropriate Subject Line, you will then choose the list that this mailing needs to be sent to. The final step is to click on Send Email button at the top right of the page. The mailing will get placed within the monthly folder and will be sent at the selected time and date.
Please Note:
Send Later is designed to get the email ready to go out as quickly as possible. Hence all the pre-processing is done in advance. All pre-processing, which includes the suppressing of unsubscribes, is done at the time the send is set up and send is clicked. All the emails are then added to the queue and released at the selected send time.
No further checks are done for updates to the list or suppression folders. If a recipient unsubscribes from mailings through another email, between the time the email is set up to "send later" and the time it is actually sent, that recipient will still receive this email.
Send Later Timezone
When selecting Send Later you can select the time zone you wish to use for scheduling the send. This defaults to the time zone in your user settings.
Resend Email vs. Send More
Once you have sent an email, you can re-use it in one of these two ways:
Resend Email
The option allows you to make a copy of the same exact email you just sent and put it back up into the Compose Email Folder with a new ID number. From here, you can make any changes you like and send this email out to a new Marketing List or the same list again.
Please note – If you send this copy of the email to the same Marketing List, it acts as a new send. This means, it will not take into account contacts who have already received this exact email in your previous send.
Most clients use this functionality to send the same exact email to a different Marketing List or alter it (e.g. Change from a Save the Date email with no RSVP button to an Invitation Email with a RSVP button) and send it to the same Marketing List.
Send More
This option allows you to send the previously sent email to additional recipients by selecting the same list or a new list.
Additional sends are de-duplicated so no contact will receive the email more than once.
Send More is useful when a few contacts are added to a list after the main send has already gone out. Also, if contacts bounce and you go into your crm and update their email addresses to the new ones. They will be on the list as before but with new email addresses. Choosing Send More will find these individuals and send to them again.
(Warning: Editing the html before a Send More will also update the Online version of the email. This means that recipients of the first version sent, if they click on the Online version, will see the updated version - not what they were sent originally.)
You can edit the "From" and "Reply-to" fields when doing a Send More.
Need to Edit the Subject Line?
What if you want to do a Send More, to benefit from the de-duplication, but you also want to edit the Subject Line before sending the second and subsequent batch of emails? There is a way to do this:
Choose the original email and select Resend (not Send More). Then use the Linked Site Pages feature to link the two emails together. Vuture will then treat the two versions of the email as one email and not send the second version to anyone who has already received the first.
Email History
The Email History displays how many emails have been sent and to whom. You can run reports on the click-throughs and responses to the messages you have sent.
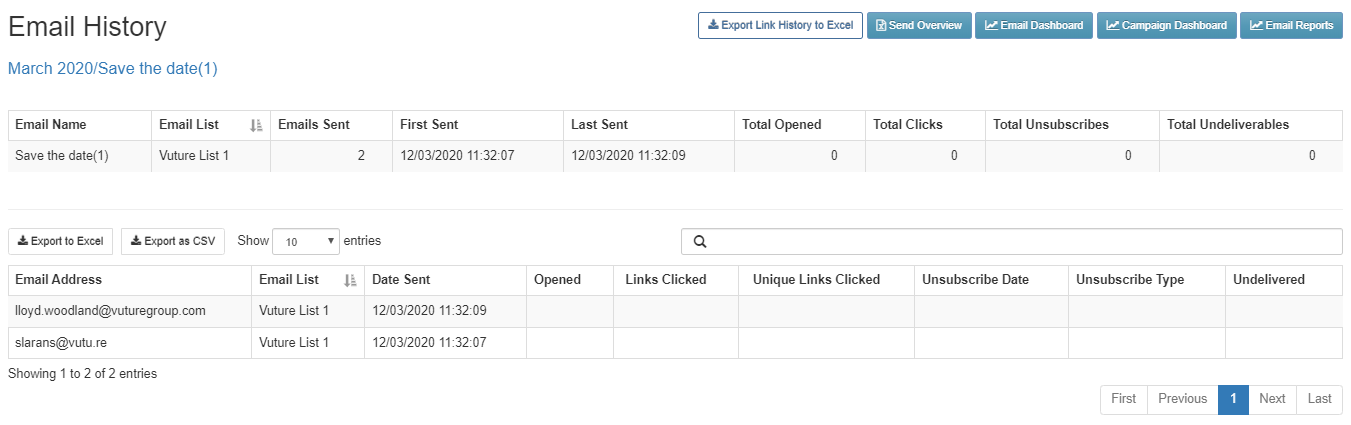
The email is sent to the selected receipts, and moved from the Compose Email folder to the sent item folder with the current Month and Year.
From here you can view the open and click-throughs in real time, as people open and click on links within in the email, this information will be displayed in real time. You may need to refresh to screen.
