Introduction
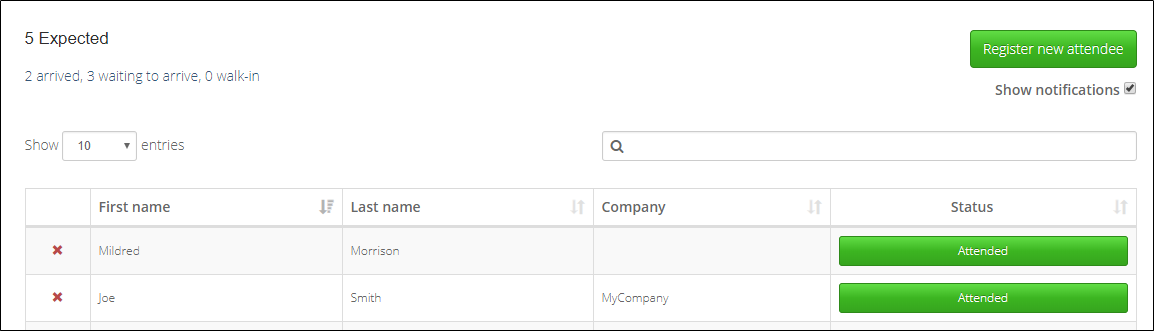
The purpose of the Vuture Events App, integrated with the Email module and your CRM, is to provide you with a Check In list of responded attendees, make it quick and easy to collect their attendance "on the day" and then write back Attended, No Show or Walk In to your CRM. This allows you accurate reporting for your events, and to collect any missing details from your attendees to update their records as they attend.
If the internet connection at your events venue is unstable, you can employ Offline Mode. This will collect attendees as you check them in, and store the information until the connection is re-established with your CRM. No data will be lost. There is an article covering Offline Mode with more information here.
Before setting up your Events App
- You must integrate with the Vuture CRM Connector.
What is the Vuture Connector?
The Vuture Connector is a tool we have developed which allows many different CRM databases to connect to the Vuture platform.
Why would I use the Connector with Upper Sigma?
Using the Vuture Connector with Upper Sigma will offer you a seamless and efficient connection between the CRM and your Vuture instance, and enable you to use features such as the Events app with your CRM.
To complete the integration, you will first have to import your Upper Sigma email lists into Vuture. Once that has been done you can continue to use your CRM and the Vuture platform as normal. ( Any subsequent changes you make to your lists in Upper Sigma will be synced across to Vuture. Any changes you make to your lists in Vuture will be synced back to your CRM when you click Save.)
Import your events list into Vuture through the Connector.
Ensure you have the following fields in your Upper Sigma events list and they have been added into the Vuture CRM metadata Manager by your Customer Success or Project Manager
-
- RSVP: Accept/Yes & Decline/No
- Attended: Attended, Walk in, No Show
Create the RSVP form and email it to your guests
Create an event campaign
Create an email campaign using your email template. This will ensure that you have all the correct page types available. If you require Event Badges, please request badge templates from your Customer Success Manager, following the format of the badge template in the campaign.
If you are unsure about your templates, please contact your Customer Success Manager.
Deploy the Events App
Each Event App has its own settings and unique URL which is used for access. To access it, from within the email campaign, go to the Events section in the Campaign Summary and complete the following fields:
-
List Source: Select your List source (e.g. Upper Sigma)
-
Events configuration password: Enter a password to access the Events App or click random to generate a random password (the password is added protection for your data in case you leave an iPad lying on a table at an event, for example)
-
The URL is used to access the Events App.
Then click “Deploy”
Please note, your Events logo and iOS icon should be set up previously by your Customer Success or Project manager in Admin.System.Events
To set up a new event, on your laptop or tablet:
- Go to the Events App URL
- Ensure you are logged in (bottom of the screen)
- Click on the Create New Event Button
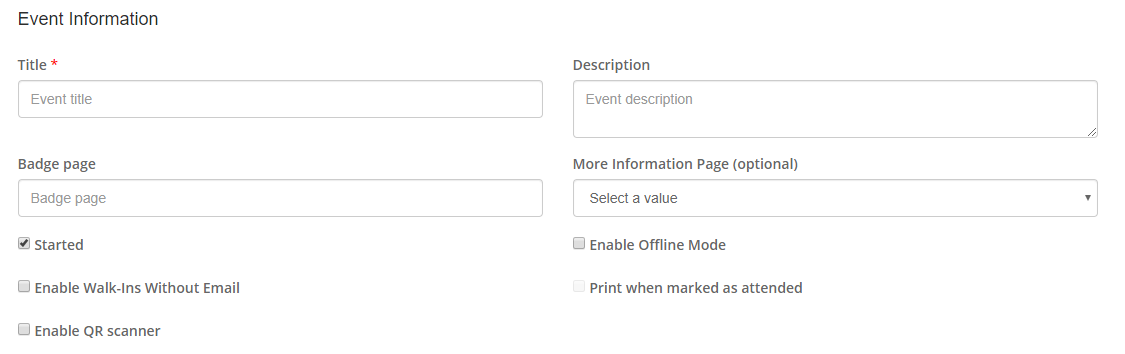
Set up the event information
- Fill out the Event Title and Description which will appear at the top of the page
- Check the “Started” box if your event has already started (typically you will be doing this before the event has started)
- Select the badge type, if you are using badges
Please note if you ever need to get back to the event setup screen to change your settings, click on the configure event button at the bottom right of the event check in page:
We recommend that Enable Offline Mode should always be checked. This will allow the system to collect data, even if your internet connection drops, and feed it back once the connection comes back up.
Guest List Configuration
- Select your Guest list.
- Enter the Yes or Accepted value in your list for the RSVP field.
- Enter your Attendee field name.
- Populate the Attended/Walk-In/Did-Not-Show values.
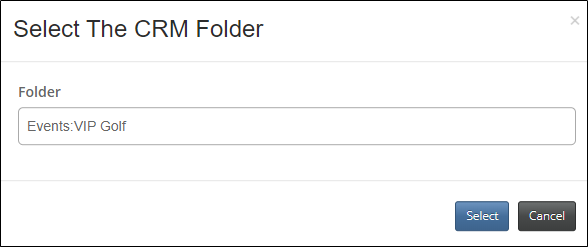
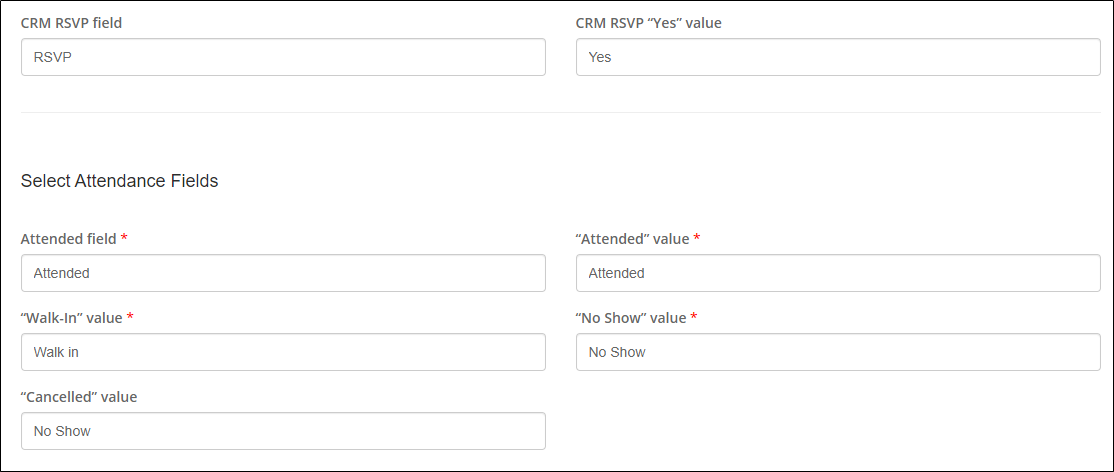
Click “save” and you have configured your Upper Sigma event
You will be able to see your guest list ( those who have RSVP'd Yes), and update their attendance status as they arrive. This will update their status within the Upper Sigma fields in real time.