By default all Vuture instances are setup with a single sending IP that is usually manage by Vuture.
Up to two additional sending IPs can be setup on the system, for example to relay mail via a smart host that is part of your existing sending infrastructure.
This is a chargeable feature so please contact your Account Manager or Vuture Support for pricing.
To set this up we require the following information:
1. Description of the new sending IP that will be displayed to the user on the email send screen
2. URL or IP address of the new sending route - emails will be relayed via this URL or IP address so this will need to be setup to receive email your primary Vuture sending IP which we can provide
3. Bounceback address for the this sending route - this will be set as the Bounceback (Envelope From) address. For Vuture's automated bounce processing to operate, emails to this address will need to be forwarded to your Vuture bounceback mailbox that will be given to you.
Once this information is provided the Vuture Team will configure these settings for you in the following system settings:
1. "Admin.System.Emails.Secondary IP Address Label" or "Admin.System.Emails.Tertiary IP Address Label"
2. "Admin.System.Emails.Secondary IP Address" or "Admin.System.Emails.Tertiary IP Address"
3. "Admin.System.Emails.Secondary Bounceback Address" or "Admin.System.Emails.Tertiary Bounceback Address"
In order for a user to be given the choice of sending IP then their role will need to have the following feature enabled:
"Admin.Roles.Emails.IP Address Selection"
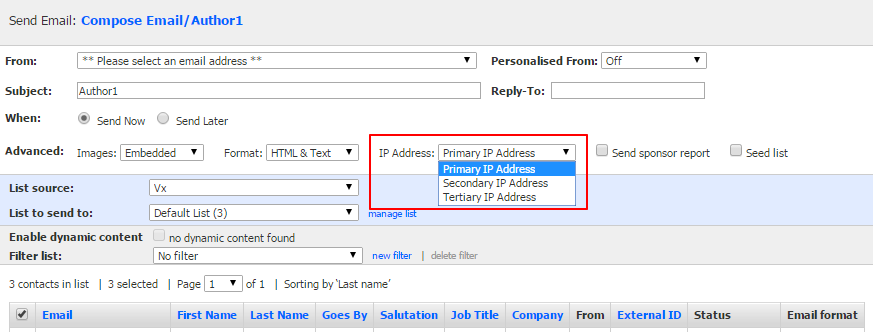
Once this is done a new option will appear on the email send screen allowing the user to choose which email sending IP to use:
Testing the new sending IP
Once setup the sending IP should be test to make sure that emails are being delivered successfully.
Bouncebacks should also be tested, for example using Vuture bounce test email: bad@redheat.co.uk
