Overview
The Events Module from Vuture allows you to use a laptop, iPad or other tablet to manage attendee lists whilst greeting delegates at an event.
Importantly, the Events Module will write back to Dynamics all the details of who has Attended, Walked In or did not Show, saving time and effort after the event is over.
Contents
Introduction
The Vuture Events Module simplifies the running of an event. You can configure it to manage the details of your delegates prior to the day of the event, print badges and set up your attendee list, making delegate registration easier and less time-consuming.
You can run the Events Module, without being logged in to Vuture, on a variety of devices such as a laptop, tablet or cell phone.
The Vuture Events Module can manage:
• The Attendees list
• The Check In list at the event
• Walk ins
• Delegate Badges
• Marking arriving delegates in Dynamics as “Attended”, “Walk-in” or “No-Show” based on their attendance status.
Using the Events Module removes the requirement for manual data entry in Dynamics.
Optional Settings
Offline Mode
Offline Mode allows you to use the Events Module to register attendees for your event or add walk-ins even if there is no Wi-Fi connection. Your Account Manager can make this feature available using the system setting Admin.System.EventsDisplay Offline Option on Event Configuration.
Once the feature is on, whenever you are setting up an event, offline capability will be automatically enabled.
When this is enabled the Module will continue to operate when there is no internet connection, storing all updates locally. When you reconnect to the internet all updates will be written back to Vuture and your CRM.
Note: You must ensure that you access the event at least once, whilst connected to the internet, from the device that will be going offline, in order to sync the attendee data.
When the device is offline you will see an offline icon at the bottom of the screen to indicate the Module is in offline mode.
You can mark contacts as attended and you can register new contacts while offline. You will see a count at the top of the screen to show the number of queued updates to be written back to your CRM.
Note: Offline Mode will not work with private browsing so please check this is switched off in your browser before using.
Warning: Once you have gone offline do not refresh or reload the page (e.g. by using the reload button in the browser or by closing the Module and re-opening it) as the attendee data will not reload and you will not be able to make any more updates until you go online again. You will not lose any updates already made which will still write back next time you go online with the Module open.
Creating the Event URL, prior to the event day
The purpose of this set up is to deploy a URL. In this URL, you configure the settings that Vuture requires to manage the values that will be written back to your marketing list within Dynamics. Settings include what your events list is called and the RSVP value you are using (Yes or Accept or Accepted). You can set all this up in advance, and then just Start the event on the day.
Saving the Events Module URL
To save the Events Module URL, use the Campaign Summary in your chosen campaign.
Select the Campaign in the relevant container and open the Campaign Summary screen.
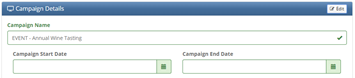
Click the Edit button for the Campaign Details and select the Start and End Date for your campaign, using the date selectors, then click Save. (Entering dates will help you to see the event in the Campaign Calendar view on your Home Page.)
Click Configure Event App
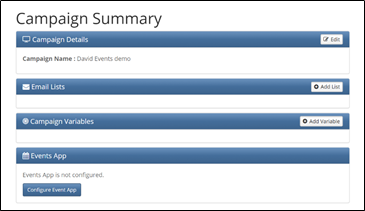
- Select the ListSource of your guest list.
- Click Random to create a password, or type one of your own
- Select Version 3
Click Save
The Successful confirmation message will display at the top right of the screen.
Once you have saved the Events Module you can use the URL to log into the module's Dashboard and configure the event.
Configuring the Event
Using the URL you will be taken to a Dashboard where you can configure the Events Module to create the event, map the values to the Attendance fields in Dynamics and choose other options. This creates the different values used in the event when registering delegates.
Vuture recommends that you create a naming convention for your events which includes the event date – to keep titles unique.
- Open your browser and Go to the new URL
- Click Login (bottom left of the screen)
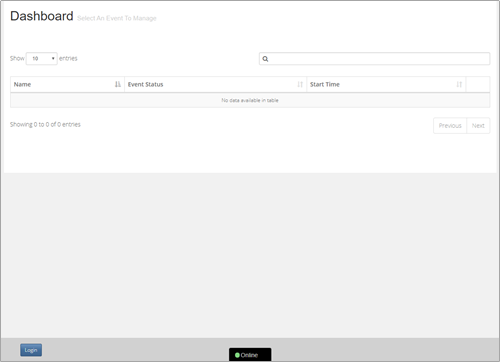
- Paste or type the password into the Login screen and click Login
- At the Dashboard screen click Create new event
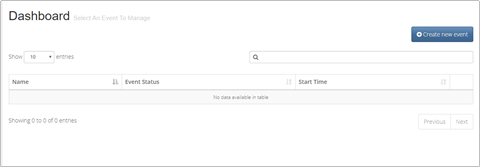
- Type the Event Name then click Create Event
- Note: Event names must be unique. We recommend including the event date to achieve this.
- At the Edit Event screen, if necessary, edit the Event Title
If using badges, select the template from the Badge page.
- Print when marked as attended: This means print the badge of the attendee as they are marked as Arrived. You will need an on-site printer connected for this to work.
- Enable QR scanner: This is not generally used, only if you have QR codes enabled.
- Notification On Arrival: Not used in Microsoft Dynamics
Microsoft Dynamics Configuration
Select the Dynamics campaign folder and click Select then click Save.
Vuture automatically assigns values to the Attendance fields of Attended, Walk-In and No-show.
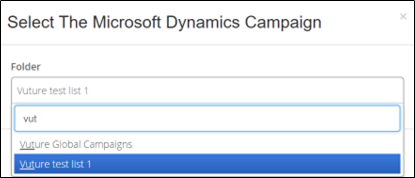
Note: If using Badges, you can now scroll up and select Generate Badges,
At the Event, using a mobile device or laptop
- Go to the Event URL. Log in.
Note: Logging in is to protect your data in case you leave your iPad lying about at the venue. Also, the Module will auto-sleep / lock if left unattended for 10 minutes
- Select the event by clicking on the name of the event that has been set up.
This will open the list from Dynamics.
- Click Start Event to display only those contacts who have RSVP’d Yes.
What you will see on your screen
The event dashboard will display the details of all the invitees who have an RSVP value of Accept or similar.
You can search by surname or company name, use the search box to filter by name or Company Name or filter by attendance values.
You may mark registered attendees or register new attendees (walk-ins).
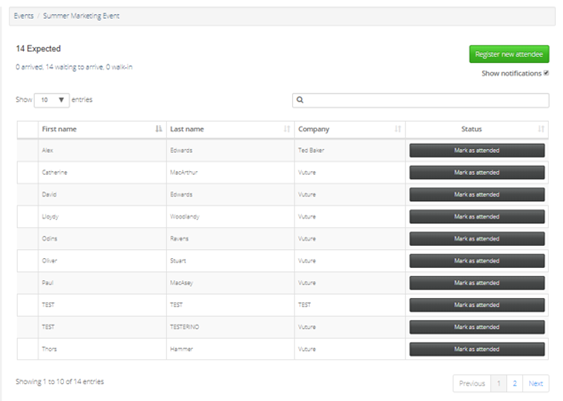
As your attendees arrive, register them either by finding their name using the “type ahead” box, top right, or sort by First Name or Last Name or Company and scroll down.
- To mark someone as Attended simply click on the Mark as attended button
You can search using the search box.
Click the filters next to the No Expected to display only a specific status such as WAITING TO ARRIVE.
Registering delegates
- Click Register new Attendee
- Add their details to the form
- Click Register
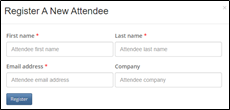
Note: For walk ins, existing contacts in Dynamics will be added to the campaign, marked as a walk-in. If they are not already a contact in Dynamics, it will add them as a new contact to the campaign. After the event, please follow the New Contact procedure in place at your firm.
At the end of the event
Once the event is over, scroll down to the foot of the page and click on the red End Event button.
This will mark any contacts who RSVP'd Yes but did not arrive as Not Attended or as a No Show in Dynamics, so only begin this process once you are certain that no more attendees are going to arrive.
FAQs
Q. If I receive a client’s response over the phone and manually update their RSVP in Dynamics, will they still appear on the Check In list at the beginning of the event?
A. Yes. Any client who has RSVP = Yes (or Accept or Accepted) on their record for the event will be included in the Check In list. The Module does a live look-up to Dynamics when you click on the button to Start Event.
Q. If a client previously declined the invitation they will not appear on the Check In list at the beginning of the event. What should I do if they walk in after all?
A. Mark them as a Walk In. Take their name and enter it as if they were not invited. Dynamics will identify that they are already a contact in the system, and mark them as Attended so they can receive the request for feedback email or any other follow up emails you send.
Q. Can I have more than one event on the Module at the same time?
A. Yes. You can have as many events on the Module as you need – perhaps several in preparation and one started and running. Each event (which must have a unique name) will be held in a separate line in the table.
Q. Will the Module help me to report on attendance figures?
A. During or before the event you can use the Module to check numbers for Arrived, Waiting to Arrive and Walk-ins. After that we suggest you use Dynamics reporting.
Q. My screen is filling up with old events. Can I delete them once they are done?
A. Yes. Click on an event name. Choose Configure. There is a Delete option at the top left of your screen.
