Overview
This article shows instructions for how to use Vuture forms with the Microsoft Dynamics CRM.
* Requires Version 2 of the Form Editor. If you are not on the latest version, please ask your Account Manager to enable:
Admin > System > Versions > FormEditor Version > 2
Admin > System > Forms > Force validation script
Admin > System > Forms > Enable Date of Form Processing
Admin > Roles > Forms > Hide Form Fields
To see instructions for the old version of Forms please click here
Contents
As part of Vuture’s landing page functionality, you can create forms either in a Vuture landing page or embed a form on your website. These forms can synchronize directly with Dynamics. You can use forms for:
- Event RSVPs
- Preference management
- Additional data capture or data enrichment
- Surveys or feedback
As part of your Vuture Master Template, we will create default RSVP forms for your events. Located in your Landing Pages folder, you'll find 'Prefilled' and 'Blank' RSVP Forms (see screenshot below). You can use these default forms as a starting point to help speed up the overall set up of your event process.
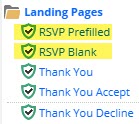
Alternatively, you can also create your own forms, starting from a new page.
- To create a new form, click into the campaign where you wish to create your form.
- Click on Landing Pages from the menu on the left
- Click on new page to create a new form
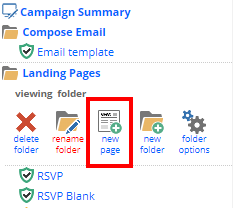
- Enter a name for your page.
- Select the layout you wish to use. As part of your Vuture setup we will include default page layouts you can use.
To get to the Form Editor screen to edit your form, click into the form itself on your Landing Page.
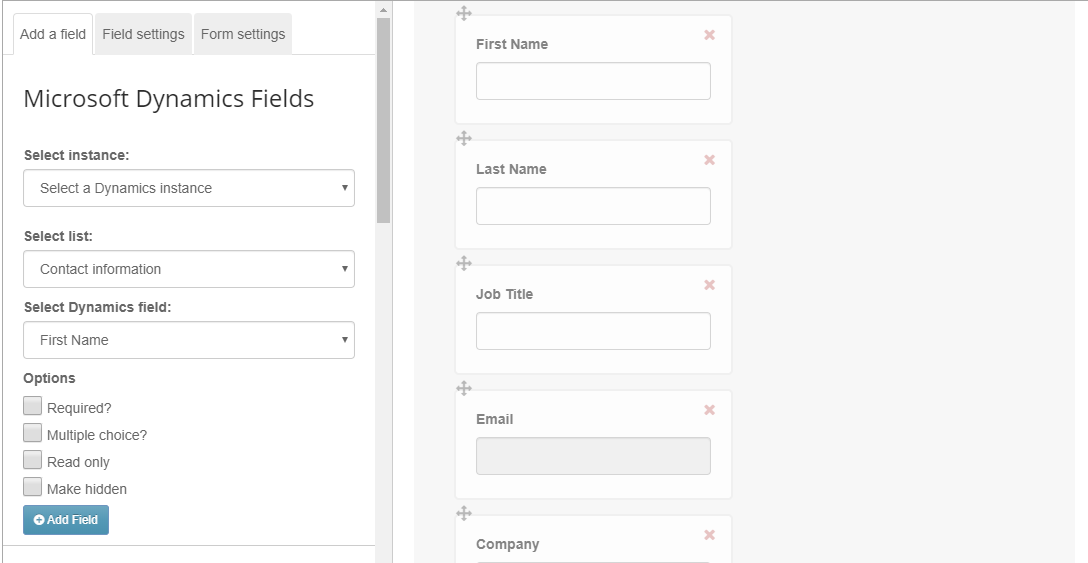
When you add a contact field into your form and a client completes the form, Vuture will write back this data to your CRM.
As part of the RSVP Forms (Prefilled and Blank) in your template, you may see that a few contact fields have been added for you. For example the First Name, Last Name, Company and Email fields.
Please note: All forms must have the following fields as a bare minimum: First Name, Last Name, and Email Address.
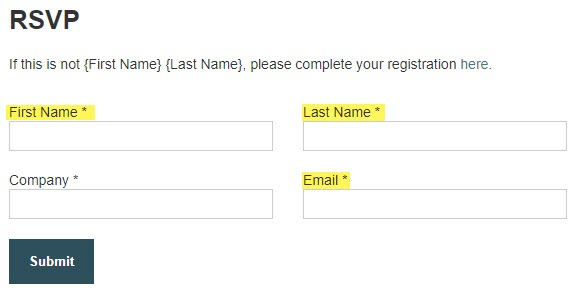
If you wish to add more contact fields that will sync with Dynamics, please follow the below instructions.
- Click into the form fields to get to the Form Editor (if you're not there already).
- Make sure you are on the "Add a field" tab.
- From the "Select list" drop-down, select make sure you have "Contact information" selected.
- From the "Select Dynamics field" drop-down, select the contact field you wish to add (i.e. Job Title).
- Then click on "Add field"
- The new field will automatically be added to the bottom of your form. Navigate to the bottom and click into the field to edit the settings.
- Decide if this contact field should be "required", "read only" (making the field uneditable), or "half width" (meaning it takes up 50% of the form, so that another field can sit beside it). Best practice tips on read-only fields for prefilled forms.
- You may also click to drag and drop it higher up on your form if desired.
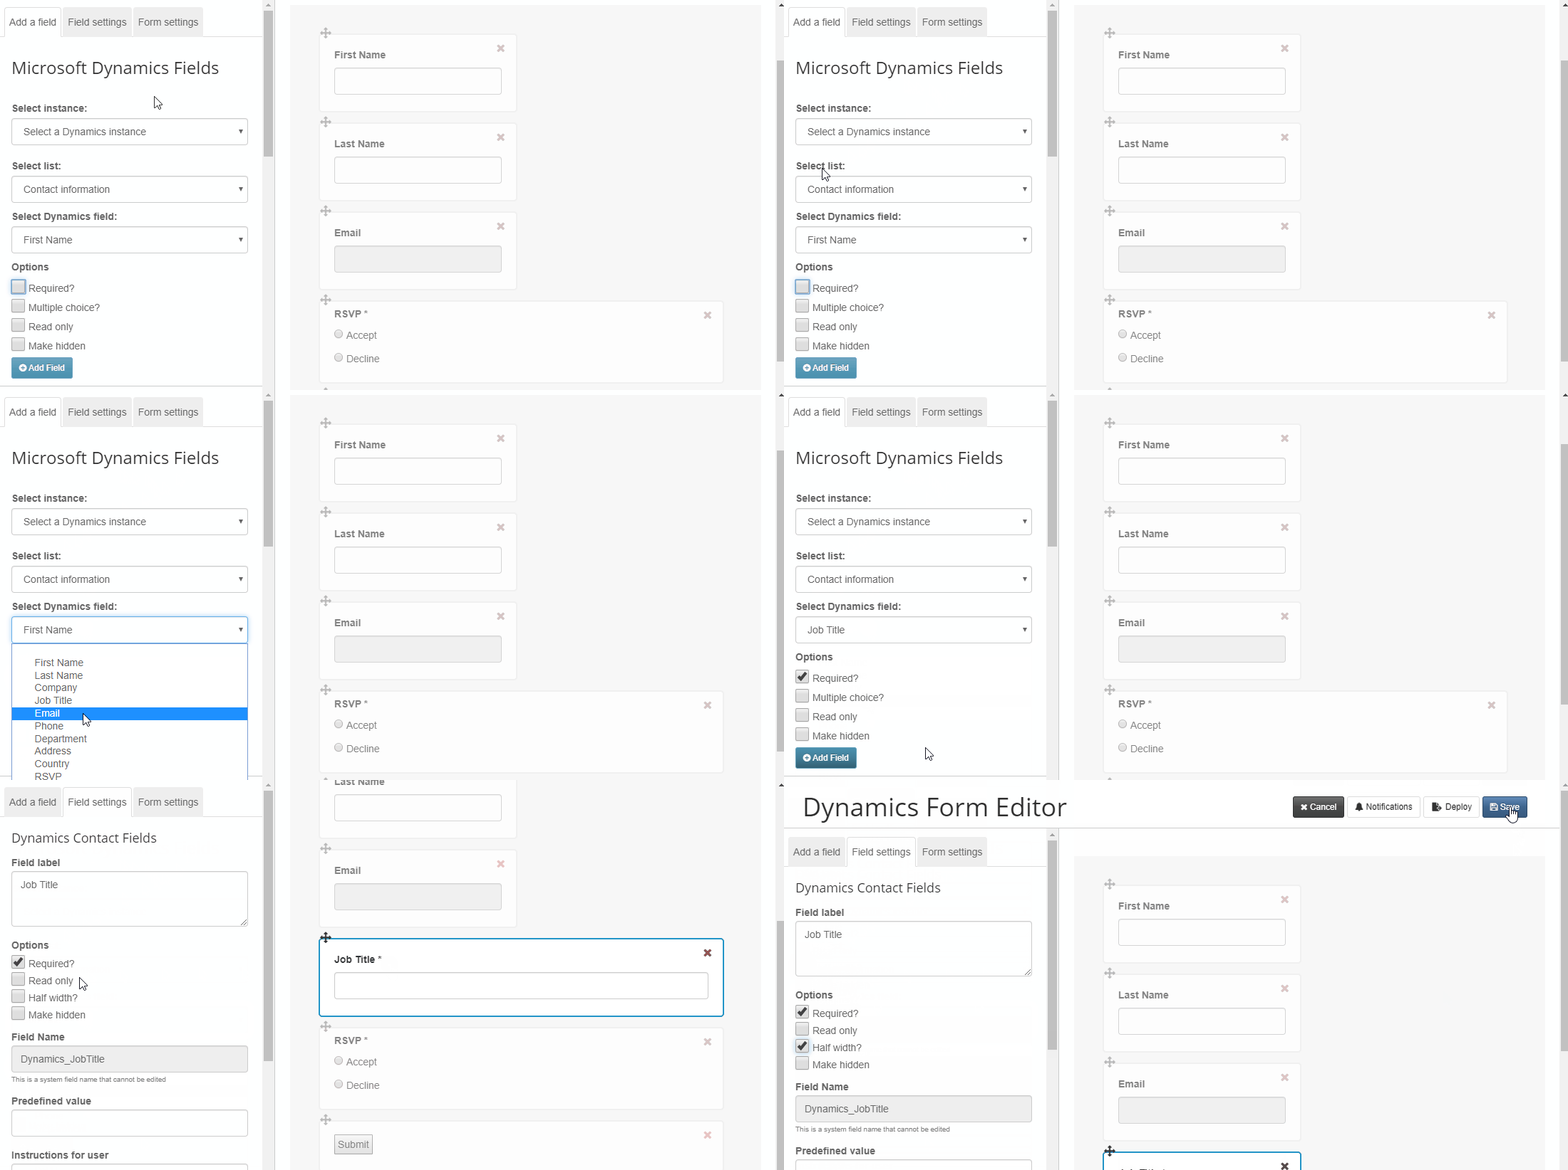
When you are finished adding your additional contact fields, click the "Save" button in the top right. Then click the "Publish" icon > "Publish now" to fully publish and save out your updates.
Adding a RSVP field
Please note: All RSVP forms must have the following fields as a bare minimum: First Name, Last Name, Email Address and RSVP.
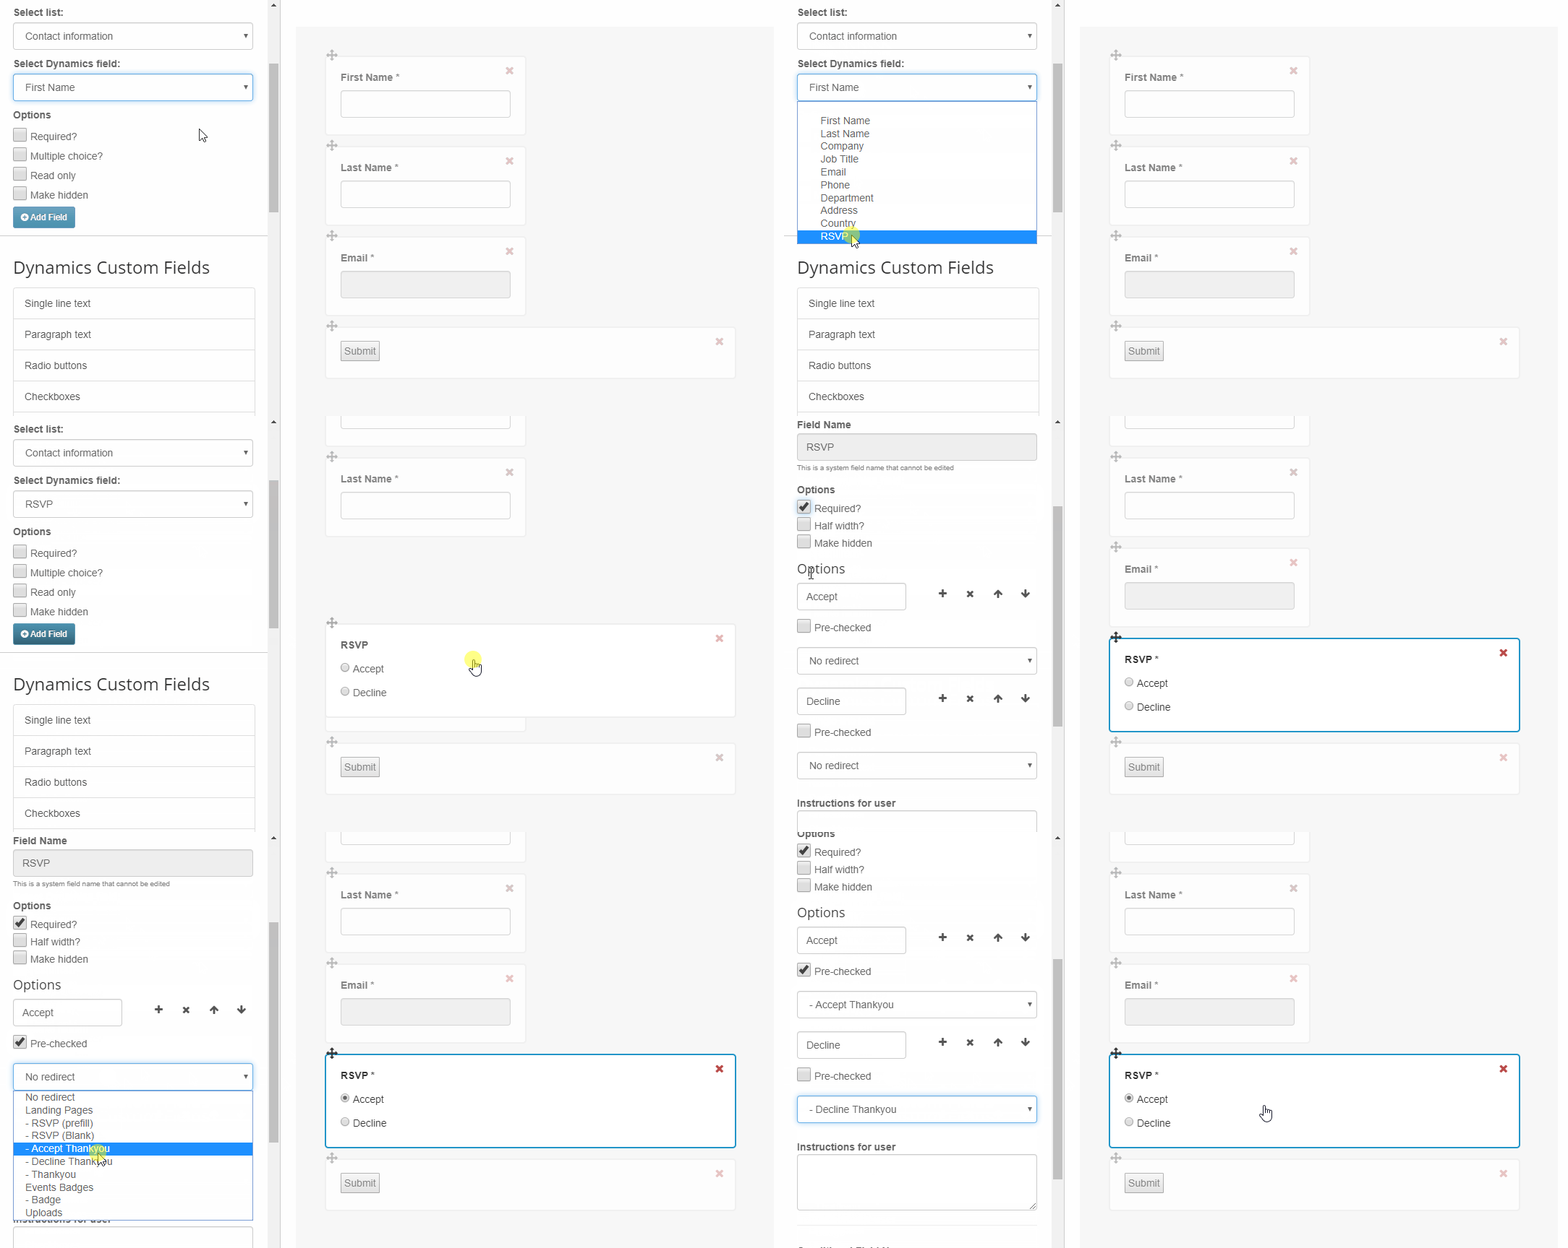
If you wish to add a RSVP field to your form that will sync with Dynamics, please follow the below instructions (see animated GIF below which highlights these steps):
- Click into the form fields to get to the Form Editor (if you're not there already).
- Make sure you are on the "Add a field" tab.
- Select your Dynamics instance (if this is not done already)
- From the "Select list" drop-down, make sure "Contact information" is selected.
- From the "Select Dynamics field" drop-down, select "RSVP".
- Click the "Add Field" button.
- This new field will be added to the bottom for your form. You may then click to drag and drop it higher up on your form if desired.
- Click into the RSVP field to get to the field settings.
- Check off required. You may wish to also pre-check the "Accept" option, as well as, setup your landing page redirects depending on which option the recipient chooses. That way, they will get to the right landing page when submitting the form.
-
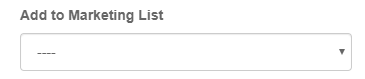
Click on "Form Settings" tab and select the Dynamics campaign you'd like this form submission to write back to. Please note: This should be done for both RSVP Prefilled and Blank forms.
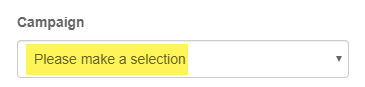
- On "Form Settings" tab, select the Marketing List you'd like to add contacts who complete these form to. If this is a Prefilled form, it can be different from the list that you've sent to. If no Marketing List is selected for a Prefilled form, the form submission data will be written back to the Marketing List you used to send to. Please note: For Blank forms, you must always select a Marketing list.
- Lastly, on "Form Settings", check the box that says "Write back to the selected Dynamics Campaign and Marketing list".

- Click on "Save" in the top right corner.
- To publish the form, click on the "Publish page" icon > "Publish now".
- Repeat these steps for the Blank RSVP Form, too.
Add a Custom Dynamics Additional Field
Vuture can also push information into custom additional fields in Dynamics. Custom additional fields are set-up in the backend of Vuture and allow information from forms to be pushed into any text or multi-select field in Dynamics. Please provide your Account Manager or Support with the following:
- The 'Name' of the field.
- The 'Value' and 'Label' of each option.
How to find the 'Name'
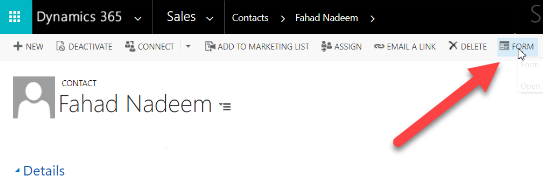
To find the 'Name' of the field, navigate to "Forms" (see screenshot below) in Microsoft Dynamics. You will need Microsoft Dynamics Admin Privileges to go into this feature.
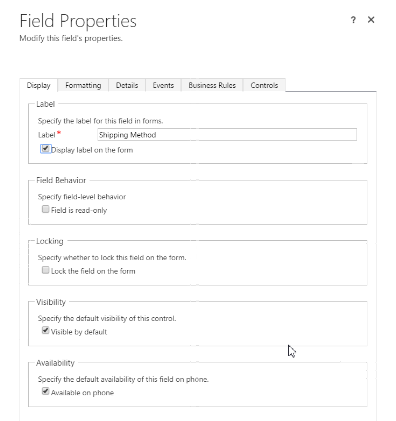
Scroll down all the way to the custom field you wish to add. Double click on the field to get to the Field Properties. (see screenshot below)
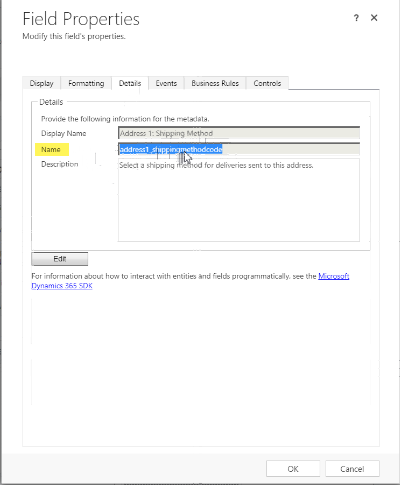
Click on the "Details" tab. You will then see the 'Name' for this field (see screenshot below). Copy and paste this into a plain text editor (i.e. Notepad).
How to find the 'Value' and 'Label' of each option of a field
While still on 'Field Properties' in the screenshot above, click on the 'Edit' button. This will open another window with additional details.
Scroll down to see all of the options for this custom additional field (i.e. Shipping). Note the 'Label' and 'Value' for each one (see GIF below).
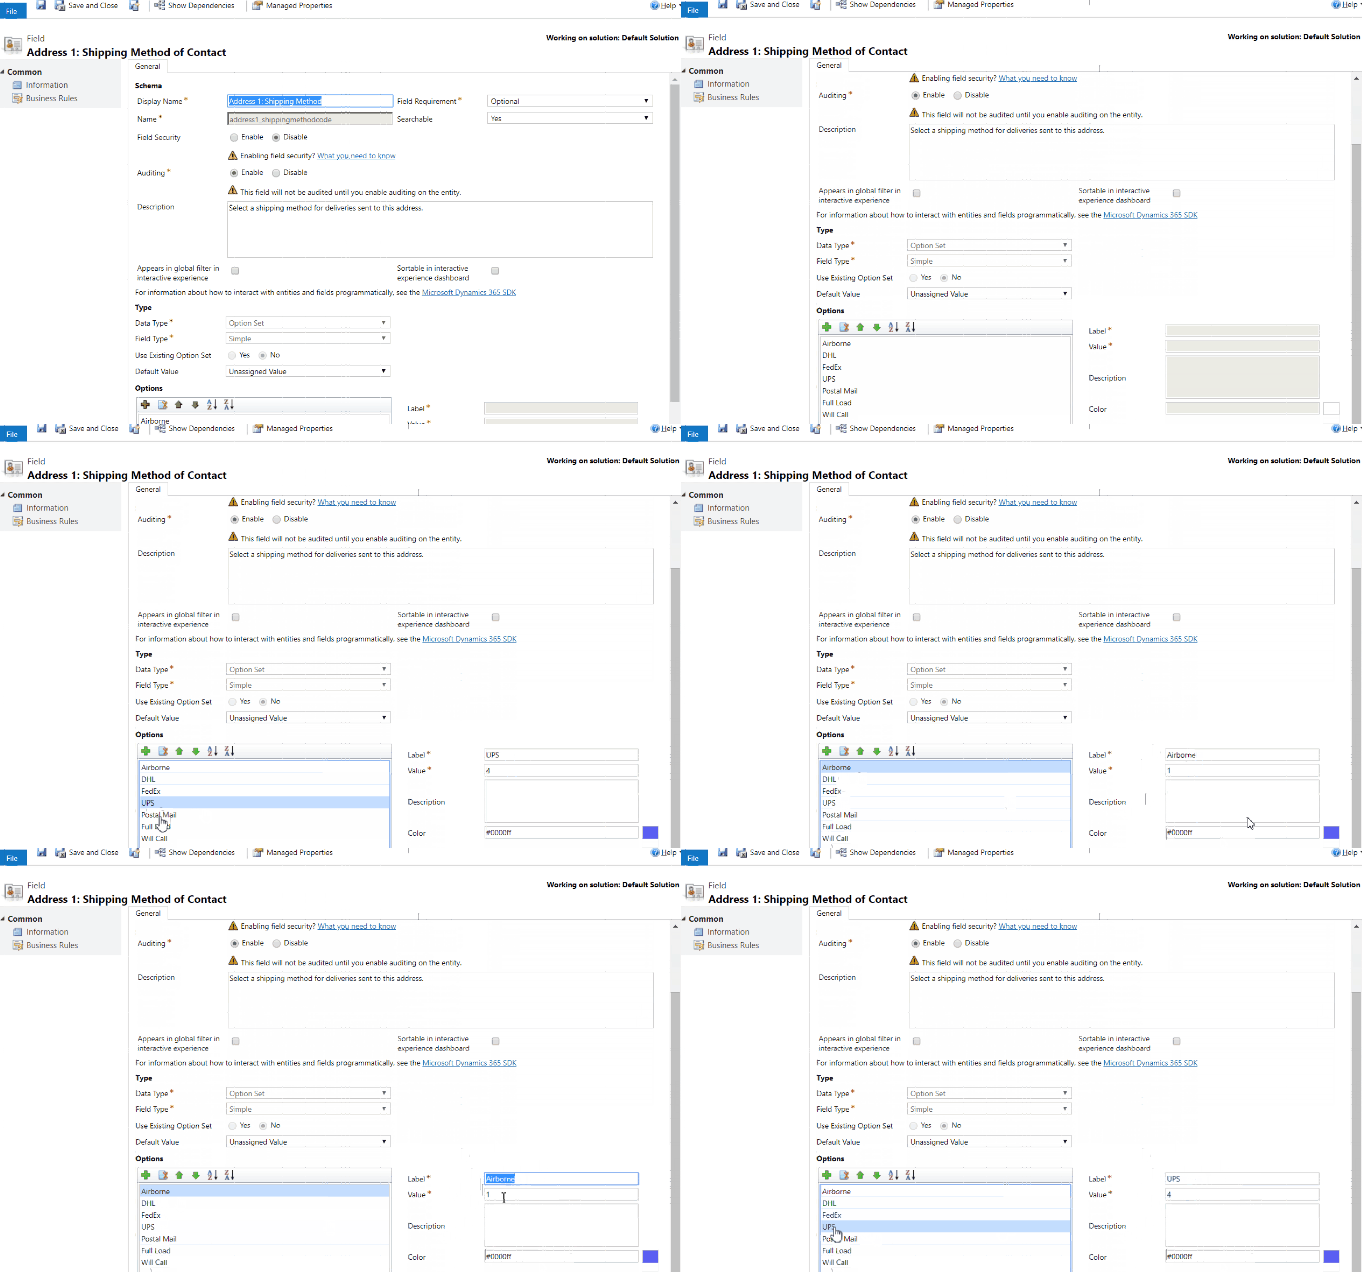
In this example, you'll want to note the 'Label' and 'Value' for each option of this field in the following way to provide this to your Account Manager or Vuture Support.
Let's take the first option as an example (i.e. Airborne):
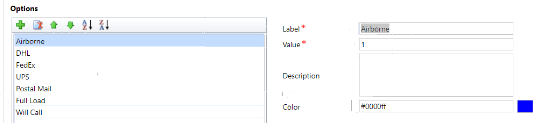
The Value is '1' and the Label is 'Airborne'. We'll want to note this in the following way: 1,Airborne; (Value,Label;)
The second option, DHL, will be noted the same way (Value,Label;):
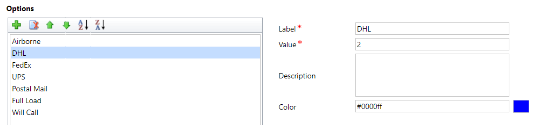
The Value is '2' and the Label is 'DHL'. We'll note this as: 2,DHL;
You will continue this for each option in this custom field (i.e. Airborne - Will Call).
Once that's done, you'll string all of these together, like below:
1,Airborne;2,DHL;3,FedEx;4,UPS;5,Postal Mail;6,Full Load;7,Will Call;
You can then provide the 'Name' along with the 'Value' and 'Label' to your Account Manager or Vuture Support (see example below). Your Account Manager or Vuture Support can then follow the instructions in this article to set this up on the backend of Vuture for you.
Name: address1_shippingmethodcode
Value & Label for all options of this field: 1,Airborne;2,DHL;3,FedEx;4,UPS;5,Postal Mail;6,Full Load;7,Will Call;
Add a hidden field
* Requires Admin > Roles > Forms > Hide Form Fields to be switched on for your role.
You can add hidden fields in your Dynamics forms. These hidden fields will not be visible to the person completing the form but will submit data against their record in your CRM. When you hide a field, both the field and the label will be hidden.
For example, you may have two separate forms for RSVP Accept and RSVP Decline. For the RSVP Accept form, you may wish to make the RSVP field hidden with Accept as pre-checked. Please see animated GIF below to highlight this example.
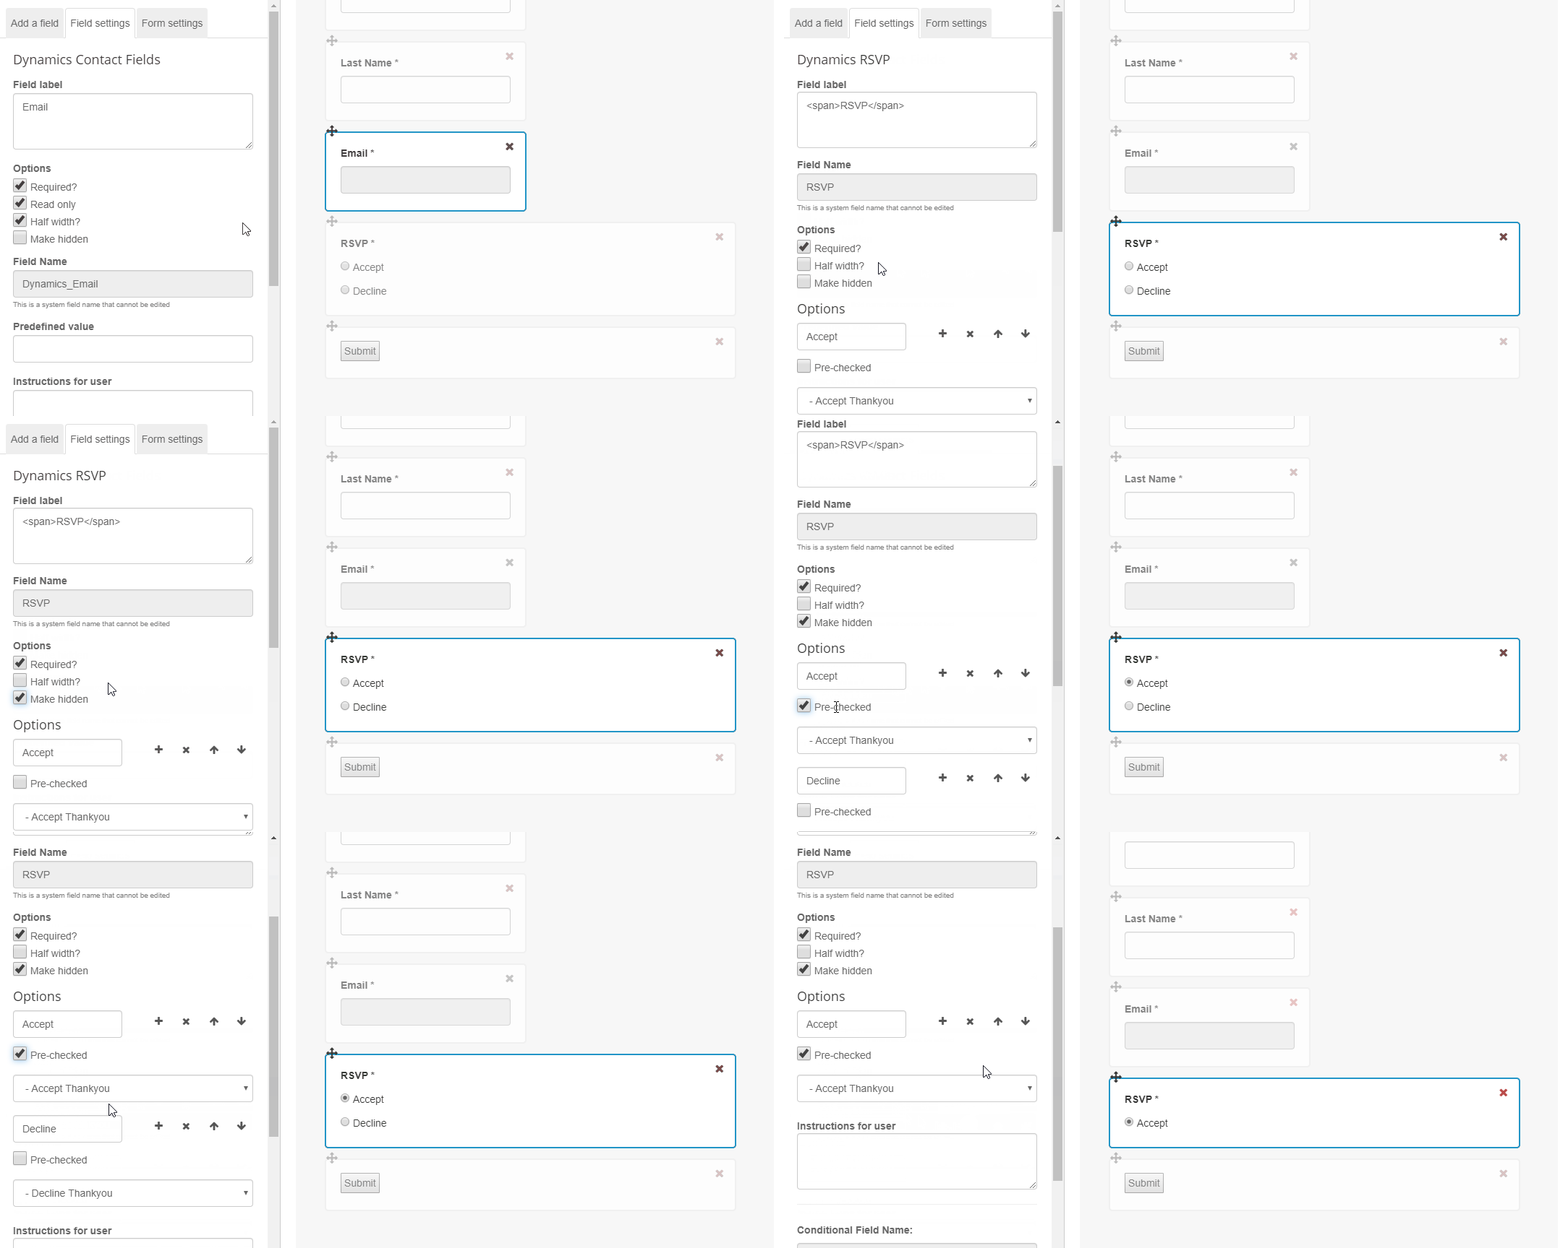
To make a hidden field on your form, please follow the below instructions:
- Click into the field you wish to make hidden, then mark this field as Make hidden
- Click on "Save" in the top right corner.
- To publish the form, click on the "Publish page" icon > "Publish now".
Removing fields from your form
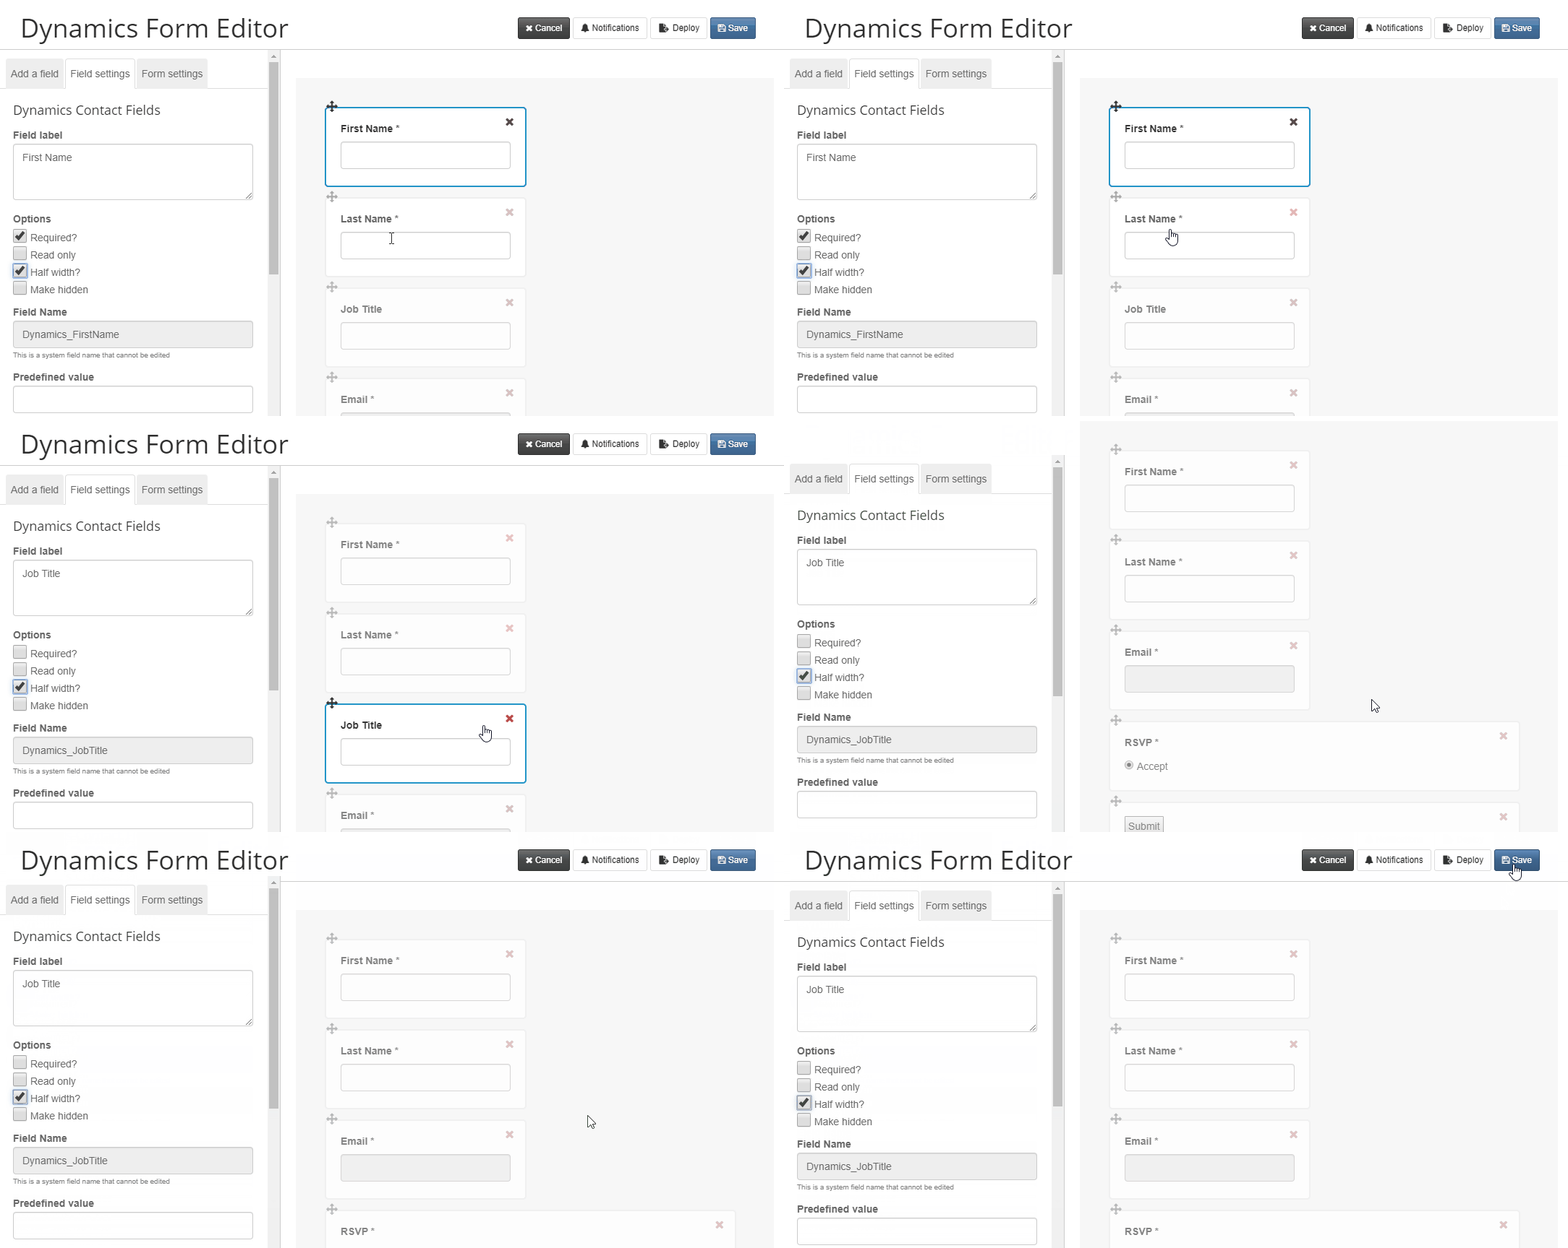
To remove fields from your form, please follow the below instructions:
- Click into the form fields to get to the Form Editor (if you're not there already).
- Navigate to the field you wish to delete.
- Click on the red "X" icon in the top right corner of the field.
- Your field should now be removed from the form.
- Click on "Save" in the top right corner.
- To publish the form, click on the "Publish page" icon > "Publish now".
Adding section breaks and instructional text to your form
When editing your form, you may wish to add sectional breaks to highlight each section of a form, especially if there are many fields. You may also wish to add instructional text to provide guidance to those who are submitting the form.
Below, you'll find instructions on how to add section breaks and instructions to your forms.
Section break
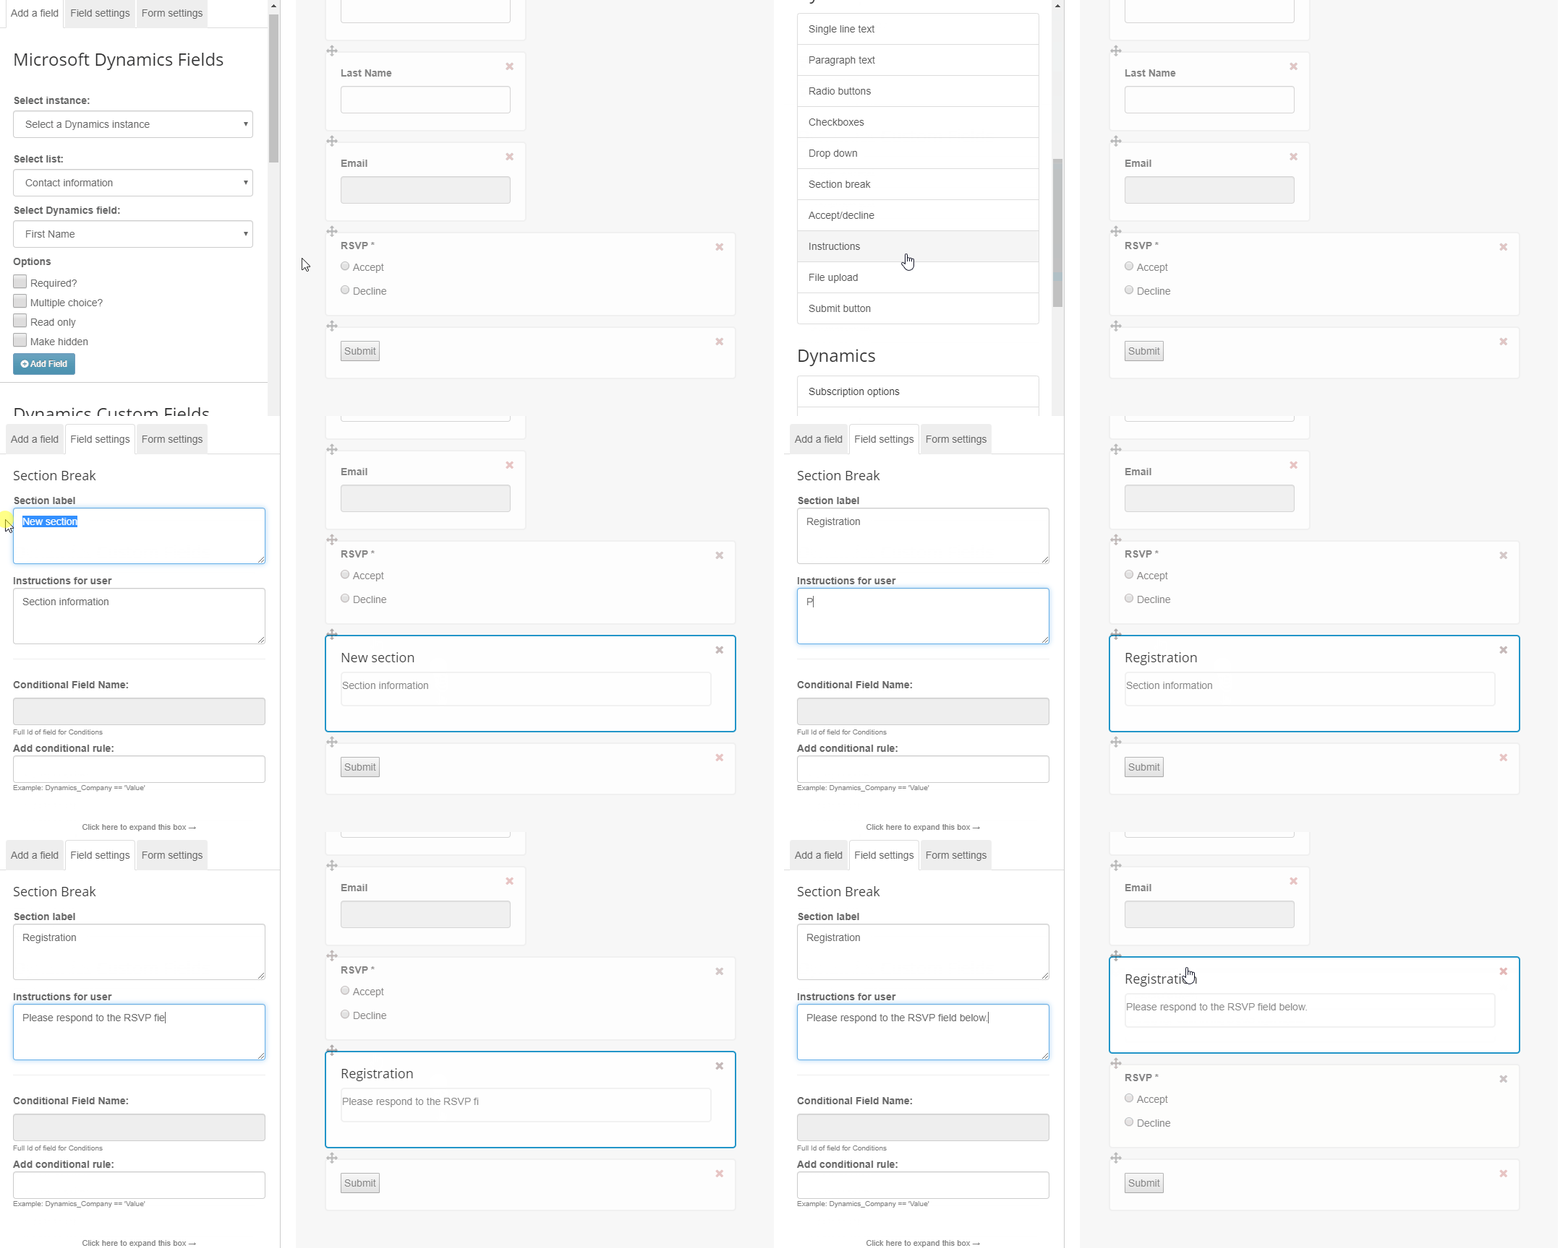
When editing a long form, you may wish to break apart the form into different sections (e.g. Contact information, Event details, etc.). You can do this by adding a "section break" to your form under Dynamics Custom .
To add a section break, please follow the below instructions (please see animated GIF below):
- Click into the form fields to get to the Form Editor (if you're not there already).
- Make sure you are on the "Add a field" tab.
- Scroll down to the "Dynamics Custom Fields" section.
- Click on "Section break".
- Your Section break field should be added to the bottom of the form.
- Click on the "New Section" field to drag and drop it higher up on your form.
- You should then be able to rename "New Section" to the title of your choice by editing the "Section label". Otherwise, click into the new field to edit this text.
- If you wish to add more information, you may add this under "Instructions for user".
- Click on "Save" in the top right corner.
- To publish the form, click on the "Publish page" icon > "Publish now".
Instructions
You may wish to add instructional text to different areas of your form to help provide guidance to those completing the form.
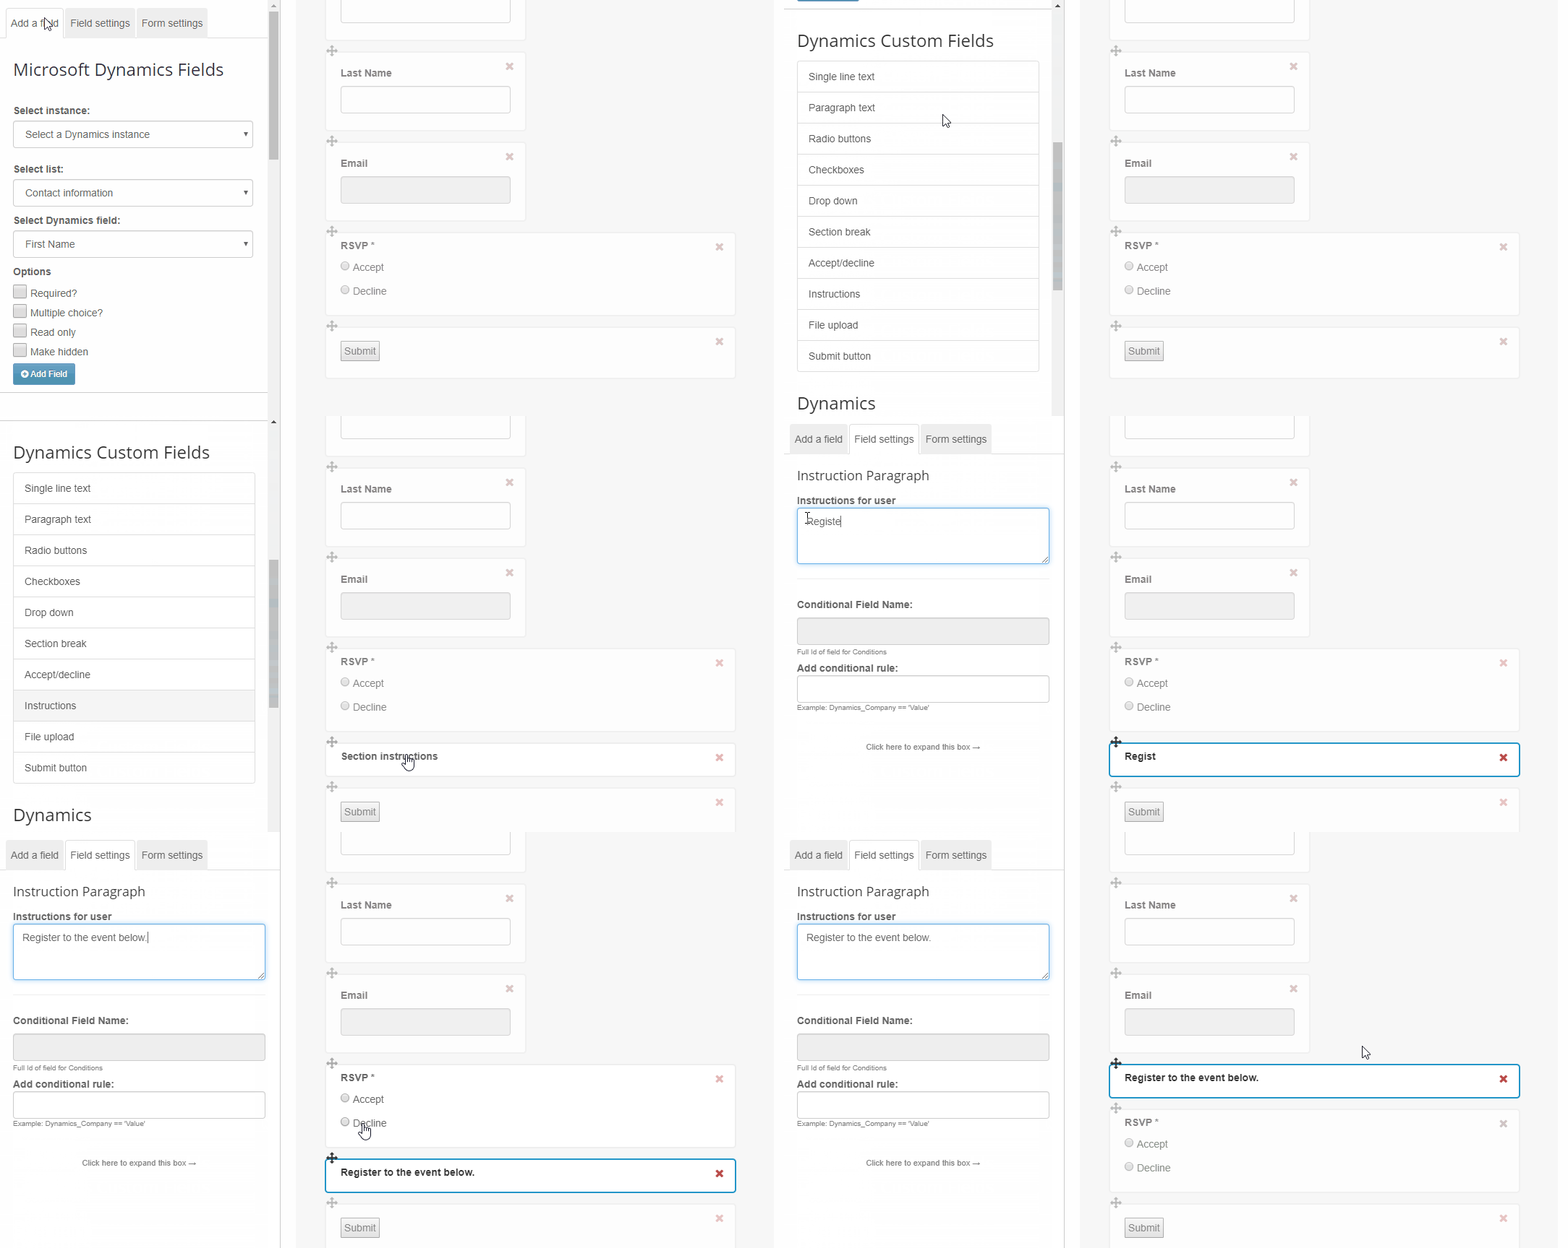
To add instructional text, please follow the below instructions (please see animated GIF below):
- Click into the form fields to get to the Form Editor (if you're not there already).
- Make sure you are on the "Add a field" tab.
- Scroll down to the "Dynamics Custom Fields" section.
- Click on "Instructions".
- Your Instructions field should be added to the bottom of the form.
- Click on the "Section instructions" field to drag and drop it higher up on your form.
- You should then be able to rename "Section instructions" to your desired text by editing the "Instructions for user".
- Click on "Save" in the top right corner.
- To publish the form, click on the "Publish page" icon > "Publish now".
Add file upload button - this feature not released for Dynamics
You may wish to change the wording of the submit button for your form.
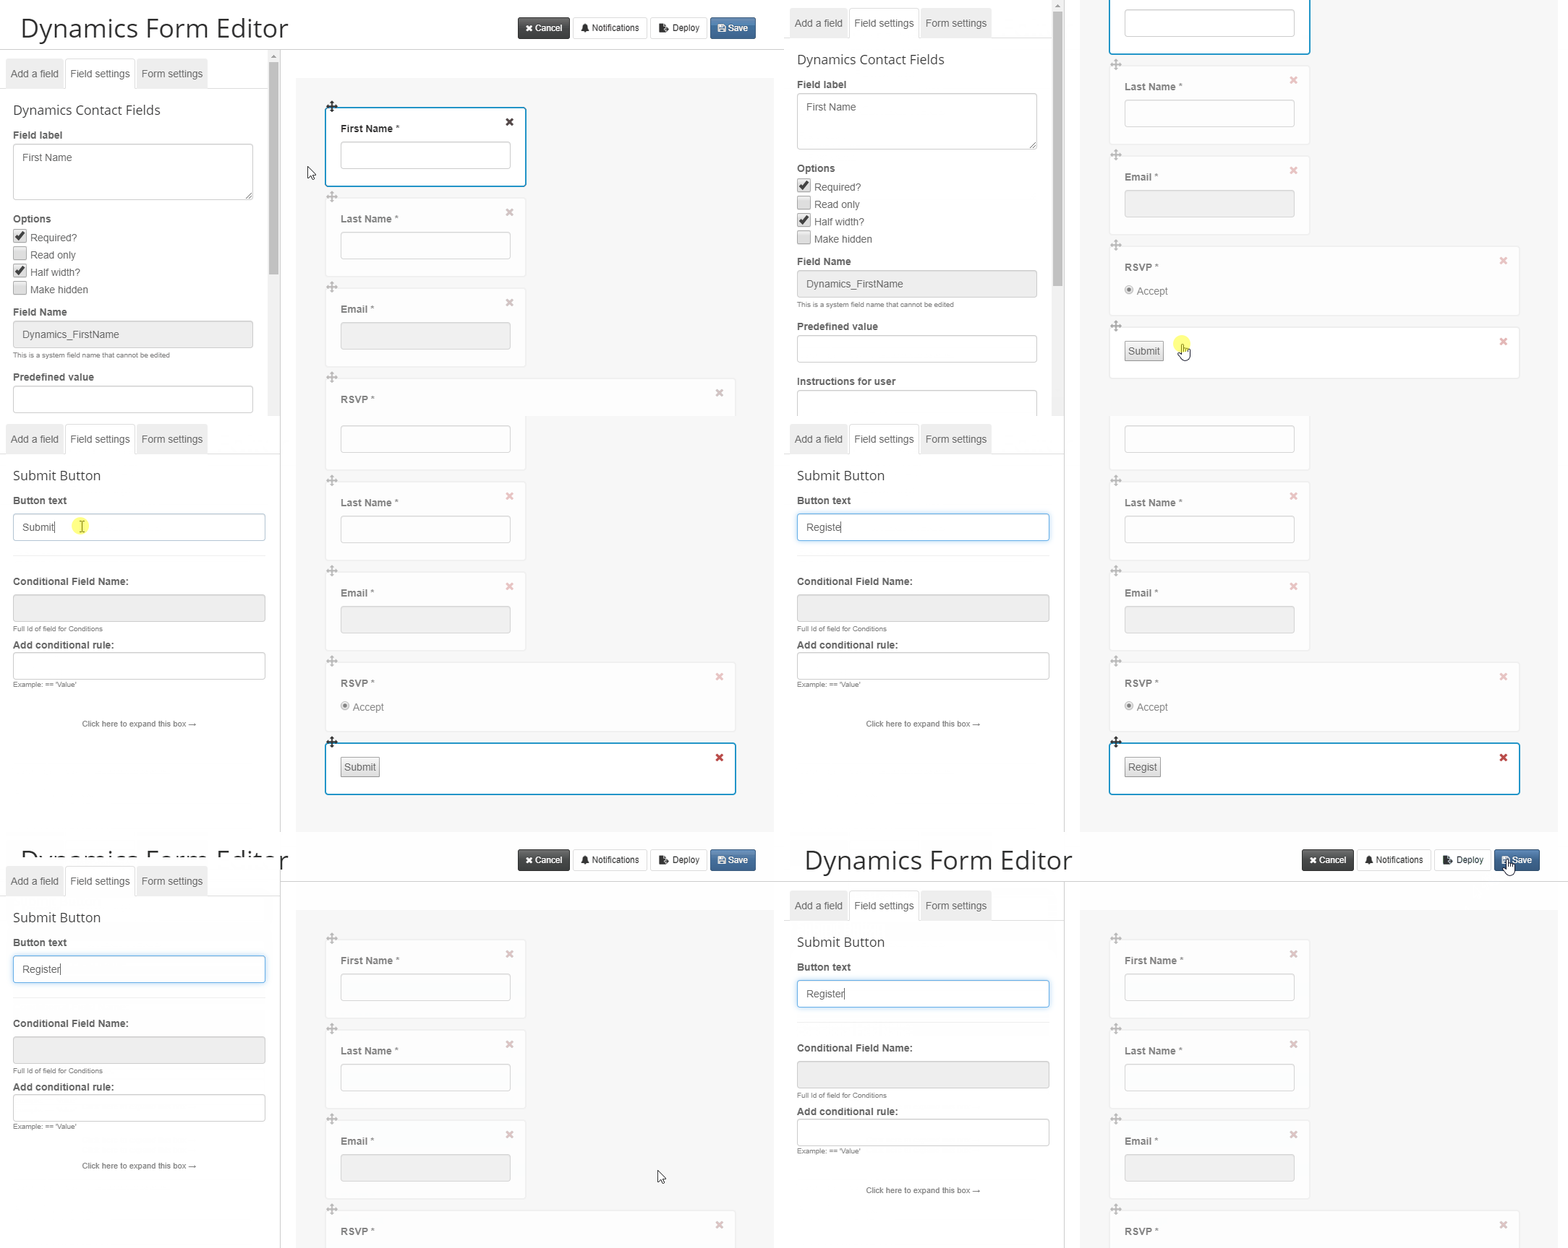
To change the wording of your submit button, please follow the below instructions (please see animated GIF):
- Click into the form fields to get to the Form Editor (if you're not there already).
- Scroll down until you see the "Submit" button.
- Click on the "Submit" button.
- You may then update the "Button text".
- Click on "Save" in the top right corner.
- To publish the form, click on the "Publish page" icon > "Publish now".
Field settings
For each of the fields you may have added on your form, you can alter each field's settings. To do so, click on any field and it will bring up further options for you to complete.
Below are some of the most common field settings you will see:
-
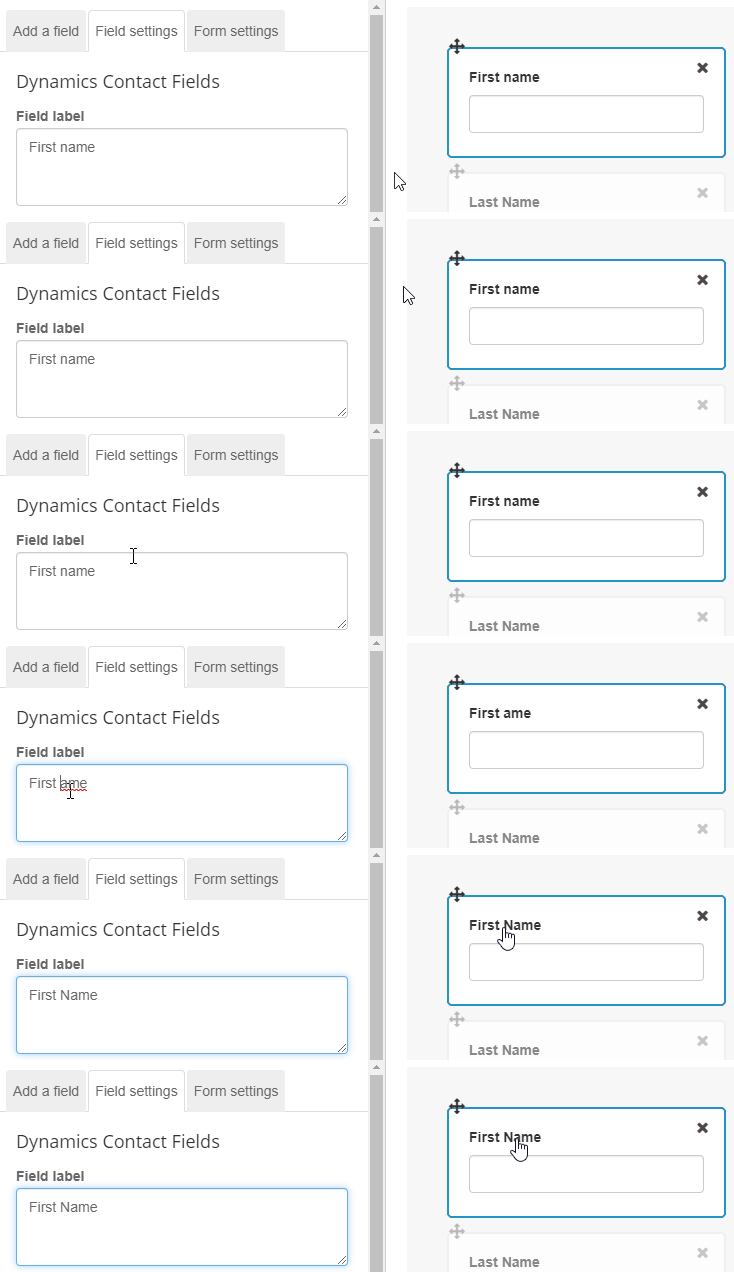
Field Label: This is the text that we display next to the form field.
-
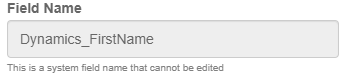
Field Name: If you are using a field from Dynamics this box will display the name of this field as it is in your CRM. In this scenario we will grey out the field name as it is a system field. We lock this field down to prevent anyone from changing the Field Name. That way, all information will write back correctly to CRM for that field.
-
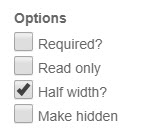
Options: By clicking into a field, you have different options you can set. The options that appear may be slightly different for each field.
-
Predefined Value: You can specify a predefined value for a field. We will automatically display this when your contact loads the form.

-
Instructions for user: If you add some instructions for this field, we will display them directly under the field.

-
Conditional Field Name: This relates to form logic. Please click here to read more about form Logic.
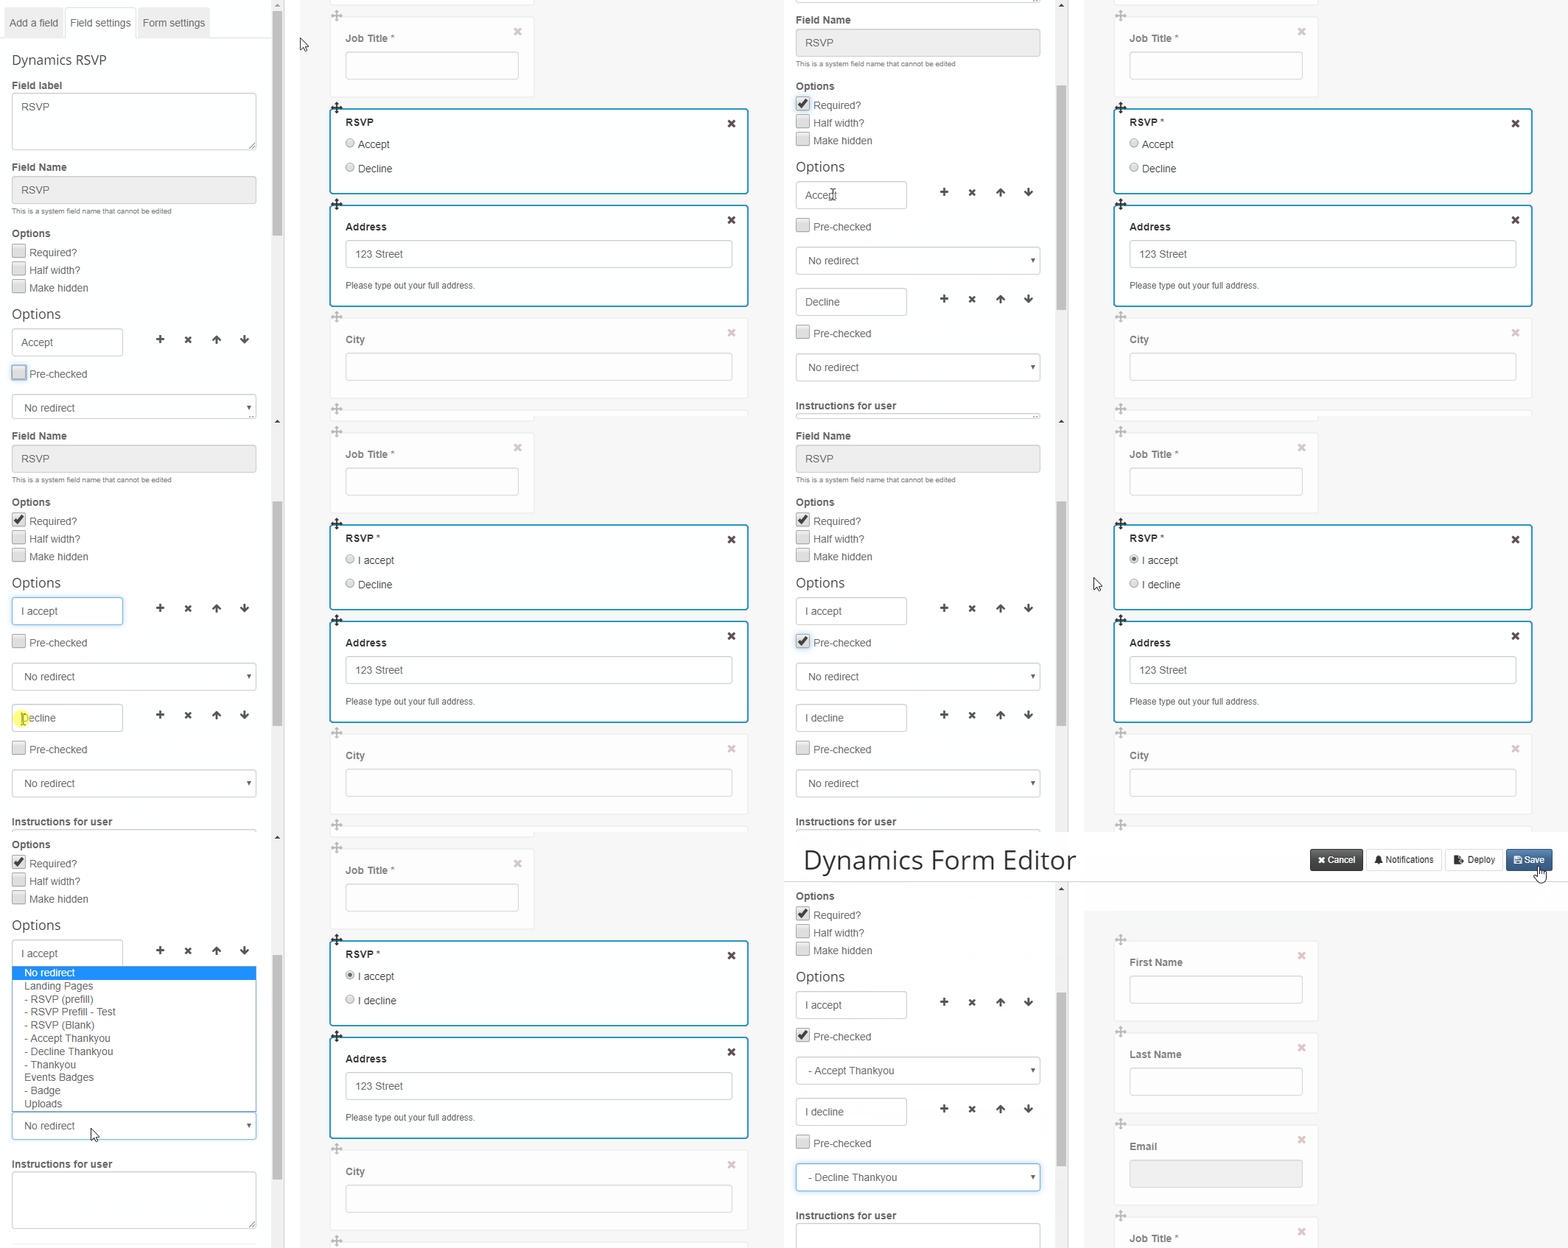
Additionally, for the RSVP field, you will see additional options (please see animated GIF below). This includes:
- Changing the text of the values (e.g. "Yes" to "I accept")
- Pre-checking the option, so that it is checked on the form automatically.
- Setting a redirect for when someone selects this option (i.e. selects "Yes" to RSVP, redirects them to the "Thank You Accept" landing page.
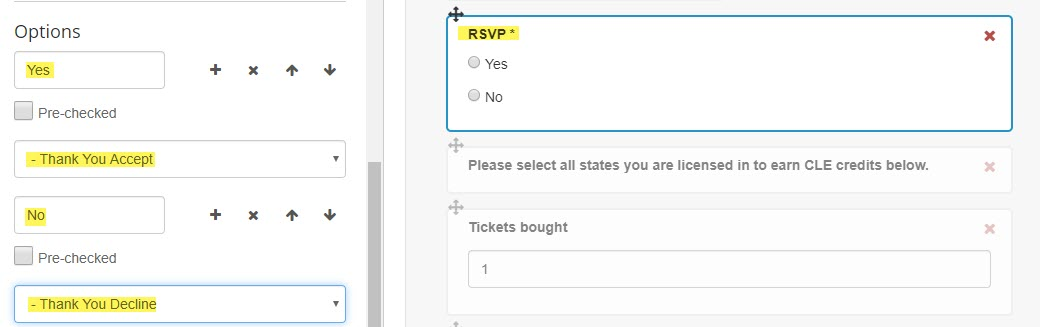
Please note: It is recommended to only set redirects on one field (e.g. RSVP: Redirect "Yes" to "Thank You Accept" landing page AND Redirect "No" to "Thank you Decline" landing page). Please see the below screenshot for this example. It is not recommended to set redirects on more than one field per form.
While the Field Settings tab covers the options for each field individually, the Form Settings tab covers options for the Form as a whole.
Click into the form on your landing page to get to the Form Editor screen. Then switch from the "Add a field" tab to the "Form settings" tab.

Form Name
If you fill in the Form name, we will use this as the subject line if we email you that someone has submitted the form (see "Email form to" setting below).
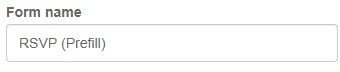
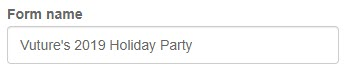
By default, the Form Name will either be "RSVP (Blank)" or "RSVP (Prefill)". It is best practice to change this to a unique name for your event.
Email form to (optional)
When a contact submits this form you can have the completed form details emailed to the email address you put in this field. If you want to add multiple emails, simply separate them with a semi-colon e.g. info@vuture.co.uk; news@vuture.co.uk. This is also the address that any uploaded file will be sent to. Important: If you put your email address in this field you will receive a copy of every form submission.
If you'd like to change the FROM Address for the form submission notification from the default of auto@the-vx.com, please ask your Account Manager to update 'Admin.System.Forms.Form Submission Notifications From Address'.
Thank you page
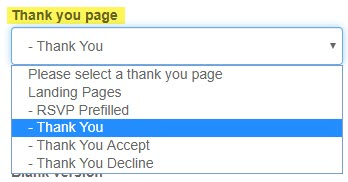
Be sure to set a landing page as your "Thank you page". This is the landing page the contact will be redirected to once submitting your form. Unless, you've set redirects on the RSVP form (see instructions here).
Important: If you do not set a "Thank you page", your contact will receive an error page when submitting the form.
Form data options
The "Form data options" setting specifies whether this form should be prefilled with the contacts details from Dynamics or should be blank for new contacts to submit.
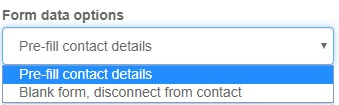
Below is a more detailed definition for each of the Form data options settings:
Pre-fill contact details
Selecting the "Form data options" to "pre-fill contact details" will display the contact details that are held in your CRM on the Vuture form. For example, the First Name field will be pre-filled with the contact's first name from Dynamics. This is true for any Dynamics contact fields you've added to this form, where there is data recorded for that contact in Dynamics.
Please note: For this to prefill correctly, a contact must best sent a live email from your Vuture platform and click through to the prefilled form from this email. The form will not prefill for any "Send Test" emails, only live email sends and "Send Sample".
This helps to save your contact time to submit a RSVP form. This also helps you to comply with GDPR by revealing the data you are holding about a client.
Examples of pre-filled forms include:
-
RSVP forms - where the contact has been emailed an invitation from Vuture, using Dynamics as the data source, and the form is set to prefill with their details.
-
Preferences form - where the contact can see what contact information you have held against them and can freely make edits to update this information, ensuring the information you have in your CRM is up-to-date.
-
Unsubscribe form - where the contact can request to unsubscribe from your communications. (See more on managing unsubscribes in Dynamics).
Blank form, disconnect from contact
Selecting the "Form data options" to "Blank form, disconnect from contact" will display all contact fields on the form as blank fields and it is not tied to Dynamics.
A blank form is meant for new contacts or those who did not receive an email from your Vuture platform with a link to the prefilled version of the form.
Because a blank form is not tied to Dynamics, these types of forms can be shared as a URL or embedded on a website.
Once a contact submits a blank form, Vuture will try to find a match in Dynamics by looking at the last name and email address. If Vuture does find a match, it will amend the contact record in Dynamics. If Vuture does not find a match, it will create a new contact record for this contact in Dynamics.
Examples of blank forms include:
-
RSVP forms - where the contact has not received an invitation from Vuture, but wants to register to the event. They were either forwarded the invitation and clicked through to the blank RSVP form, were given the URL to the blank form, or completed the blank RSVP form on your website (if embedded).
-
Subscription form - where the contact can subscribe to receive your marketing mailings and add themselves to lists based on their interests.
-
Gated forms on websites - where the contact provides their contact details on your website in return for a piece of downloadable content (i.e. white papers).
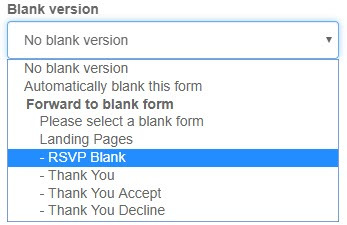
Blank version
This setting is directly related to your Forward to a Friend Form. This setting allows you to choose a blank version of a form for when an email is forwarded via the Forward to a Friend Form. This way, if someone were forwarded an email (via the Forward to a Friend Form) and they click through to register, they can be taken to the RSVP Blank Form, instead of the RSVP Prefilled Form (meant for the original contact).
You can read more about this setting here. As best practice, we recommend using option #2, when using any personalized fields.
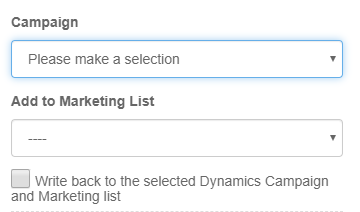
Campaign & Add to Marketing List (see screenshot below)
Always select the Dynamics campaign you want to link this form to in the "Campaign" drop-down. This should be done for both RSVP Prefilled and Blank forms.
For the "Add to Marketing List" drop-down, you can set the Marketing list you'd like to add contacts who complete this form to.
- If this is a Prefilled form, it can be different from the list that you've sent to. If no Marketing List is selected for a Prefilled form, the form submission data will be written back to the Marketing List you used to send to.
- If this is a Blank form, you must always select a Marketing list.
Additionally, you should always check the box that says "Write back to the selected Dynamics Campaign and Marketing list".
Click the save button (top right of the screen) when you have finished editing the form.
