Keywords: Container structure, sub-templates, copying campaigns, forms, RSVP forms, image library
Overview
This article will walk you through a ton of best practice for setting up your Vuture Platform. The below video will give you a high level overview of some of this important best practice guidance.
Contents
How should I set up the Container Structure?
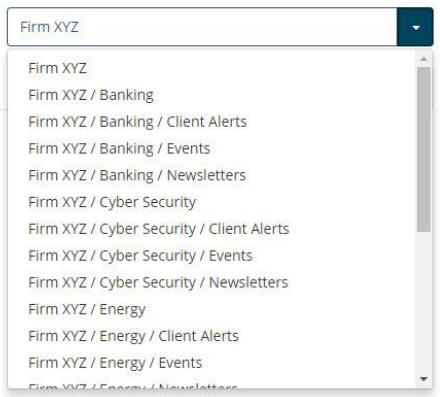
From a best practice perspective, we want to make sure that you set up your Container Structure in a way that will allow for more control and flexibility in your reporting. This will allow you to look at how an overall practice area or department is performing vs. how an overall mailing type is performing (e.g. Events).
To find out how best to setup your Container Structure, please click here. For more information on how to setup Containers, please click here.
How should I utilize Containers?
It is not recommended to create or send mailings from the root container (e.g. Firm XYZ). Each mailing should be created and sent from a specific container that is most relevant to that mailing. This helps with all Vuture Reporting.
For example, if we created and sent a newsletter for the Energy practice group in the root container, this would not be included in any of our reporting in the “Energy / Newsletters” container. You would want to create this newsletter in the "Energy / Newsletters" container.
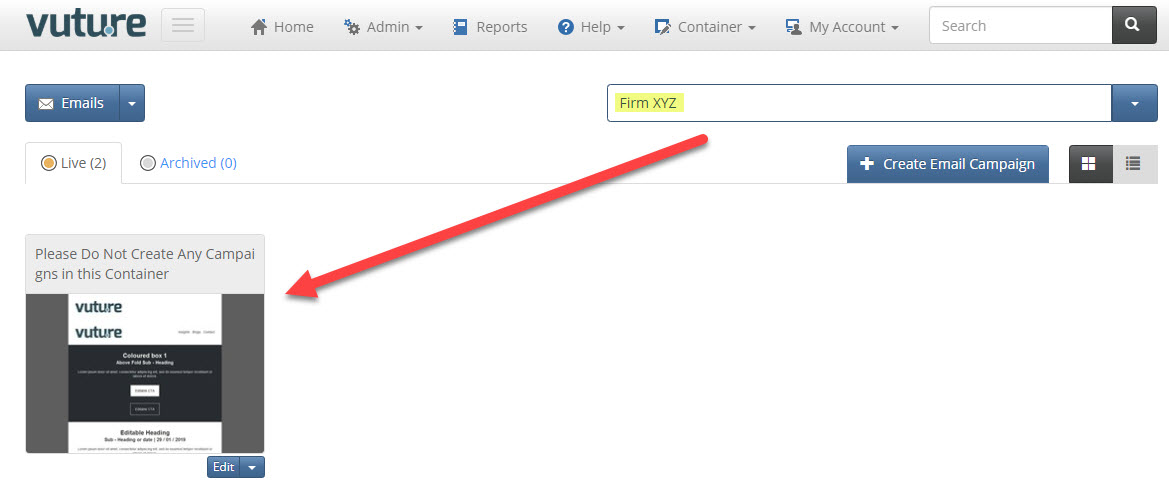
Best Practice Tip: You may want to create a placeholder mailing that reads “Please Do Not Create Any Campaigns in this Container” in the Root Container. This can serve as a friendly reminder for your team and encourage them to use a specific container. You may also wish to remove access to any templates in the Root Container to eliminate users from creating email campaigns. You can do this by going to Admin (top menu) > Containers and Users > selecting the root container (top most level) > clicking into the "Template Categories" tab > select "Email" as the module > and uncheck all Template Categories > then click "Save Categories".
For more information on how to setup Containers, please click here.
What is best practice for creating Sub-Templates?
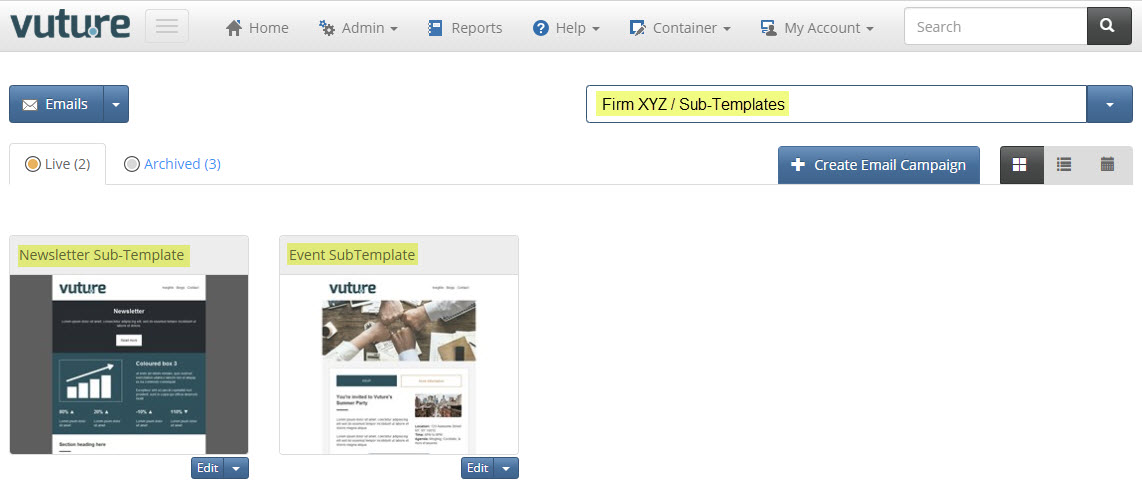
All Sub-Templates should live in a Sub-Templates Container and each type of mailing (e.g. Alert, Event, Newsletter, etc.) should have its own Sub-Template. This saves you time and keeps the branding consistent.
For example, if we create an Event Sub-Template, we can create a Save the Date, Reminder, and Follow Up emails to include in this Sub-Template along with the initial invite. That way all of these are automatically created when you choose this Sub-Template and will keep the branding and overall process uniform.
To get started creating your Sub-Templates, please review the following Help Desk Articles and video:
Also, if you're about to create an Event Sub-Template, please review this article for best practice.
What should I consider when setting up my Sub-Template categories?
You'll want to consider the level of access your users should have to your Sub-Templates and your Container Structure.
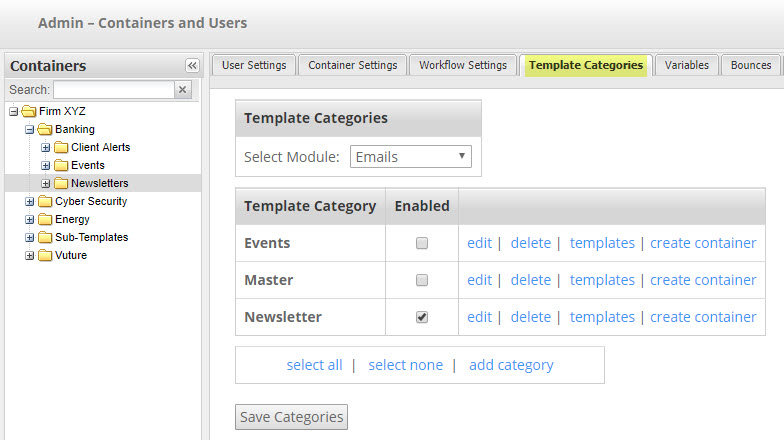
For example, let's say you have multiple Newsletter Sub-Templates for different practice areas or departments and have your Container Structure setup as "Practice Area / Mailing Type".
You could create a single "Newsletters" Template Category where you would save all Newsletter Sub-Templates. Setting up your Sub-Template category in this way, would rely on your users to choose the correct Newsletter for that Practice Area. If you wish to lock this down further, so that your users always select the correct Sub-Template, you may wish to create a Template Category for each type of Newsletter (e.g. Banking Newsletter). You would then give access to that specific Container only (e.g. "Banking / Newsletters").
However, if you have one generic Newsletter Sub-Template that you are using, regardless of practice area or department, then this would be a great solution.
For more information on Template Categories click here. For more information on what step to create Template Categories when building a Sub-Template, click here.
What is best practice for creating a new email campaign?
In terms of best practice, you should create a new email campaign with the specific Sub-Template for that mailing type. For example, if you are creating an Event, you'll want to use an Event Sub-Template. Make sure to create this email campaign in the appropriate Container, too!
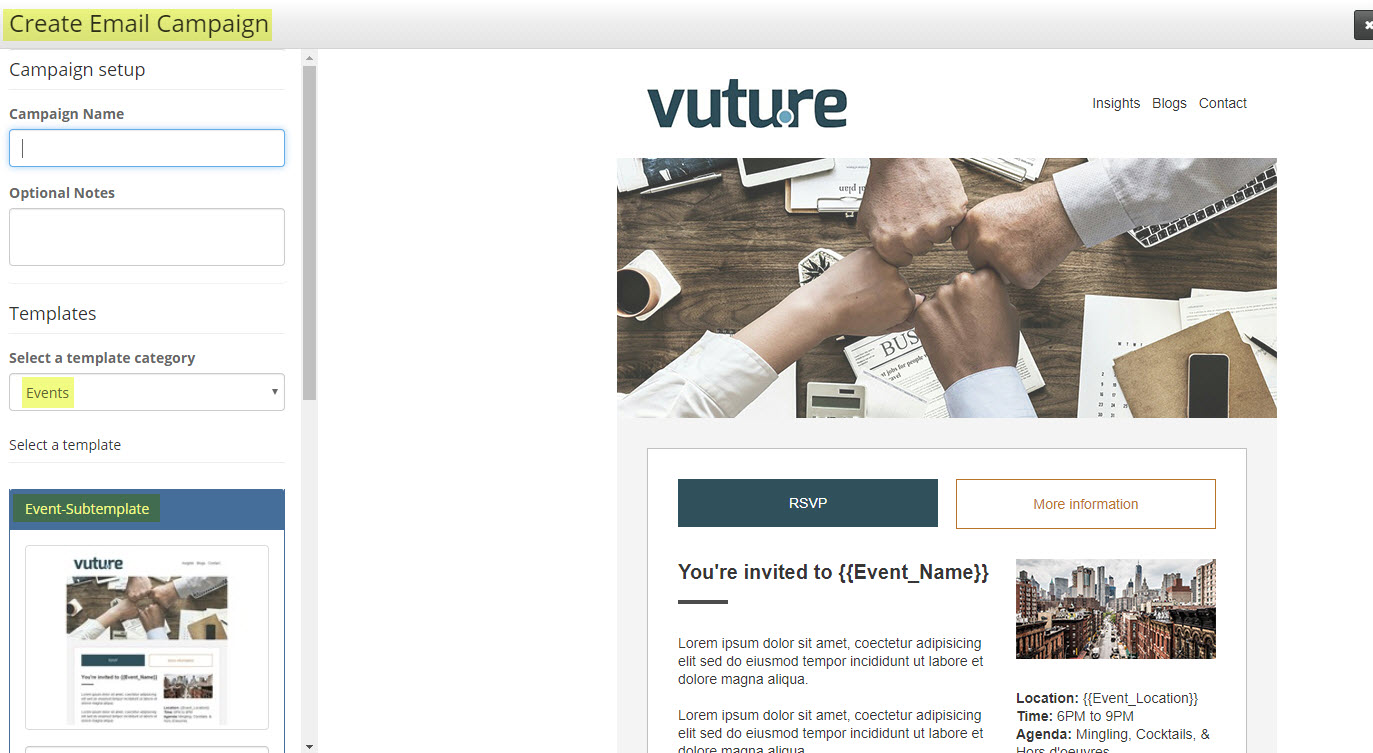
Should I copy an existing email campaign or use a Sub-Template?
We do not recommend copying email campaigns, especially emails with forms, because it opens up potential for human error in the following ways:
- RSVP forms may write back to the wrong list or campaign (depending on your CRM);
- Risk of links pointing to the wrong places, including Vuture forms;
- Campaign variables, triggers, and filters would have to be re-created each time you copy a campaign;
- Copied campaigns don't inherit any changes to templates (snippet updates, support fixes, footer edits, etc.). This can therefore cause code to degrade over time;
- Any manual edits to the campaign are compounded. For example, if you copy in some text which carries some messy code (i.e. copied from Word), next time the campaign is copied the excess code is also copied. This often leads to formatting and rendering issues;
- Copying campaigns also copies the send folder (i.e. August 2020). Unless you remember to delete the send folder(s), this makes the campaign and Vuture reporting messier. The reporting will appear blank for these 'empty' send folders and often cause confusion later down the line when looking at overall reporting;
Best Practice Tip: It is best practice to always create a fresh email campaign from a Sub-Template. For more information on whether you should copy an email campaign or create/use a Sub-Template, please click here.
What is the difference between a Pre-filled and Blank RSVP Form?
The Vuture Platform has two types of forms: Pre-filled and Blank.
- A Pre-filled form is meant for the contact that you've sent an email to on your mailing list. With a Pre-filled RSVP Form, when a contact clicks through to RSVP, it will pre-fill with their contact information. Once they RSVP, it will write back the RSVP data to a CRM. If you're using Vuture standalone, it will write back to the Vx List or Contacts module.
- To make sure your form is set to pre-filled, click into the form to get to the Form Editor > Click on the "Form Settings" tab, scroll down until you see the field named "Form data options" > make sure "Pre-fill contact details" is selected, then save your form.
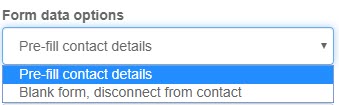
- A Blank form is meant for a contact who was not on the original mailing list. With a Blank RSVP Form, the contact could have navigated to this form from a forwarded invitation or from someone sharing a link to this form. Once a contact submits this Blank RSVP form with their contact information and RSVP data, Vuture will update or create a contact record in your CRM. If you're using Vuture standalone, it will add the contact to your Vx list.
- To make sure your form is set to blank, click into the form to get to the Form Editor > Click on the "Form Settings" tab, scroll down until you see the field named "Form data options" > make sure "Blank form, disconnect from contact" is selected, then save your form.
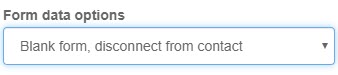
Other types of Pre-filled and Blank forms in Vuture are:
- Subscription Form (Blank Form - meant for new contacts)
- Preferences Form (Pre-filled Form - meant for existing subscribers to update their contact information and preferences)
- Unsubscribe Form (Pre-filled Form - meant for existing subscribers to unsubscribe from mailings)
How should I set up my RSVP Forms (Pre-filled & Blank)?
Please consider the following best practice advice when creating your RSVP Forms (Pre-filled & Blank) in your Sub-Templates and any event email campaigns.
RSVP Pre-Filled Form
Link to your Blank RSVP Form
In your RSVP Pre-Filled Form, you should always link to the Blank RSVP Form, with a statement like, "If you are not {First Name} {Last Name}. please register here." The "here" should link to the Blank RSVP Form. This will help to stop contacts who may have been forwarded the email to fill out the Pre-Filled Form, which is meant for the original recipient, and help guide them to the Blank Form to enter in their contact details and RSVP.
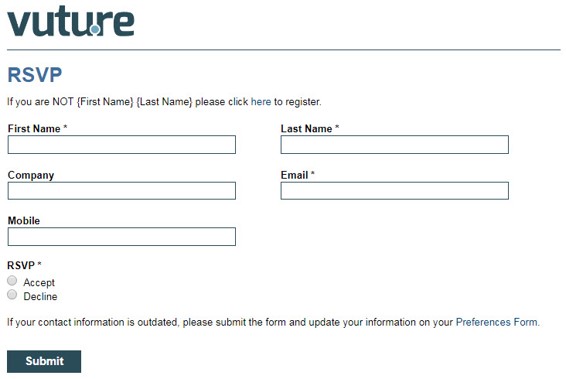
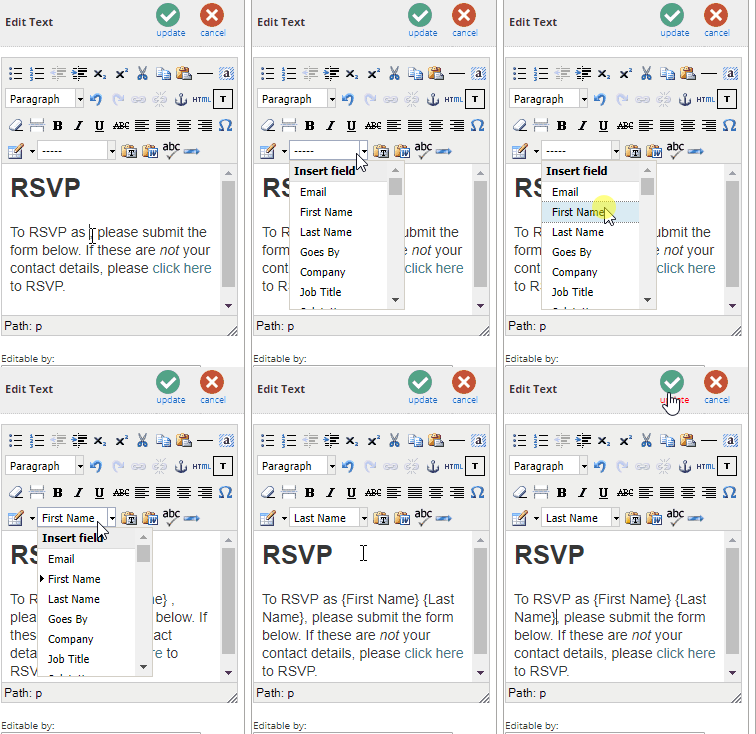
Please note: the {First Name} {Last Name} tokens will be personalized with the intended recipients First Name and Last Name, upon sending the email and clicking through to the RSVP form. Please refer to the below image for how to access these tokens in your Text Editor.
Lock down your Pre-Filled RSVP Form
It is important to double check that your Pre-Filled RSVP Form in your Master Template and/or Sub-Templates have the First Name, Last Name, and Email Address fields locked down (e.g. read only). This will help to prevent a contact’s information from being overwritten accidentally.
Please note: This should be done for all clients with a CRM and standalone clients (e.g. Vx Lists and Contacts Module).
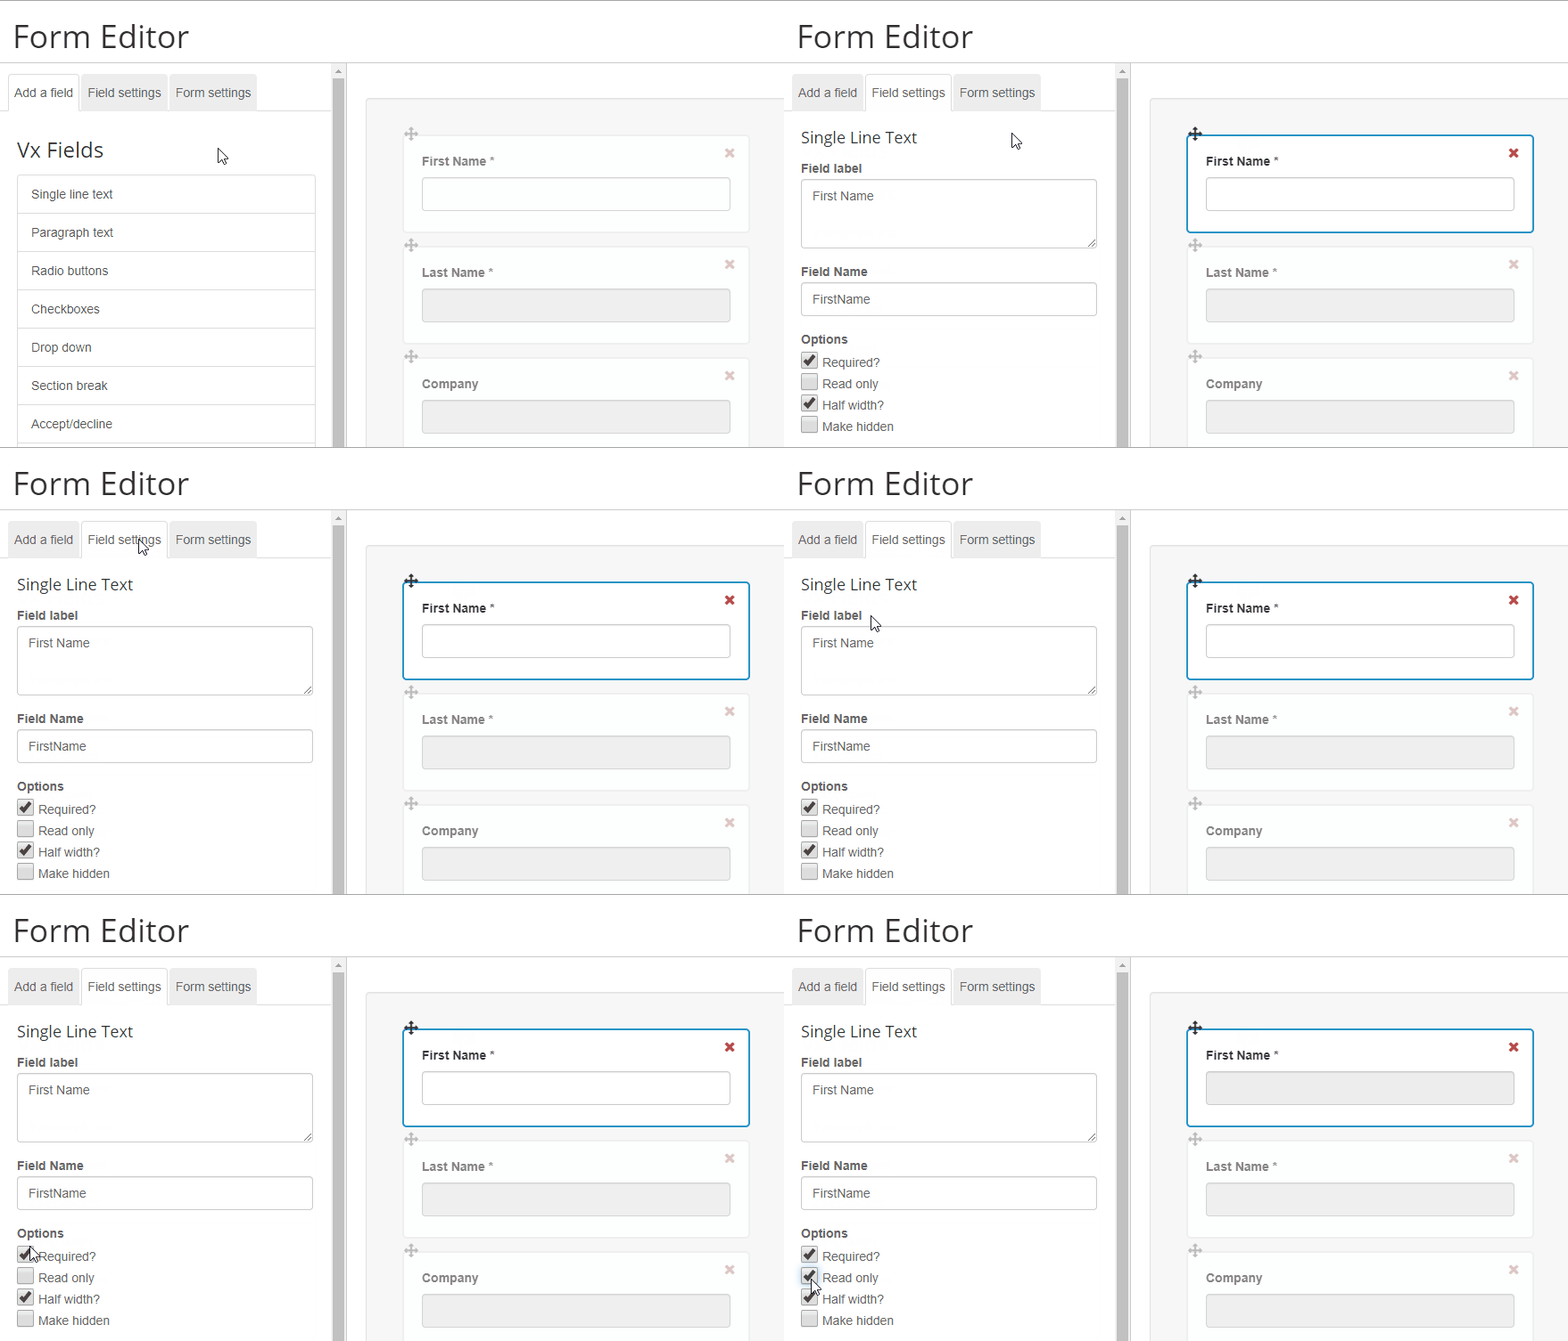
To lock down the Pre-filled RSVP Form, the "First Name", "Last Name" and "Email Address" fields all need to be required and read only. Any other fields on this form (e.g. Company, Job Title, Phone, etc.) should be read only and not required. If you make the field required and that information is not available in your CRM or on your Vx List, the contact will not be able to submit the form.
Add a link to the Preference Form
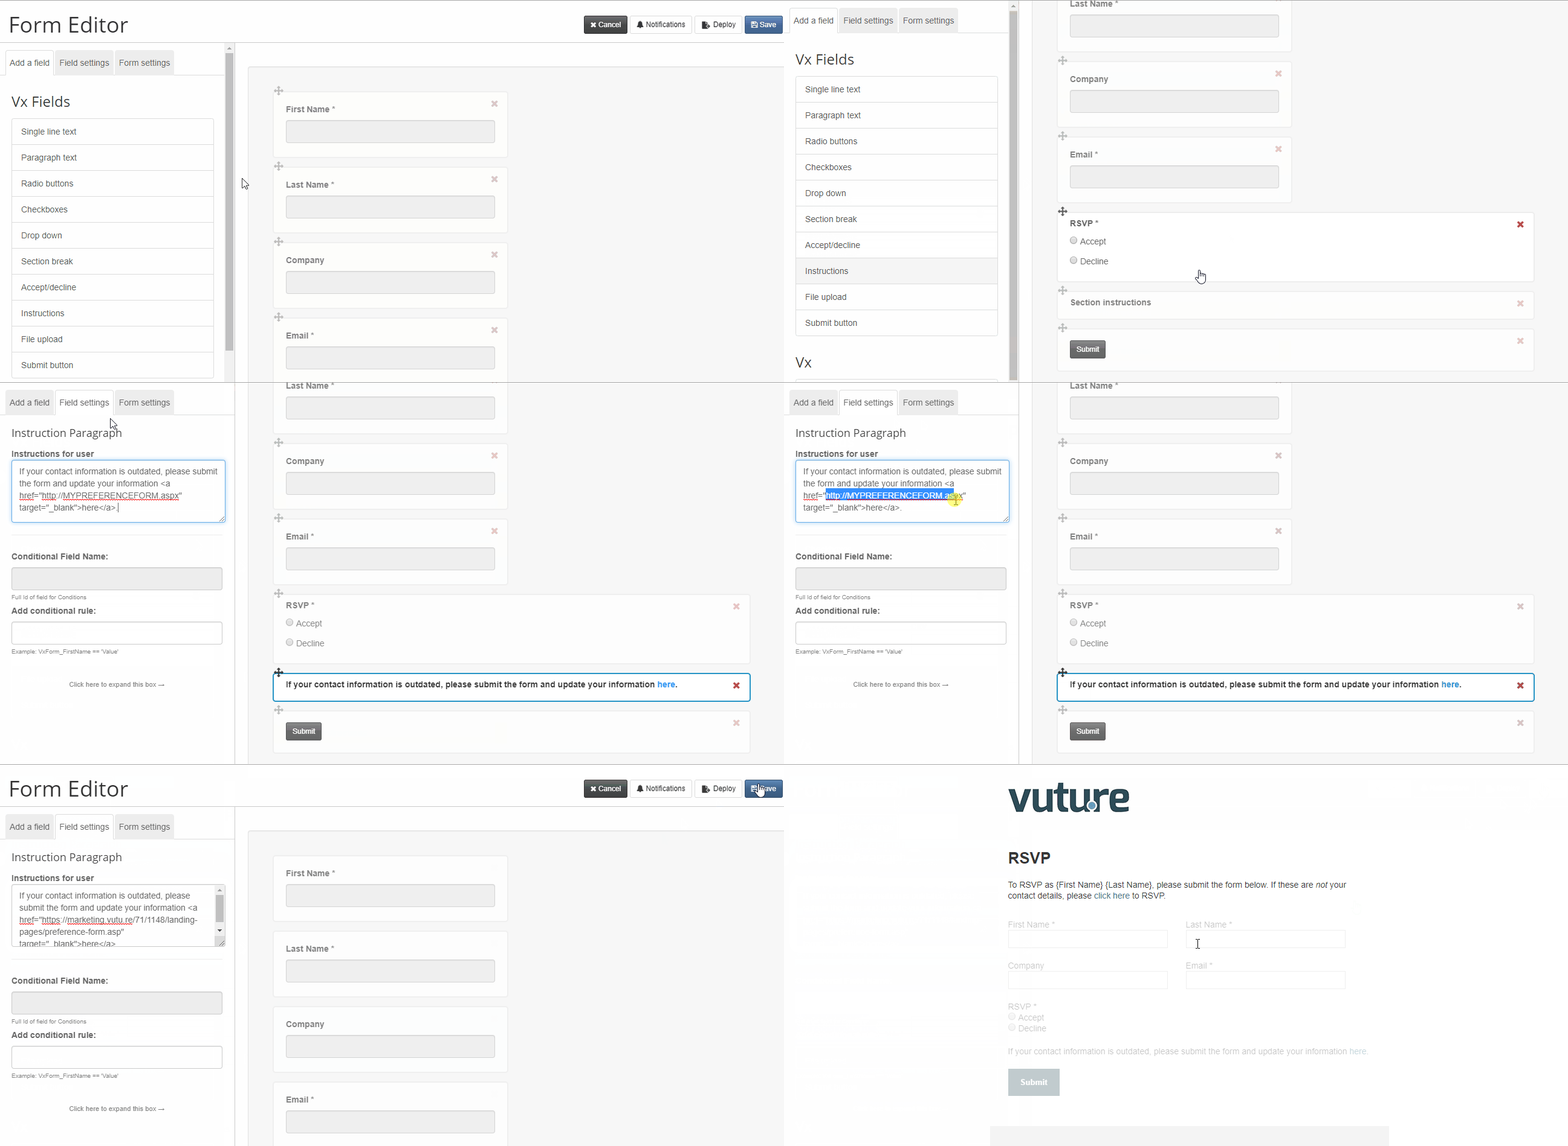
Now that this form is locked down, you may wish to give the original contact the option to update their contact information (e.g. Name or Job Title) by linking to their Preference Form. It is recommended to place this right above the Submit button using an "Instructions" Vx Field. You may copy the code below and place it into an "Instructions" Vx Field. Be sure to replace the link with a link to your Preference Form.
If your contact information is outdated, please submit the form and update your information <a href="http://MYPREFERENCEFORM.aspx"" target="_blank">here</a>.
For more help, see the screenshot below:
*For Standalone clients (e.g. Vx Lists and/or Contacts Module):
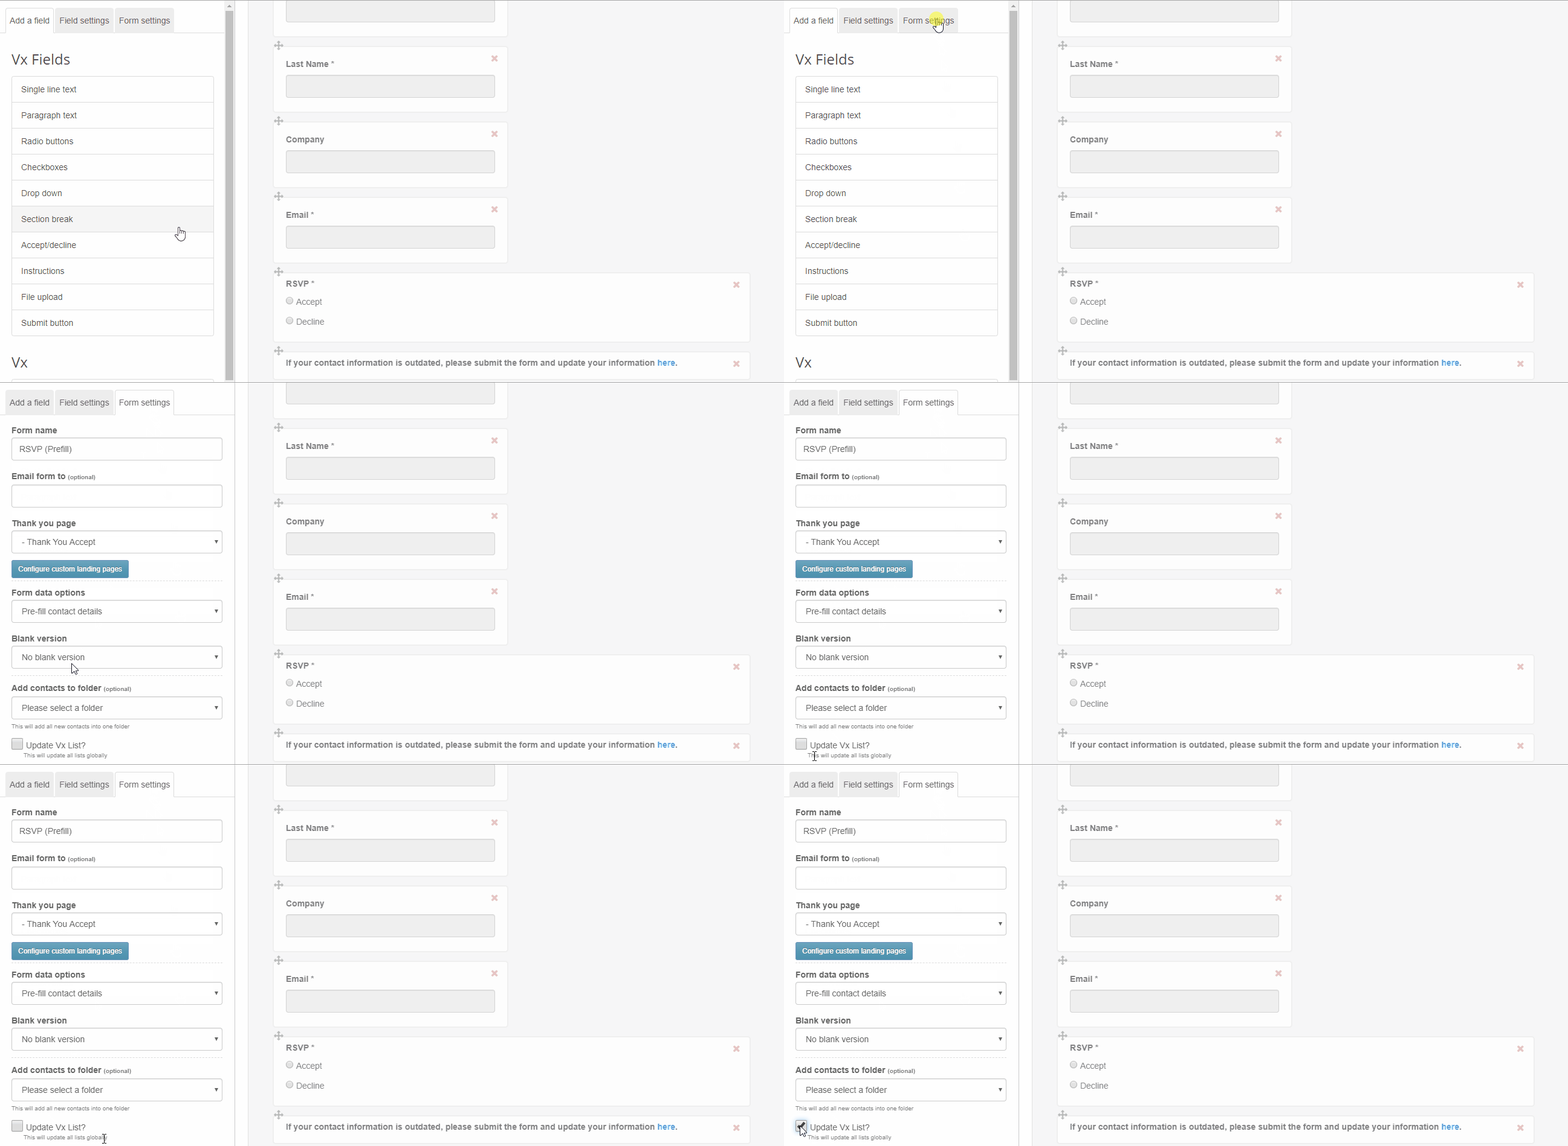
On the RSVP Pre-filled Form, make sure the "Update Vx List?" checkbox is checked under Form Settings, then save. This will update the Vx List with RSVP data. See below screenshot to follow along.
Best Practice Tip: Save these changes out to your Event Sub-Template(s). That way, these changes will appear in all newly created email campaigns based off this Sub-Template.
RSVP Blank Form
Mark "First Name", "Last Name" and "Email Address" as Required
As a bare minimum, the Blank RSVP Form should have the following fields marked as required: First Name, Last Name, and Email Address. If you're using a CRM integrated with Vuture, Vuture needs this information to create or amend a contact record in your CRM. If you're using Vuture standalone with a Vx List or the Contacts Module, Vuture needs this information to update the Vx List or add a contact to a list*.
*For Standalone clients (e.g. Vx Lists and/or Contacts Module):
On the RSVP Blank Form, make sure the "Update Vx List?" checkbox is checked under Form Settings and be sure to select a folder (a.k.a. a Vx List) to add new contacts to. This will add the new contact to the Vx List you chose to track all RSVPs for the Blank Form.
Please note: The "Add contacts to folder" under "Form Settings" will need to be done for every RSVP Blank Form for Standalone clients to tie the RSVP data to that specific Event List. For this reason, it cannot be saved with a Sub-Template and should be left at the default "Please select a folder".
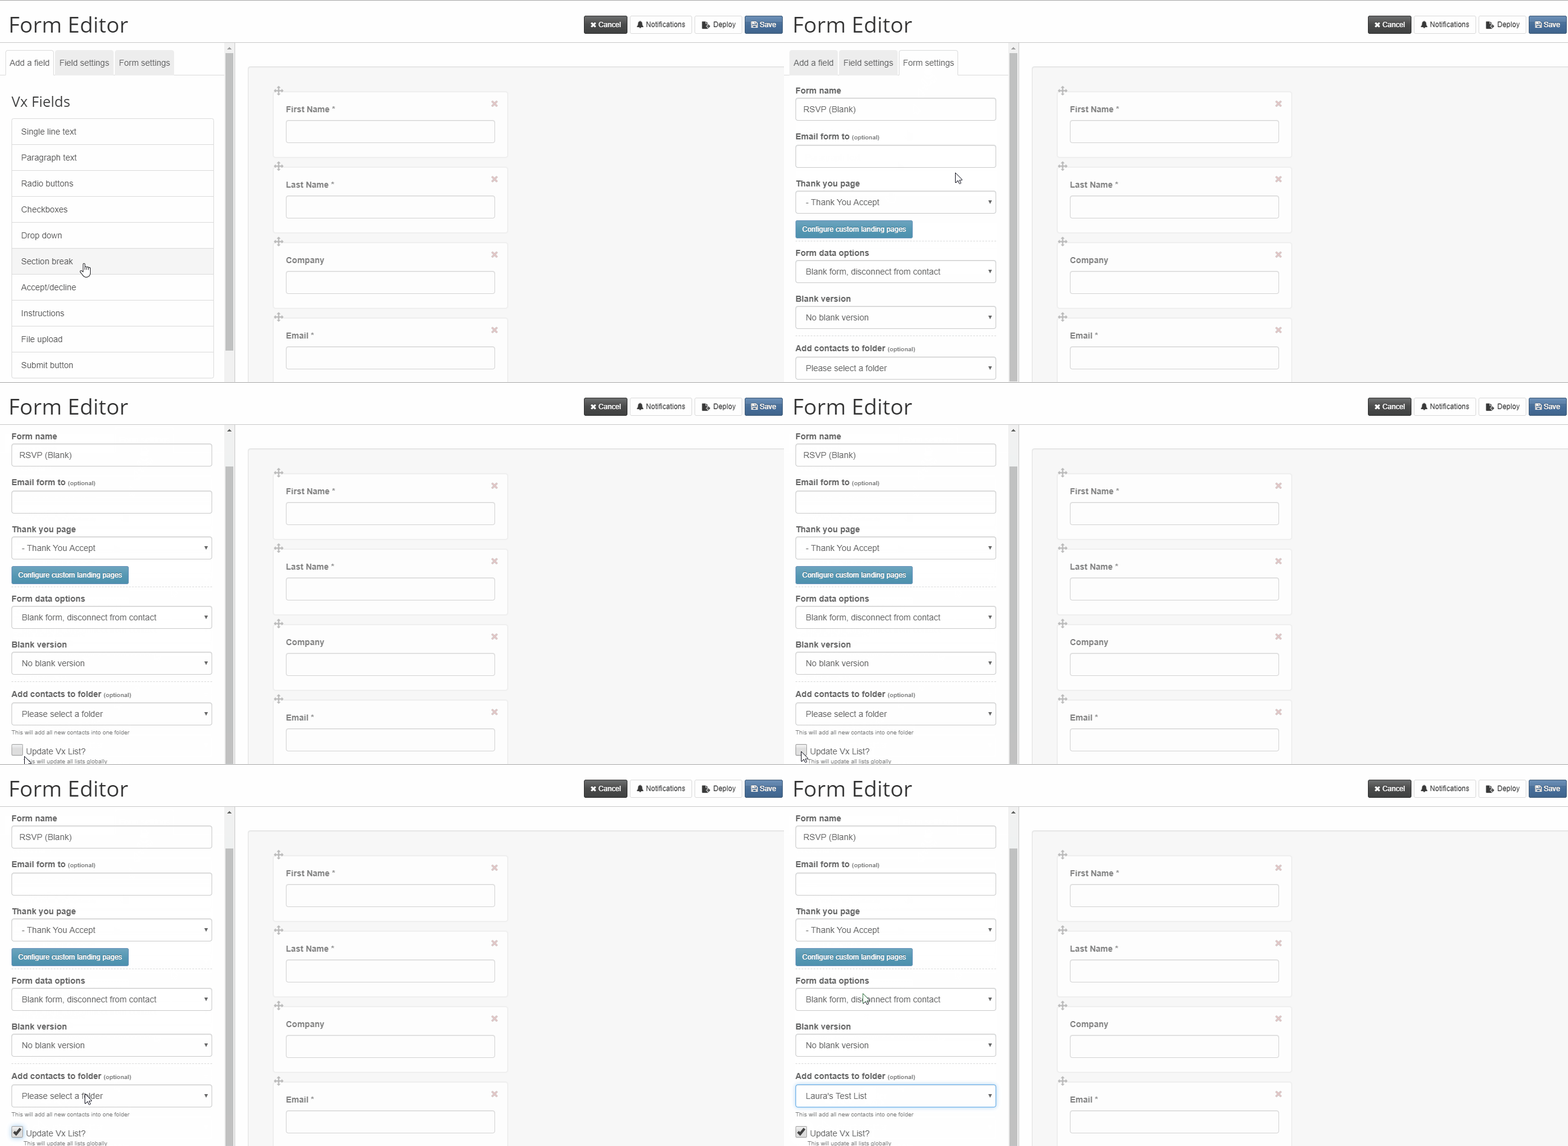
Best Practice Tip: Save these changes out to your Event Sub-Template(s). That way, these changes will appear in all newly created email campaigns based off this Sub-Template.
How should I set up my image library?
The Vuture platform has two built-in Image Libraries: a Global Image Library and a Container Image Library. The Global Image Library allows you to access images globally, regardless of what container you are in. The Container Image Library allows you to access images in that container only.
You should discuss internally which images would be beneficial to have globally (e.g. bio photos) and which images should be locked down to particular containers (e.g. Client Alert or Newsletter banners).
Once you have an idea about what types of images you wish to have access to, you can create the image folders, and upload your images. For a "How To", please click here.
