Keywords: Trigger, Triggers, Preference Mailing, InterAction, Standalone.
Overview
This article will guide you through how to use Triggers to manage a preference mailing with InterAction as your data source.
As part of your list hygiene strategy, it is recommended to:
- Check in with engaged contacts (i.e. those who are opening/clicking) asking them to update their preferences (areas of interest / contact information) often.
- Touch base with disengaged contacts (i.e. haven't been opening/clicking) to confirm if they would still like to receive emails from you.
Both processes can be done with an initial email to update preferences / confirm they'd like to continue to receive your emails and a series of reminder emails for those who do not respond. For the non-engaged contacts, if they do not respond to your third and final reminder email, it is recommended to archive them in your database/remove from active mailing lists.
We'll walk through how to automate both of these processes using a 'Date' Trigger and three 'Link Not Clicked' Triggers. The only real difference between the two is your audience (i.e. engaged vs. non-engaged).
Please note: These instructions will also work for Vuture clients using CSV files or the Contacts Module as their data source.
Step by Step Instructions
Step 1 - Create the list of contacts you wish to send this Mailing a Preference campaign to.
If non-engaged contacts (i.e. haven't opened or clicked in the past 6 months), be sure to ask if they'd like to continue to receive your email communications. This will show ISPs that you are trying your best to clean up your data.
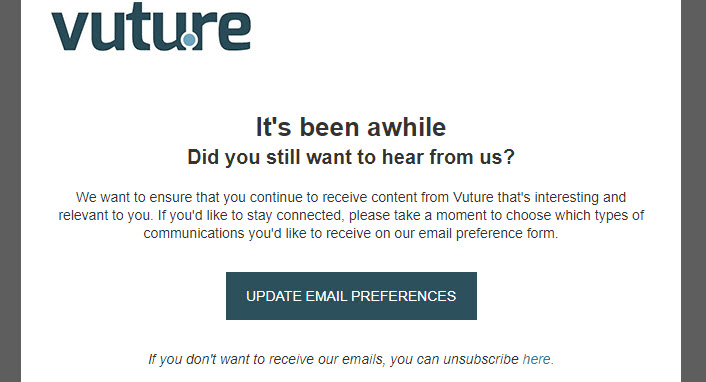
Step 2 - Create the email you wish to send out with a link to your Preferences form. You may also wish to include a link to your Unsubscribe form.
Below is an example for reference.
Step 3 - Copy the email and rename it 'Reminder 1'. Then copy 'Reminder 1' and rename is 'Reminder 2'. Then copy 'Reminder 2' and rename it 'Reminder 3'.
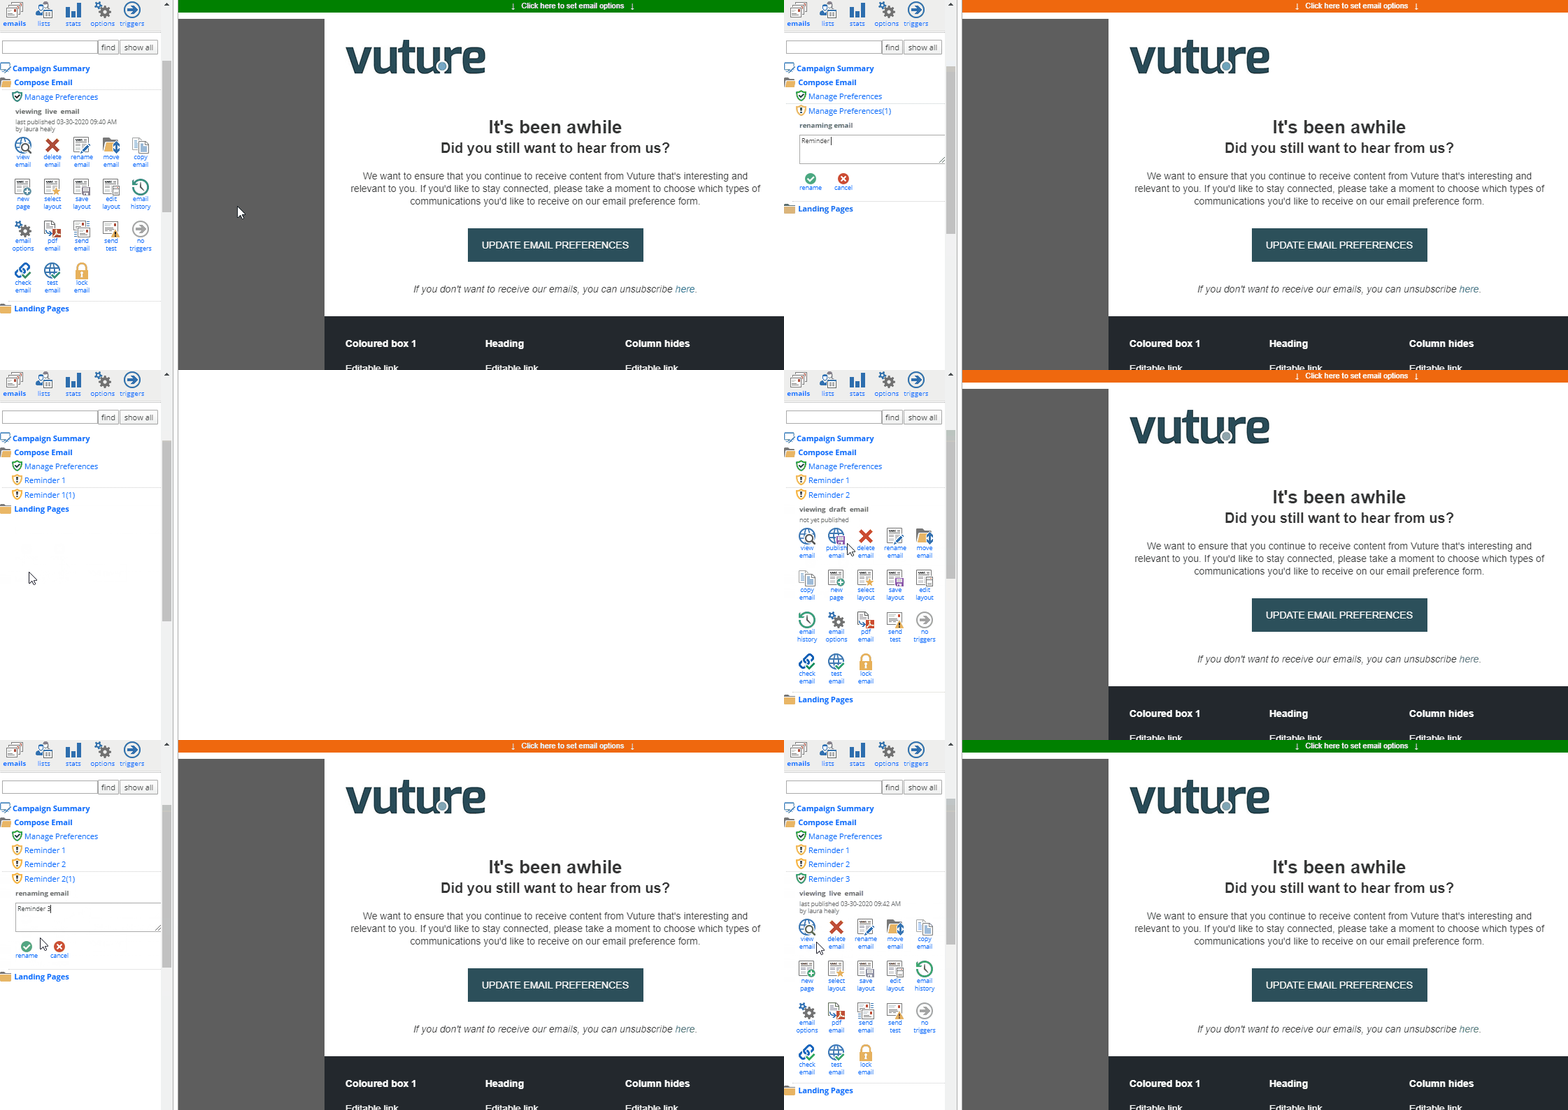
Make any changes to the language in these emails. For example, "Did you still want to hear from us?". You may wish to include language on the third and final reminder of what will happen next (i.e. they will no longer receive your emails).
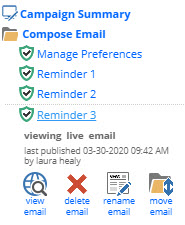
Publish all emails. Your Compose Email Folder should look something like the below.
Note: Unsubscribes will be honored.
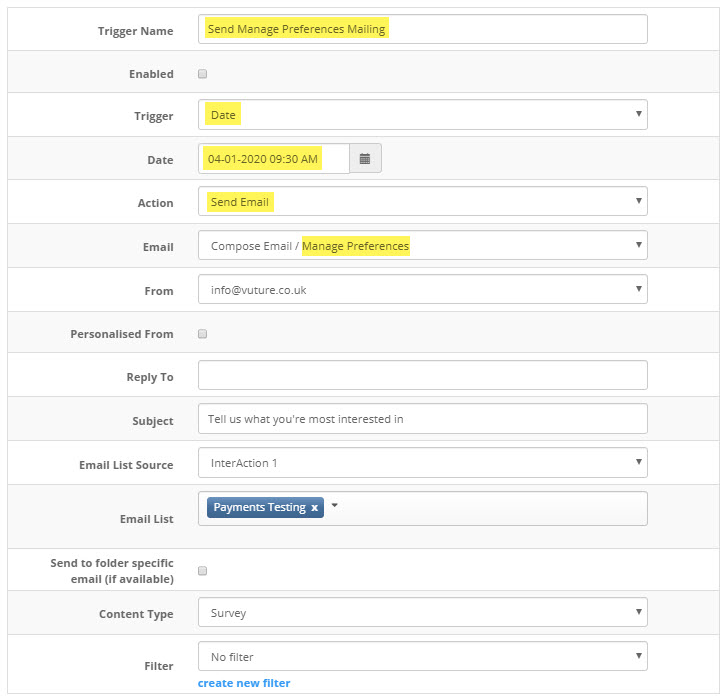
Step 3 - Setup the 'Date' Trigger to send the initial email with the link to update email preferences. You will find full instructions on how to set up this trigger here (steps 3 - 12).
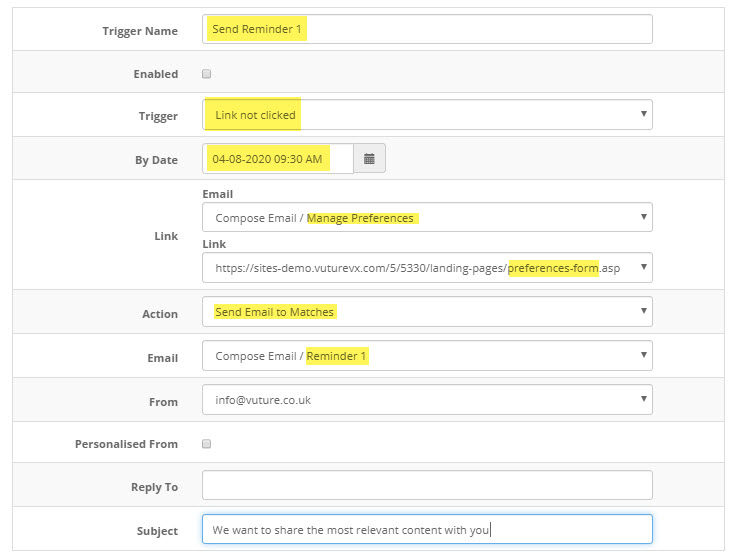
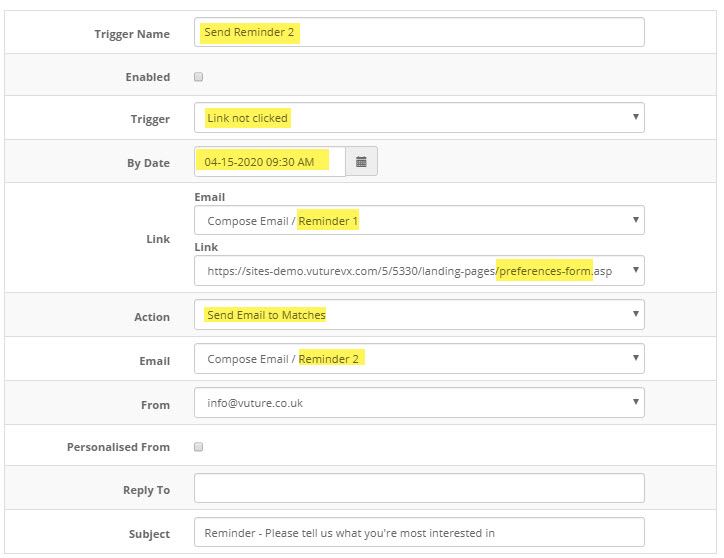
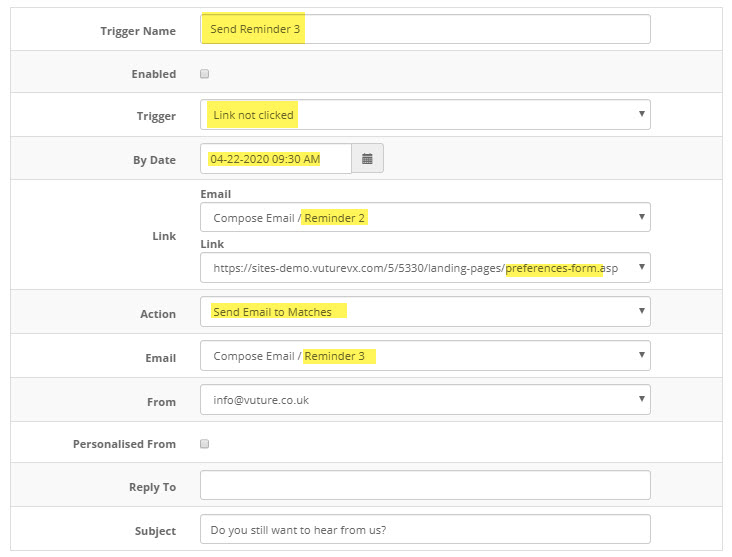
Step 4 - Setup 3 'Link Not Clicked' Triggers to send the 3 reminders to those who do not click on the 'Update Preferences' link. Each of the 3 'Link Not Clicked' Triggers, could be one week apart at the same time you sent the original manage your preferences email.
Please note: If someone were to unsubscribe, and did not click on the 'Update Preferences' link, they would be suppressed from the Reminder email send.
For full step by step instructions on how to setup these 'Link Not Clicked' triggers to send another email if a link is not clicked, click here (steps 3-14).
For reference, please see the below 3 screenshots for each Reminder email, using the 'Link Not Clicked' Trigger.
Reminder 1
Reminder 2
Reminder 3
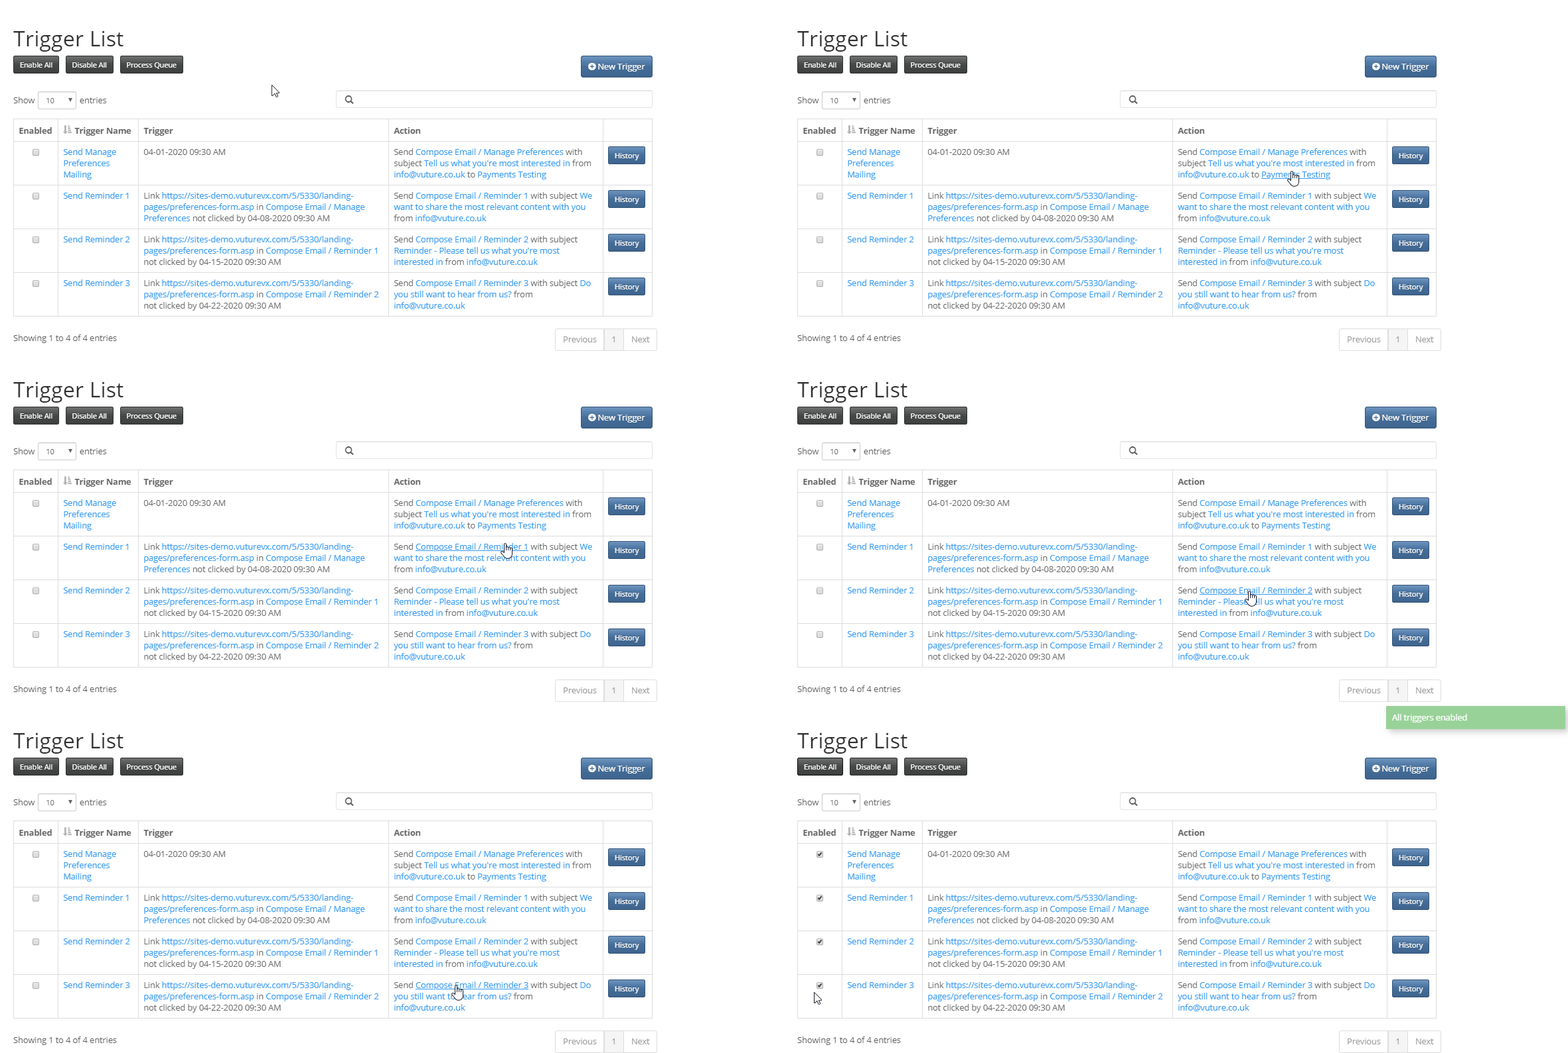
Step 5 - Double check your setup and that everything is correct (i.e. Date, Time, Reminder Email to Send, Subject Line, (etc.). Then when you're ready, from the Trigger List Screen, check the box for 'Enable All' to enable all of your triggers. The trigger will then send the first 'manage your preferences mailing' on the date/time you specified and the reminder emails will go out only to those who have not clicked on the Preferences Form link in the time you specified.
For those who have not responded to all 4 emails in this manage your preference campaign and have not opened/clicked in the past 12 months, should be archived from any future mailings as part of your list hygiene strategy.