This article is for users of InterAction. There is an article for Vuture Standalone users here.
There is a document attached to the foot of this article which explains Campaign Types in more detail, and gives some step by step examples of how (and when) to create new Campaign Types.
From the Campaign Type and Activity Template screen you can create templates that allow you to do the following:
- Suppress a mailing on specific lists; and/or
- Customize the information that appears on your CRM activity summary and notes
To access the Campaign Type and Activity Templates screen you must ask your Account Manager to make sure it is enabled for your role in Admin.Roles.Email.Campaign Types.Display Campaign Types in the Email Types dropdown on the Send Screen.
To create an Email Type or an Other Campaign type template, follow the steps below:
Step 1. From "Admin.CampaignTypes & Activity Templates" select your CRM source:
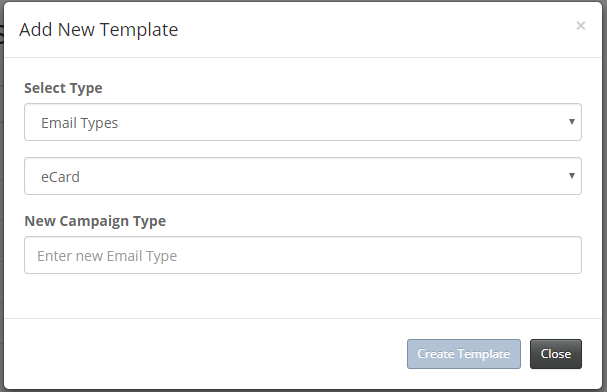
Step 2. To edit an existing template simply select it from the list. To create a new template click on “+ New” and choose from the available Email Types or create a Non-email Type, which are used for custom link clicked or form submitted activities.
Email Types
- Select a category for your template, e.g.Invitation, Publication, E-Card etc. This will mark the default for activities that aren't customized in the template.
- New Campaign Type: enter the name for your new template (e.g. UK newsletters)
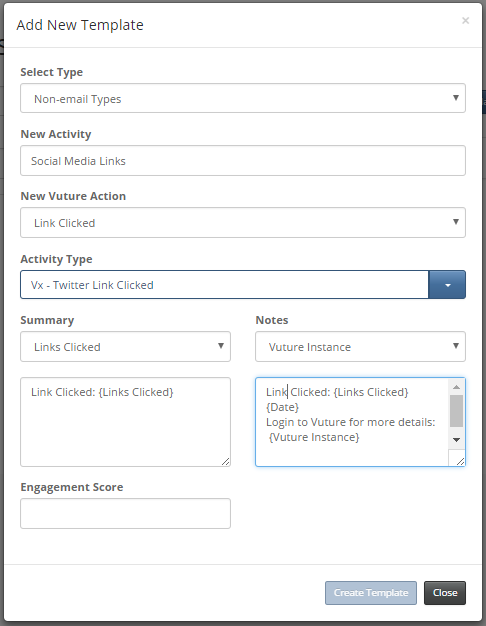
- Other Campaign Types
Non-email Types.
- New activity: enter the name for your new activity (e.g. Newsletter links)
- New Vuture Action: select which action will be linked to the CRM activity
- Activity Type: select which activity will be written back to your CRM. Please note, this functionality currently only caters for Links Clicked and Webtracking activities
- Summary for the activity to be written back to your CRM
- Notes: notes or description for the activity to be written back to your CRM
- Engagement score: Add a specific score to each activity. The following Vuture dashboards contain reports with Engagement Score based on pre-set values for Links clicked
- Business Development Dashboard – Individual
- Business Development Dashboard – Company
- Company Activity Dashboard
When the campaign type scores are not set, the system will revert to the default scores for the dashboards, which is 2 points for links clicked.
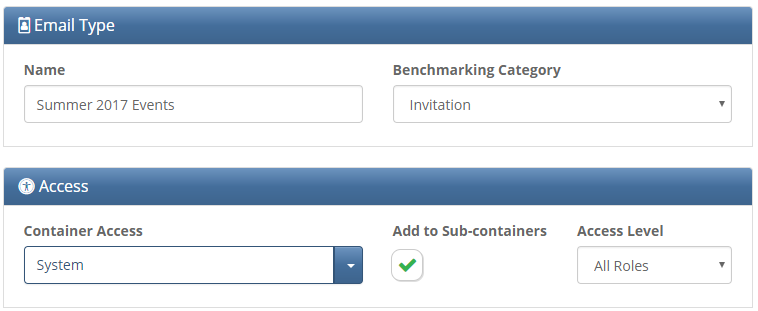
Step 3. Within your new or existing Email or Other Campaign templates you can edit and specify:
- Template Name and Category
- Container access: this access defines in which containers this template will be accessible
- Access level: this defines which roles will be able to select this specific template when sending an email or editing a link
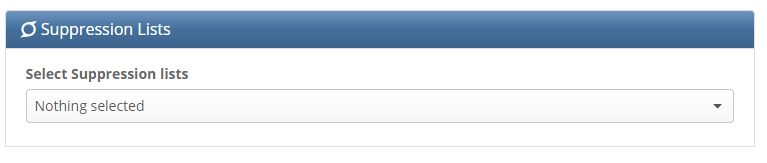
Step 4 (optional). Specify suppression lists: when this Email type template is selected for an email send, any contacts that are in the lists chosen as suppressed in this field won’t receive the mailing.
You should not add your bounce folder to this list as it is picked up automatically.
Please note IA users, you will have to enable the "InterActionTask" service in Admin.Services.
Note, this step is only available for Email type templates.
Step 5. Click on "New Activity".
This will open the activity template pop-up. The content saved in this area will dictate what is written back into your CRM activities for the specific template and the Vuture action related to the activity.
To ensure your activity is dynamically updated, use the placeholders provided. Please see the definition of these placeholders below.
You may also add an engagement score for the different activities. At the moment, the following Vuture dashboards contain reports with Engagement Score based on pre-set values for Email opens only
- Business Development Dashboard – Individual
- Business Development Dashboard – Company
- Company Activity Dashboard
When the campaign type scores are not set, the system will revert to the default scores for the dashboards, which is 1 point for email opens.
Once you’re happy with a specific activity type you must click “save” and proceed to add the next activity type for the same template. You will notice your activity summary and notes have been successfully saved as they will appear on the top right.
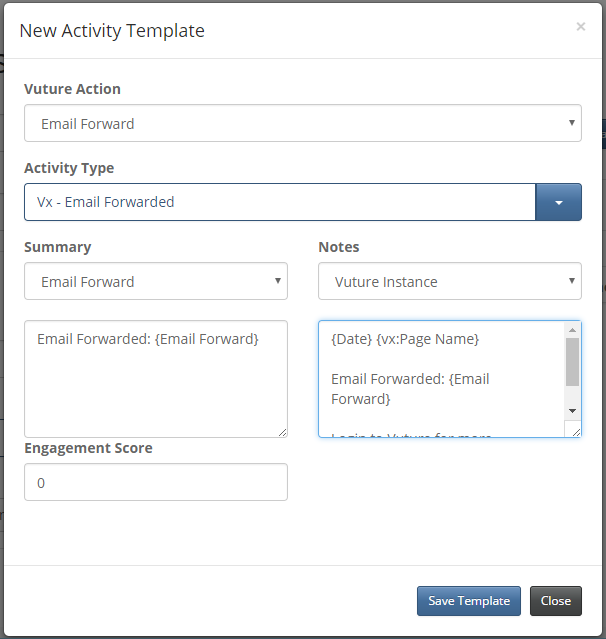
When you are finished with your template click “Save” and it will be ready to use. If you click “reset” this won’t delete any saved changes but it will take you to Step 1.
You may delete a Campaign Template only if it has not been used in an email send. If it has you will only be allowed to disable it.
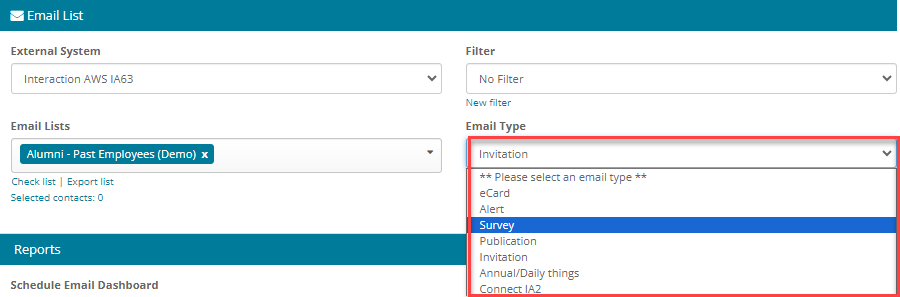
Selecting an Email Type Template when you send an email
You will use the Email Type template you have created when you’re ready to send an email. Once in the send email screen select your desired Campaign type template from the “Email Type” dropdown.
Once the email has been sent with the selected template, the activities recorded in your CRM should match the summary and notes defined in the Campaign type and activity templates page. If you have marked any suppressed lists in the template, then they should apply for this send.
Selecting an Activity Template for a link clicked
Activity templates for links are set on a link to link basis through the link manager or in the image editor.
Pre-requisites - the following options must be configured before using this feature. They can be checked by your Customer Success Manager or the Support Team
- Enable the link shortener using the system config: "Admin.System.Email.EnableLinkShortener".
- Set "Admin.System.Versions.TinyMce Link Picker Version" to "Version 3"
- Set your InterAction to write back separate activities for each link click. This can be done by disabling "Admin.System.InterAction.Combine links clicked into one activity". Note this will apply to all links clicked, not just those set up using Activity Templates, and will potentially generate a large number of additional activities in your InterAction.
Link manager
- Once you have defined which is your link, click on the link manager within the text editor panel
- Make sure you give your link a title in the “Insert/Edit link” tab as this will be the name of your link when you select to show it in your activity.
- If you wish to record an activity for the selected link, you must select an activity template from the dropdown in the “Insert/Edit” tab. This will determine the summary and notes written back to your CRM when this specific link is clicked. Please Note: You will need to have previously created an Activity Template for it to show in this drop down list. See the New Activity Template section above. If this field is left empty the system won’t record an activity for the link unless you have enabled all links to be recorded, in which case it will pick up the default settings
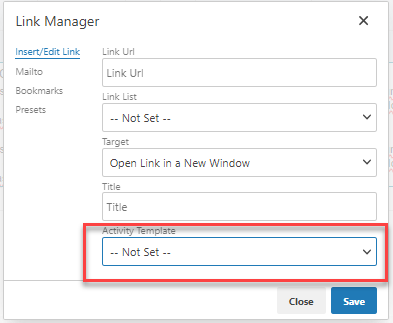
Image Editor
- Once you have defined which image will have a link, click on the image and once in the image library, select it and click on “Create link”
- Make sure you give your link a title as this will be the name of your link when you select to show it in your activity
- If you wish to record an activity for the selected link, you must select an activity template from the dropdown. This will determine the summary and notes written back to your CRM when this specific link is clicked. If this field is left empty the system won’t record an activity for the link, unless you have enabled all links to be recorded, in which case it will pick up the default settings
Selecting an Activity Template for a form submitted
Note, this feature is currently under development and will become available in a future release. Until then, you can specify activities for a form explained here.
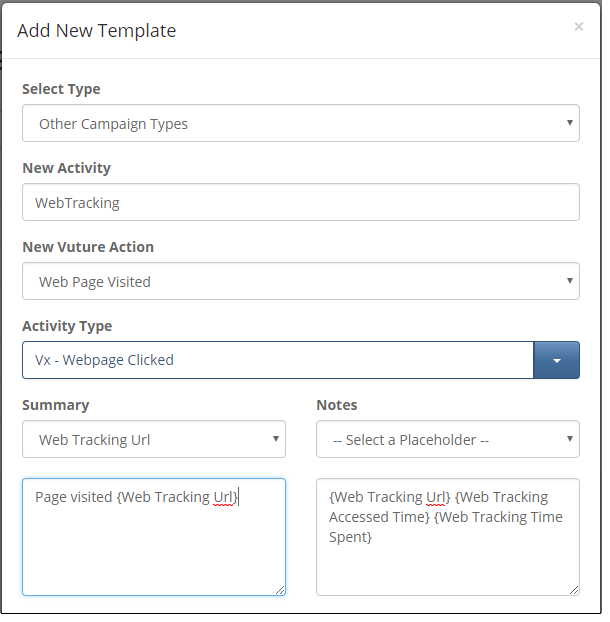
Setting a template for webtracking
The summary and description of a web visited activity (used for Webtracking) can be edited in the Campaign and Activity templates screen. The same template will apply to every page being tracked so you will only be allowed to create one template for this type.
Placeholder Descriptions
For use with Email Types - Email Open and Email Sent Activities
| {From Email} | Sender Email |
| {vx:Contact List} | Name of the contact list to which the email was sent |
| {vx:Combined Links Clicked} | Combined links clicked for an open email (when you have enabled the combined links setting) |
| {vx:Page Name} | Name of the page |
| {vx:Campaign Name} | Name of the email campaign |
| {vx:Campaign Link} | Link to the campaign in Vuture from which it originated. Only Vuture users will be able to access this page. |
| {vx:Page Url} | Full URL of the page (same as the URL of the published page if you click "view page") - note this URL changes if the page or folder are renamed |
| {Time} | Time when the activity was recorded |
For use with Email Types - Email Forwarded Activity
| {vx:Email Forward} | Email to which the page was forwarded |
| {From Email} | Sender Email |
| {vx:Contact List} | Name of the contact list to which the email was sent |
| {vx:Page Name} | Name of the page |
| {vx:Campaign Name} | Name of the email campaign (recently added) |
| {vx:Campaign Link} | Link to the campaign in Vuture from which it originated. Only Vuture users will be able to access this page. |
| {vx:Page Url} | Full URL of the page (same as the URL of the published page if you click "view page") - note this URL changes if the page or folder are renamed |
| {Time} | Time when the activity was recorded |
For use with Email Types - Email bounced Activity
| {Email} | Recipient Address (mostly used for Bounce activities) |
| {vx:From Email} | Sender Email |
| {vx:Contact List} | Name of the contact list to which the email was sent |
| {vx:Bounceback Reason} | High level reason for bounce |
| {vx:Page Name} | Name of the page |
| {vx:Campaign Name} | Name of the email campaign (recently added) |
| {vx:Campaign Link} | Link to the campaign in Vuture from which it originated. Only Vuture users will be able to access this page. |
| {vx:Page Url} | Full URL of the page (same as the URL of the published page if you click "view page") - note this URL changes if the page or folder are renamed |
| {Time} | Time when the activity was recorded |
For use with Email Types - Unsubscribe Activity
| {From Email} | Sender Email |
| {vx:Contact List} | Name of the contact list to which the email was sent |
| {vx:Unsubscribed List} | The list from which the contact unsubscribed |
| {vx:Page Name} | Name of the page |
| {vx:Campaign Name} | Name of the email campaign (recently added) |
| {vx:Campaign Link} | Link to the campaign in Vuture from which it originated. Only Vuture users will be able to access this page. |
| {vx:Page Url} | Full URL of the page (same as the URL of the published page if you click "view page") - note this URL changes if the page or folder are renamed |
| {Time} | Time when the activity was recorded |
For use with Other Campaign Types - Link Clicked Activity
| {vx:Link Title} | “Link title” field in the link manager |
| {vx:Link Clicked} | Link clicked / URL in the link manager |
| {vx:Campaign Name} | Name of the email campaign (recently added) |
| {vx:Campaign Link} | Link to the campaign in Vuture from which it originated. Only Vuture users will be able to access this page. |
| {Time} | Time when the activity was recorded |
For use with Other Campaign Types - Web Tracking Activity
| {vx:Web Tracking URL} | URL visited |
| {vx:Web Tracking Accessed Time} | Time when the URL was visited |
| {vx:Web Tracking Spent Time} | Time spent on the visited URL |
| {Time} | Time when the activity was recorded |
There is a document attached to the foot of this article which explains Campaign Types in more detail, and gives some step by step examples of how (and when) to create new Campaign Types.