Overview
Triggers are a piece of paid functionality which allow the user to create rules that, given certain conditions, perform a certain action automatically. For example a Page can be published automatically, triggered by selecting a specific date.
There are no pre-requisites for making triggers work with the Website module other than enabling them.
How to enable Triggers
If triggers for websites are not enabled in your system please contact your Account Manager or Vuture Support who can enable them through "Admin.System.Triggers.Triggers Enabled".
For triggers to work in the Web module, Trigger Version 3 should be enabled through "Admin.System.Versions.Triggers Version: 3" and in "Admin.Roles" for the specific role.
Where can I find Triggers?
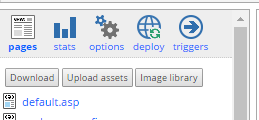
Individual triggers are associated with websites. You can access the Triggers for a certain website by selecting the "triggers" option in the website menu.
Trigger List
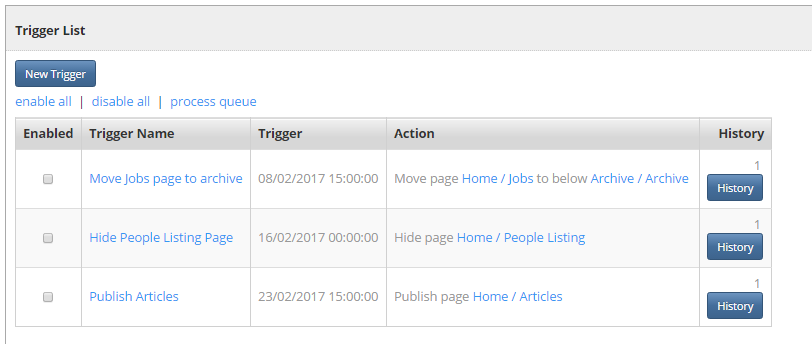
When in the Triggers screen you are presented with the list of Triggers associated with the current website.
Trigger Commands
Enable All
“Enable” effectively makes a trigger “Live”. Triggers will only work if they are enabled (note that certain kinds of Triggers can only fire once, so even enabled they won't fire again if they have a history value of 1)
Disable All
Stop all Triggers
Process Queue
Process all Triggers right away without waiting for the Trigger Service. This can be used for testing. The Trigger Service is configured by your system administrator to check for Triggers periodically (default is every 5 minutes).
Trigger List Fields
Enabled
Shows if the Trigger is enabled or disabled.
Trigger Name
Trigger's name given by its creator. It is advised to use a descriptive title and keep it unique if possible.
Trigger
Description of the condition that has to be met for the Trigger to fire.
Action
Action that will be performed by the Trigger if the conditions are met.
History
How many times there has been an action against the Trigger including if it has been fired.
Creating a Trigger
When you click on the New Trigger button in the triggers screen, you're sent to the Edit Trigger screen where you can create a new trigger or edit an existing one.
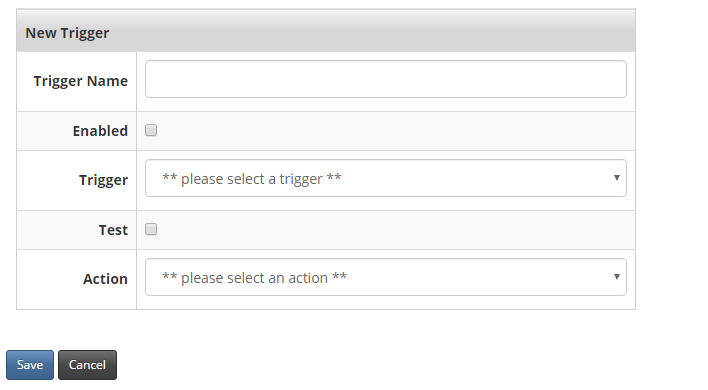
You're presented with 4 items you need to choose to create a Trigger:
Trigger Name
A descriptive and unique name so you can easily distinguish the trigger among the others in the trigger list
Enabled
Determines if the Trigger is enabled or disabled. It is advised to leave this box un-checked until you have finalised preparing all your new triggers.
Trigger
Defines the condition that has to be met in order for the trigger to fire, for example, a date is reached.
Action
Action that is performed when the Trigger fires, for example, a page will be published.
We will look in detail each one of the available triggers and actions that can be used.
Trigger Types
Date
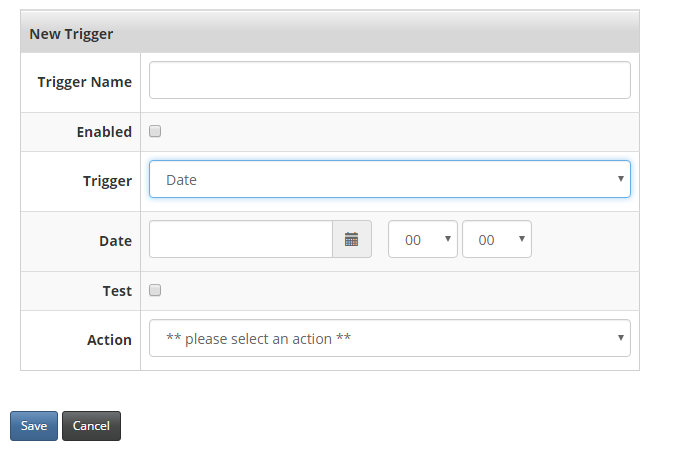
The "Date" Trigger is fired when the specified date is reached or passed.
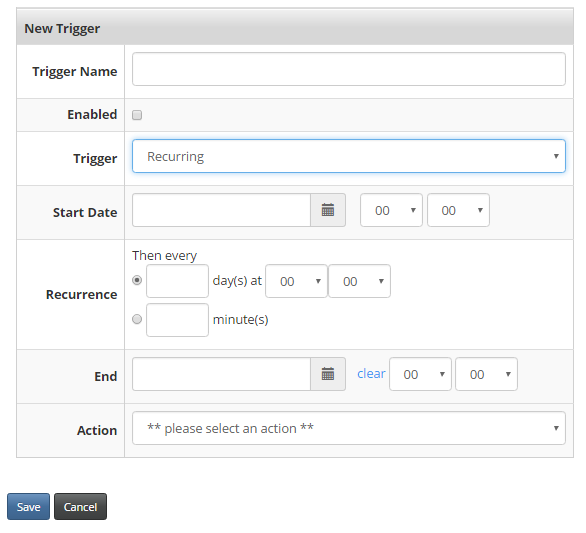
Recurring
The "Recurring" Trigger is fired at its starting date as well as every certain number of days at a certain time until it reaches its end date.
Trigger Actions
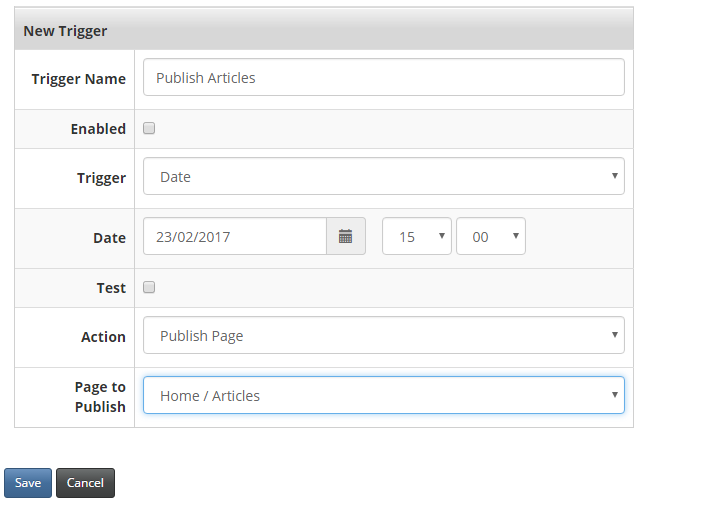
Publish Page
It publishes a selected page on the website. The user must provide the page to publish when creating the trigger.
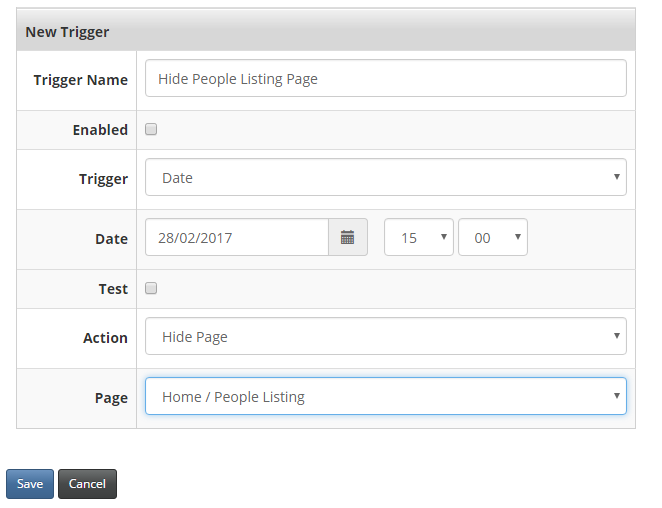
Hide Page
It hides a selected page on the website. The user must select the page to be hidden when creating the trigger.
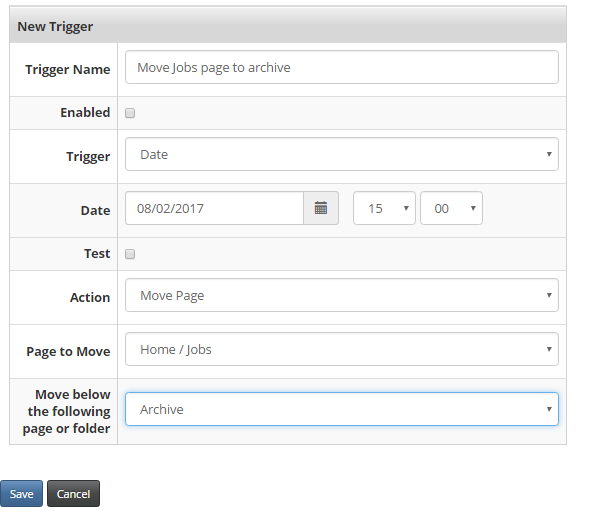
Move Page
It moves a selected page to a different folder in the website. The user must provide the page to be moved as well as destination when creating the trigger.
Generate Site Map
You can automatically generate a site map for your website at a selected date or recurring schedule.
If the trigger is setup on a recurring schedule, you should see the history logs increase and sitemap.xml will be updated in the root directory at the requested recurrance time.
Enable Triggers / Disable Trigger
This enables or disables all the Triggers in the website.
