This article describes how to create new templates; manage new templates and how to apply new templates to the correct container. It applies to users of all crm integrations and none (standalone).
Update
Since the November 2018 Feature Release, there is now a new way that you can choose to manage sub-templates in your system. The article below still applies if you want to use the current method, but as an alternative, why not check out here for an article on Template Campaigns?
Contents
Overview of sub-templates
Creating a new sub-template
Step 1 - Building the sub-template
Step 2 – Turning your campaign into a sub-template
Step 3 – Apply the new sub-template to the correct container(s)
Videos
You can watch the below videos for help, too.
Overview of sub-templates
The set of templates initially supplied to you by Vuture will contain all the design and snippets you have specified during your project. These are known as the Master Templates and you should not make any attempt to edit them yourself. If you accidentally damage or delete them they would have to be recreated from the beginning. For this reason, the Master Templates container is not usually accessible for most users and any necessary changes to the Master templates are usually carried out by Vuture staff.
Warning: It is very important that you do not amend or delete the Master Templates supplied to you by Vuture. If you make an unintended change you will not get it changed back without a further charge.
To create a “quick start” template and to cut down the opportunities for error, Vuture SuperAdmin users can take a copy of a Master template, edit it to be appropriate for one office, practice area or work stream and then save that publication as a sub-template. This sub-template can be made available for other users to use with no risk to the Master Templates.
As an example, if you are a global firm with offices around the world, you may find it useful to have different sub-templates for each office. These would be copies of the Master templates, with the relevant office address, footers and other details already completed for your users.
It is not required to start with a Master template each time. You can create a sub-template from an existing campaign (see To Use an existing campaign as a sub-template on page 15 of this document).
Categories
Collections of variations on the Master template styles, called sub-templates, are held in groups called categories. You could have a category called London sub-templates, containing different layouts for use by London users, a category called New York sub-templates and so on for all your office locations. In each category there could be a London invite and a London newsletter, or a New York invite and a New York newsletter and so on.
Alternatively, you could have a content focus instead of a location focus and create categories called Newsletters and Events or have a category for each Practice Area or Department. There is no single correct way to do this. The choice depends on your own requirements; how much your email campaigns vary in look and feel and how much you want to “pre-set” for your users. If you are unsure, discuss the matter with your Project Manager or your Account Manager.
Here are two examples of the approach chosen by some of our clients:
Possible Scenario: Large firm
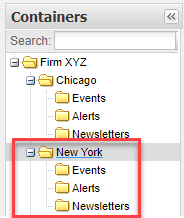
- Create containers for each office and then each mailing type at each office.
- Create a category called New York.
- Create a sub-template for each layout, one for events, newsletters, and alerts.
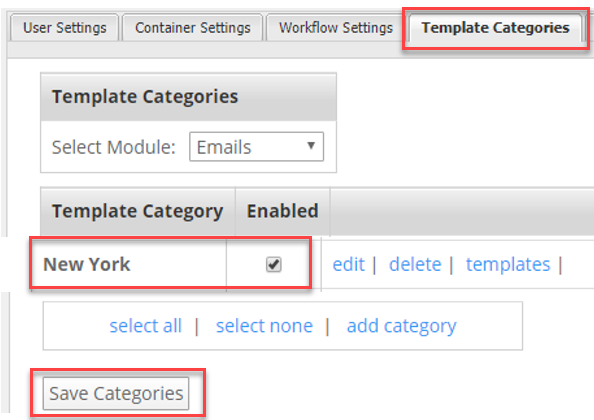
- Save these 3 sub-templates using the New York category.
- Apply the New York category to all the New York containers.
Possible Scenario: Smaller firm
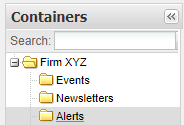
- Create containers for each mailing type.
- Create a category called Alerts.
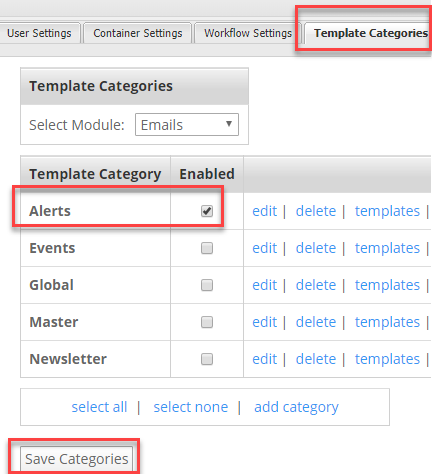
- Create a sub-template for Alerts.
- Apply the Alerts category to the Invitations container.
- Repeat for the other mailing types (Newsletters and Events).
Before you begin: It is helpful to create new sub-templates in a separate container and leave them there while you are working on them. Once they are built and approved you can add them to a category and then apply that category to one or more containers. This will make them available to your users.
Creating a new sub-template
There are 3 main steps in the process:
- Create a new campaign in the normal way (or edit an existing campaign)
- Save it as a Sub-Template and assign it to a Category
- Apply the Category to one or more containers
Create a new category
To prepare, create a new Category for each set of sub-templates you intend to build. You will need the Category to apply your finished sub-templates to the correct containers. You could build one sub-template per Category or several sub-templates per Category, depending on the approach you have chosen.
- To create the Category, go to the Admin area by clicking on the Admin tab from any container in the Email module and then select Containers and Users from the drop-down list.

- Once in the Admin area, click on the root container (the very top container in your container structure) and then on the Template Categories tab. Select Emails if you have more than one module installed.
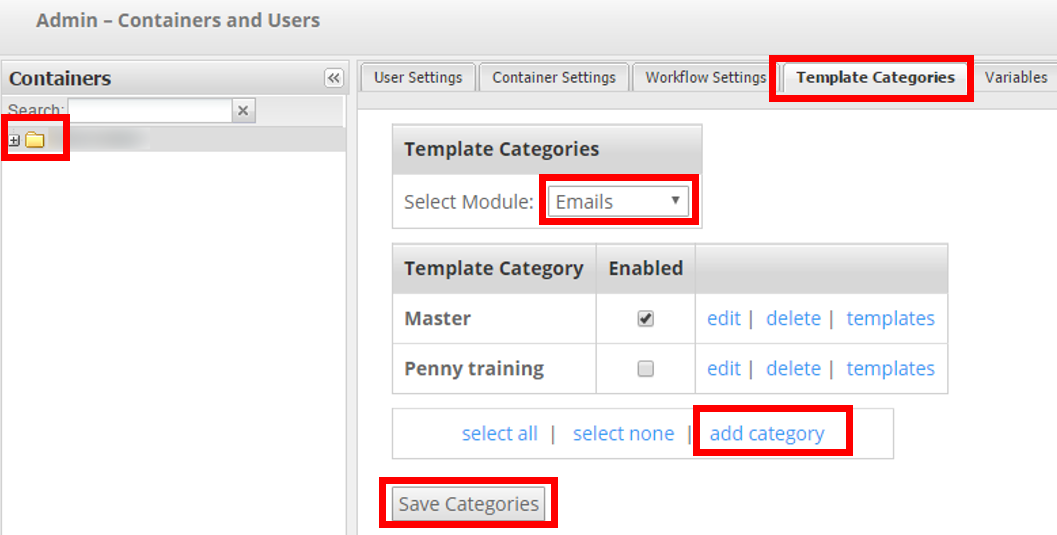
In the image above you will see that there is a category called Master which is selected for the root container (the firm’s name is blurred out in the root container). There is also a category called Penny training which is not selected.
- Choose Add Category and give the new category a name. The name should be descriptive of the planned content, so London Newsletters, for example, or just Newsletters, depending on how you have decided to structure this.
- Save the new Category.
You are now ready to build a sub-template to put into the new Category.
- Return to the Home area of your platform by clicking on Home.
Step 1 - Building the sub-template
- In the Home area of Vuture (not the Admin area), navigate to your sub-templates container or you could use any suitable container, usually out of the way of other users.
Click the link the Create Email Campaign and go through all the steps as if preparing a mailing, including:
- Adding images
- Putting ‘Body text goes here’ or other instructions for the users
- Using campaign variables such as {{Event-Title}} and {{Event-Venue}}
- Triggers (if using)
- Checking the logo file and footers on each page
- For an invitation sub-template, edit the landing pages and their footers as well, and publish as you go.
- Link any buttons or email addresses you have on the page. Link the Call to Action 'Register Here' button to your RSVP form but do not add the RSVP field to your form.
Note: Any mailing list you link to at this point is likely to be wrong when you use the sub-template later so it is safer not to have an actual link to a mailing list in your sub-template.
Including Triggers in your sub-template
- If you have Triggers installed, any Triggers built for your original campaign will be saved in the sub-template, just not enabled.
This will save you time and effort with no need to recreate them.
Note: When using the sub-template to create a new campaign later, you will have to change the mailing lists they are pointing to, and edit the dates they are set to trigger, and also enable them.
Delete pages you don’t need
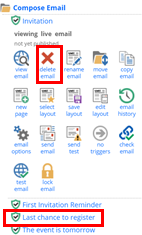
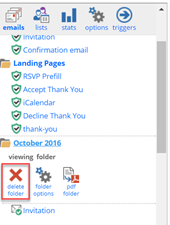
Once you have completed all the steps to create a generic campaign, publish it again to save it. You then need to delete the pages and folders which are not required in this sub-template by clicking on them and choosing the delete email or delete folder icon.
You can see in this image a page called Invitation, sitting in the Compose Email folder and a further page, called Last chance to Register, which is not required and can be deleted. Click on a page first to select it and then choose the Delete Email.
To use an existing campaign as a sub-template
In the copy, if your original campaign has already been sent out, go into the Monthly Send folder, click on the sent page (invitation or newsletter) and click on Resend. This will send a copy of the page back up into the Compose Email folder. Repeat for Confirmation, Reminder and so on until you have a copy of all the sent pages back in the Compose Email folder.
Warning: Ensure that you first take a copy of the successful campaign. This allows you to rename the copy for your use and retain the original for reporting purposes.
In this copied campaign, clean up the campaign by deleting any sent item monthly folders.
Check all the pages for links, paying attention to any RSVP forms. If a form is linking to a previous Mailing list it is safer to delete the old RSVP field from the form and replace it with an Instruction to your users to “add RSVP field here” or similar.
Create a Preview image for each email and landing page for the sub-template layout
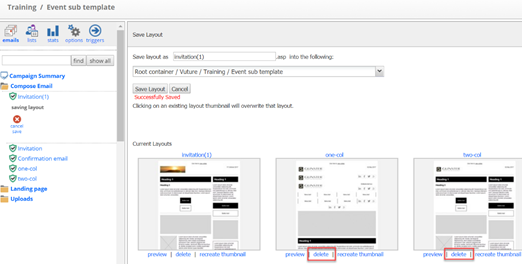
Saving a thumbnail will allow others to view a thumbnail preview of each email and landing pages saved as part of this sub template, when selecting a sub template for a new campaign.
Click on each email and landing page in turn and click Save Layout. This allows you to name and save, a thumbnail preview image of your finished page, naming image the same as the page so they match.
If other thumbnail images shown that are not being used for this sub template we recommend you delete them, so you are left with only the images included for the sub template.
Step 2 – Turning your campaign into a sub-template
This step applies whether you are using a brand new campaign OR a copy of a previous campaign.
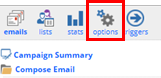
- In your campaign click on Options in the top toolbar.
- In the list that appears select Create Template from this site.
- If necessary type a new Category Template name, then click Create new category or select the desired Category from the drop-down list.
- With the desired category selected, type in your new sub-template Name and select the correct thumbnail image.
The correct thumbnail image will already be selected if you navigated there directly from your new sub-template. This will give you a similar screen to the below:
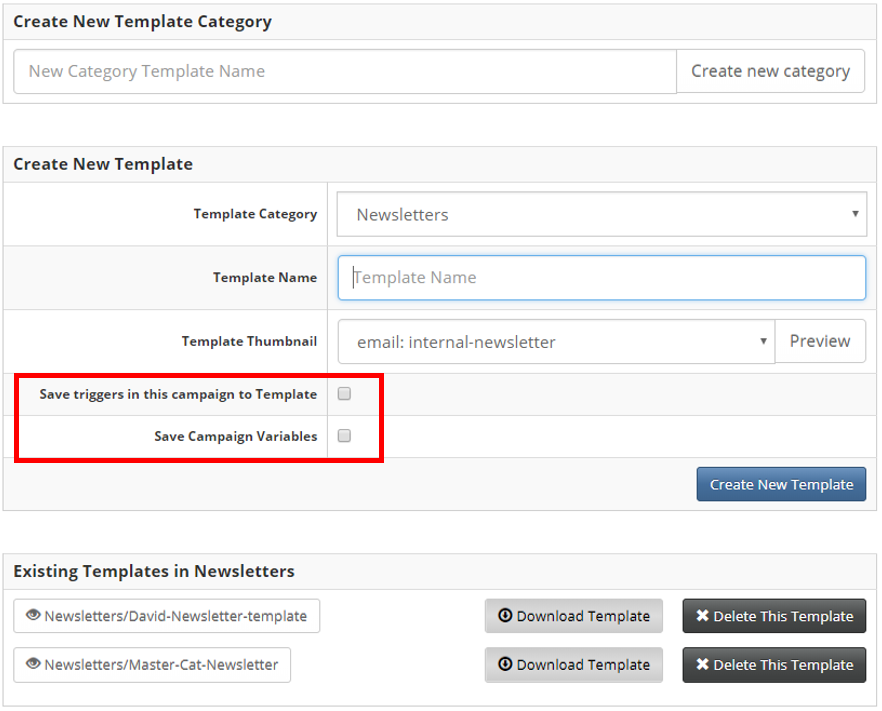
- If you have used Campaign Variables and Triggers in this Sub Template, place a check mark beside each to save.
Note: The Save triggers in this campaign to Template, and Save Campaign Variables in the above screenshot, only appear if these functions have been used as part of this template.
WARNING: It is very important that you do not overtype anything in the Master Template category. In the image above, the Newsletters category is showing. Change the drop-down to select your own new category, NOT the Master category.
- Once done, click on Emails in the top menu to return to your campaign.
Step 3 – Apply the new category to the correct container(s)
- To make the new sub-template available to your users, click on Admin and then select the Template Categories tab.
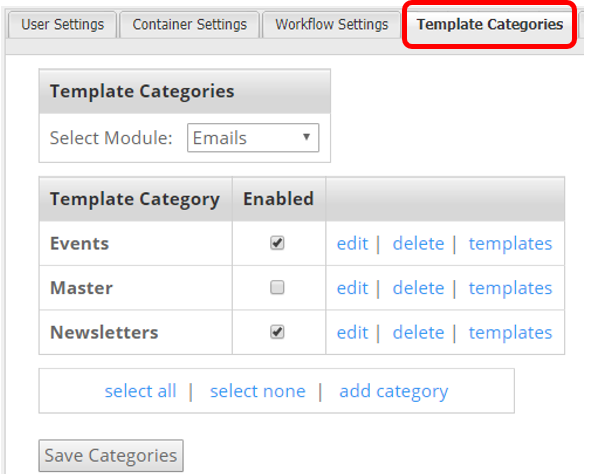
- Select the Emails module (if you have more than one module on your platform).
- In the container tree, click on each container where you want the new sub-template(s) to be available and check the box next to the category name.
-
Save Categories for each container and sub-container.
Test the new sub-template
- To see the new sub-template, return to the Home area of Vuture, navigate to a container where you have applied the new sub-template and click New Campaign.
- The list of possible sub-templates you see will include your newly created one, when you select the template category applied.
Depending on how you want your users to work, you could choose to switch off all other categories for a container. This will force your users to use only your new sub-template to create a campaign.
Editing an existing sub-template
You do not have to start from scratch to edit an existing sub-template. Changes can be made to the existing campaign and you can then choose to either save the sub-template with a new name or save over an existing sub-template with the same name.
- Navigate to the Sub Template, (it could possibly be stored in a Sub-templates container).
- Edit or correct any emails or landing pages as required and Publish each one.
- If you have made change to the look of any emails or landing pages, click on the Save Layout icon, to overwrite the existing layout.
Note: Updating here will ensure that if someone selects the New Page option, each thumbnail layout will be the most recent.
- Go to Options at the top of the left hand panel and then choose > Create template - create a template from this site.
- Find the template category this template is saved into.
- Ensure to re-select, Save Campaign Variables, and / or Triggers (if used).
- With the desired category selected, type the same sub-template name, to overwrite the existing sub template (similar to overwriting an existing Word document), alternatively save with a new name to create a new template.
