Overview
There are two different editing modes in Vuture, Edit Layout and Edit Text. Once done you may wish to add images, then publish your page.
The layout of Vuture's Emails is structured using Snippets. These Snippets are the building blocks of your email. Read more about Snippets here.
Contents
Editing the layout of your email
Before you start editing the text and images we suggest that you edit the layout of your email. This will make things easier for you as you build your email.
- Click on Edit layout above your email content.
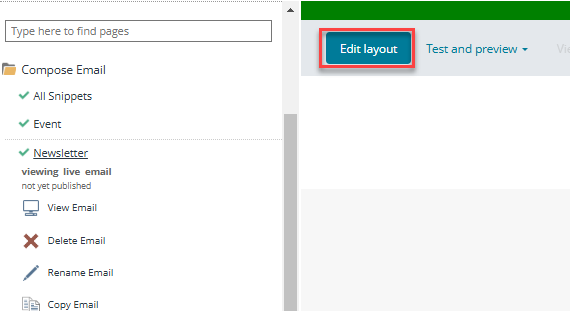
The screen elements are called snippets. You can drag and drop snippets, right mouse click and insert, delete or copy snippets Once you've edited your layout make sure that you save this layout.
- Click selecting Save Layout in the above the content of your email.
Moving snippets
- Hover your mouse over the snippet.
The snippet will grey out as it is selected
- Click, hold and drag the snippets to a different position
Deleting snippets
- Right click the snippet
- from the shortcut menu click delete
The snippet is removed from your email.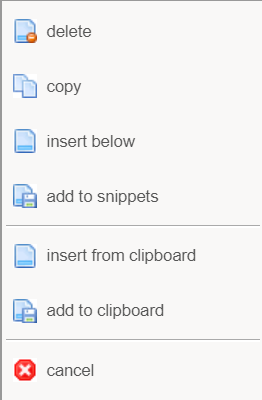
Copying snippets
- Right click the snippet to be copied and select copy
A copy of selected Snippet directly below.
Inserting a different snippet
The snippet library holds all the snippets for the section you are currently in. For example if you "right-click" in an area that is going from margin to margin, when you access the snippet library you will see all snippets that go right across the page, but not those that maybe half-width.
- Right click at the desired location and click insert below
The Edit Layout Snippet library opens
- Click onto a snippet to insert into your email
Other options that may be available
Note: Talk you your Account Manager if you need these options.
Add to snippets: Adds the snippet you've selected into the snippet library. This is useful if you've spent time editing a particular snippet and you want to save it for future use
Insert from clipboard: Adds the snippet you've selected into the snippet library. This is useful if you've spent time editing a particular snippet and you want to save it for future use.
Add to clipboard: Copies the selected Snippet to your clipboard. These can then be copied and used in other Campaigns
Editing the text in your email
- Click on any snippet containing text. This will open the Text Editor in the main screen above your selected text snippet.
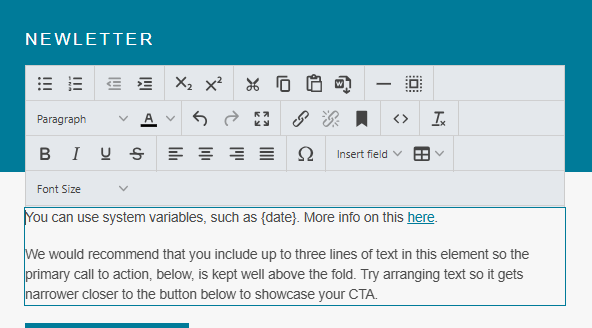
- To edit the text simply type over the holding text in the text editor. You should see the text you type appear in the text snippet.
Formatting text
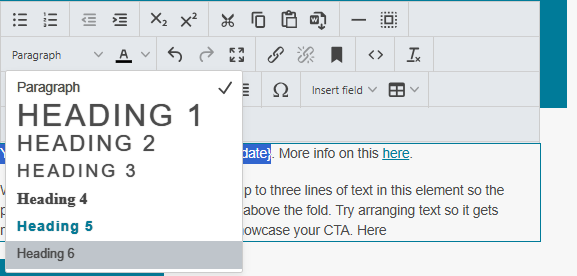
You can format your text using the formatting toolbars, selecting options such as Bold, underline and italics.
There is also a drop-down list of Headings 1 - 6 with various preset colours and sizes. For regular text select Paragraph style from the top of the list.
Copying text
When copying and pasting text into a text snippet, you may find it helpful to use right mouse click and Paste. Either one of the following:
Right click > Paste, or ctrl +V to paste with formatting
Right click > Paste as plain text to paste without formatting
The first option will replicate the old paste from Word function, and carry over most formatting from the source. This is typically not desirable when pasting onto a Vuture page because it may give unexpected results. It is generally safer and more reliable to paste as plain text and allow the Vuture settings to format your page.
Adding personalised fields
- Select where you want to insert the personalised field
- Click the Insert Field drop down box and select the relevant data field.
You will see for example, {First Name} appear in your text. When the mailing is sent out, these will be automatically populated by the CRM list being used.
Inserting hyperlinks in text
You can insert a hyperlink to take the recipient to a document, external web page or RSVP form hosted by Vuture.
- Highlight the text you wish to link.
- Click the hyperlink button

- This will bring up the List Manager dialog box
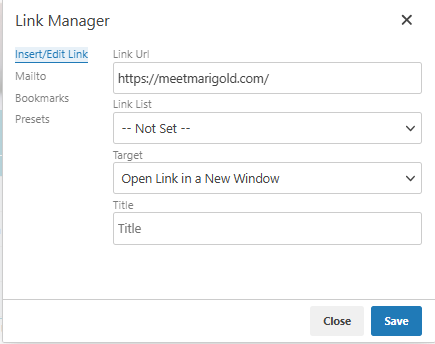
- To link to an external web page, paste the URL in the box next to Link URL
- To link to a Vuture landing page, such as an RSVP, click on the Link List drop-down and select the landing page or downloaded item you wish to link to.
- Click Save.
Hyperlinks allow you to take the reader to individual documents, webpages or forms that mean they can respond to an invitation. By linking an RSVP button to the RSVP landing page, a recipient can accept or decline an invitation and register themselves for an event.
Once you have completed your text changes you will be prompted to Save Content
Inserting and editing images
- Click on any image placeholder in your email, or select Image Library from the menu at the top of the screen.

This will open the image library. You can select from Global images; these are available across all containers, or Container images that have been made available for this container only.
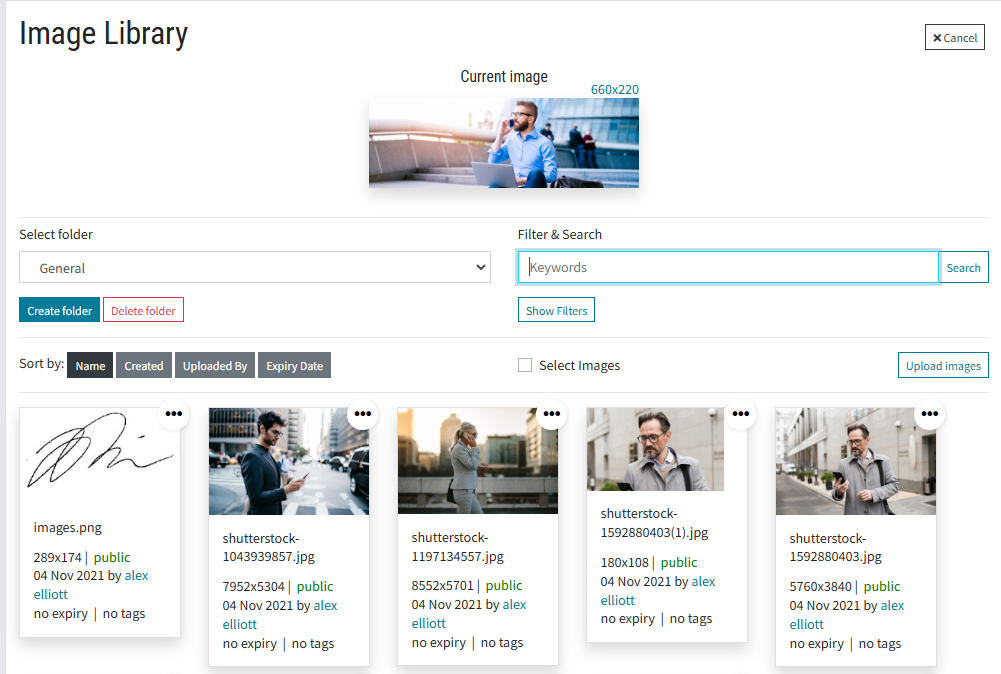
- Find the image you want to add from the image library and select it.
- Once added you can edit the image
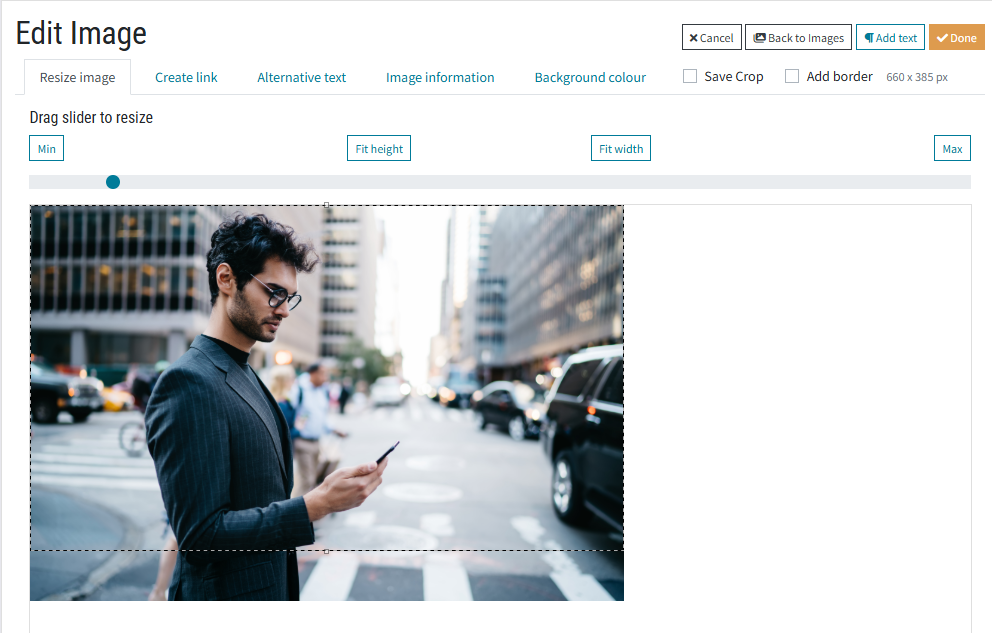
- You'll be prompted to amend the size of the image and crop so that it fits to the necessary size
- You can use the slider to change the size and drag and click to select the crop area
- To link to a web page click on create link and it will bring up the same insert link dialog box as above
Note on Resizing Images
You are always encouraged to upload images at the best resolution you have, and then reduce them, if necessary, in the image library, to fit the snippet. However, when Vuture builds your templates, we create each snippet to have a fixed width. This means that you can't insert a wider image, and then drag the box left or right to expand the WIDTH. You can however, set whatever height you wish. So if you want to insert a TALLER image, you can upload that image, and drag the snippet box to increase its height.
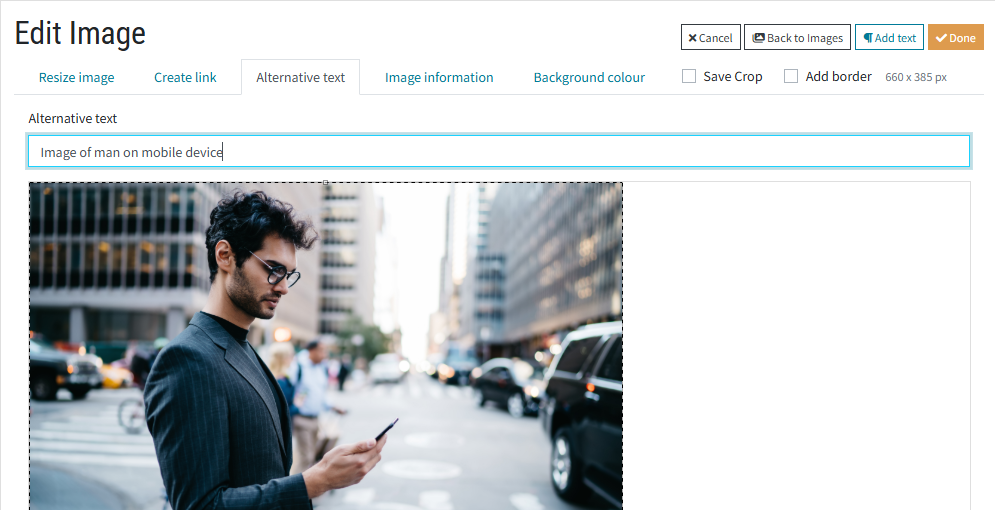
To add alternative text to your images.
Alternative text will display in some email clients if images are turned off. It is considered best practice to add a line of text describing the image in the Alt Text box.
- Once you've finished click Done at the top right.
Once you have completed making changes to text or images you will need to save these changes by clicking Save content at the top of the screen.
Publishing Pages
Whilst a document is being edited the icon next to the name of the document will be displayed as a sheet of paper with a pen symbol.
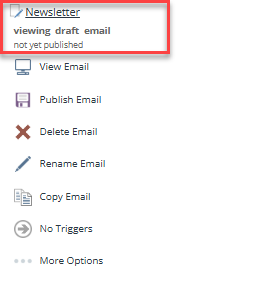
This indicates that it is still in draft mode.
To save all the changes made to the document it needs to be published. This saves a new version in the email history allowing you to roll back to a previous version.
- To Publish a document, select Publish Email in the editing menu
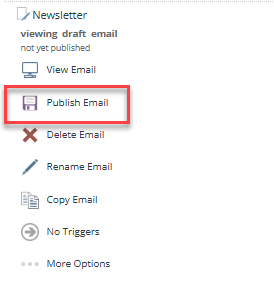
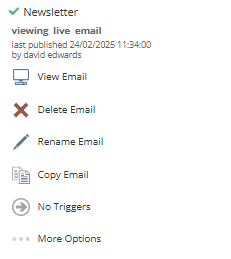
The pen and paper icon icon be replaced by a green check mark, the wording will change to viewing live email and the document will be saved as a new version. The send email icon will appear as only published emails can be sent.
Versions
Each time you select Publish and Publish now, a new version is created. These may be viewed in the Version history.
To view all published versions, select More Options and Version history.
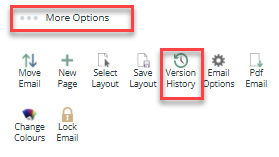
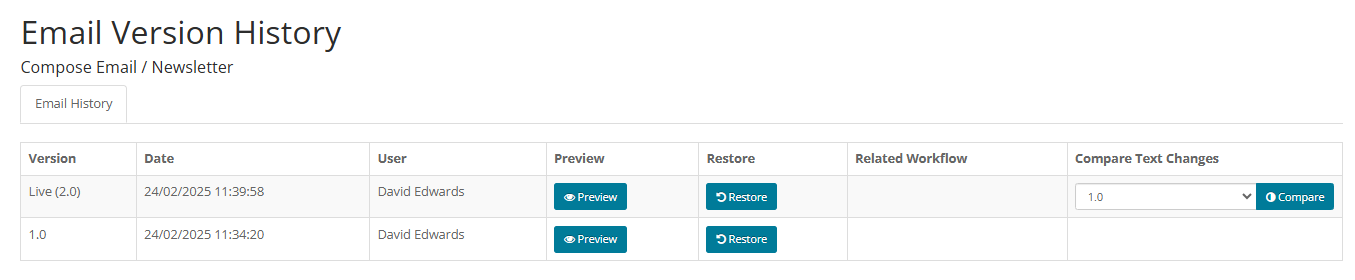
- The Email Version History is displayed.
Preview a version
- Preview a version by clicking the Preview link.
To Roll back to a previous version
- In the Page History window click Restore beside the required version.
The Restored email will become the next Draft version in the Page History.
Next step: Testing and sending your email
Go back: Creating an email campaign
