Overview
It is important to test your email prior to sending, to ensure all hyperlinks are working and the email renders correctly on various devices
Contents
Send Test vs Send Sample
A "Send Test" will allow you to check the overall layout and design of the email.
Please Note: This function is not connected to Dynamics and will not write any activities back to your CRM, so using this method you will not be able to test any Pre-filled Forms. If you wish to test your Pre-filled RSVP form, use the "Send Sample" function.
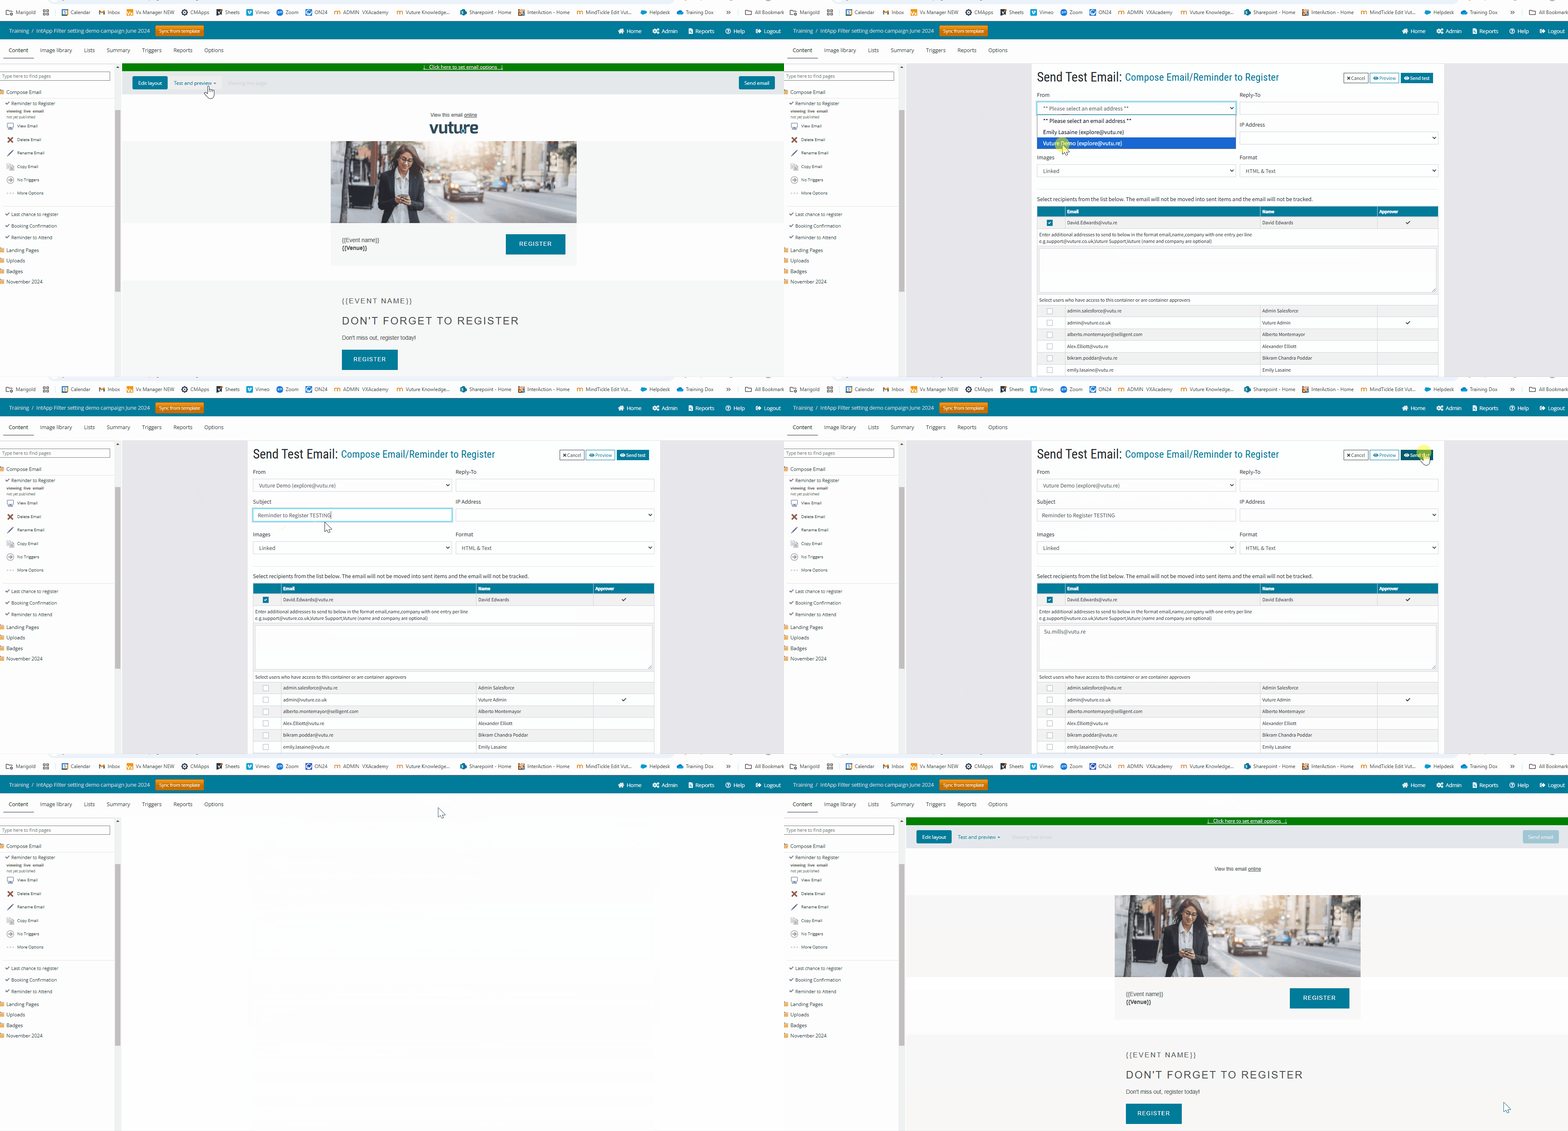
To use Send Test
- Navigate to the mailing you wish to test
- On the left hand side click the send test icon
- Select the individuals you wish to send this test to.
- If you want to send this test to any individuals who are not Vuture users type their email into the text box.
- Click send test in the top right corner and confirm the send.
You will see the word Process appear beside each name selected as the email is sent, and you are then returned to the mailing.
Best Practice Tip: We recommend asking your Account Manager to automatically add the words "TEST - " as a prefix to your Subject Line, so that you do not get any "Send Tests" or "Send Samples" confused with the live email in your inbox. If this is not already enabled, please ask your Account Manager to go to "Admin.System.Emails.Send Test Subject Prefix" and add the word "TEST - ". Note: This prefix TEST - will appear when the email arrives in the inbox, and is not visible on the send screen.
Send Sample
The Send Sample will behave like a real email send and allow you to fully test the email campaign with a CRM or Vx List, except the email is copied to the Sent items folder, while the original email remains in the Compose Email folder.
The Send Sample is limited to a maximum of 10 email addresses.
Using Send Sample allows you to click through to a Pre-Filled RSVP Form and see the content pre-fill. You may also submit the form to see the RSVP data write back, as well as, all other CRM activities associated with the send.
Note: It is recommended you delete the Send Sample in the Send Folder, once testing is completed (e.g. July 2020 folder) to remove any reporting in Vuture. You will need to manually remove any data in your CRM associated with this Send Sample.
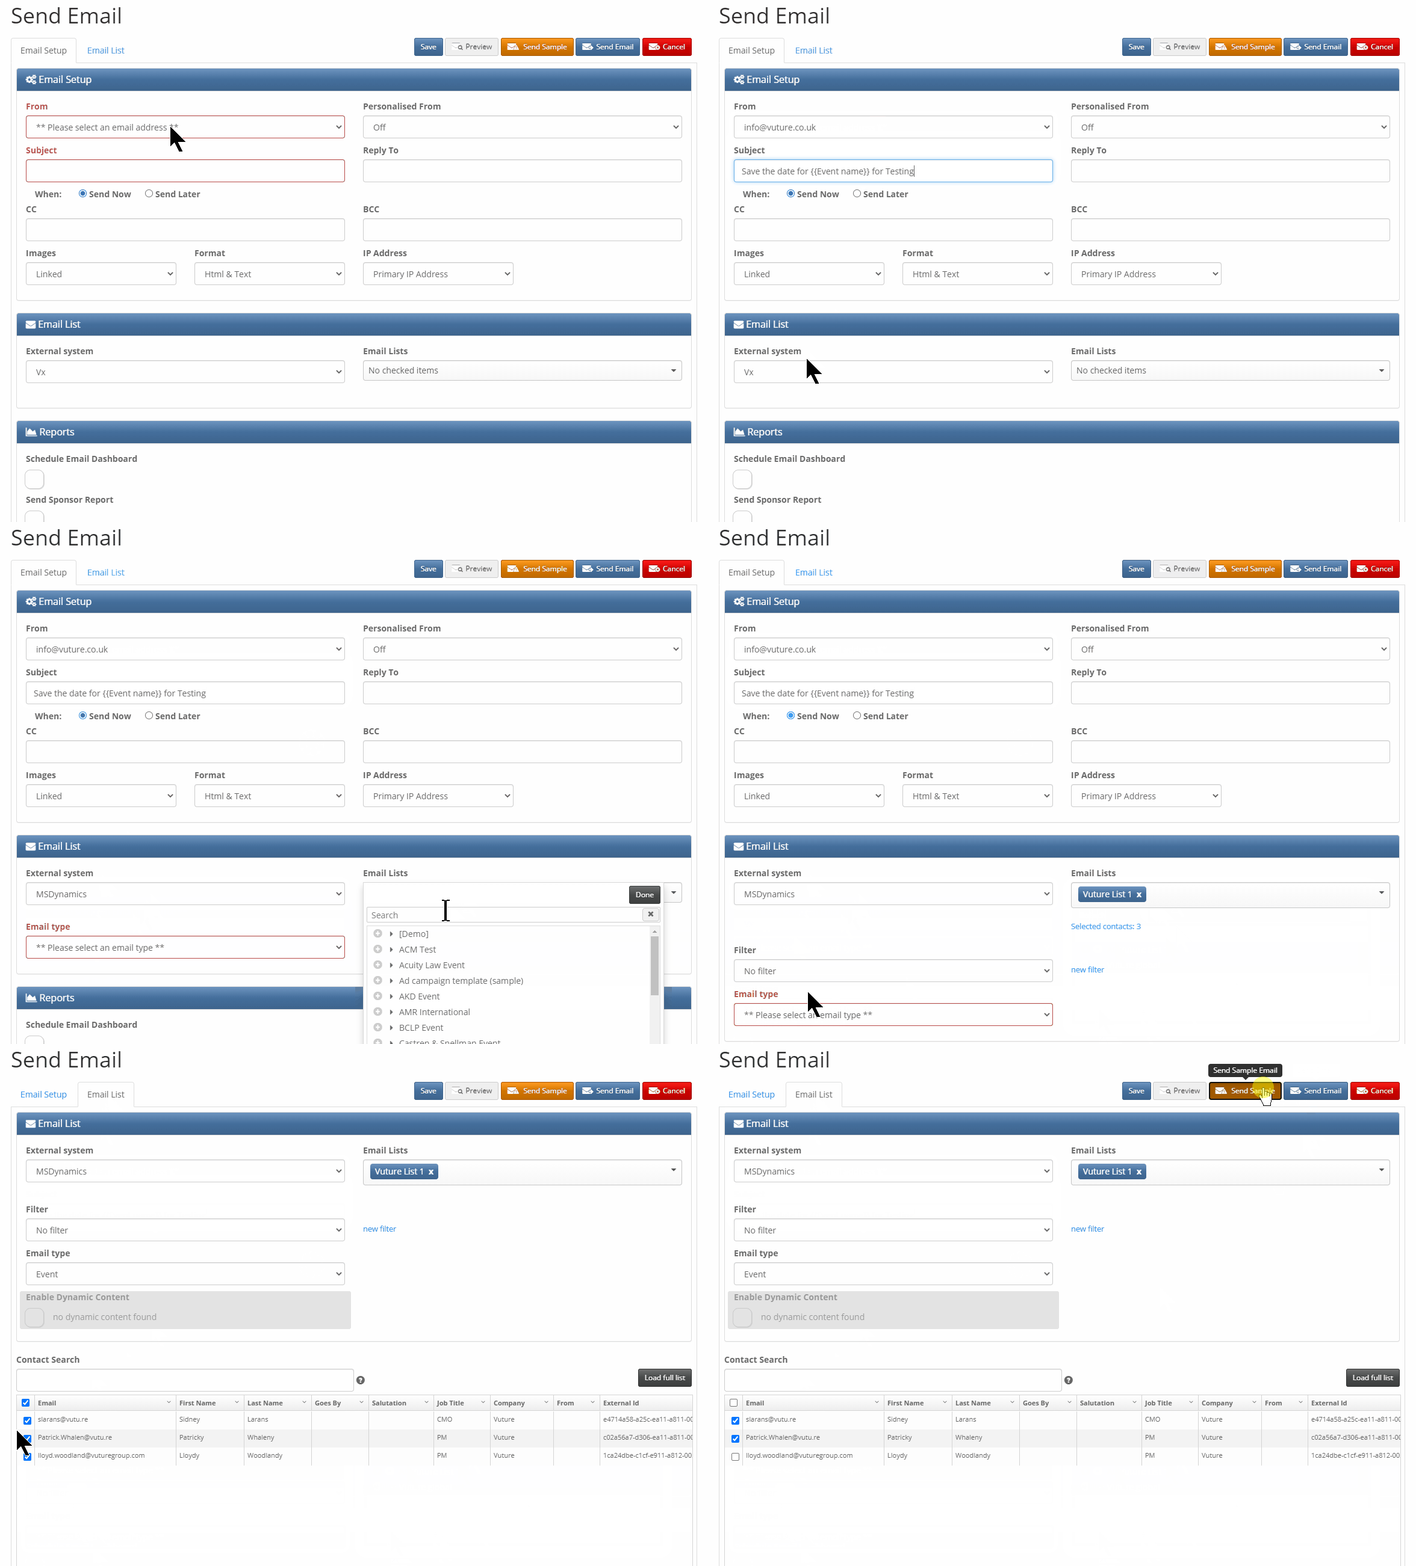
To use Send Sample email
- Navigate to the mailing you wish to test and ensure your email is Published.
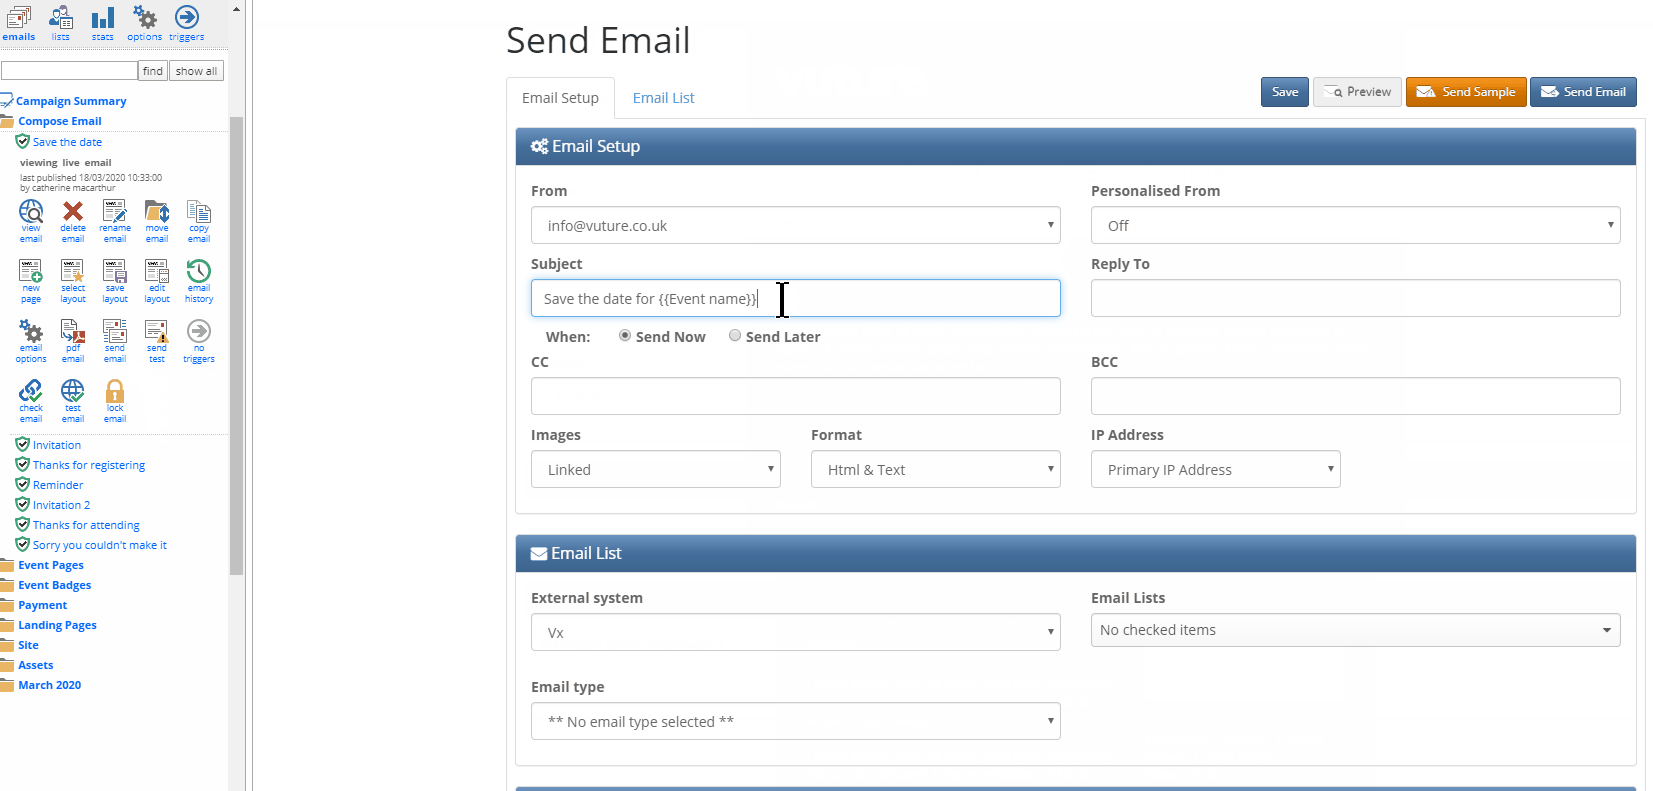
- In the navigation panel click send email
- On the Email Setup tab:
- Select the FROM Address from the drop down list
- Type the Subject line of the email
- Select MSDynamics from the External system
- From Emails Lists, select the list you wish to use
- Select the Email Type (e.g. Email)
- Click the Email List tab
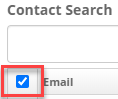
- Deselect all by clicking the top check mark beside Email.
- Click to select up to 10 internal contacts to send the sample email to.
- Click send sample in the top right corner.
For more detailed information on "Send Sample", please click here.
Testing with variable placeholders
When you are sending a test of an email that includes variables, the variables will not populate with data for any fields that are supplied by the CRM. This is because it is a test, and test sends do not refer to the CRM in use.
Some fields will populate, even on a test, because they are referencing data held by Vuture. Here is a list of the fields for which the placeholders will be replaced when sending a test email:
{First Name}
{Last Name}
{Email}
{From Name}
{From Email}
Date fields. For example: {Date}, {MonthShort}
Campaign Variables (for example, those set up in the Campaign Summary screen such as EventName and EventLocation).
Sending a live email
- Once you've tested your email and you are ready to send, click send email
- Click on the From drop-down to select the email address and friendly From Name you wish to send from.
- (Optional) Enter in a Reply To email address for replies to go to.
- Important: Each email platform such as Outlook or Apple Mail will make its own decision whether to honor that Reply To address. Some may ignore it which means that some automatic replies may find their way to a Partner’s Inbox. To prevent this, you may use the Partner's Name as the Display Name and a generic email address for the FROM Address. For example: Display Name, Email@email.com = John Smith, marketing@vutu.re.
- Select when you wish to send your email. You can either send it now or send later. You'll be given an option to select when you wish to schedule your email.
- Under List source select the CRM source where your lists are held (i.e. Dynamics)
- Check the list you wish to send to
- Select the type of email this is, from the email type drop-down
- Click send
Email History
The Email History displays how many emails have been sent and to whom. You can run reports on the click-throughs and responses to the messages you have sent.
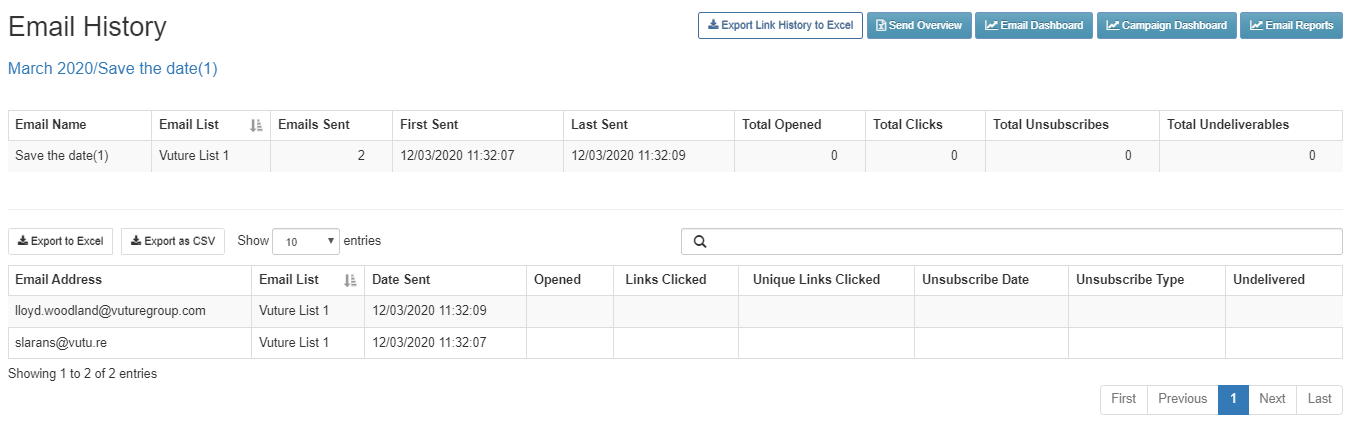
The email is sent to the selected receipts, and moved from the Compose Email folder to the sent item folder with the current Month and Year.
From here you can view the open and click-throughs in real time, as people open and click on links within in the email, this information will be displayed in real time. You may need to refresh the screen.
