The Events App integration with Salesforce is only available with the Events App Spacelab Interface.
Before setting up your events app
By default, the events app will filter on guests who have "Accepted" as an RSVP value in the Vx form submission table of the campaign. This means that when you view the check in report in the Events App you will only see guests who have RSVP = Yes.
To change this, you can provide your Account Manager with fields on which you would like to filter the events app list. For example the RSVP field of the Campaign Member table. Your Account Manager will have to:
- Disable Admin.System.Events.Default RSVP Accepted For Salesforce
- Depending on the field category (Campaign or VX Form submission) your account manager will add the name and API in:
- Admin.System.Salesforce.Vx Form submission fields
- Admin.System.Salesforce.Campaign member form fields
To setup a new event
- Go to the Events App URL (see How to Access the Events App)
- Ensure you are logged in (bottom left of the screen)
- Click on the New Event Button
Setup the event information
- Fill the Event Title and Description which will appear at the top of the app
- Select the badge type (see the section on Badge Page if you require more information).
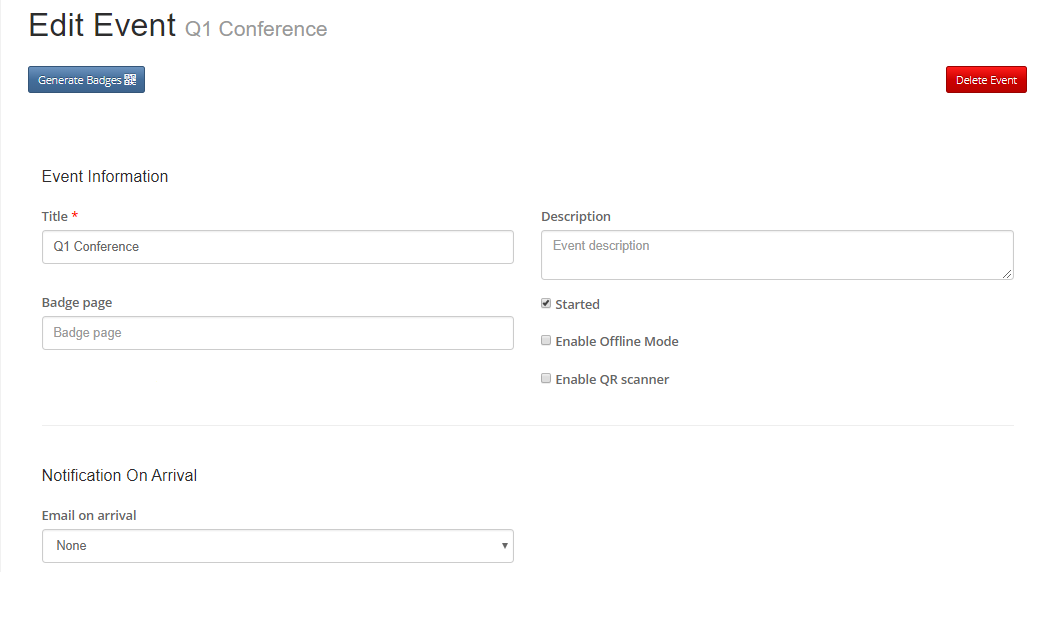
Select who you would like to notify when your clients arrive
Set up your CRM
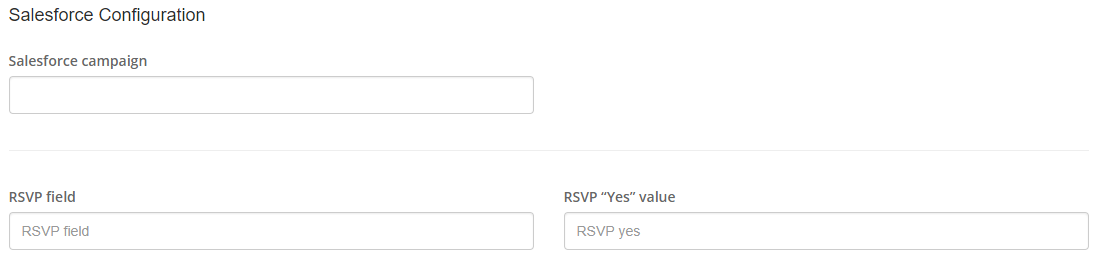
- Select which campaign you are working from by selecting the Salesforce Folder.
- Select which Field and value the events app should filter on. This will usually be an RSVP field from your campaign member fields or Vx Form submission fields as set up earlier. (**New from October 2018**)
- Once you are happy with your settings click “Save”.
- You can then see your guest-list and update their attendance status by clicking on the “Status” column.
Mark a Guest as Attended
- When the Events module is enabled in your Vuture instance, the "Attended" object is created in your CRM so that the "Attended" column is seen in the Campaign Member table.
- The Vuture instance will require the adequate permissions in order to do this.
- If you would prefer to create the objects in Salesforce manually, please contact your account manager.
Register a Walk-in
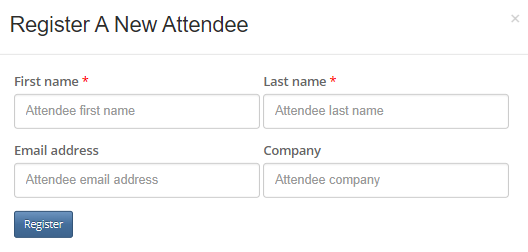
- If a person who is not on the guest list shows up to your event, you can register them by clicking on “Register new Attendee”.
- If they are a new contact or exist in Salesforce but weren't in the original guest list, then they will be automatically added to the Campaign Member table for the specific campaign and marked as "walk-in" in the "Attended" column
How to show the full invitee list (instead of just those who have RSVPd Yes)
If you would like to see the whole list, please contact your account manager and ask them to disable "Admin.System.Events.Default RSVP Accepted For Salesforce"
You can then remove the value from the "RSVP field" box and leave the "Select a value" predefined option. Please note, this will cause the field to turn red in warning, but you can ignore that.
When you save the settings and view your guest list, it will show everyone on the selected marketing list, regardless of their RSVP value. Note that the full list could be slow to load on a tablet if it is very large.
