Keywords: Dynamic Content, Personalised confirmation email, personalized, InterAction
Overview
This article will walk you through how to use Dynamic Content to personalise your confirmation emails, depending on how a contact responded to your RSVP form.
Contents
Prerequisites
Contact your Account Manager to ensure that Dynamic Content is enabled under 'Admin.System.Emails.Enable dynamic content'.
To automate your confirmation email, you will require Triggers (premium add-on - please speak to your Account Manager for more information).
Users: If you are an experienced Vuture user, you may be able to follow this process using only the 6 step guide below. If you are new to Vuture or unsure, there is a detailed breakdown of each step below that.
Step by Step Guide to Building Confirmation Emails using Dynamic Content
Step 1 – In InterAction, create your marketing list and add Additional Fields covering all the options - including RSVP.
Step 2 – In Vuture, create your invitation email, linking to the Prefilled RSVP Form, which in turn links to a Thank You page. Be sure to setup your RSVP Form(s) with all necessary additional fields and following best practice advice. (If you want to open up this event to contacts who are not on the invitation list, be sure to create the Blank RSVP Form, with a link from the Prefilled Form.)
Important: Make sure that all additional fields are required fields on your RSVP forms.
Step 3 – In Vuture, create the Confirmation Email, which must contain every option available, as separate snippets.
Step 4 – In the Confirmation Email, go to 'Edit Layout' and apply Dynamic Content to each snippet.
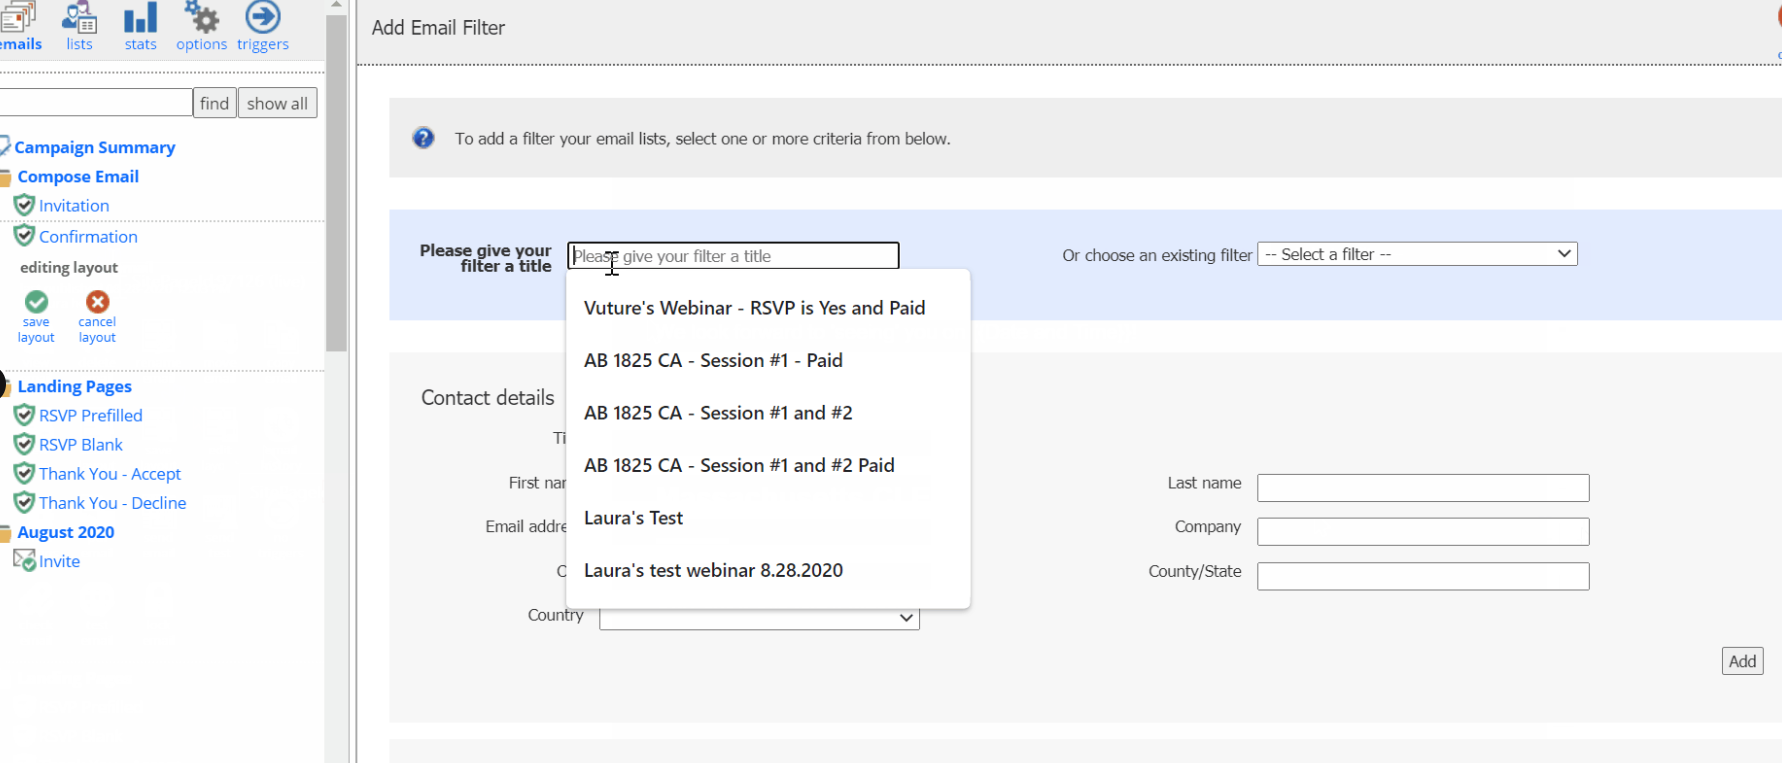
You can do this by: going into the Confirmation Email > Edit Layout > right click select 'Dynamic Content'.
Give it a unique title, e.g. “Vuture Webinar - CLE is MA”.
Under 'Additional fields' > Pick the folder, select the Additional Field, Value is Yes or whatever is appropriate, then click 'Add', then click on Filter.
Step 5 – Test your email internally, via a Send Test, testing for all the links working. This will not pull through IA field choices.
Step 6 – Test your email internally, via a Live Send, testing for the choices writing back to IA and for the Confirmation Email containing all the choices made using Dynamic Content. Use the 'Test Email' function to preview the confirmation email as a contact, and view how the dynamic content works for each contact on the list.
Detailed Instructions
Step 1 – Create the marketing list in InterAction
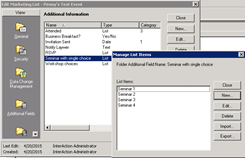
Create your Marketing List within InterAction, along with all necessary Additional Fields - including RSVP. The Additional Fields can be of most types; a single choice from a list of workshops or a Yes/No answer to a question, for example.
Check out our FAQ for more information on additional fields and dynamic content here.
While you will have to use the IA Windows client to create a new Marketing List, it is not essential to use the IA Windows client for creating Additional Fields - you could also use the IA Web client for this.
For more information on how to create a Marketing List or Additional Fields, please contact your InterAction Client Advisor.
Step 2 – Create the invitation
In Vuture, create the invitation email and RSVP Prefilled and Blank forms in the usual way. This is covered in more detail here. Be sure to setup your RSVP Form(s) with all necessary additional fields and following best practice advice.
Important: Make sure that all additional fields are required on your RSVP forms.
The Thank You page could have this sort of statement on it: “Thank you for registering to this event. A confirmation email containing all information for this event will be sent to you within 24 hours.”
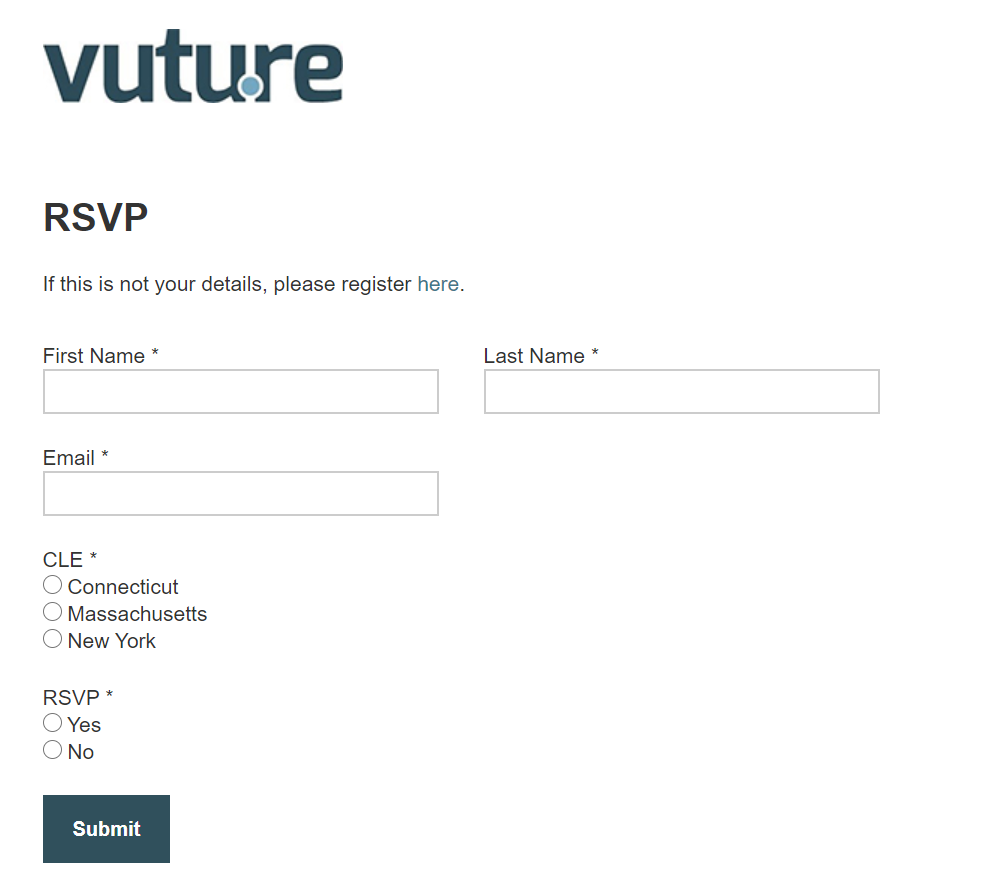
An example of the way the Prefilled RSVP Form could be prepared for use is below:
Step 3 – Create the confirmation email
The confirmation email is a normal email created in the Compose Email area. Add the same branding as the invite, personalise the email if you wish with Dear {First Name}, and then add all the options and choices available to the client.
In the example below, we asked on the RSVP Pre-filled form to select the state for CLE credit. Depending on which state the contact selected on the RSVP form, they should only see the CLE information for that state.
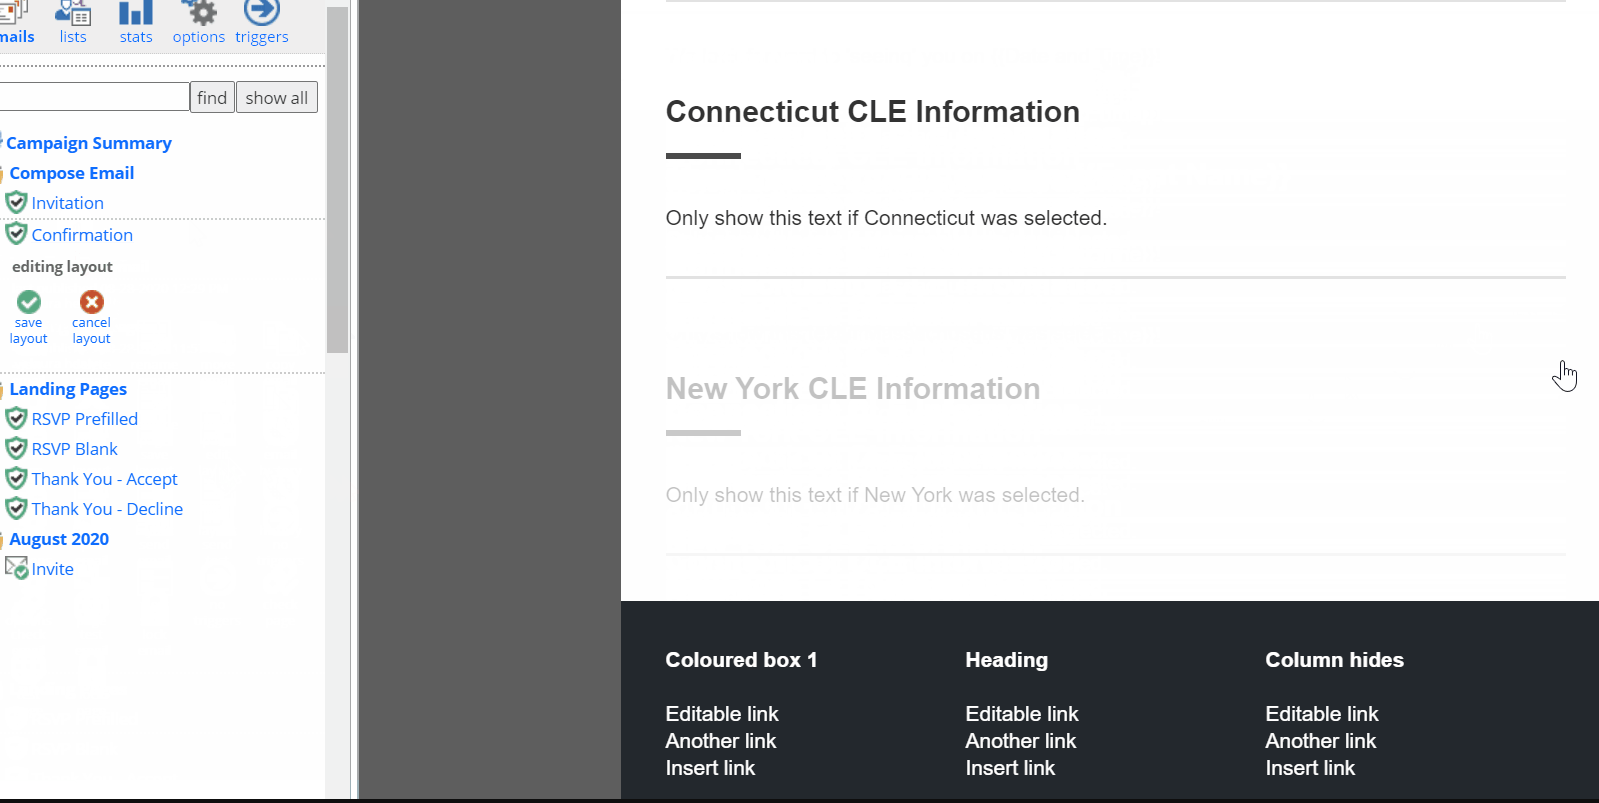
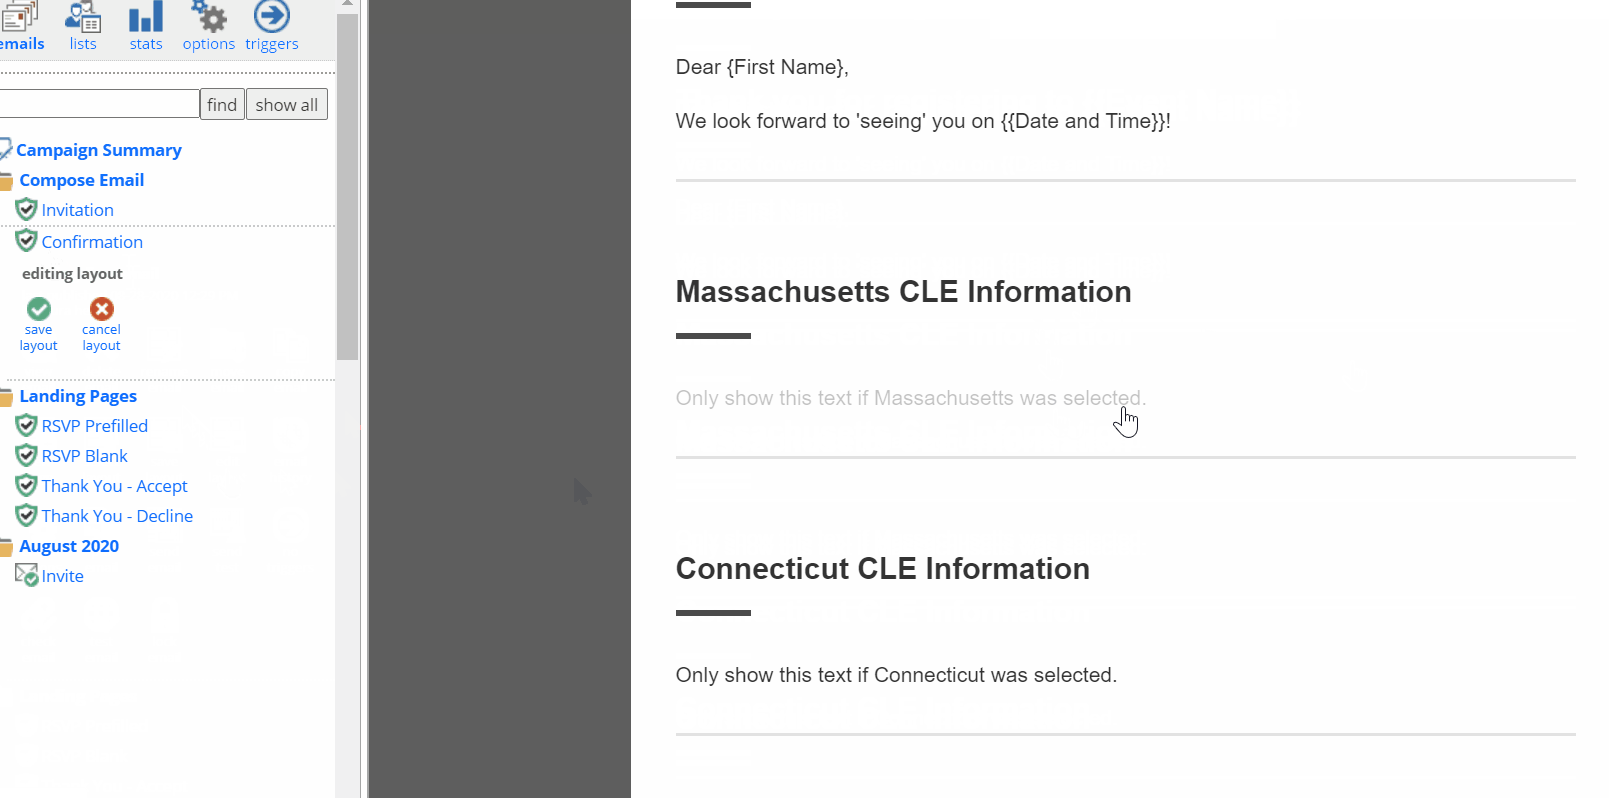
Now, before we apply the dynamic content, we need to add the CLE information for each state to the confirmation email. This should be separated out into different snippets. See animated GIF below.
Notice how when I hover over each CLE information area, it is highlighted in gray. This shows that each block of content has its own snippet. This is required for us to apply dynamic content.

Step 4 – Applying Dynamic Content to every Snippet
In the Confirmation Email, click on Edit Layout.
With the first snippet highlighted, right click and select dynamic content from the menu.
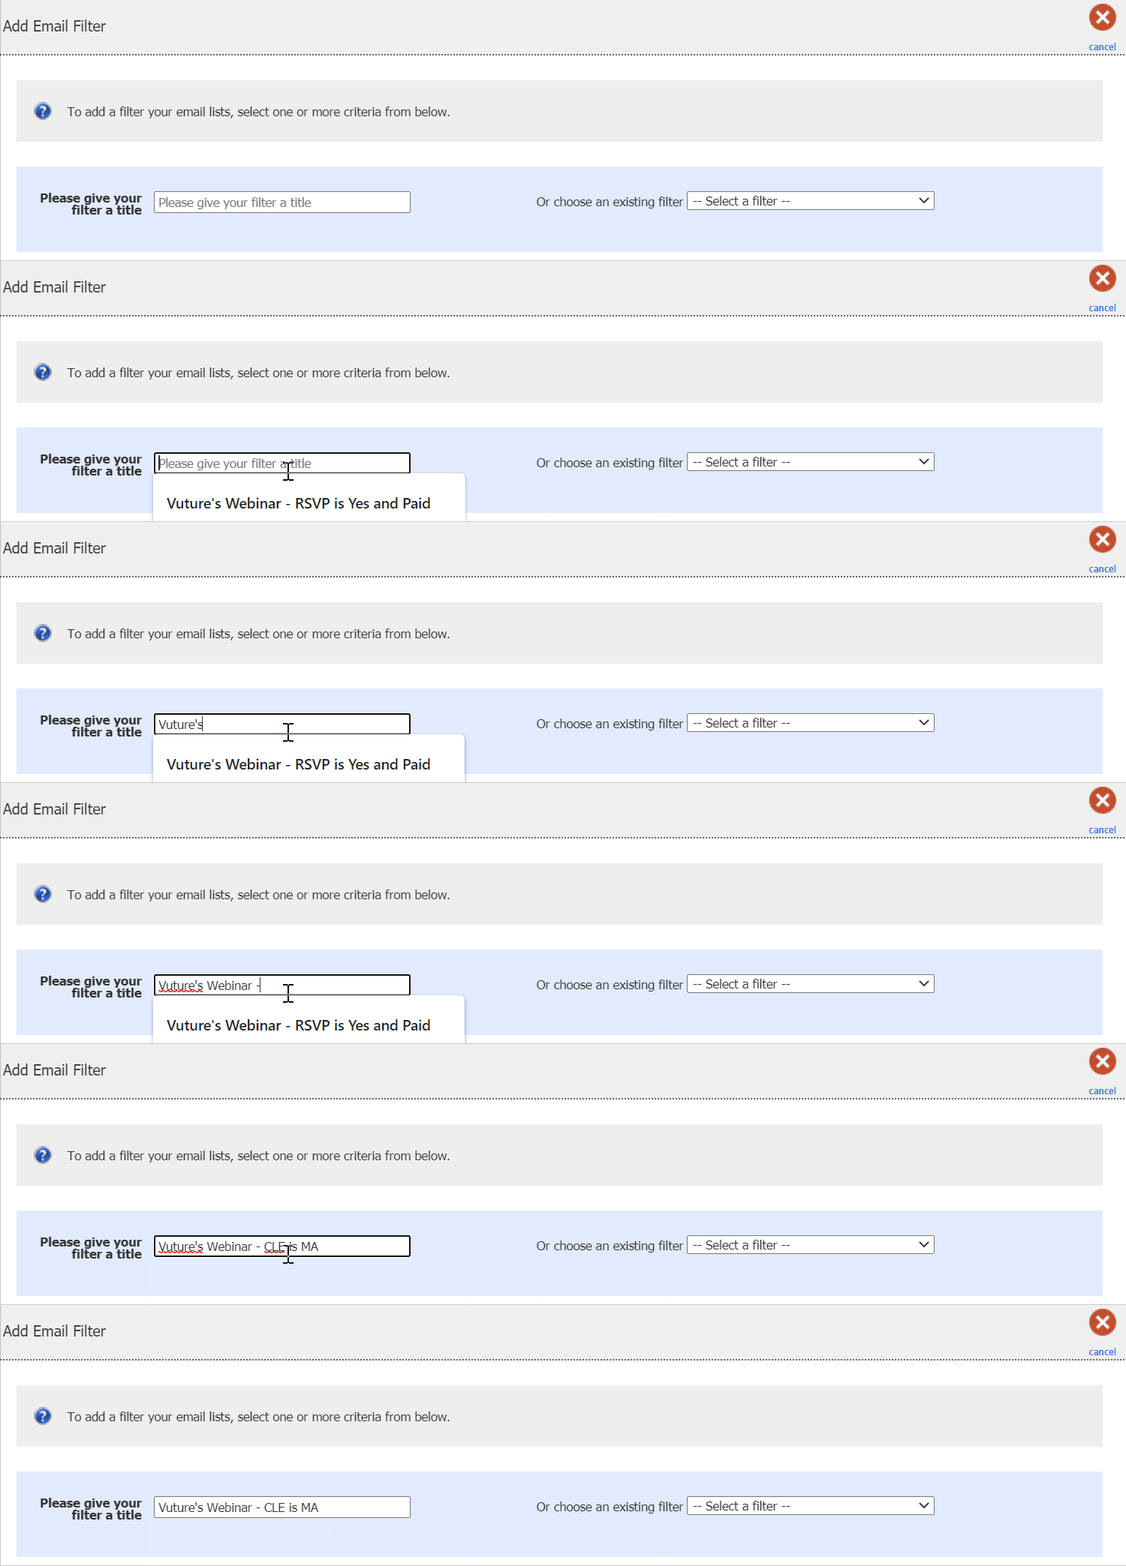
This opens the Add Email Filter screen.
Follow the below instructions to create your filter for the dynamic content:
- Give it a unique title, e.g. “Vuture Webinar - CLE is MA” - this is the name of your event and what you are filtering on. In this case, it is the 'CLE' additional field and the value is 'Massachusetts'.
- Scroll down to 'Additional fields' and select your Marketing List. This should be the same Marketing List you used on your RSVP Form(s).

- Next select the Additional field that you are filtering on and the value. For example, if we only want to show this snippet (or block of content) when someone has chosen Massachusetts as their CLE, we'd want to choose 'CLE' as the Additional field and 'Massachusetts' as the value.

- Click Add then click on Filter
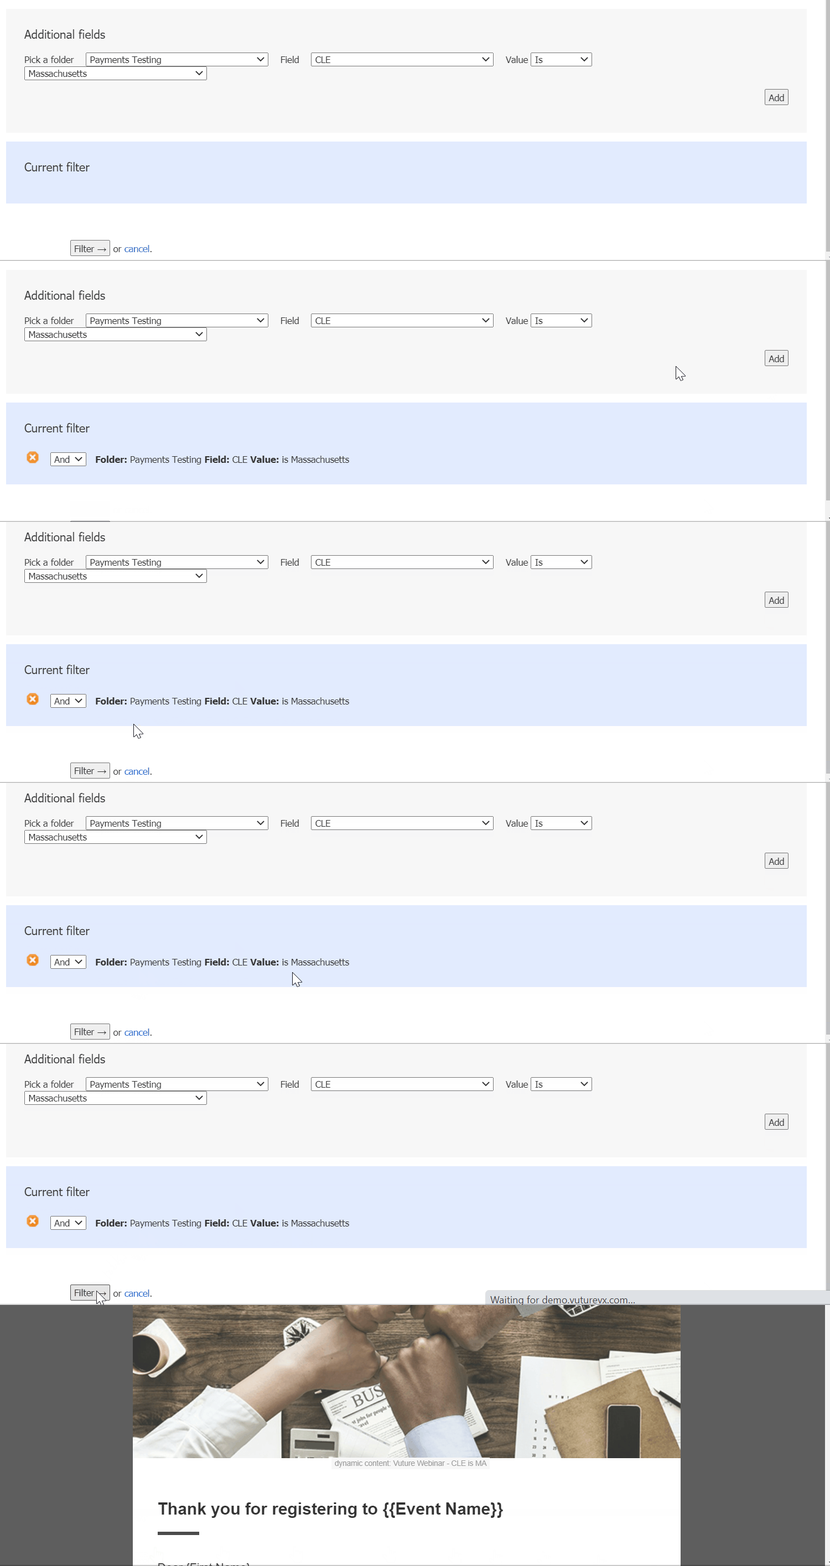
- You should now see your dynamic content filter is applied in your confirmation email (see screenshot below for MA).

You will need to repeat the above steps for all of your choices. So in this example, we would apply dynamic content to the 'Connecticut' snippet and the 'New York' snippet within our email confirmation.
Once you're finished adding they dynamic content for each snippet, you should see it applied while still in 'Edit layout' mode:
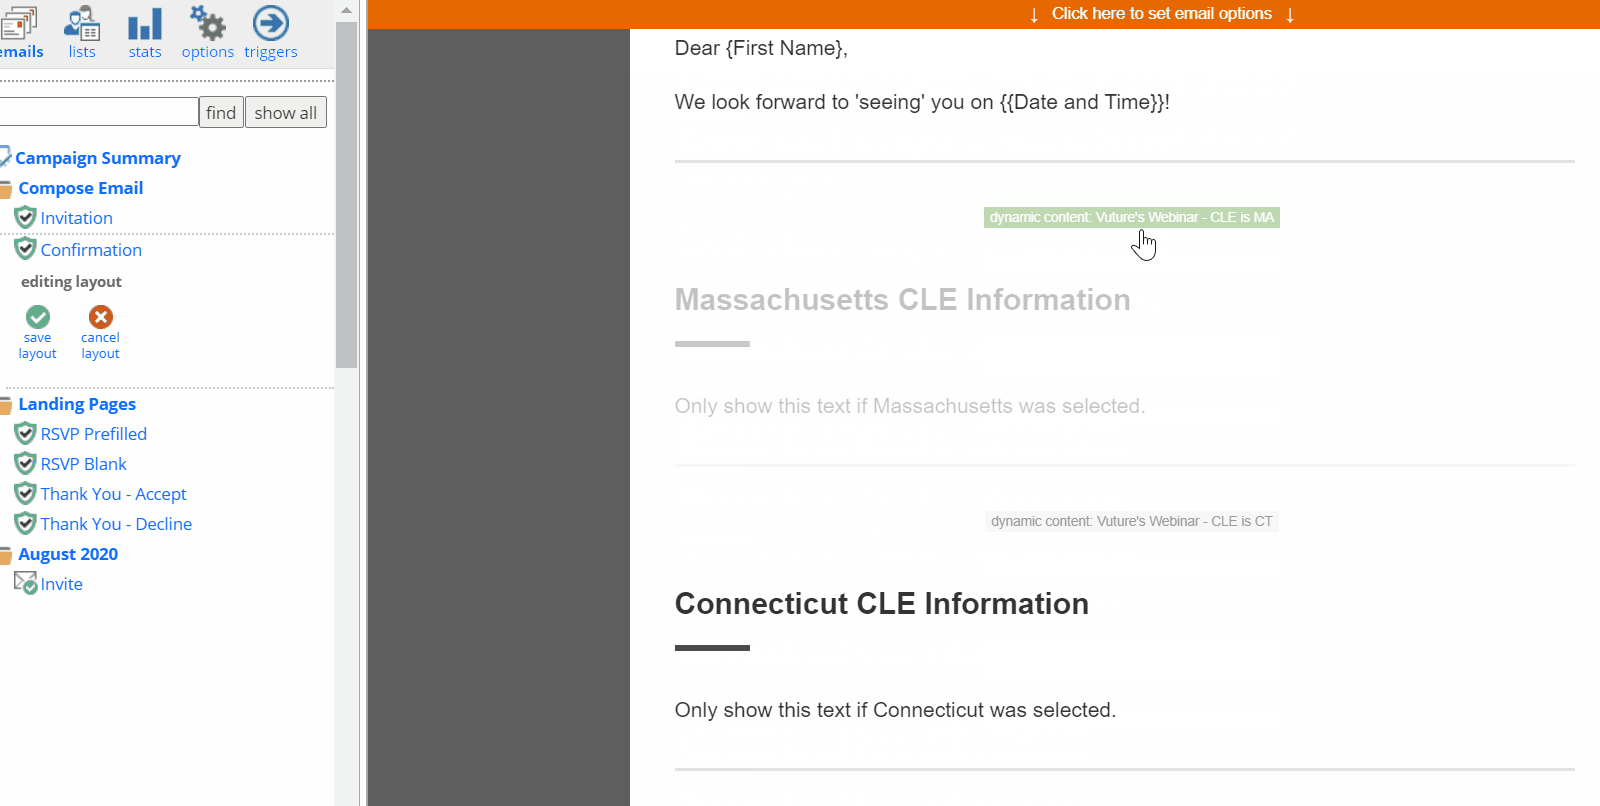
You can now select Save Layout and then Publish > Publish Now to save your dynamic content to your confirmation email.
Note: The Dynamic Content markers will then no longer be visible. To view any dynamic content select edit layout.
Step 5 – Send out a test email internally
To check that all the links between the different mails and landing pages are working correctly.
Step 6 – Send out a live test email
To check that the chosen Additional Field content is writing back to InterAction and from there onto the Confirmation Email, Use the 'Test Email' function to preview the confirmation email as a contact, and view how the dynamic content works for each contact on the list.
Once confirmed, you are now ready to send your Invitation, knowing that the confirmation email will be personalized to the options they select from the RSVP form(s).
Sending out the Confirmation Email
IMPORTANT: If you were to use the Notification Template, and add a Notification in in the RSVP Landing page form editor, the Confirmation email would be sent before the data is written back to InterAction and not leaving enough time for the dynamic content to be applied (i.e. The dynamic content would not work). For this reason the Confirmation email must be sent either manually, or using a Trigger that includes a wait time, to allow InterAction to update.
Option 1 - Manually
This can be done manually, after a set period of time has elapsed (a day or a week for example). Filter the mailing list on people who have RSVP’d = Yes and send out the Confirmation Email.
Option 2 - Automatically using a Recurring Trigger
Alternatively you could set up a recurring Trigger to make the Confirmation Email send automatically, containing the client’s choices.
Important - You must delay the Confirmation Email for a minimum of 30 mins, so as not to overload your InterAction with the number of API calls Vuture needs to make. This also allows time for the additional field information to write back to IA and then back to Vuture for dynamic content. If running multiple recurring triggers in your Vuture system, please increase this to a minimum of 60 minutes.
The below sample Recurring Trigger will react only if the RSVP Is Yes for both the RSVP Prefilled and Blank forms being submitted.
Create the Recurring Trigger as follows:
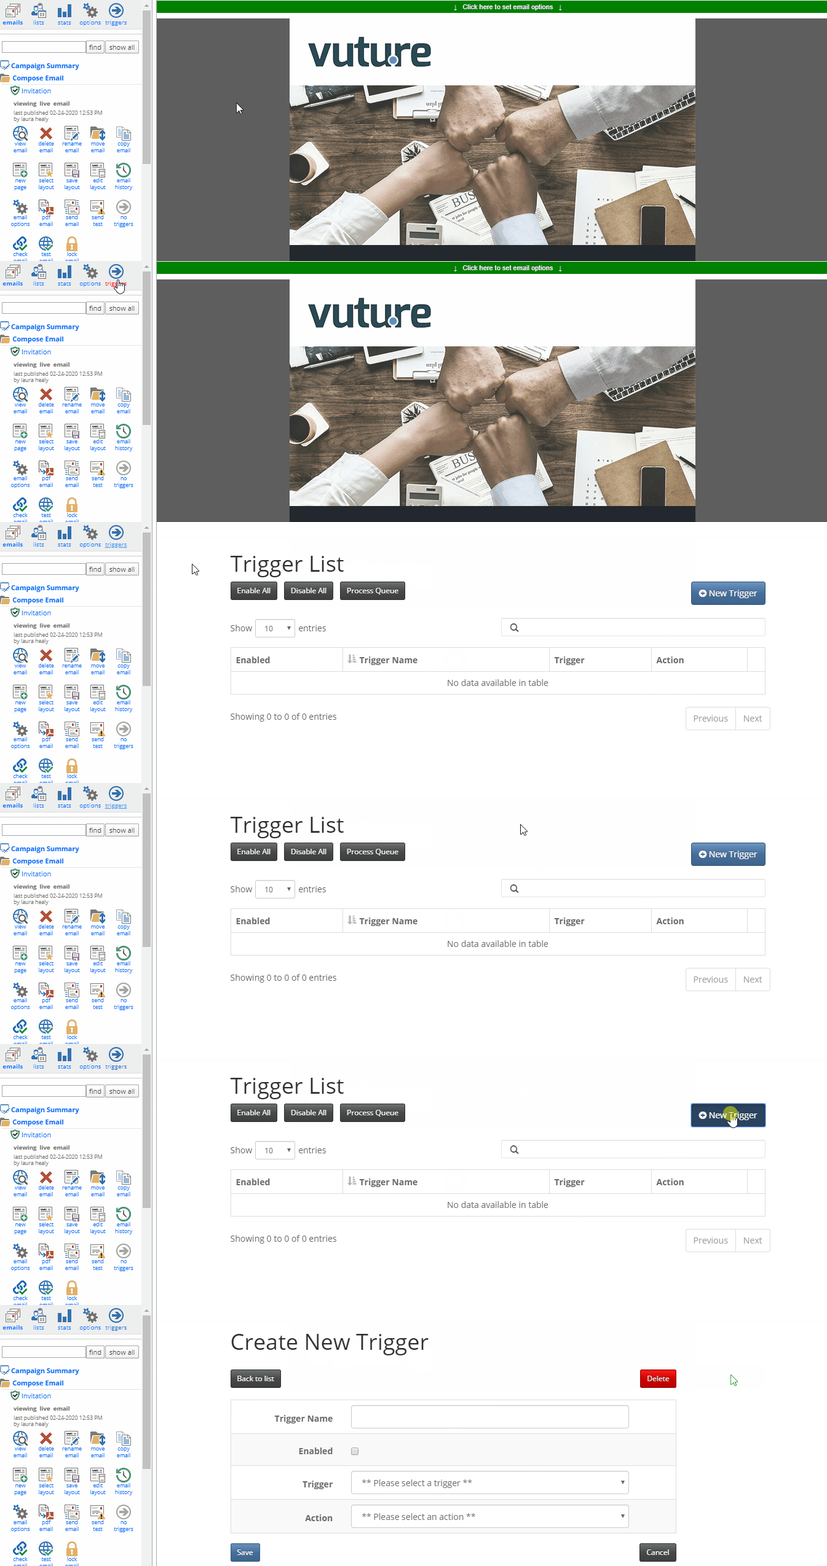
- Navigate to your email campaign with dynamic content applied and click on the 'Triggers' icon in the top left. Then click on '+ New Trigger' to create your trigger.
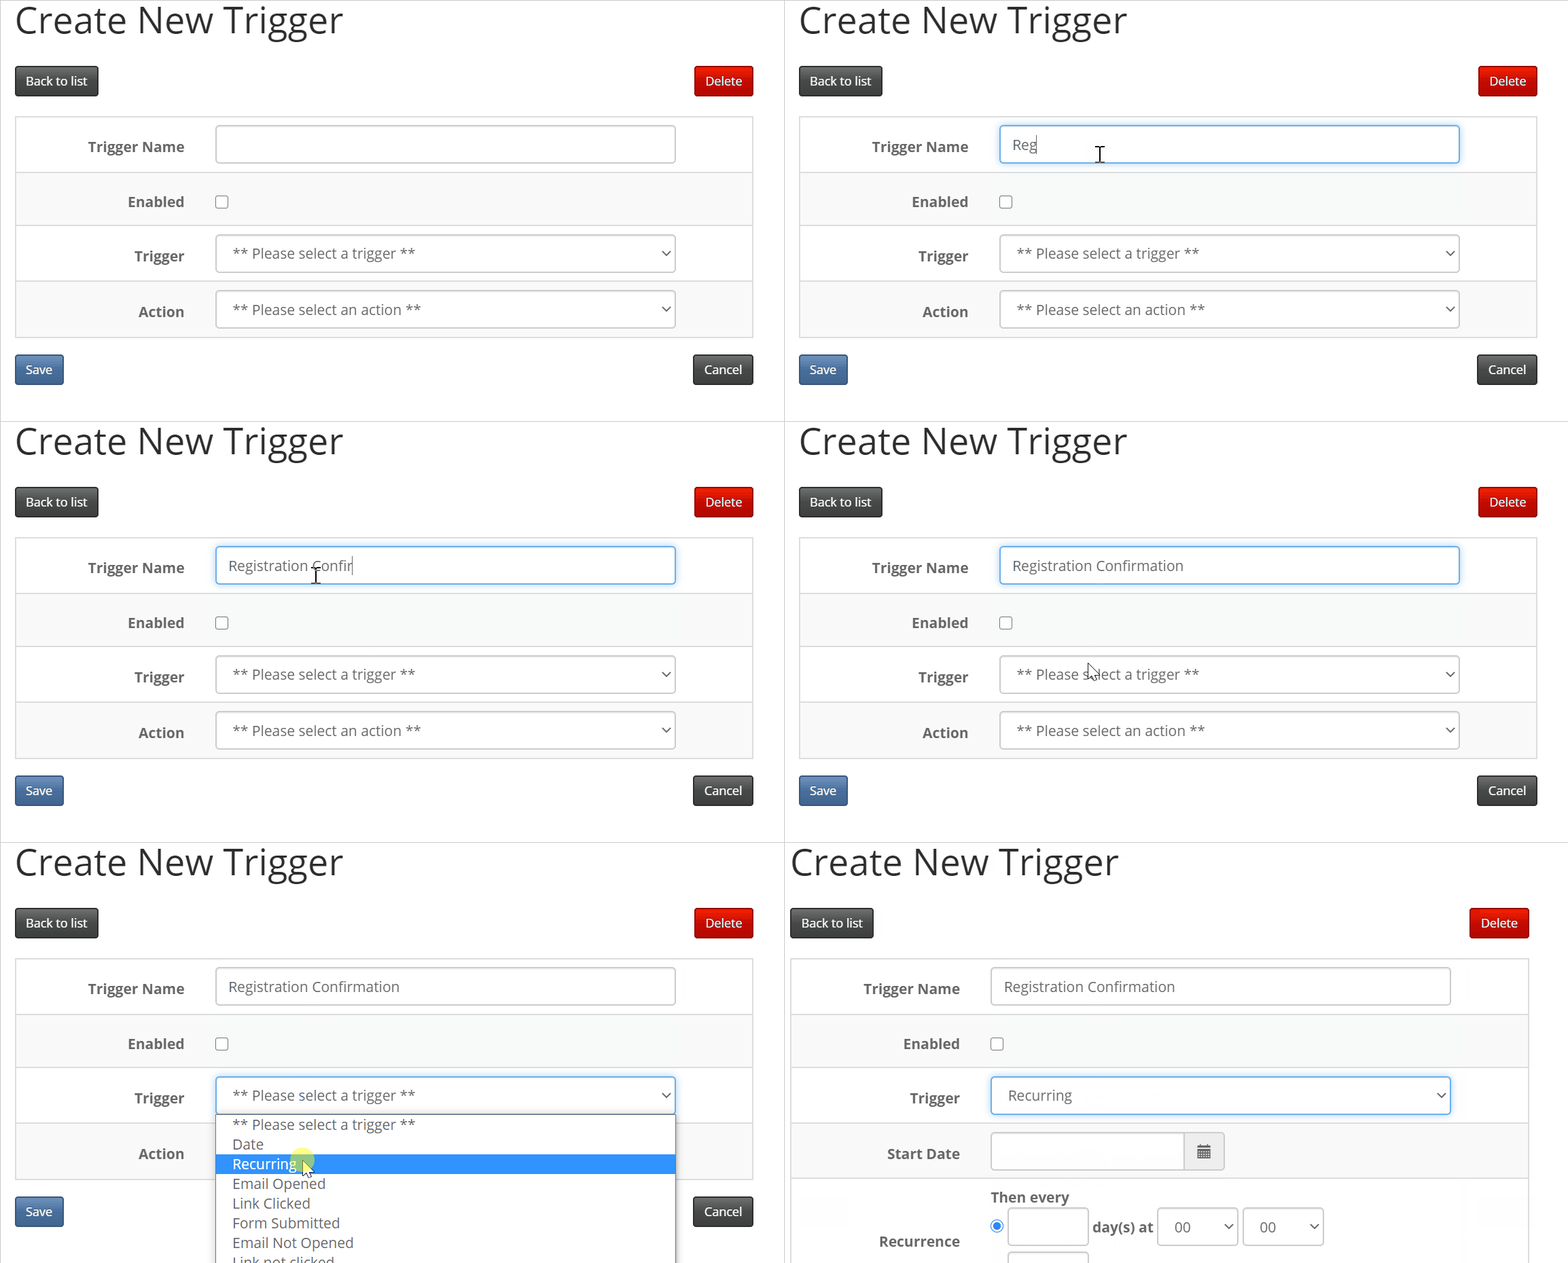
- Give your Trigger a clear name for what this Trigger will do for you. For example, if it is going to send the registration confirmation email, name it 'Send registration confirmation'. Leave 'Enabled' unchecked and select 'Recurring' from the Trigger drop-down.
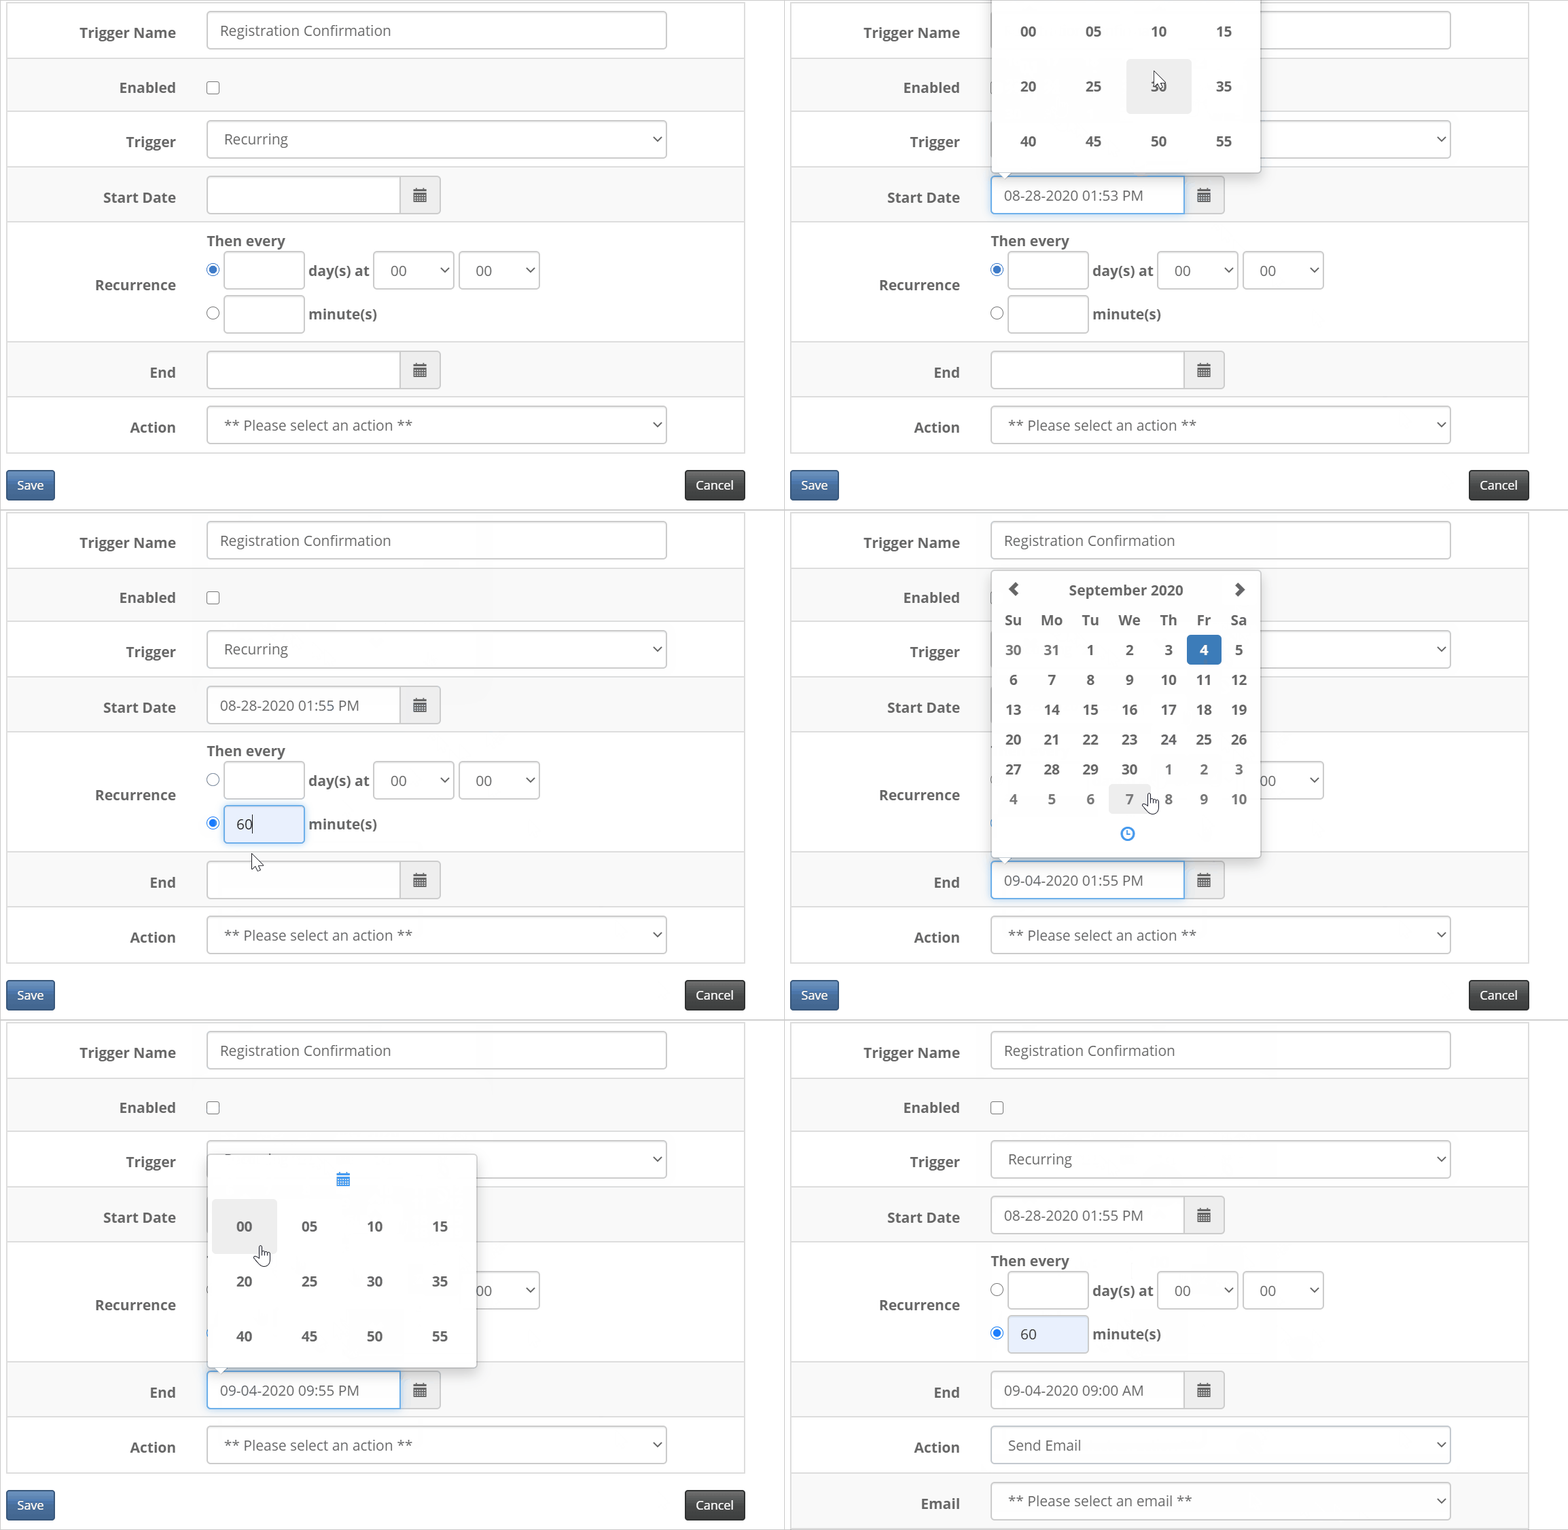
- Set a start Date and an End date the times during which the Trigger will operate (typically, from the day you send the invite up to the day of the event). Select the Recurrence of 60 minutes (the minimum recommended time is 30 mins). Then select the Action, which is what the Trigger will actually do. In this case, send an email to people who said they are attending and complete the form: Send email
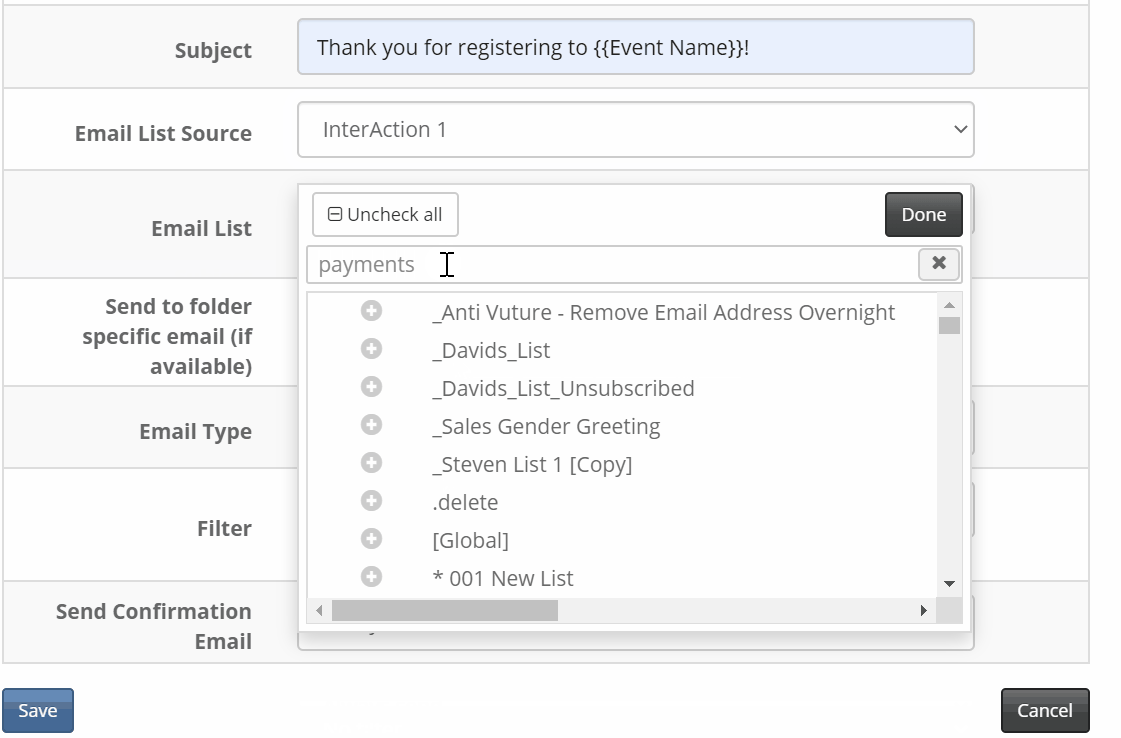
- Select the email you want this trigger to send, which would be the Confirmation Email. The Personalised From, Reply to, Subject, and List Source, Email List, and Content types fields are the same as on the send email screen.
- Then click on 'Create a new filter'. We need to create a filter to only send this Confirmation Email to those who have RSVP'd Yes.
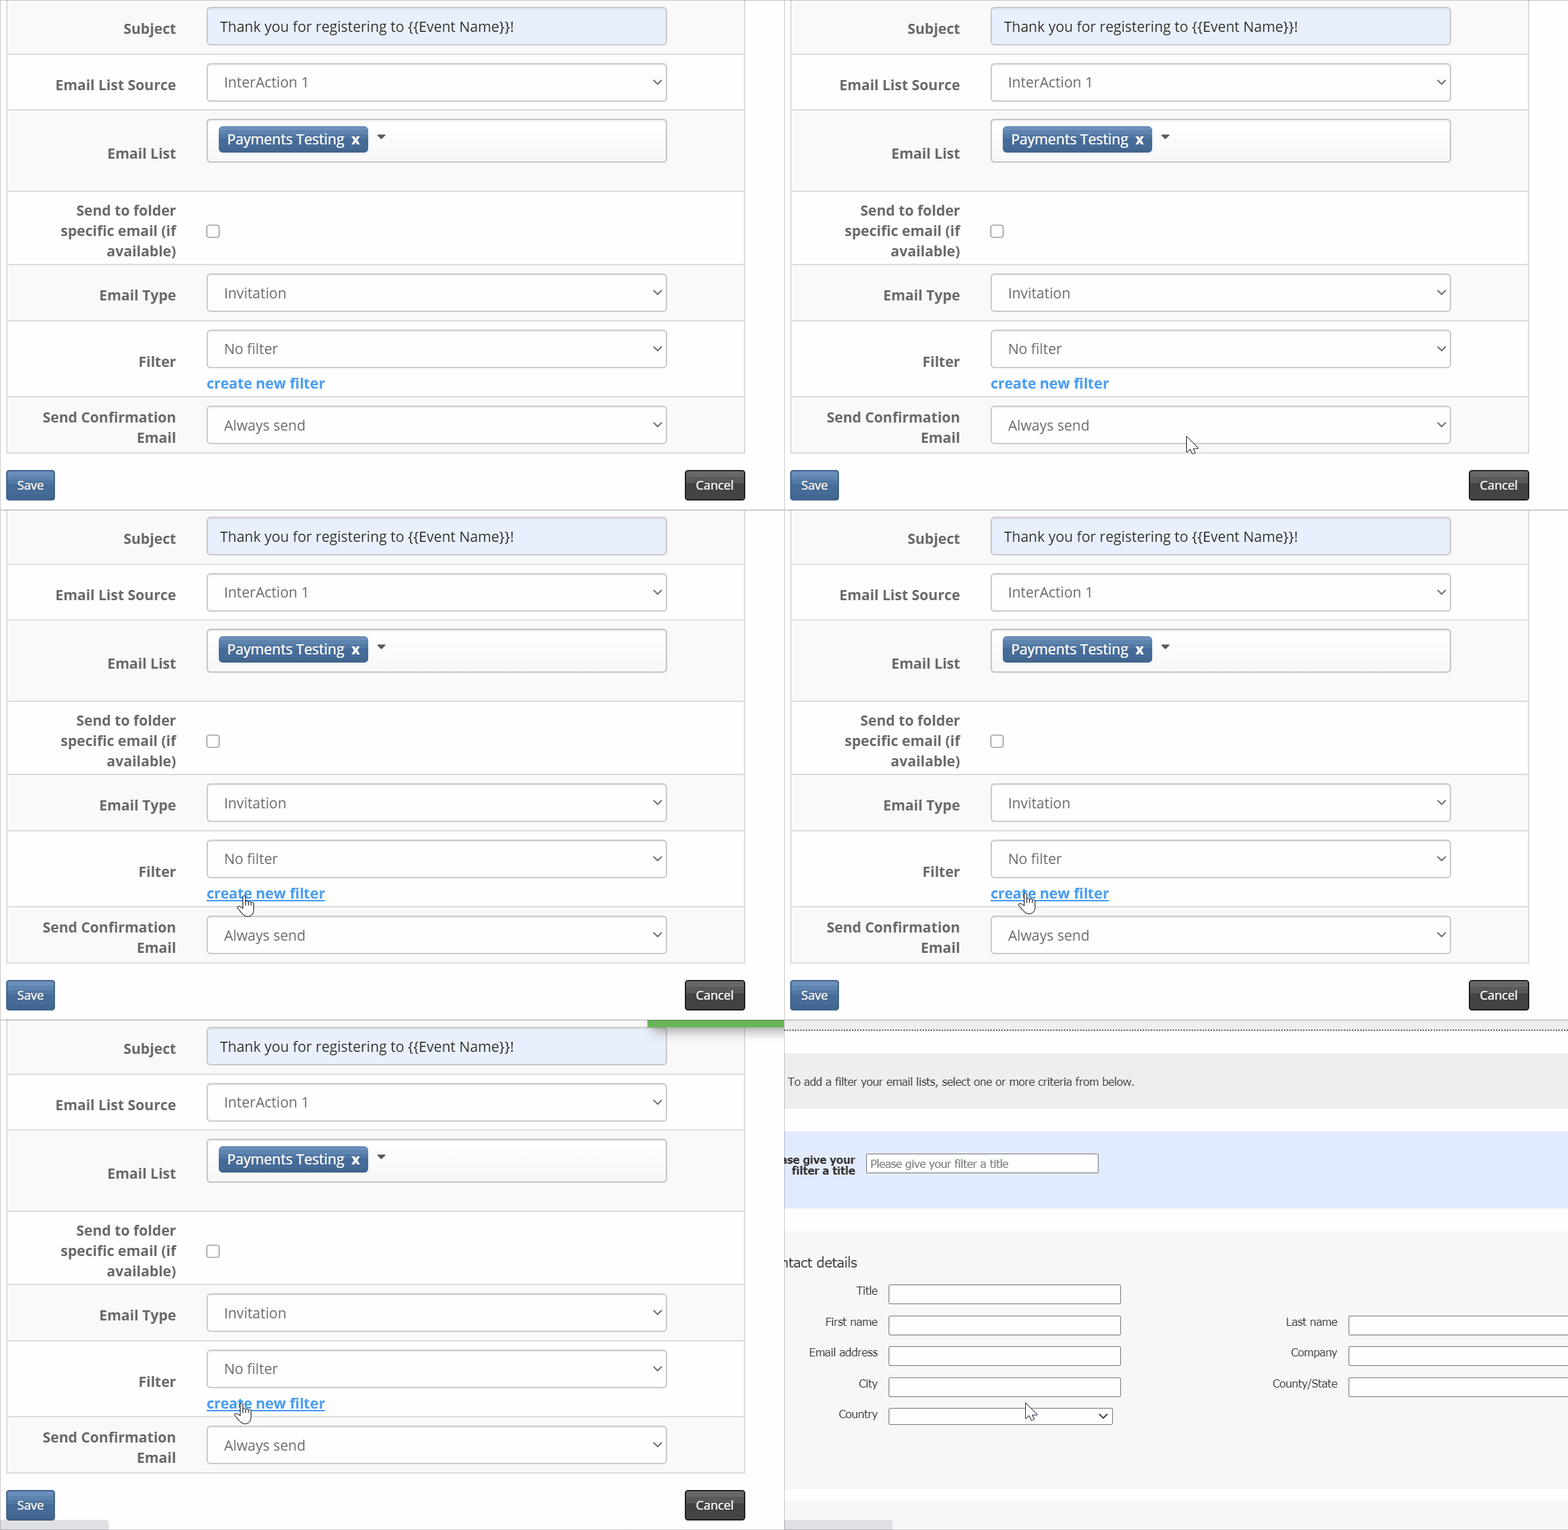
- In the Add Email Filter screen, give your filter a unique name e.g. “Vuture Webinar - RSVP is Yes” - this is the name of your event and what you are filtering on. In this case, it is the 'RSVP' additional field and the value is 'Yes'.
- From the Pick a folder drop down, select the same Marketing List that you used on the RSVP Form(s) and that you set your dynamic content on.
- From Field, select RSVP
- From Value select Is - Yes
- Click Add, then click filter at the bottom of the screen
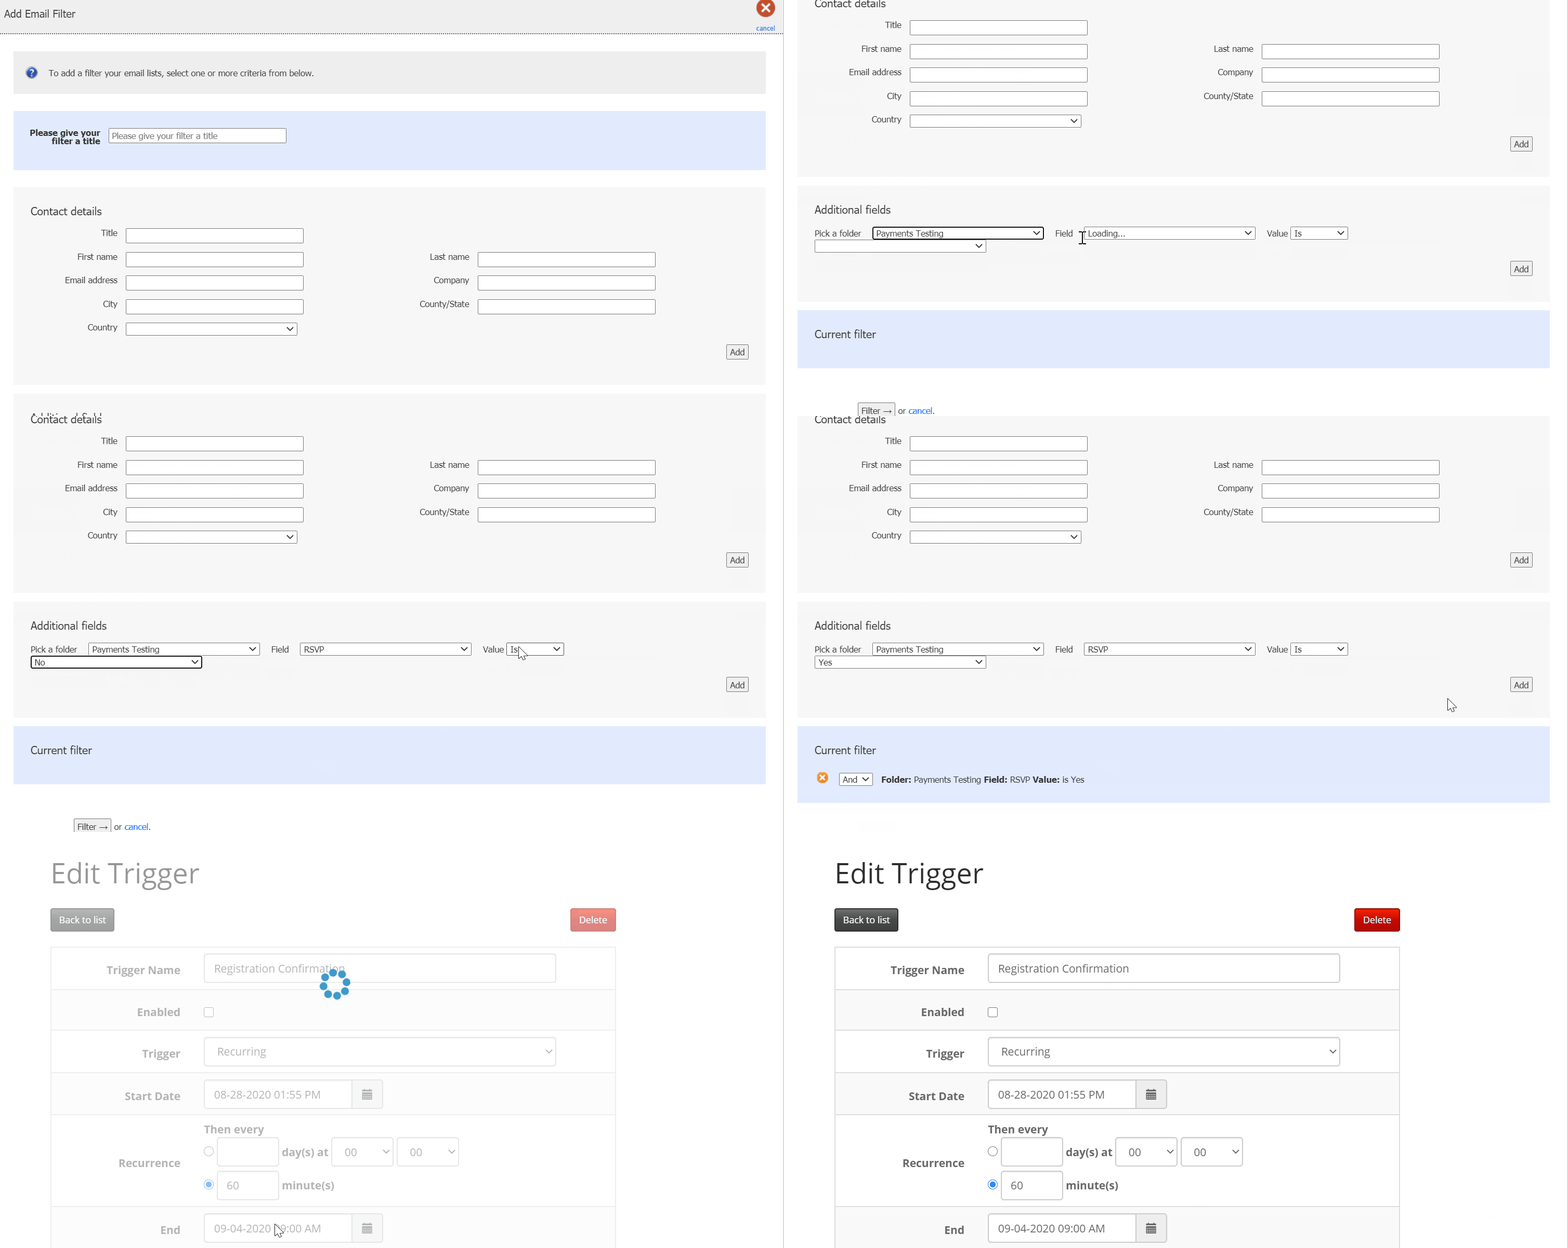
- Back on the Trigger screen where you were setting up your recurring trigger, scroll down and select the Filter from the drop-down list. Then click Save.
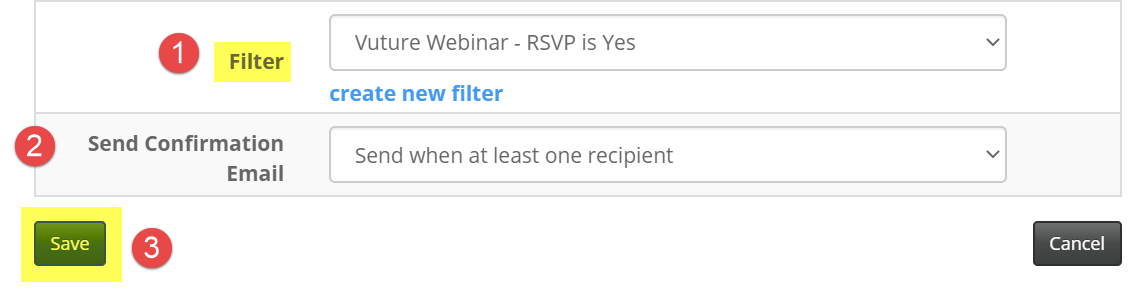
- This will bring you back to the Trigger List Screen and you will see the trigger that you just created listed.
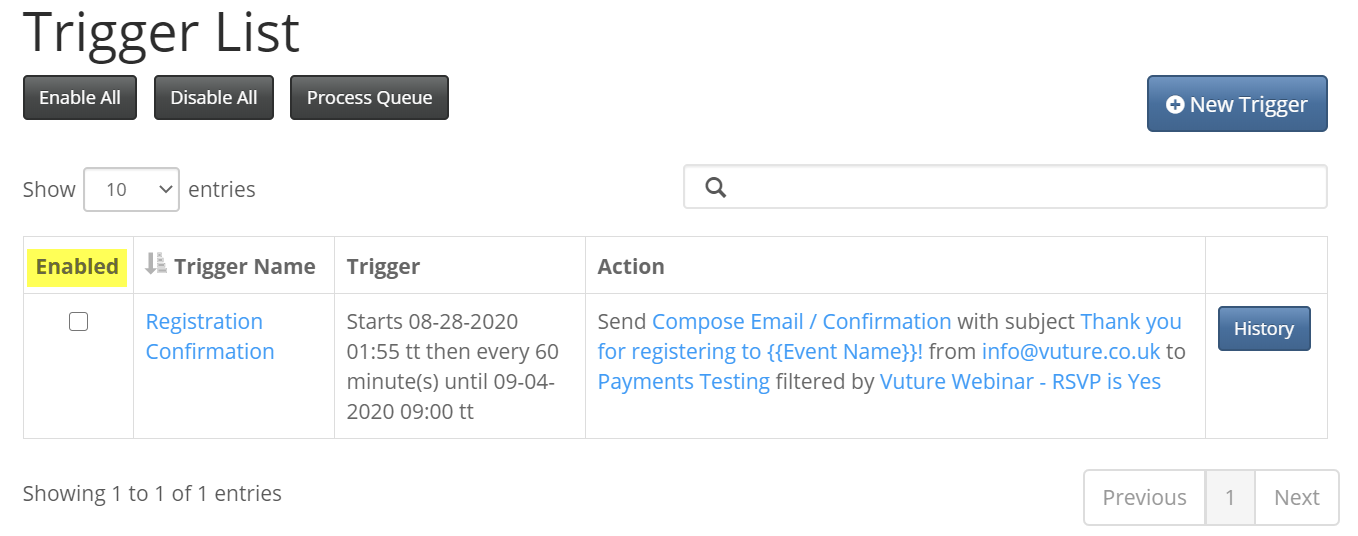
Enabled should be Off until you are ready to send, (to prevent any accidental sends).
