Overview
This article covers the testing and sending processes for Intapp Legal Blueprint.
Contents
Uploading an Intapp list to Vuture
To use contact fields and custom fields on a Vuture Form (for example, to build an RSVP form for your event) you will first need to upload and sync the Intapp list to Vuture.
- Log in to Vuture’s platform and select the correct container and then the Contacts module.
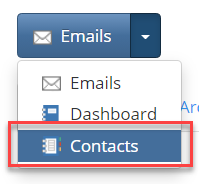
- For the CRM Source you will be asked to choose between Vx and Intapp as a data source, select Intapp.
All mailing lists, whether for events or publications, will appear as Campaigns
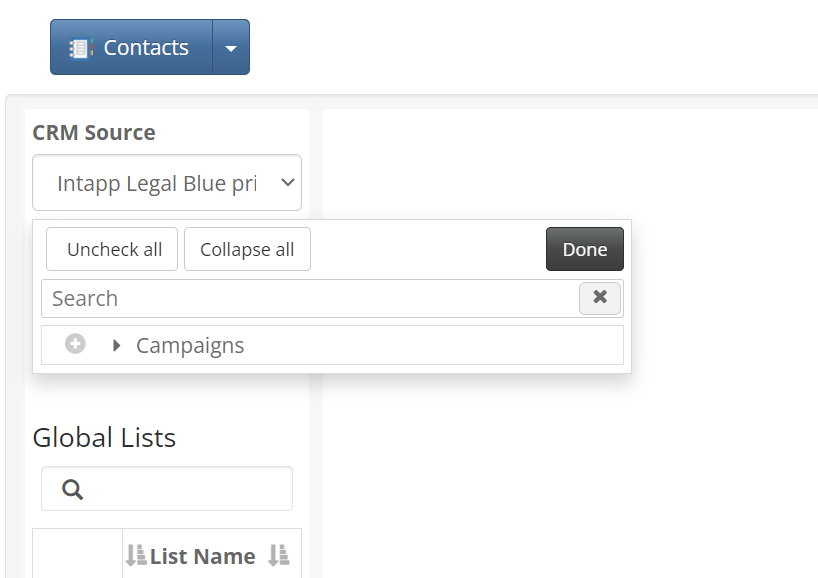
- Click on the right arrows to select and expand the lists.
- To quickly locate a list click into the search bar and type a list name.
- Click on the '+' to select the list you wish to use then click on Done, and click Import List.
- You will get a success message – Imported Lists, written in green, at the top right of your screen.
- The list will appear under the Global Lists and this will populate the screen with individuals.
- Place a check mark beside the list you are using to view the list.
- If it does not populate, click on Refresh from CRM to bring the contacts in.
A Contacts imported message appears in the top right corner of the screen once the synch process is complete.
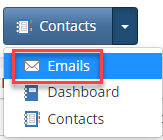
- Return to the Emails module, by clicking the module selector in the top left corner, and choosing Emails.
Within your campaign in the Landing Pages you will already have your RSVP Prefilled and RSVP Blank forms.
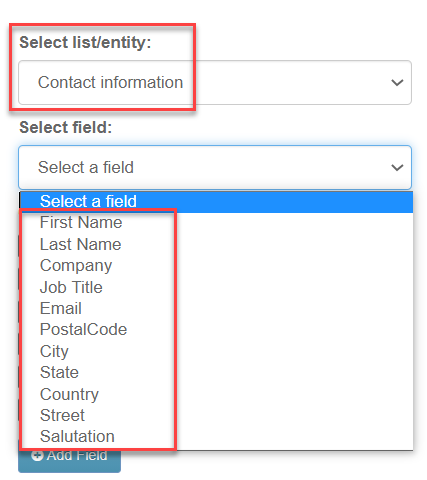
The form fields you can use in the Intapp integration are shown in the screen shot below in the list of Contact Entities. The list of Contact information and those Campaign target entities that have first been created in Intapp.
|
Contact Entities
|
Describe the Contact. They are a standard set of fields which are always present for each Contact.
The Core Fields are:
|
|
|
First Name
Last Name
Company
|
Job Title
Email
PostalCode
City
|
State
Country
Street
Salutation
|
| Campaign Targets | Contain the RSVP, Attendance etc. |
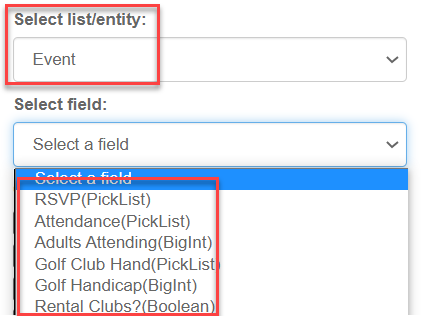
Many other Entities can be created – for example, details of how a contact may be travelling to an event, hotel requirements, or which sessions they wish to sign up for at an event.
Note: If there is an entity you need to track which is not available in the current integration, a workaround would be to create the field on your form as a Vuture field only. Any information entered in that field by your contacts would not write back to Intapp but would be stored in the Vuture database and made visible in the View Stats report.
Event RSVPs
Adding the RSVP field will give you an Accept/Decline option to use on your form for Event Campaigns, and these will write back to your list in Intapp. Note: The RSVP Prefill form will only write back to the list that the email was sent to and not another list that's selected.
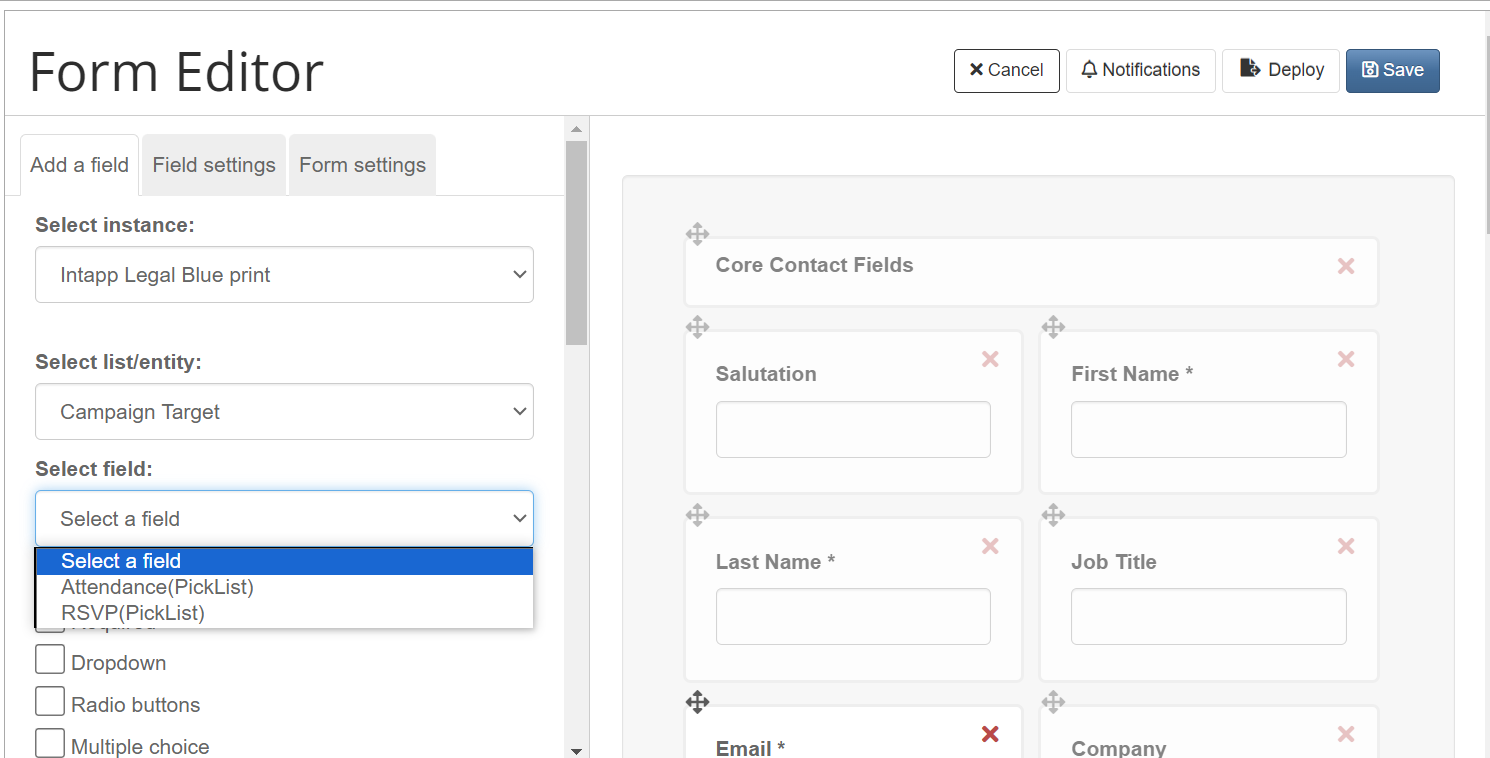
- In the Vuture form, in the Add a Field tab, click on the Select Instance drop down to select Intapp .
- From the Select list/entity select Campaign then.
- From the Select field, select RSVP(PickList).
- Click Add Field to add it to your form.
Next we need to setup the redirects.
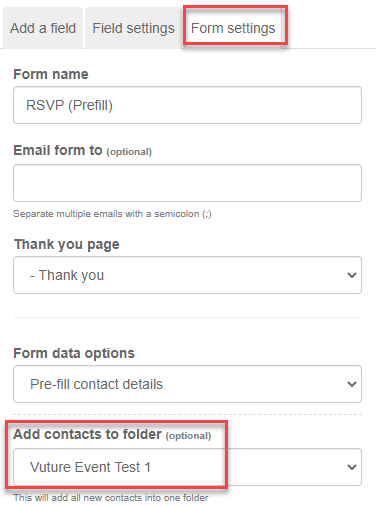
Under the Form Settings tab, you need to enter a form name (make this unique for each campaign, RSVP Prefilled and RSVP Blank is fine but you should add more detail such as the date), this can be useful when looking at future reports of forms submitted.
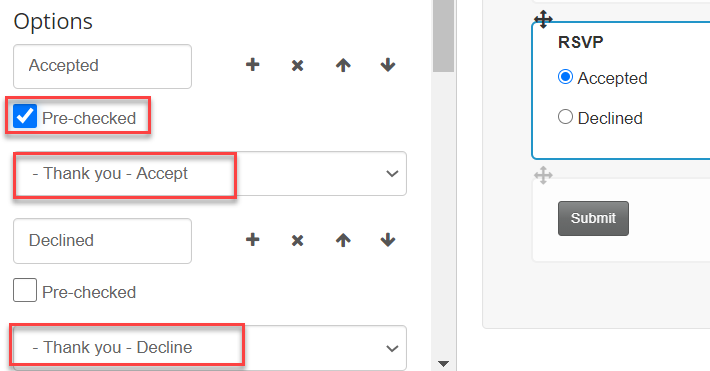
- Click onto the RSVP field you added to the form.
- From the Field settings tab, select the Redirects.
- for Accepted, redirect to the Thank you Accept Landing page
- for Declined, redirect the the Thank you Decline Landing page
- You may also wish to select Pre-checked.
- In Add Contacts to Folder, at the bottom of the list, select the list you are planning to use for the email. This will ensure that any new contacts are added to this list. Note: while this is optional for the RSVP Prefill form, we recommend it is best practice to select it, that is, the list that you are sending to.
- Click Save in the top right to save and return to the form view.
- Repeat for the RSVP Blank form.
The Vuture RSVP Prefill form: This Prefilled form will update an existing contact.
The Vuture RSVP Blank form: When the form is submitted it will create a new Contact. Vuture will use the regular duplicate look-up for a new contact’s surname and email address. If a match is found, Vuture will update the existing contact. If a match is not found, a new contact will be created in the database.
Note about Duplicates: Intapp has an option to either allow contacts with duplicate emails or not. If Intapp is set to allow duplicates, there is a possibility that two contacts with the same email/last name will exist. In this case, the contact with the newest Update Date in the CRM will be updated. If Intapp is set to not allow duplicates, and Vuture cannot match the contact by last name and email, there is a possibility that the update to Intapp might be rejected when the CRM is called.
Once all fields are added and the field settings and form settings are complete you can Publish both forms.
Test Email
Test Email or Test Page, allows you to test emails and landing pages by previewing them in your browser as a contact would see them, or sending yourself a copy of an email as any of your contacts will see it.
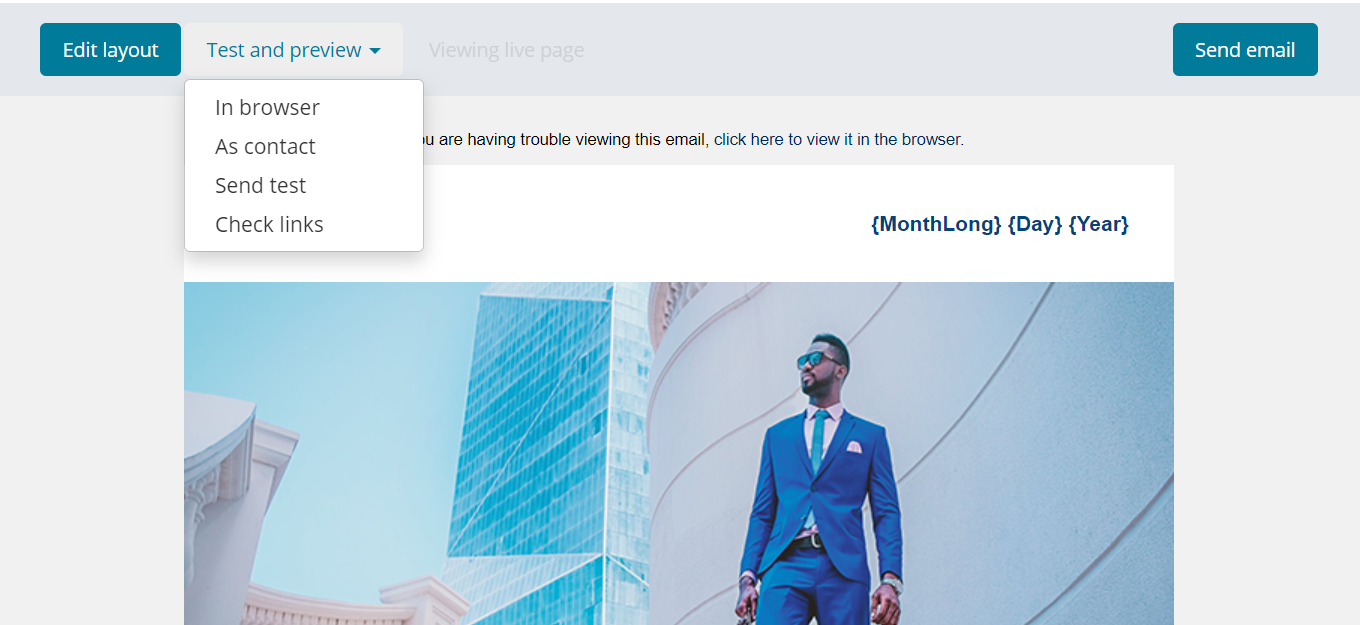
Test as Contact
- From the Select an instance drop-down select Intapp
- From the Select a folder from the drop down select the desired List.
- Once selected, the contacts from that list are displayed in the lower part of the window place a check mark beside a contact then click Preview.
The email or Landing Page is displayed in a separate tab and can be viewed as the client would use it.
Note: When viewing the RSVP Prefill form, you will see it is pre-filled with the selected contact's information. Should you accept the invitation, this will write back to the Intapp list.
Sending a Sample Email Using an Intapp List
Sending an email using the Intapp integration requires the latest version of the Vuture Send Email screen (version 2).
In your campaign, once fully built and tested and ready to go, select Send Email. The Send screen has two tabs – Email Setup and Email List.
The content of the fields you need to complete are on the first tab at the top.
Enter the:
From: address
Subject of the email to be sent
Reply To: address, if you require an alternate email address
cc or bcc (if using)
- Scroll down to see further fields at the foot of the first screen:
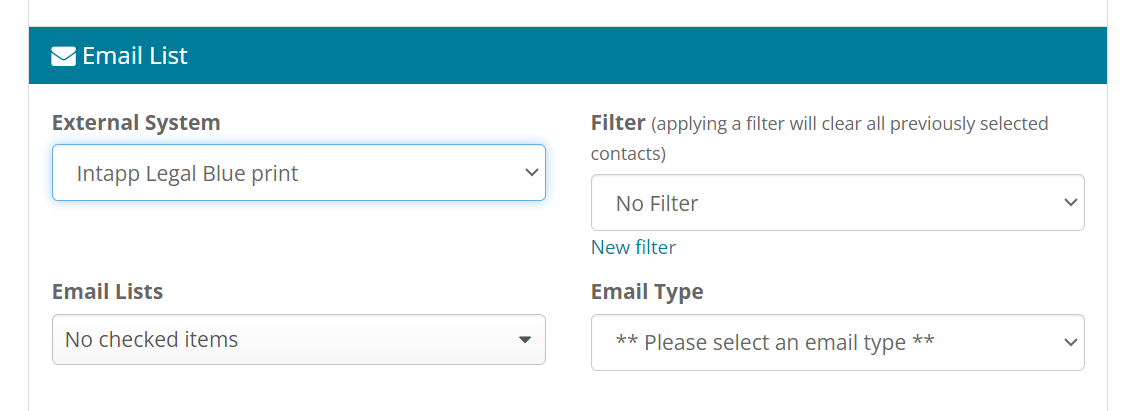
- Select Intapp Legal Blueprint in the External system drop down.
- Find the list you are using in the Email Lists drop-down.
Note: The only lists you will see here, are the lists that have been imported using the Contacts module.
- Click on the link to Refresh this List to ensure you have the update live data.
Important: Refresh “This” List fetches the latest state of the data from Intapp and pulls it into Vuture. Changes made in Intapp will not automatically be shown until the Email list is Refreshed.
- Select the Email type – Invite, Newsletter, or as your firm has chosen to set up the types.
This selection will influence the suppression lists which Vuture will apply.
Email Types
If you wish to ensure that users select an Email Type on sending, ask your Client Success Manager to configure the 'Email Type Optout' suppression setting in the CRM metadata tool. This will ensure that an Email Type must be selected before sending an email. This is the recommended setting.
You can schedule reports to go out automatically, to yourself or others, after the email is sent. You can put your email address in the box or others’ email address and select the number of days to elapse before reporting.
On the second tab:
Email List you will see the name of the external system and of the email list, repeated.
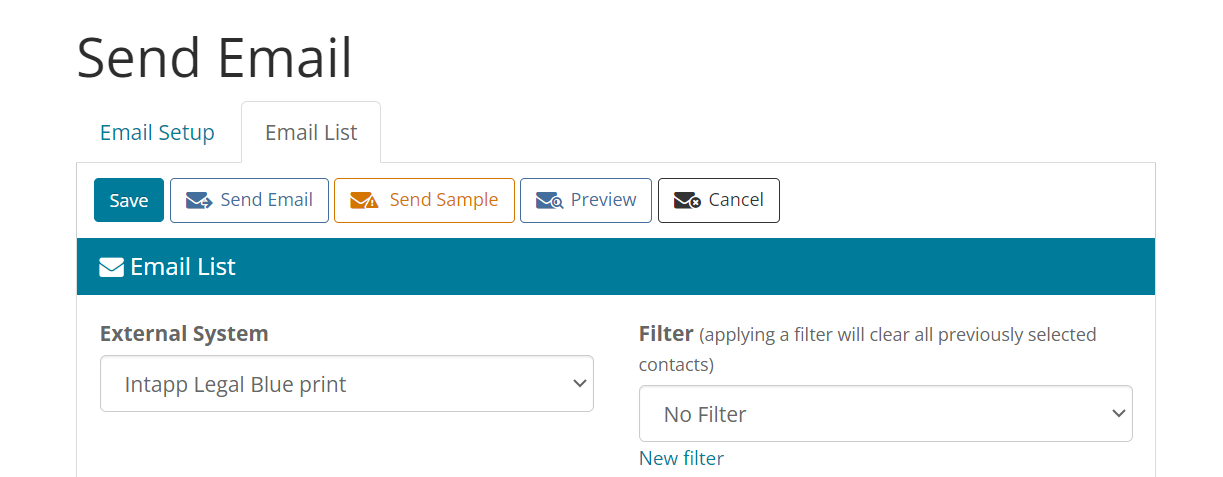
The first 60 subscribers on your Email list will be displayed, by default. This is faster to load and will be quicker than waiting for the page to refresh if you had thousands of contacts in your list. You can click on Load Full List to see the full list. If you do not click on Load Full List, the complete list will still be emailed.
- Click on Send Sample at the top right of the page to do the send.
Note about Goes By field: This maps to a field in Intapp called “IR Goes By” which is the same as any other contact field. There is a placeholder which maps to this field called {Goes By}. You can use this place holder in your emails instead of Dear {First Name} for example.
Sending the Live Email
If you used Send Sample email it is recommended that you delete the sample send before you send the ‘live’ email, to remove any statistics which might otherwise skew your results on click-throughs/ emails opened reports etc.
Sending the live email follows the same procedure as sending the Sample email.
Note: If you have been using a Sample Marketing List for testing, you will need to replace the RSVP fields in your RSVP Prefill and RSVP Blank forms to ensure they are pointing to the correct Marketing List and re-publish them.
Once sent the email no longer appears in the Compose Email folder as it has been moved to the sent items folder, created and named with the Month and Year it was sent.
Creating Follow up Emails using Filters
Filters are used to send an email to part of your list. For example, to resend an invitation to everyone who has not yet replied, or to send a confirmation to everyone who has replied Accept. You can copy the Invitation email once it has been tested, rename it and reword it to create a Reminder to Register email, a Last Chance to Register or an Event Reminder email. It is recommended that you remove the RSVP buttons from Event Reminders, to prevent contacts from trying to register again.
To create a filtered email
- Prepare your email for sending as if to the whole list.
- Complete the Subject Line.
- Complete the From field and select the relevant Mailing List and choose the Email Type.
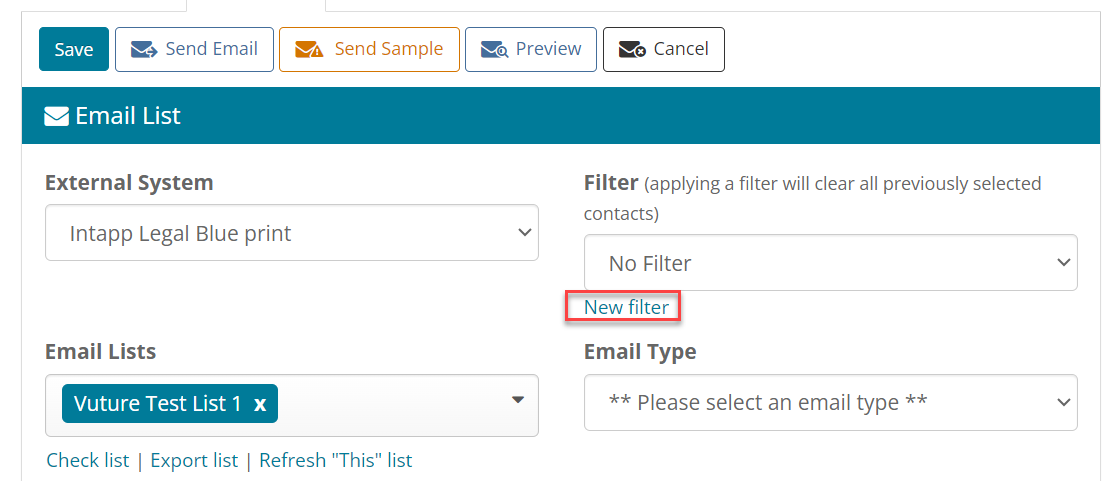
- To specify who should receive the filtered Email click new filter.
The Add Email Filter screen will appear.
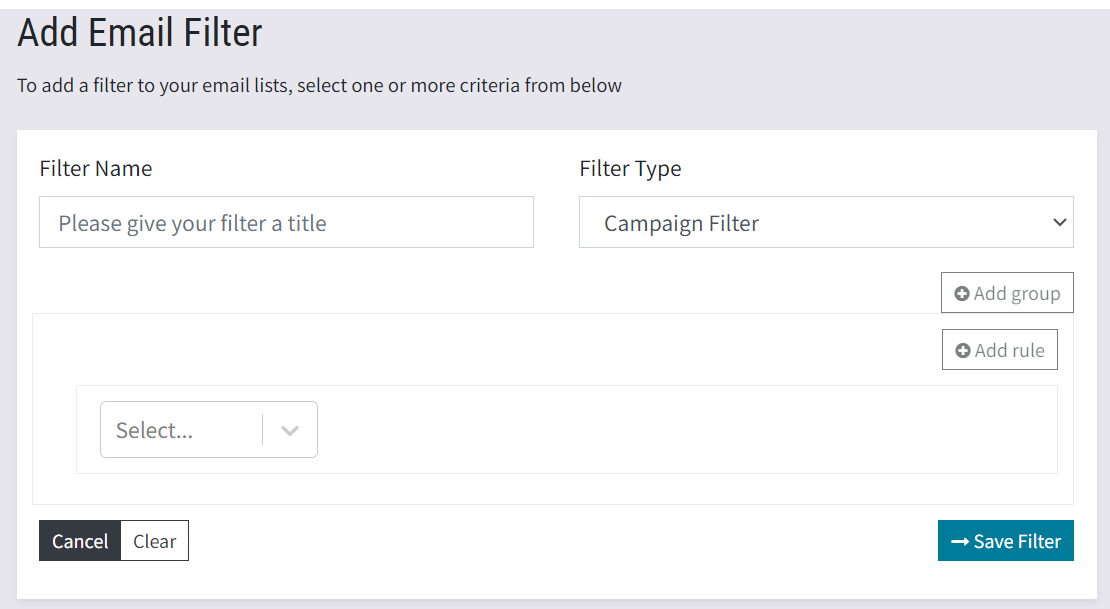
- Type the name for the filter using a clear explanation of what it does.
Warning: Include the Campaign name at the beginning of the Filter name, as Filters are container based (unless you select campaign based) to ensure the correct filter is selected that is pointing to the correct Marketing List.
- For the Filter Type it is recommended you select Campaign Filter as there may be many filters residing within a container, and this makes it easier to manage your filters.
- From the Select drop down choose the location of the fields you need to create your filter
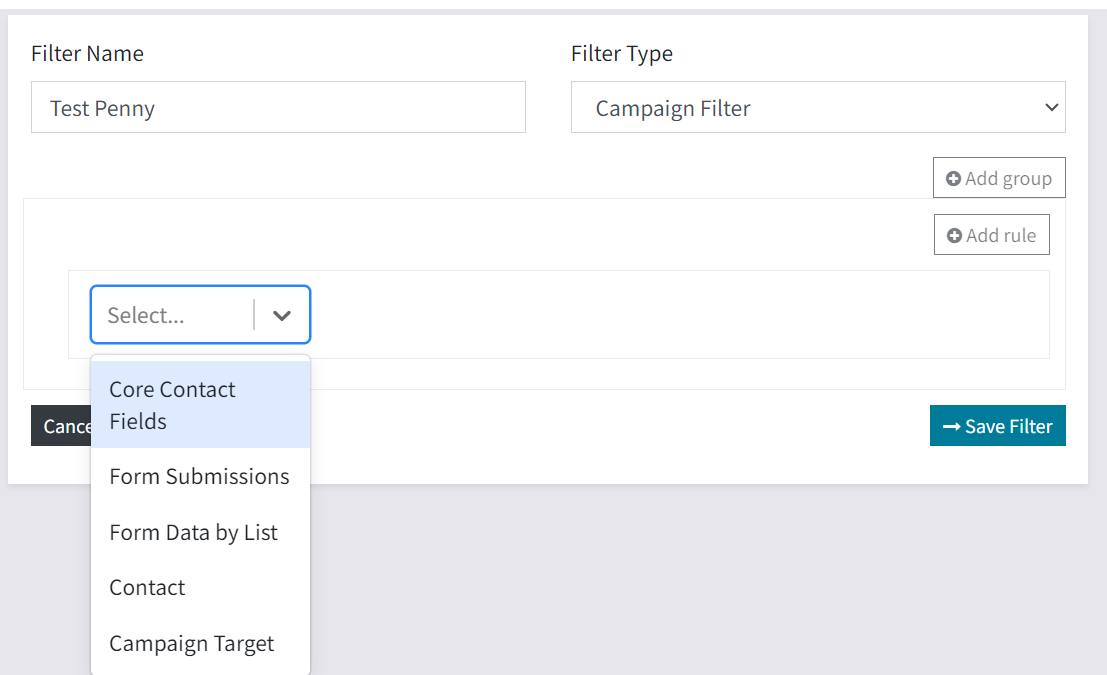
There is a detailed How To document on the Knowledge Base describing how to build and use Filters here
Once finished you will be returned to the Send screen, where you will need to apply the filter created.
- Click the down arrow for the filter and select the desired filter (there maybe more than one filter displayed).

The example above is using the RSVP field to filter for anyone who has not yet submitted the RSVP Prefill form.
Activities
The following email activities can be written against Contacts in Intapp:
Email Sent
Email Opened
Email Hard Bounced
Links clicked
Unsubscribes
Writing Back Link Clicked Activities to Intapp
Link Clicked activities are sent to Intapp OnePlace in two ways. This allows OnePlace users to see top-level marketing stats in the Vuture Activities dashboard (image below), and now also to drill down into the granular detail of each click by sending the details to the OnePlace Page Views object.
Note: as both the link clicked activities are processed together, in the unlikely situation that the first call is successful, and the second fails, there might be a small discrepancy between the number of clicks in the Vuture Activities Dashboard vs the Page Views object. If that does happen, please get in touch with your OnePlace representative.
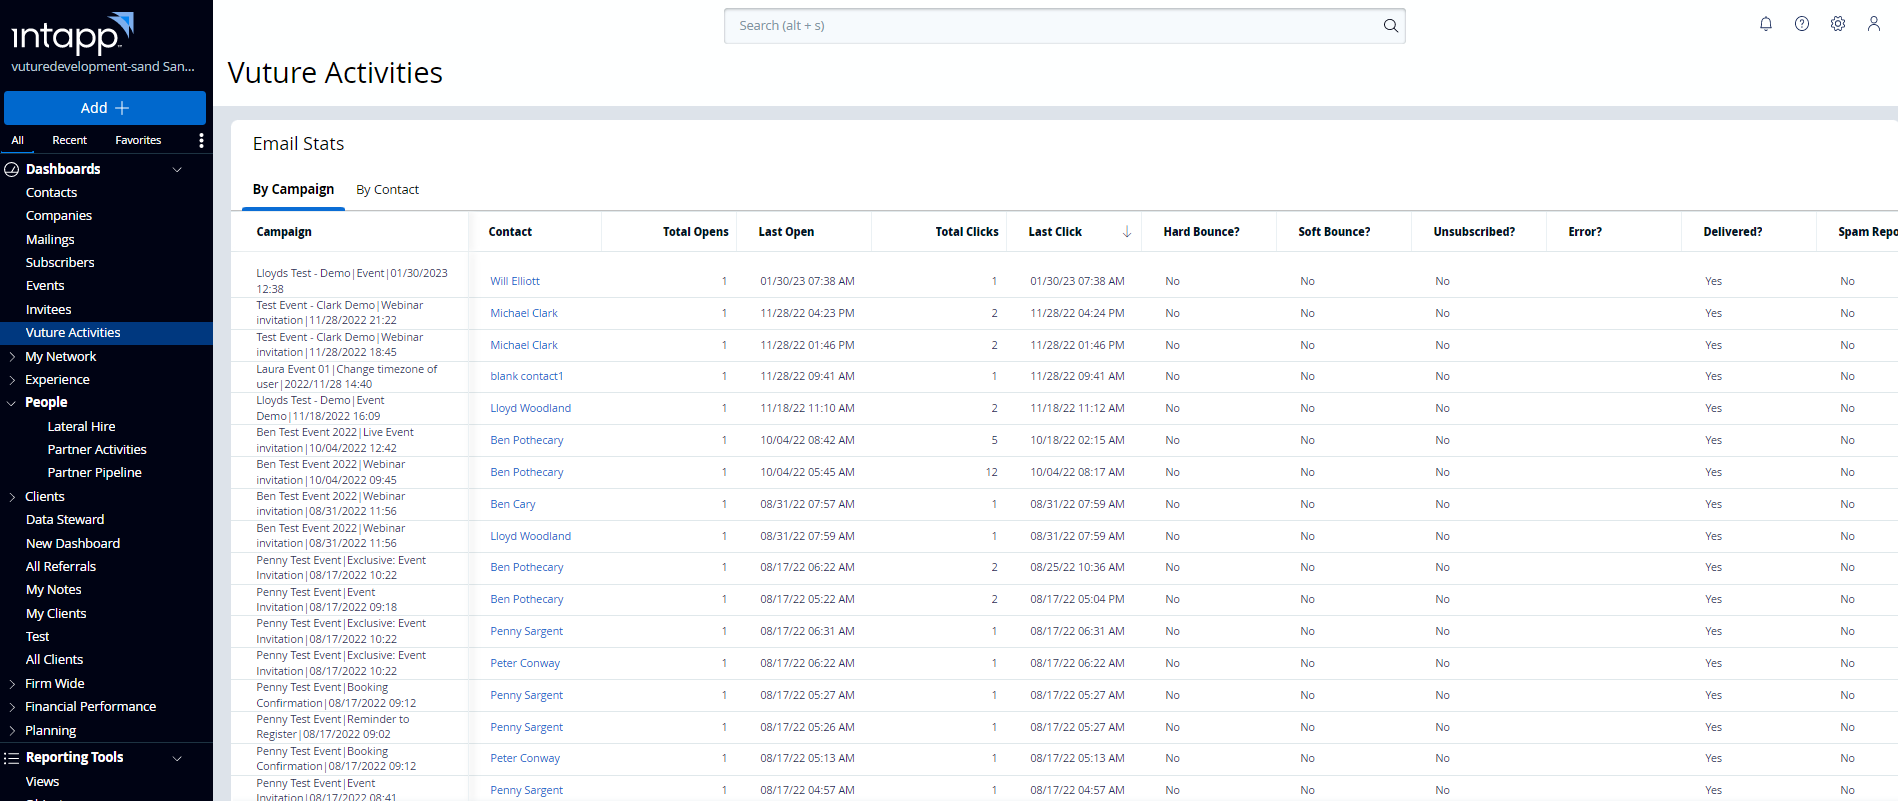
The Page Views object allows OnePlace to collect and store multiple pieces of data for each click, such as the contact ID of the ‘clicker’, the OnePlace campaign ID, and the URL of the link which was clicked. Therefore, it will allow you to put together customer reports/views. Your OnePlace representative will be able to help with your custom reporting requirements.
