Introduction
We have developed a feature which allows you to filter across either one or two lists, before sending an email to the filtered, resulting list. This will allow you to filter a list in your CRM, together with a list uploaded directly into Vuture via a csv. file for example, and combine the two results into one filtered, list on the Send screen, before sending an email to the result.
Filter Types
Filters are available at a Campaign, Container or Global Level. This level refers to their visibility or availability across the platform. You could create a Global Filter from within a campaign, for example, by selecting Global to start (more on that below).
Naming Convention
Important Note: It is vital for clarity and ease of use later, that you establish an effective naming convention on your filters from the start. Filters which are intended for use purely within one campaign could be called simply “RSVP=Yes”, for example. You will know, within that campaign, which list is in use. However, any filter which is visible across different campaigns - Container level filters or Global level filters – must contain both the List Name they are filtering and the criteria you are filtering on. It is best practice for event list names to include the date of the event as well, to prevent confusion.
Prerequisites
You will need:
The Email Module
Send Screen v2 with the new Filters Screen
A connection to your crm
Admin.System.Versions.Filters version 2 enabled for you by Vuture
The New Filters feature enabled for your Role at Admin.Roles.SpacelabPages.Email Filters
CRMS
This feature works for DealCloud, Fibre, Intapp, Upper Sigma and ContactEase (CE with the Vuture connector).
In a typical scenario, you will access the new Filters Screen from Send Screen v2. You will be planning to send an email but first require to filter one (or two) lists, to send the email to a selected group of contacts only.
Note: You will also be able to access this new Filters Screen from within the Triggers area. The functionality of these Filters is exactly the same as from within Triggers. However, this article deals only with the Send Screen v2 route.
Creating a New Filter
In your campaign, click on Send Email.
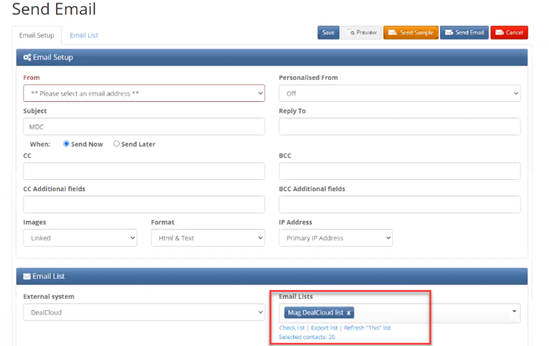
This will open the Send Screen. In the Send Screen, select your external CRM and the main list you wish to filter on:
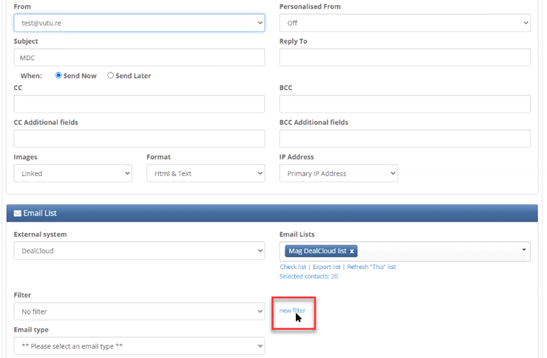
In the Send Screen, scroll to the Filter link and click on New Filter.
Clicking on New Filter will open the Filters screen.
Note: the first part of your filter is going to offer you Core Fields such as contact name and address.
The Filters Screen
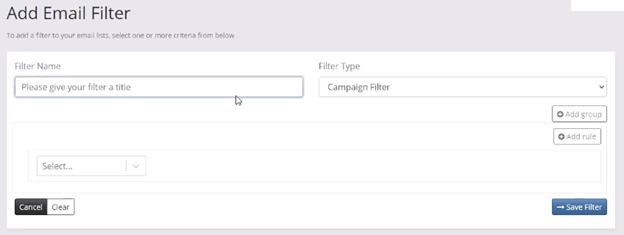
Filter Name
You can give your Filter a temporary, working name. If you do this, you must rename it properly later, using a clear, detailed name, once you have created the rule(s) you need.
Filter Types
The Filter Types available are Campaign Filter (visible from within this campaign only), Container Filter (visible across all campaigns within this container) and Global Filter (visible from any campaign or container across the platform).
In this example we are creating a Campaign Filter.
Next, select from the drop down list the criteria on which you wish to build your filter:
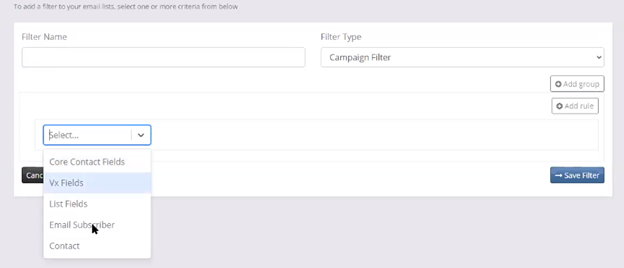
Your choice here will vary, depending on the criteria you need.
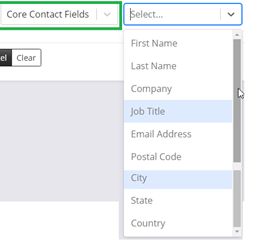
Core Contact Fields are the contact’s name and address details:
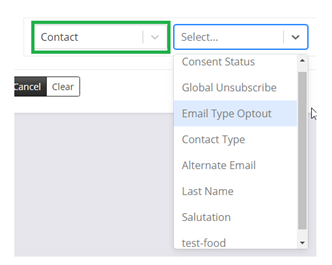
Contact Fields are contact-related custom fields:
Form Submissions are any fields which have been submitted via a Vuture form for the selected list. You may want to use this to reference a field added to a form which has not written back against the CRM contact record.
Form Data by List again relates to form submissions, but which have been made against forms submitted for a specified list (not the one selected on the send screen or triggers screen).
You may see other elements in the dropdown which relate to specific entities within your CRM.
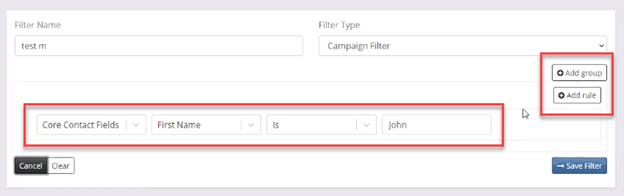
Once you select a criteria source, the Add Group and Add Rule buttons will become “live” or active.
Rules and Groups
Add Rule allows you to add a single filter. A Group is a collection of one or more filters.
Filters can be built up in a hierarchy using And or Or. Selecting the Add Group option results in:
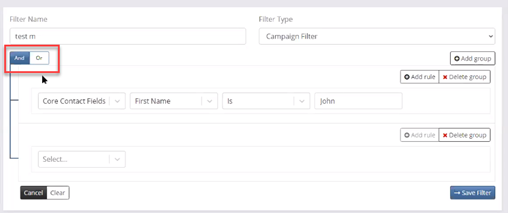
So it is now possible to add a further filter to this Group where the First Name is John OR James, for example. Alternatively you could add a further filter to this Group where the First Name is John AND the City is London, for example.
The And / Or selection can be toggled. You cannot mix And and Or in the same Group.
Continue to add filters to this first list as you require. In the example below, several new rules have been added to find contacts named John, AND who work for Vuture, AND who are attending an event.
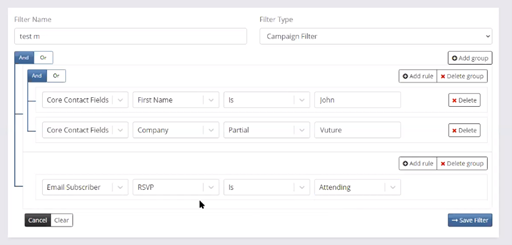
If this was all you needed you would now return to your working Filter Name and rename it, to describe more closely what you are filtering for, before selecting Save Filter.
Note about completing or filling fields – free text or drop down? When you select a field with an operator of Is/Is Not or Partial, the next field will be a free text field where you can enter your filter. First Name Is John, for example. Examples of free text fields are highlighted in the image below:
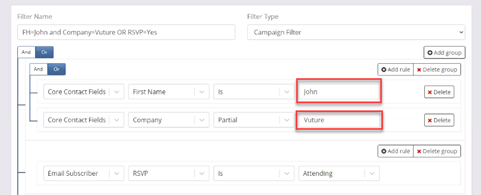
The Email Subscriber field of RSVP is a crm list field with set values. These are Attending, Not Attending, Is Empty, Not Empty. Therefore you cannot enter free text in this field. You must pick one of the values from the drop down list.
When you have finished adding rules to your filter, select Save Filter. You will be returned to the Send Screen with your newly-created filter selected. If you continued on to Send the email at this point, this filter would be used:
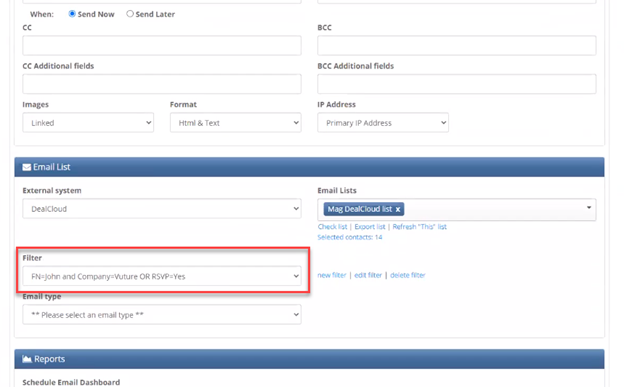
The new filter is now saved in the available filters list. From this point you could select a different filter to use for this mailing if you wished, or click on Edit Filter to return and change the criteria on this filter.
Editing a Filter
On returning to the filter screen, there are three buttons available to you while editing:
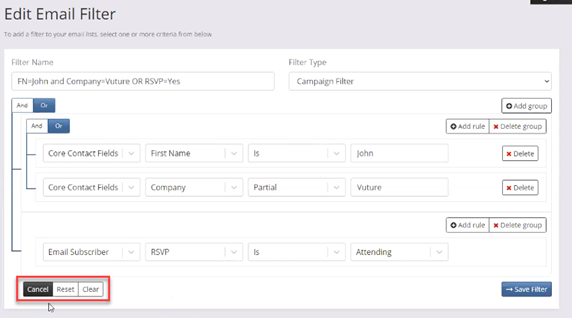
Cancel allows you to leave this screen without making any changes.
Reset will return you to the last saved version of that filter, undoing any recent changes.
Clear will empty all the selections you have made so far and present you with effectively an empty filter screen.
Warning Message when leaving Send Screen
In the Send Screen, if you decide to edit a filter, or create a new one, you may see a warning message like this:
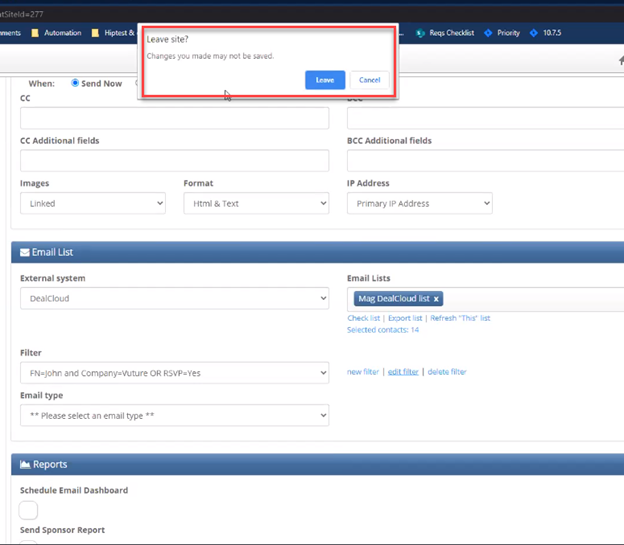
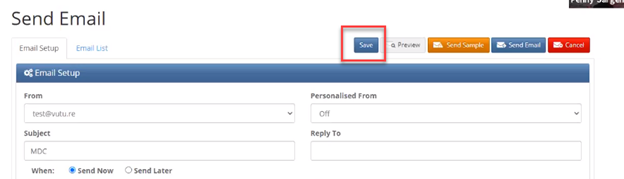
This message is not a concern. It is simply saying that the system may not save all the settings from the Send Screen that you have already selected. If you have already entered selections such as From Name and personalization options, you could first click Save at the top right hand side of the Send screen, before returning to Edit the Filter later. This Save will save the From Name and other choices you may have already made on this screen.
Then you could select Leave if you see the warning message. Your choices will have been saved when you return to the Send Screen later.
Send the Email
You can now complete the rest of the Send Screen and click on Send Email to send your email to the filtered list.