Introduction
It can be useful to identify “at a glance” whether an attendee at your event is a visitor or not. Having different badge types printed for internal staff, visiting delegates and perhaps also speakers or presenters, will make this easier. You could choose to differentiate by color, or perhaps by including your firm’s logo for internal people.
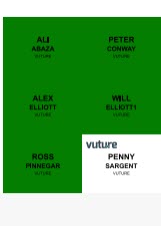
In this example, the badges will change from green (for visiting delegates) to white with a logo (for internal staff), automatically, as the list is printed:
Prerequisites
- This process works for Vuture Instances integrated with InterAction only.
- The Event App
- Access to the IA windows client, to add the extra additional field to your event list
- In Vuture, access to Event Badges enabled for your role
- The full event list, including speakers and internal attendees
- A new badge template designed for you by our Front End team. This will be chargeable.
Design Note: This type of set up only applies to logos and color background changes. The dimensions of the name badge cannot be changed using contact types.
Process
This step by step guide describes how to produce varying event badges, according to the “contact type” for each attendee, which you will assign for them in InterAction, in a new, list-specific additional field. In brief, the steps are:
- Build the list in IA
- Add the extra additional field in IA
- Give each person on the list a value in IA
- Get a new badge template created
- Configure the event in Vuture
- Print out the badges
1. The List in IA
In IA, check that everybody who is attending the event, including internal attendees and speakers, has been added to the list. This is a departure from the norm where only external delegates are on the list; however, it is required if you want to show the different attendees via colored badges.
In the IA Windows Client, add a new Additional Field to this event list. You could call it Attendee Contact Type. The Additional Field should be a List Type, with three possible values. For the values we suggest Staff, Delegate and Presenter but the wording can be anything and is up to you. Just note that:
- The wording MUST match (described in point 2. in this process below) and
- Nobody will see the contact type they have been assigned unless you choose to use it publicly or display their value on the check in screen, as described at the very end of this article.
Assign everybody on the list a contact type.
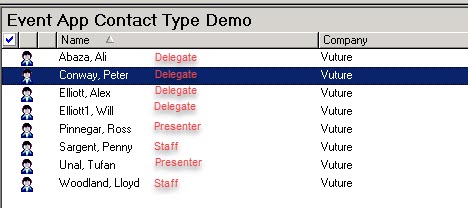
For this example we used Staff, Delegate and Presenter as in the image below:
The red contact types have been superimposed on our Event List to show who has been marked as which contact type. This image is not a true screen shot of IA.
2. The Badge Template
Ask your Client Success Manager to organise a Front End job for you. For our example, we specified the following:
When a class called “contact_type_Delegate” or “contact_type_Presenter” is applied to the attendee the logo will disappear and the background will change to green.
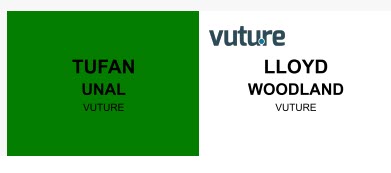
You can see from the image above that Tufan has been marked as Presenter and Lloyd has been marked as Staff.
When any other class (i.e. “contact_type_Staff”) or no class at all is applied then the badge will appear with the logo/image and white background.
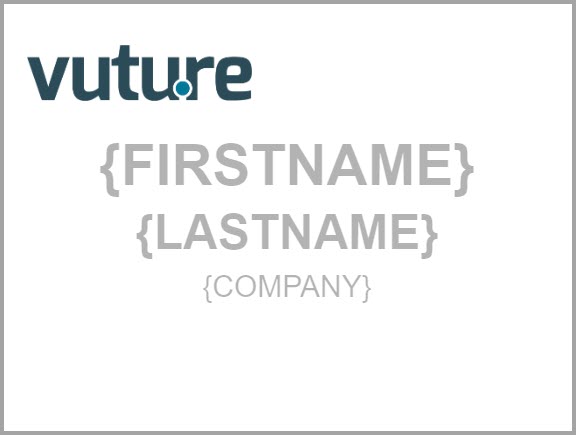
Note that the terms Delegate, Presenter and Staff part of the class MUST MATCH exactly from the badge form to the list value.
Design Note: This type of set up only applies to logos and color background changes. The dimensions of the name badge cannot be changed using contact types.
3. Configuring the Event
In Vuture, navigate to your campaign and the Campaign Summary screen. Use the Campaign Summary screen to access the Event App in the usual way, entering a password for the app.
Complete this screen as usual with the name of the event list or InterAction folder name, the RSVP value for Yes or Accepted and the Attended values:
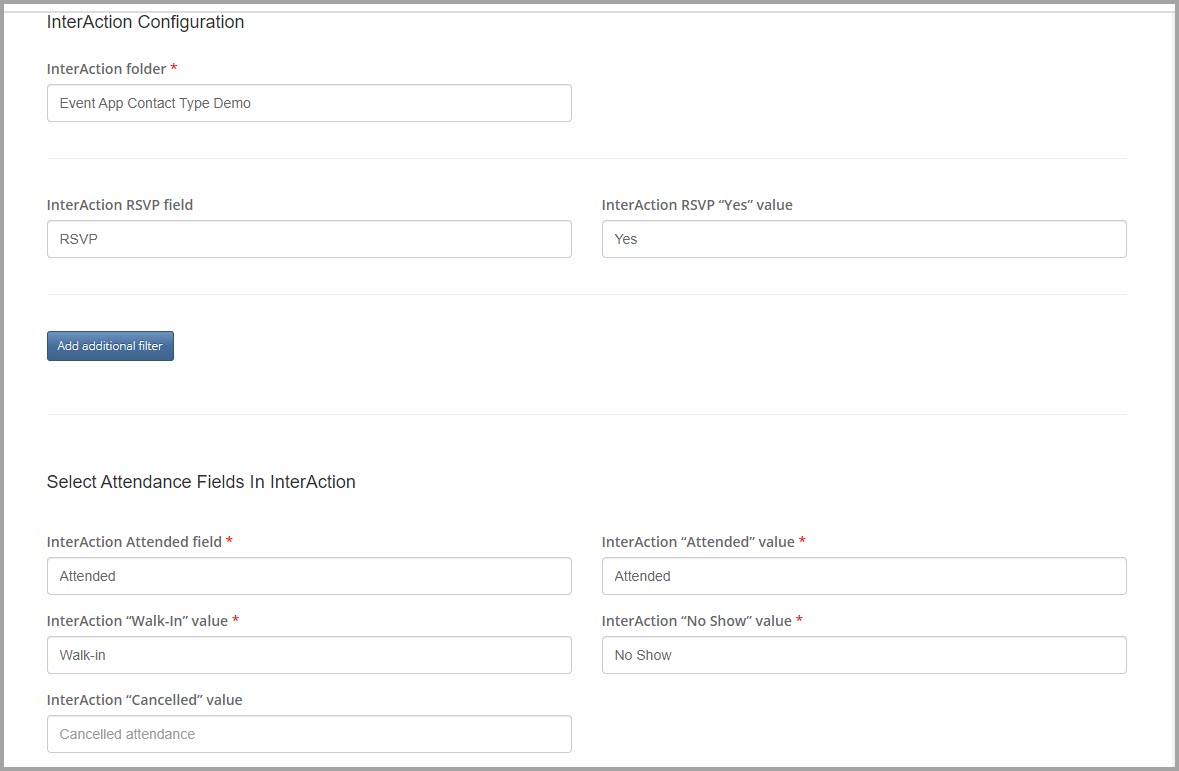
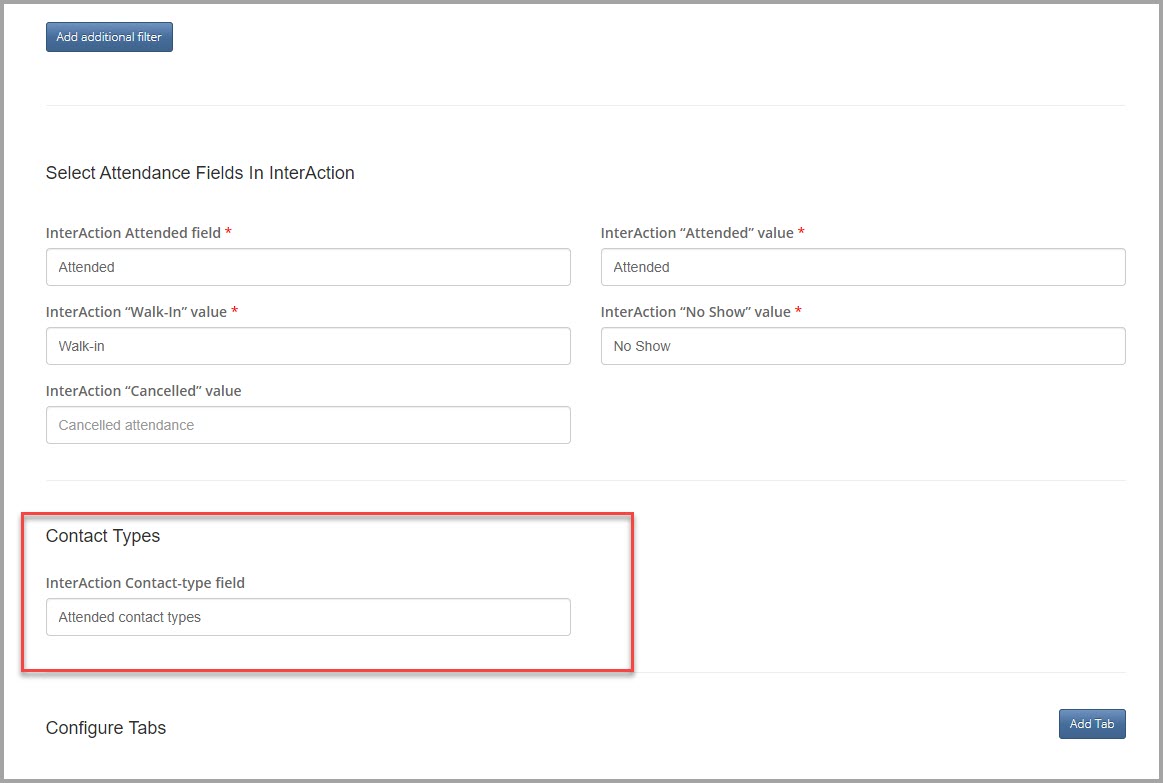
At the bottom of this screen you get the opportunity to complete the attendance fields and then specify which extra Additional Field you have created for Badge Contact Types.
Once you have saved your configuration you will be able to click the link at the top of the screen to Generate Badges. This will give you a downloadable and printable file which could (if you had chosen green) look something like this:
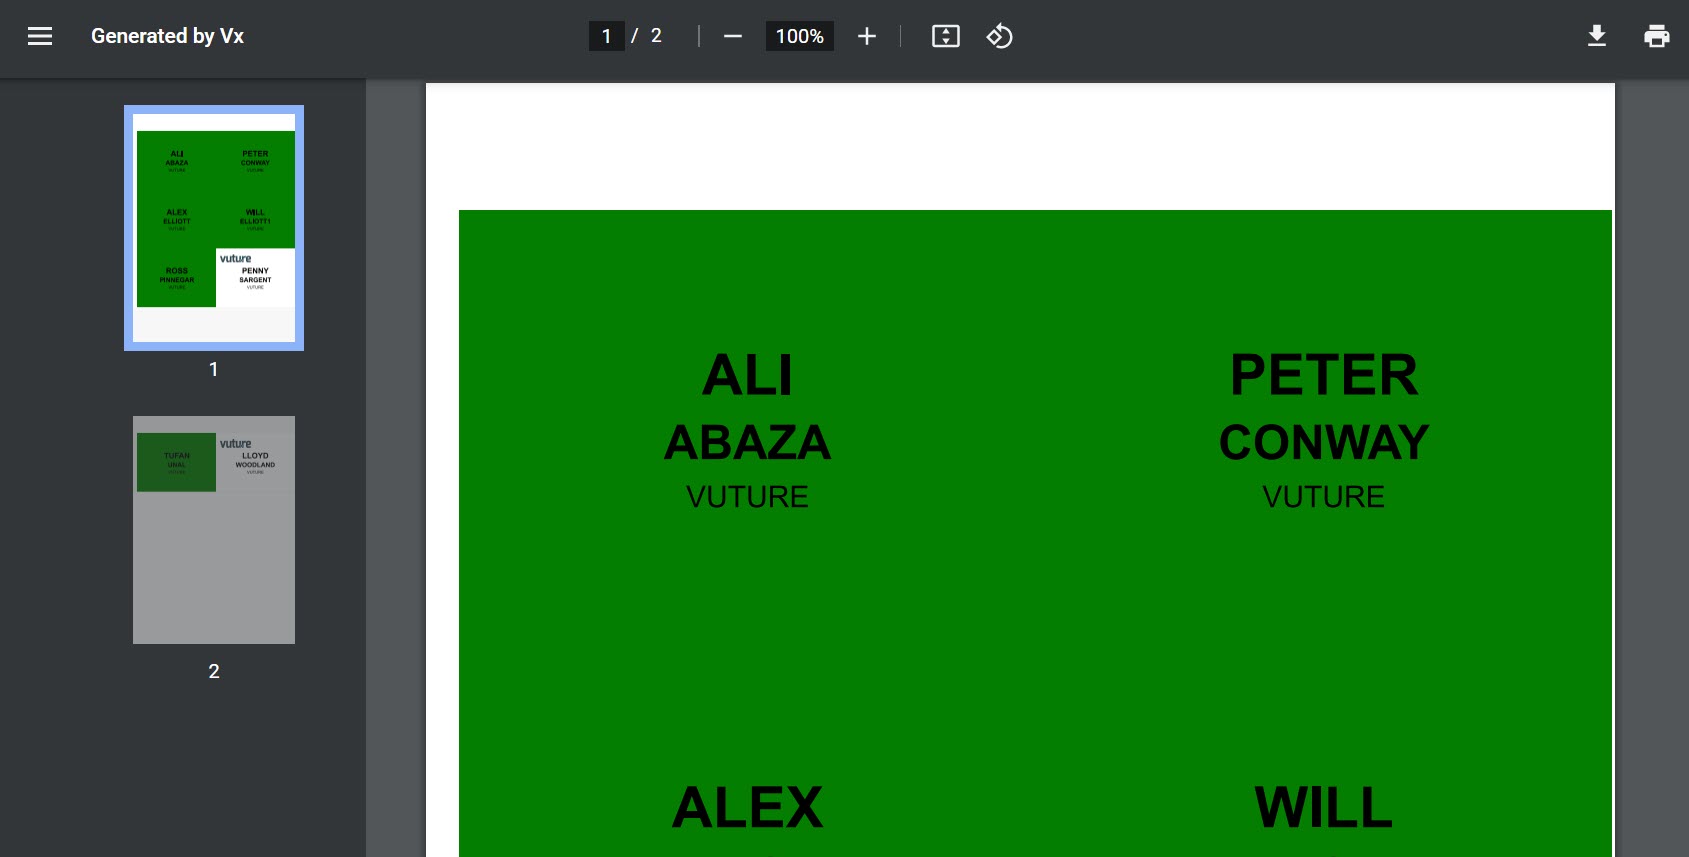
You can see that the Delegate green changes automatically to Staff white.
Optional - Display each attendee’s value on the Events App check in screen
If you wish to show the additional field value for each person (to understand their status as they check in on the day, for example) you can display the additional field value as an extra column on the check in screen.
You will need to have Admin.System.Events.Enable Additional Column on Events App enabled for your Role.
Configure the event as normal and select the additional field where the option to choose an additional column will now appear:
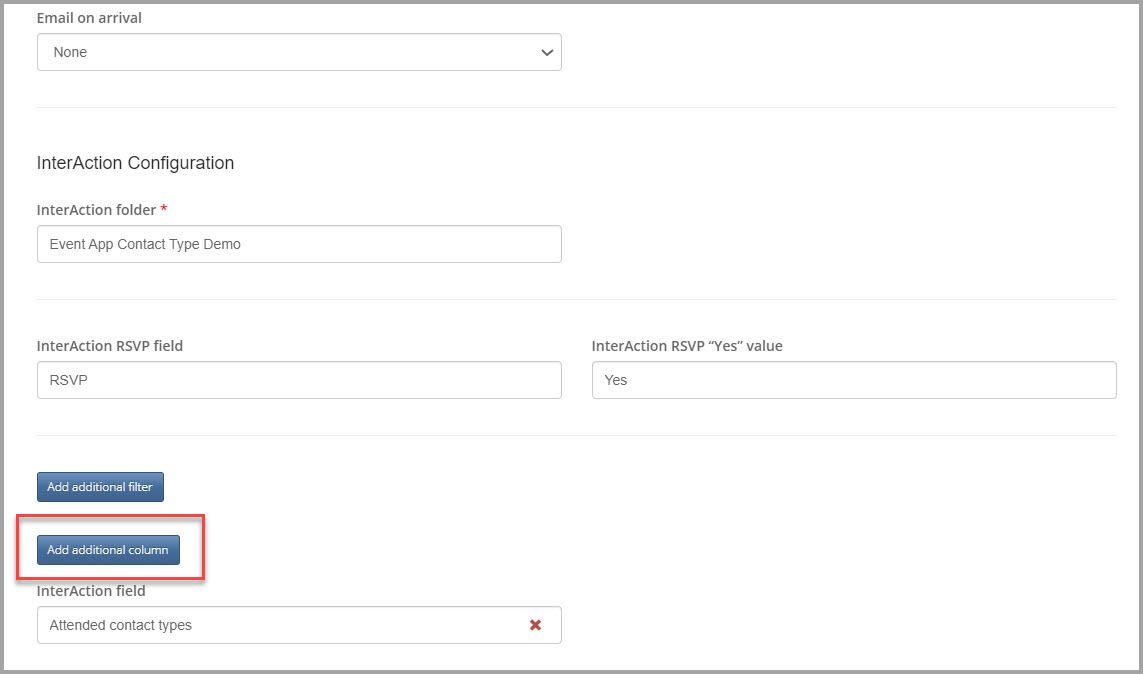
Save the event and open it.
Your check in screen could then look like this, where the value for Attended Contact Types is showing as an extra column, (along with Sponsor because Sponsor has also been added and selected in this example):
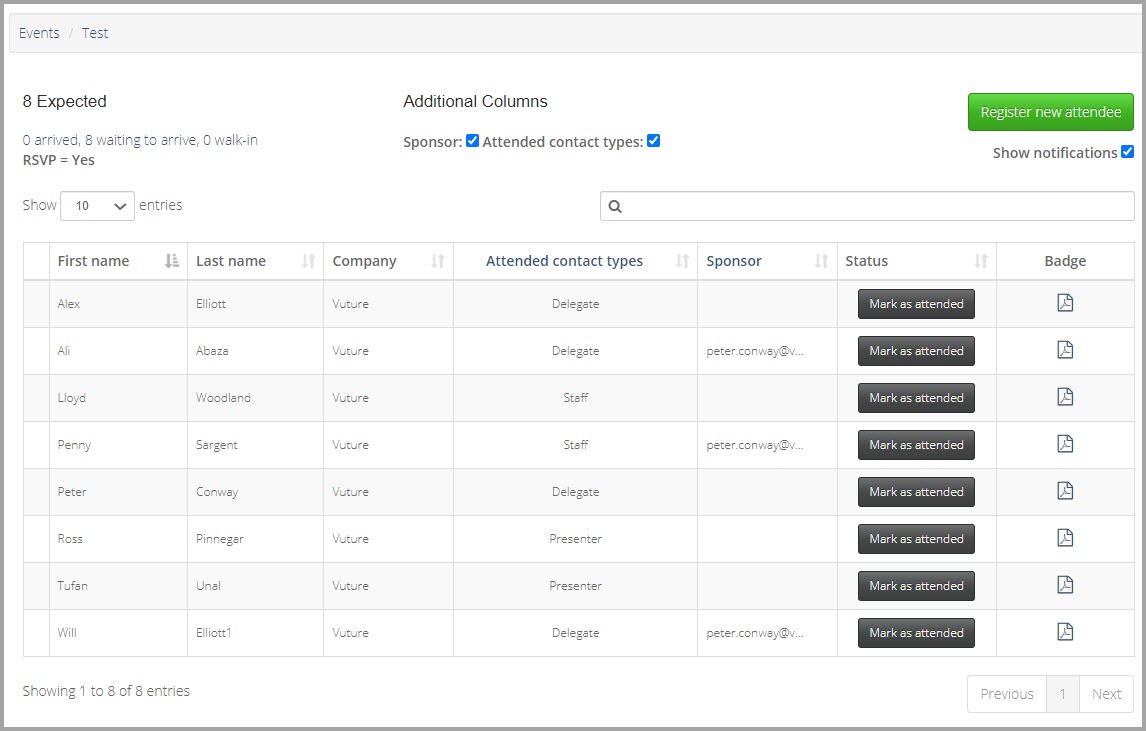
This feature could also be used to display Table Number, Dietary Requirements or any other values for any additional fields you choose to create and populate on the events list.
Note: Multiple columns are available but you must select all your additional fields from just one list only - your main event list.
