Note: Azure AD was renamed to Microsoft Entra Id but this article.
Introduction
This article contains instructions for clients for setting up Azure AD / Entra ID and testing Single Sign On (SSO) with Vuture.
- Login to your Azure Active Directory portal
- Select Enterprise Applications
- Select + New Application
- Select ‘Create your own application’
- Give your App a name
- Select “Integrate any other application you don't find in the gallery (Non-gallery)”. Then Create
- On the Properties Page, make a note of the User Access URL. (You will need to send this to your Vuture Customer Success Manager)
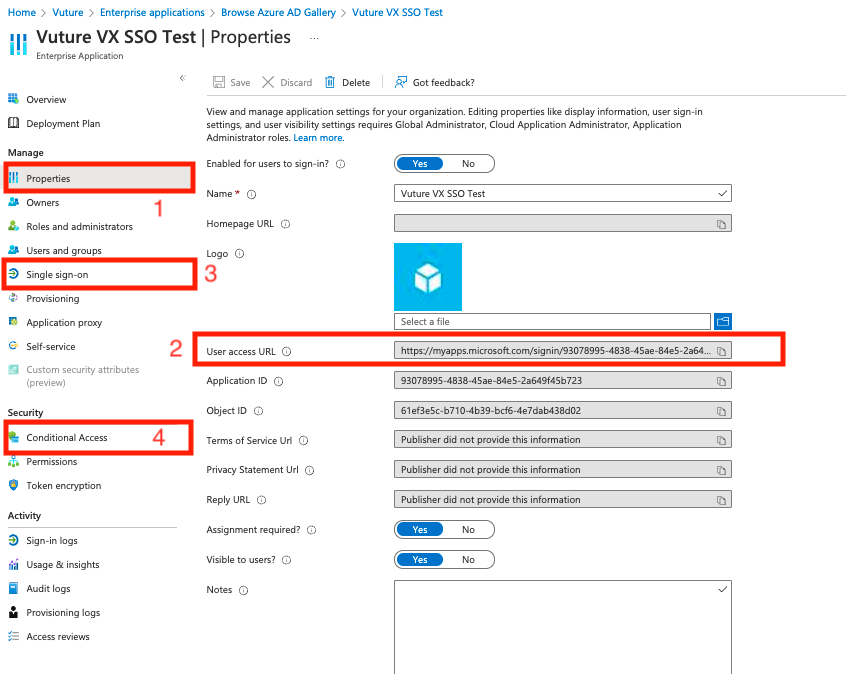
8. Set up Conditional Access if required.
9. Then Select “Single Sign-on” to continue with Configuration.
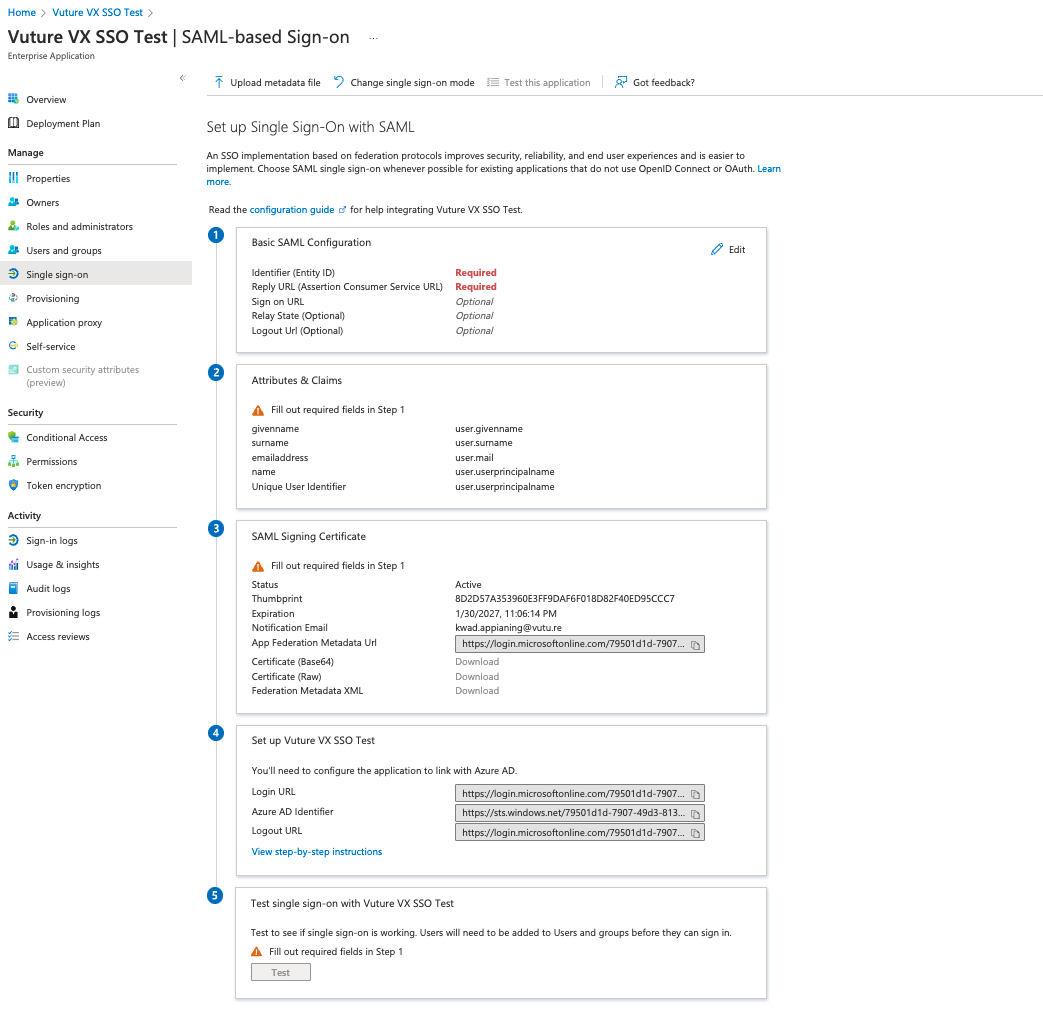
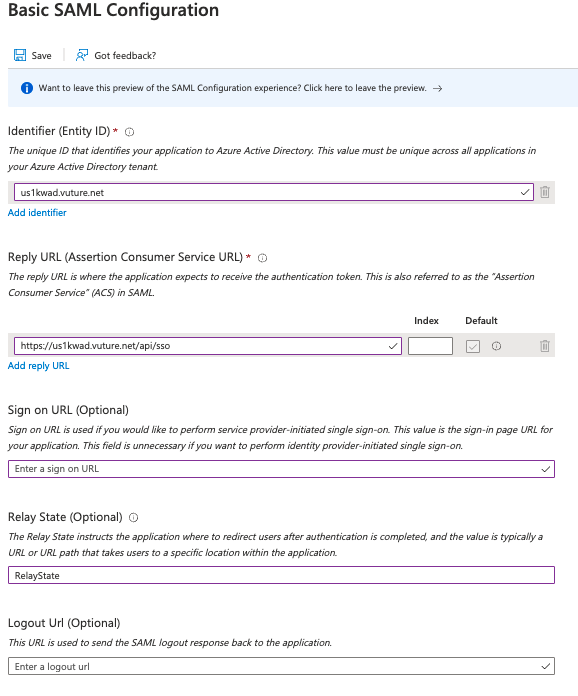
10. Select “Edit” in Basic SAML Configuration. For IDP Init SSO
The fields of interest are
- Identifier ID
- This should be the URL of the your Vx instance {vx-instance-url}
- Reply URL(Assertion Consumer Service URL)
- This should be set to https://{vx-instance-url}/api/sso
- Relay State
- This should be set to RelayState
- Example Configuration where {vx-instance-url} = us1kwad.vuture.net
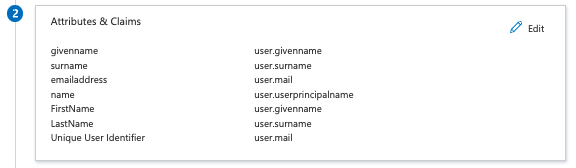
11. In the Attributes & Claims Section, the following Attributes should be configured:
- Unique User Identifier = user.mail(The email address of the user as created in Vx)
- FirstName = user.givenname
- LastName = user.surname
All other attributes are optional.
Example:
SAML Signing Certificate.
Please send the certificate to your Vuture Customer Success Manager. The signing certificate should be in Base64 format.
Please also remember to send the User Access URL to your Vuture Customer Success Manager.
This will then be set up on the Vuture side.
Testing.
When configured on the Vuture side, you can click on the link at the Vuture login page to test your SSO. You can also use the User Access Url to test SSO. They will need to make sure they have signed out of Azure AD or use Browser Private Mode to test
