Overview
This article will walk you through how to display a contact's InterAction Additional Field value in a Vuture email.
Specifically, it will guide you through sending a Confirmation Email once someone registers to an event, with their registration details displayed, utilizing their IA Additional Field value. If you wish to automate this process, you will need Triggers Version 3.
If you do not have Triggers, you can still use these steps by skipping step 6 to display an IA Additional Field value in an email that you send manually.
Please note: Personalizing with Additional Fields is not supported using Form Notifications.
Contents
Prerequisites
- Contact your Account Manager to get the Triggers functionality switched on. Please note, Triggers is a premium feature.
-
Your Account Manager will also need to enable the following: "Admin.Settings.InterAction{InterActionId}.Replacement on IA custom fields"
You will also need to work with your InterAction IAADMIN user to get the Additional Field ID information from the web client. This will be covered in a step below.
Summary of Steps to Triggering Confirmation Emails
Step 1 - In InterAction, create your marketing list and add any Additional Fields you'd like to ask on your RSVP Form (i.e. RSVP, Dietary Requirements, Session, CLE State, etc.).
Note that not every type of Additional Field can be displayed in a Vuture email. The below fields are not compatible:
- Multi choice (where you can choose more than one answer) will not work.
- Multiple answers in one field will write back to InterAction correctly, but can't be used in a confirmation email.
While you will have to use the IA Windows client to create a new Marketing List, it is not essential to use the IA Windows client for creating Additional Fields. You could also use the IA Web client.
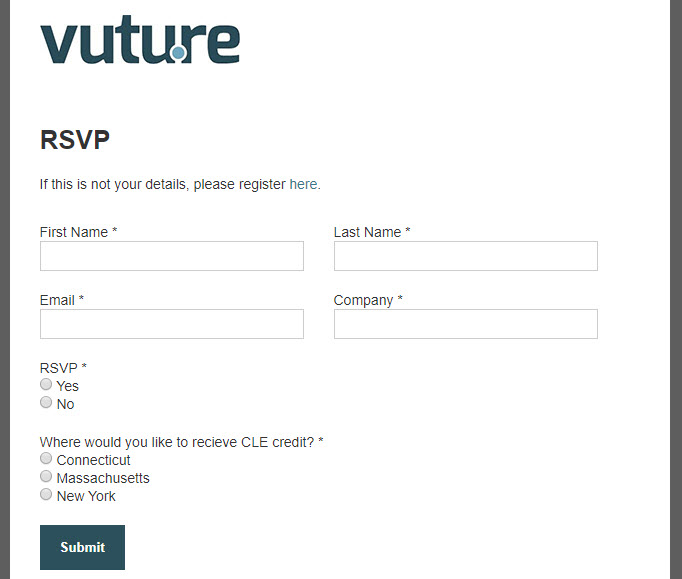
Step 2 - In Vuture, create your invitation, RSVP Prefilled form, and thank you pages as you normally would. Make sure your RSVP Prefilled Form has all the IA Additional Fields you'd like to display in the confirmation email, letting the registrant see exactly what they registered for. Do the same for your RSVP Blank form.
For help with creating an event campaign in Vuture, please refer to this Help Desk Article.
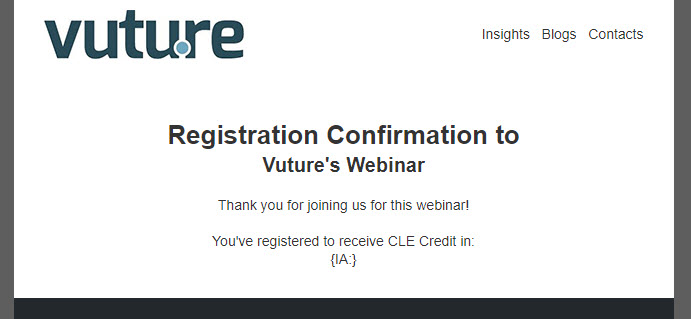
Step 3 - In your event campaign, create the confirmation email you wish to send to those who registered to your event.
Step 4 – In InterAction, either log in to the web client as IAADMIN or ask the IAADMIN staff member to do it for you. In the Admin section, navigate to your mailing list and make a note of the 10-digit Additional Field ID numbers that you wish to include in your confirmation email.
You'll need the 10-digit Additional Field ID numbers to include in your email in the following format {IA:1234567890}.
The IA field ID numbers in '{IA: }' are found in the Admin area of the Web client.
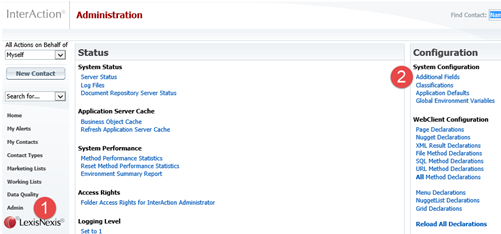
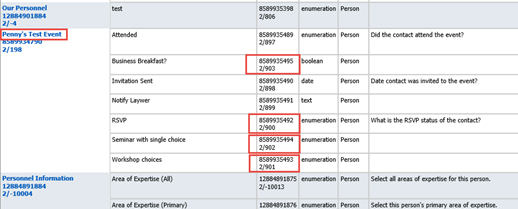
Log in with Admin access (1), navigate to the Additional Fields section (2) and then find your list name and note the top set of numbers for each Additional Field
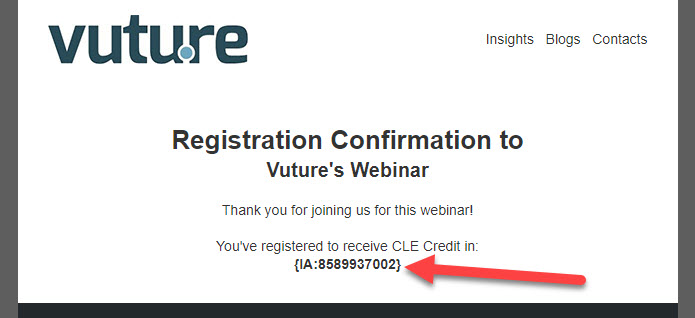
Step 5 – In Vuture, go back to your confirmation email and insert the InterAction Additional Field ID numbers into your email in the following format {IA:1234567890}. Where '1234567890' is your 10-digit Additional Field ID.
For example, if you want to display the CLE choice in your confirmation email and the Additional Field ID for CLE is '8589937002', you would enter it in the following format: {IA:8589937002).
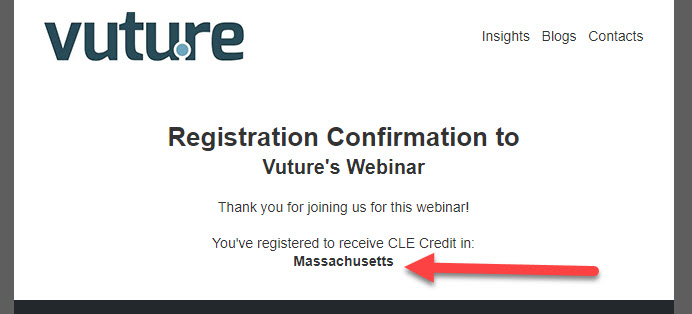
Upon receiving the email confirmation, the registrant would see the value they chose on the RSVP Prefilled Form.
Step 6 – In Vuture, create your Recurring Trigger – called, for example, Send Confirmation Email, with a Filter for RSVP is Yes. Include at least a 30 minute delay before the Trigger runs, to allow InterAction to update with the client's choices first.
For step by step instructions on setting up this Trigger, please review this Help Desk Article.
Step 7 – Fully test that everything is working correctly using a Send Sample. Click through from your invite to the RSVP Prefilled Form, register (responding to all additional fields), confirm that you receive the confirmation email with your chosen additional field values displayed. Then test the RSVP Blank Form, submit the form, confirm that you receive the confirmation email with your chosen additional field values.
