Overview
This article will walk you through how to print badges in the Event App, both before your event and for walk-ins on the day of your event.
Please note, these instructions assume that you have already configured your Event in the Event App. See this article for instructions on configuring your event.
Content
Printing badges before the event
If you are printing badges before the event, it is easier to access the Event App through the browser on your desktop than using your tablet, as your desktop machine will be connected to your printer.
Instructions
1) Launch the Event App from the event URL or from the iOS icon and login.
2) Select the correct event and choose Configure.
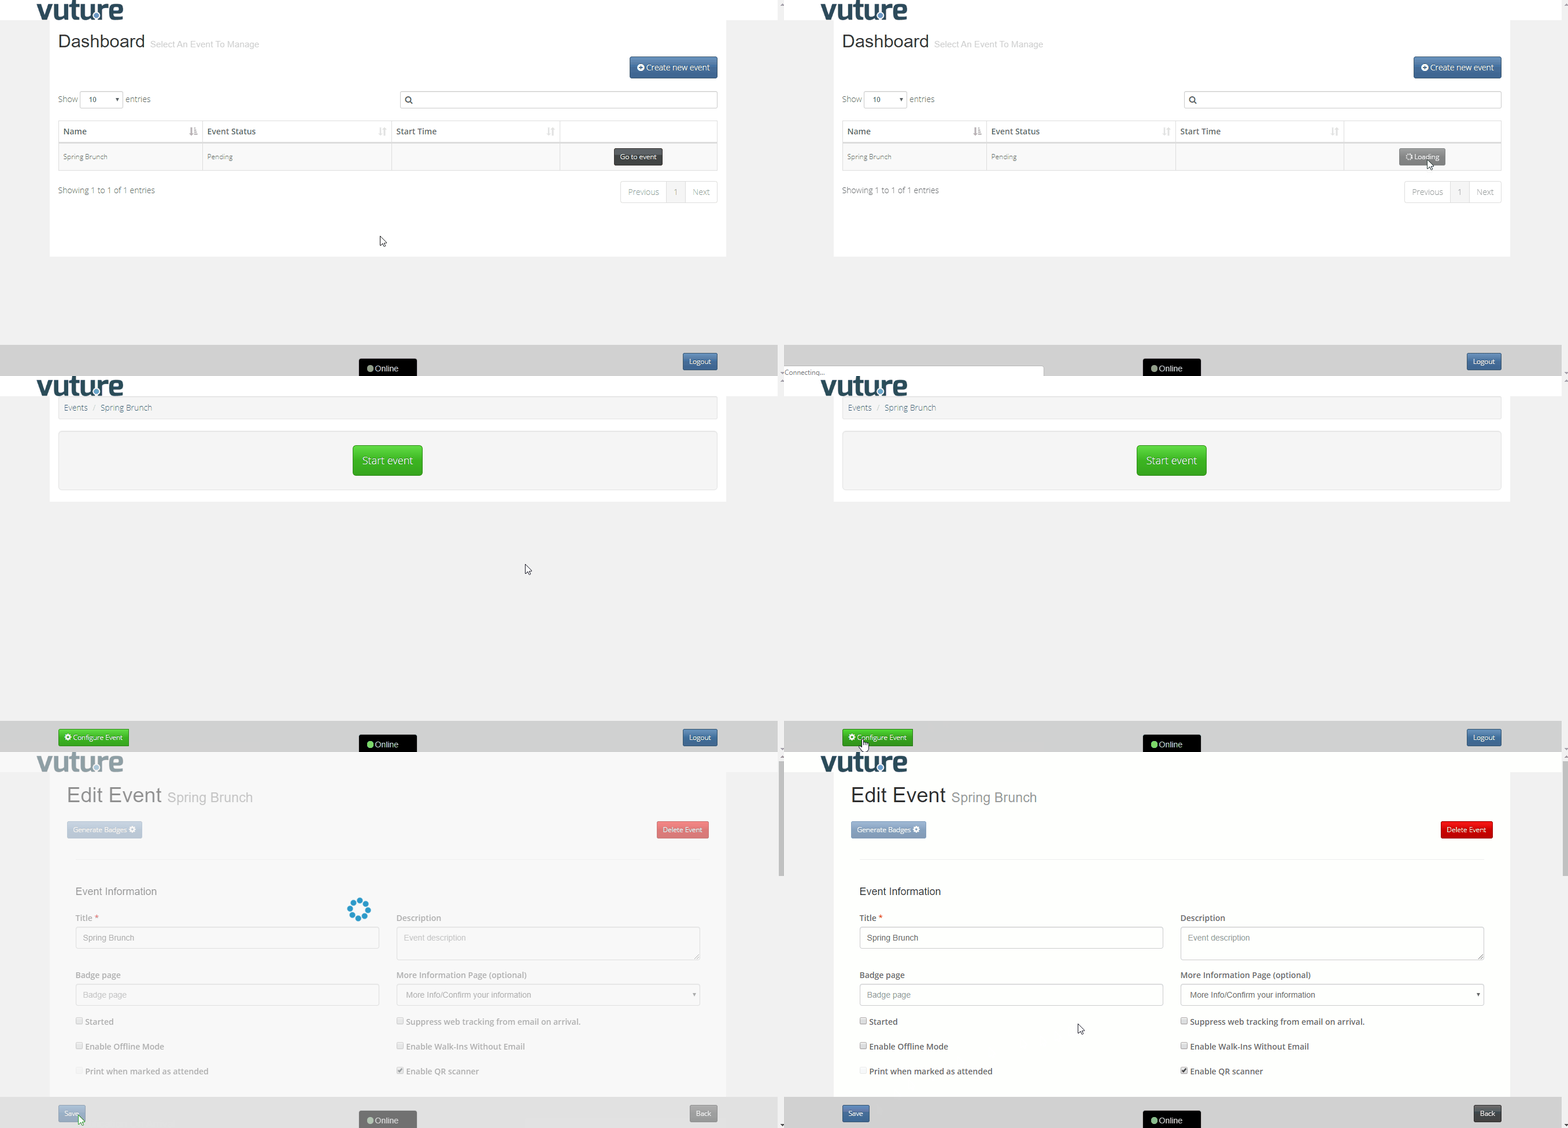
3) Select the required badge type from the drop-down list. The badges available in the drop-down are based on the templates provided by your Vuture administrator. Then click save.
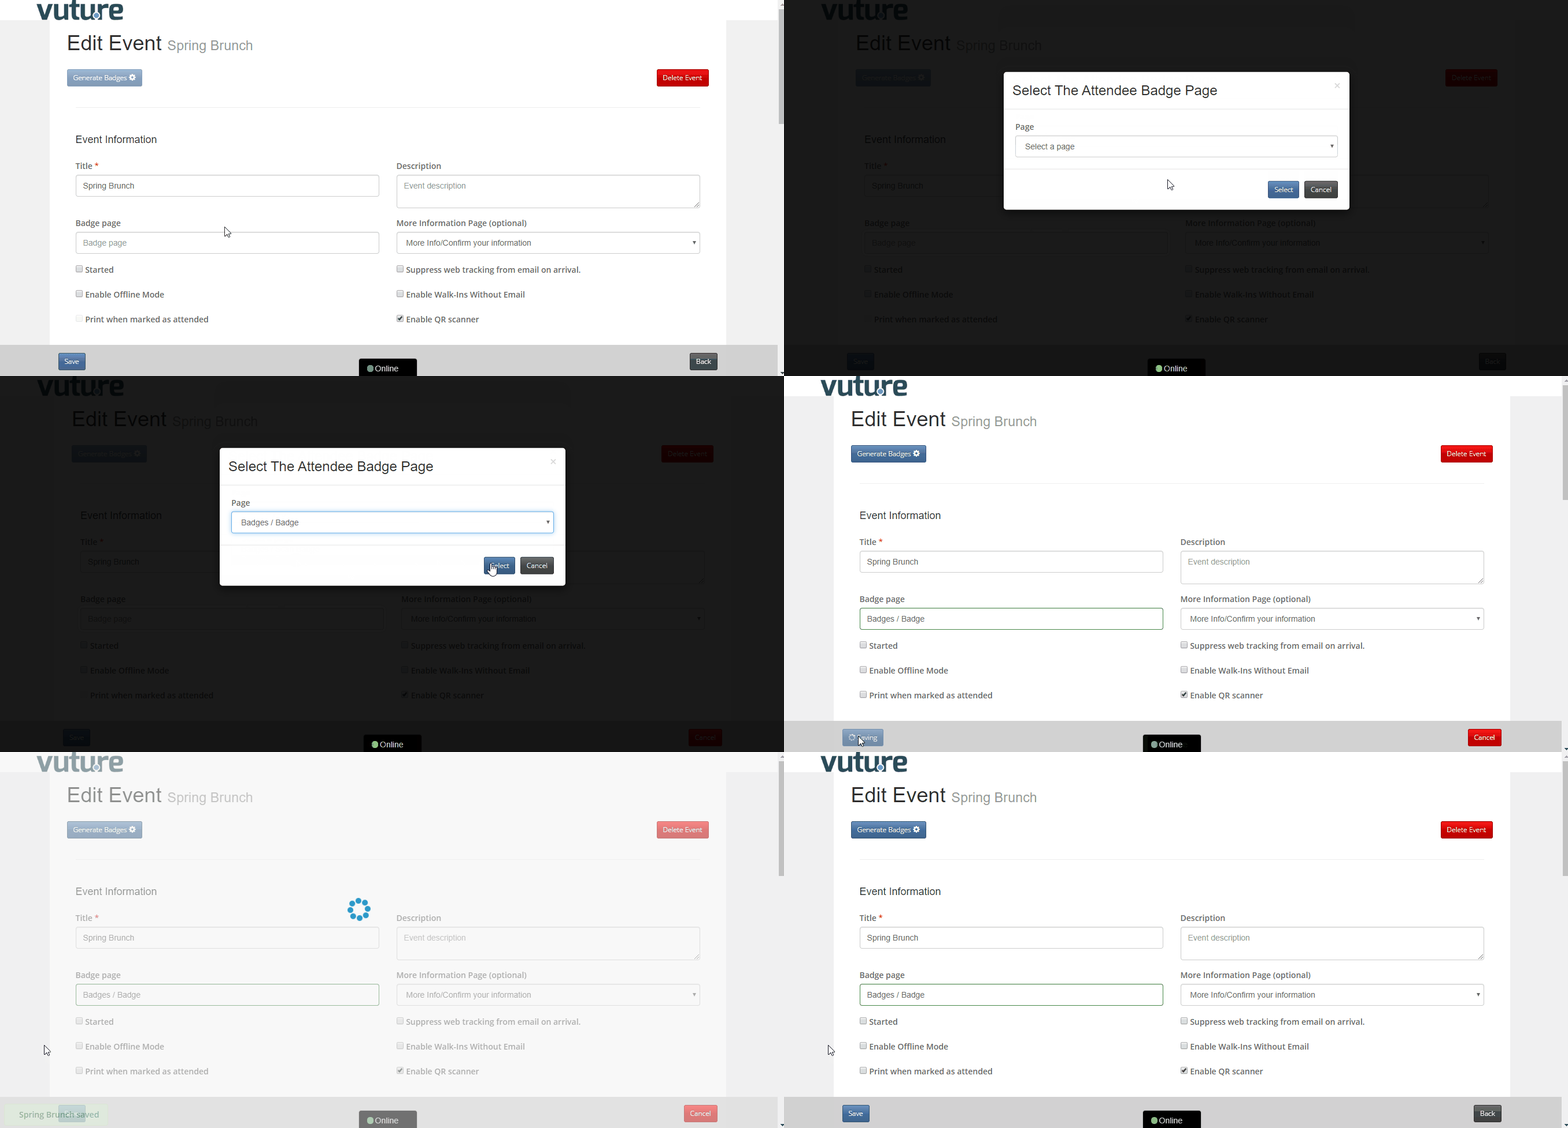
4) Click the Generate badges button at the top left of the screen. The badges will print for the contacts on the RSVP yes list from the fields you have selected. Please be patient as this may take a few minutes if it is a big list:

Clicking on 'Generate Badges' will generate a .pdf file. When the .pdf has downloaded you can send it to the printer.
Printing Walk-in Badges
Please note, you will need to 'start' the Event to register a walk-in and print the badge. This also requires having a printer on site to print a walk-in's badge on site at the event.
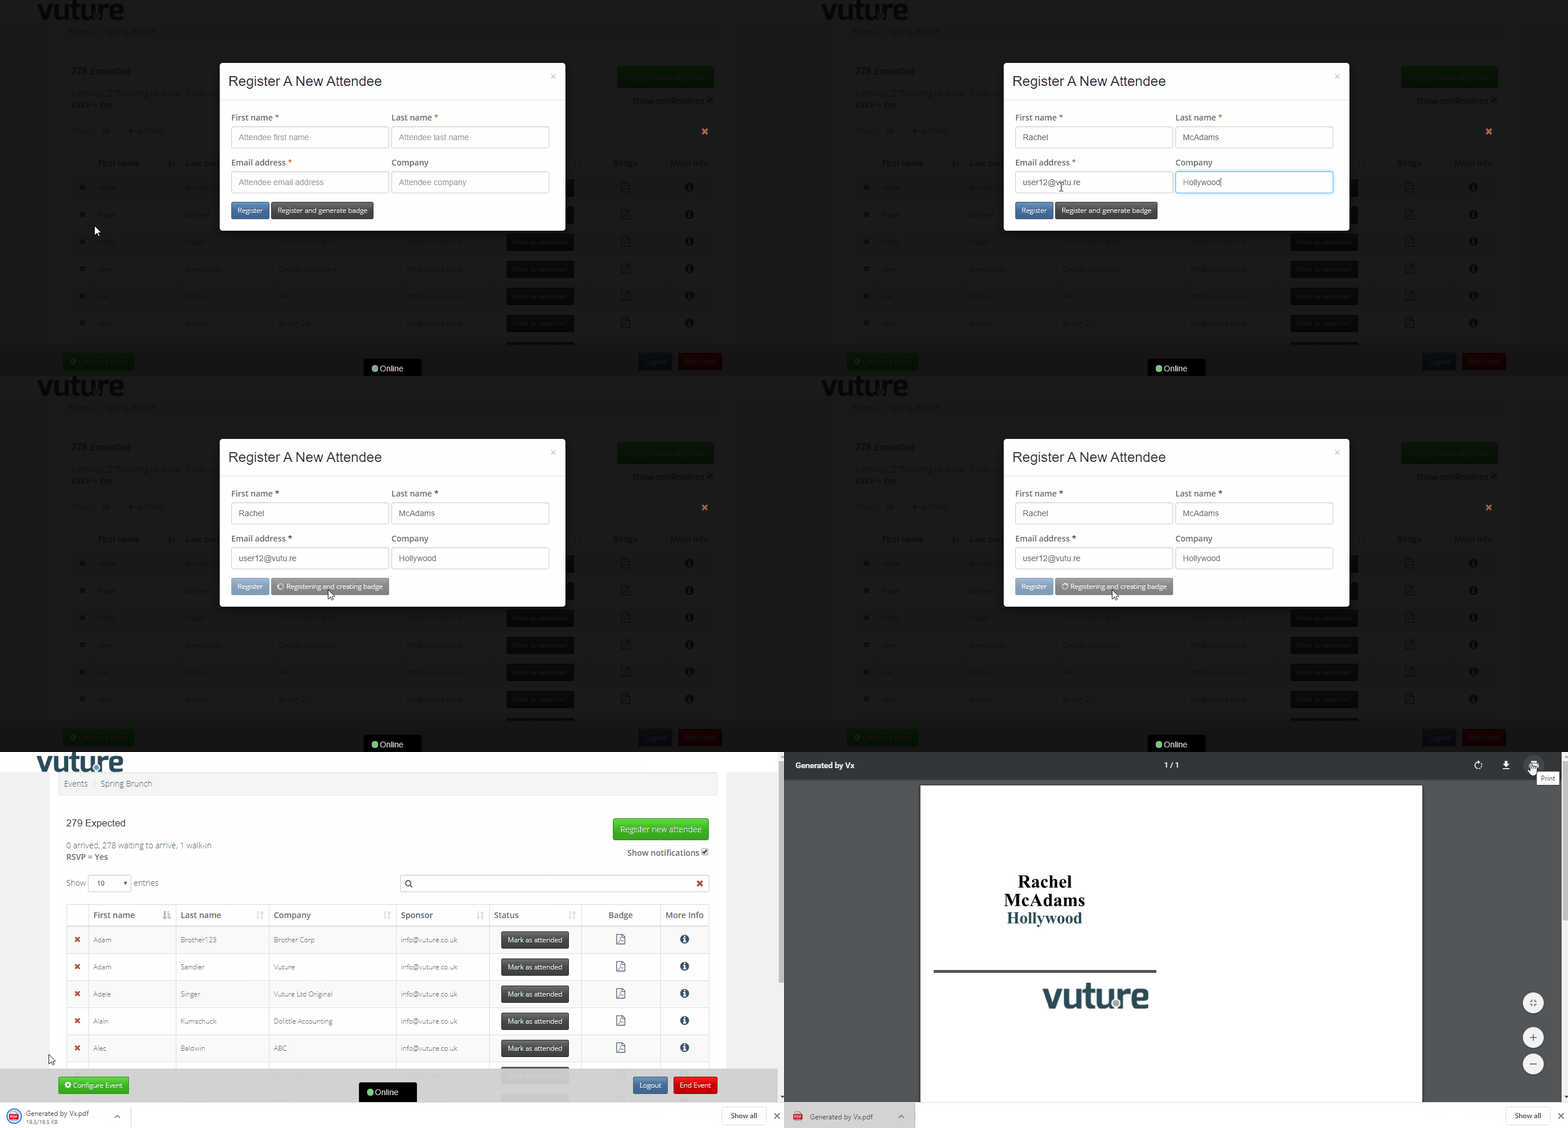
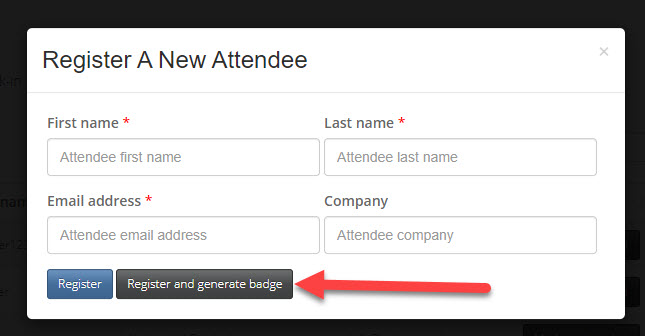
When you register a Walk-in you can select the “Register and Generate Badge” option which will register the walk-in and generate the .pdf badge at the same time, speeding up the individual badge generation process.
Instructions
1) Click on 'Register new attendee' in the top right corner.
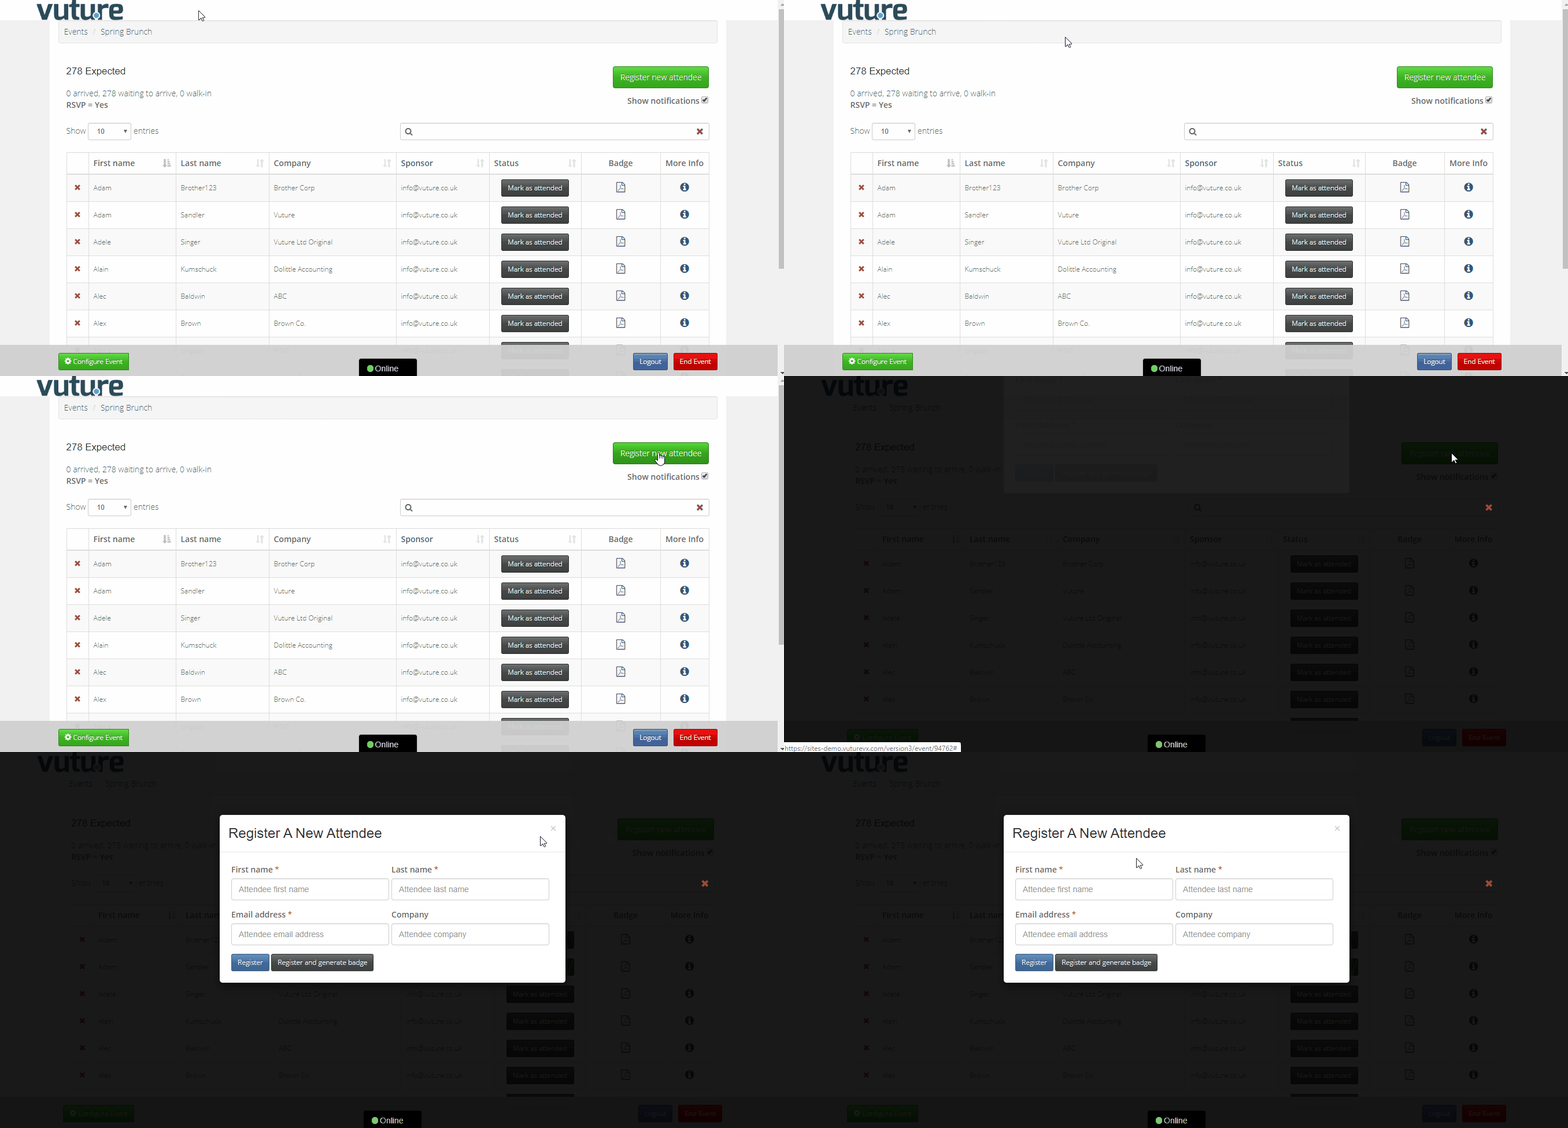
2) Enter in the Walk-in's First Name, Last Name, Email Address, and Company (optional). Then click on Register and generate badge. This will download a PDF for this walk-in for you to then send off to the printer.