Introduction
Approval Workflow allows selected, enabled users to control updates to content in emails and landing pages through a single or multi-step approval process.
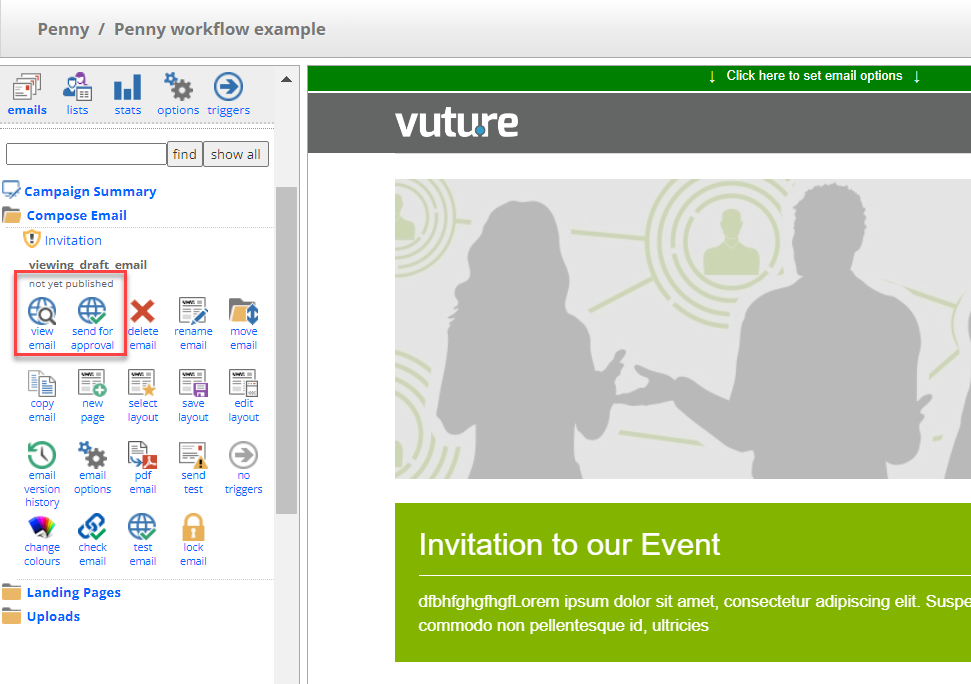
Workflow is managed on a per container and sub-container basis and, once enabled by the SuperAdmins for a container or subcontainer, the publish button is replaced by a send for approval button for all campaigns in that container. This means that users working in that container cannot send live emails, only test emails, because without Publish, the Send Email icon is missing.
Who can Approve Emails?
To be able to approve emails, a user must:
- Have a login to Vuture (their Role can be Read Only or Approver if they are not regular users)
- Have a Role which includes Admin.Roles.Approval.Approve
- Have access to the container in question
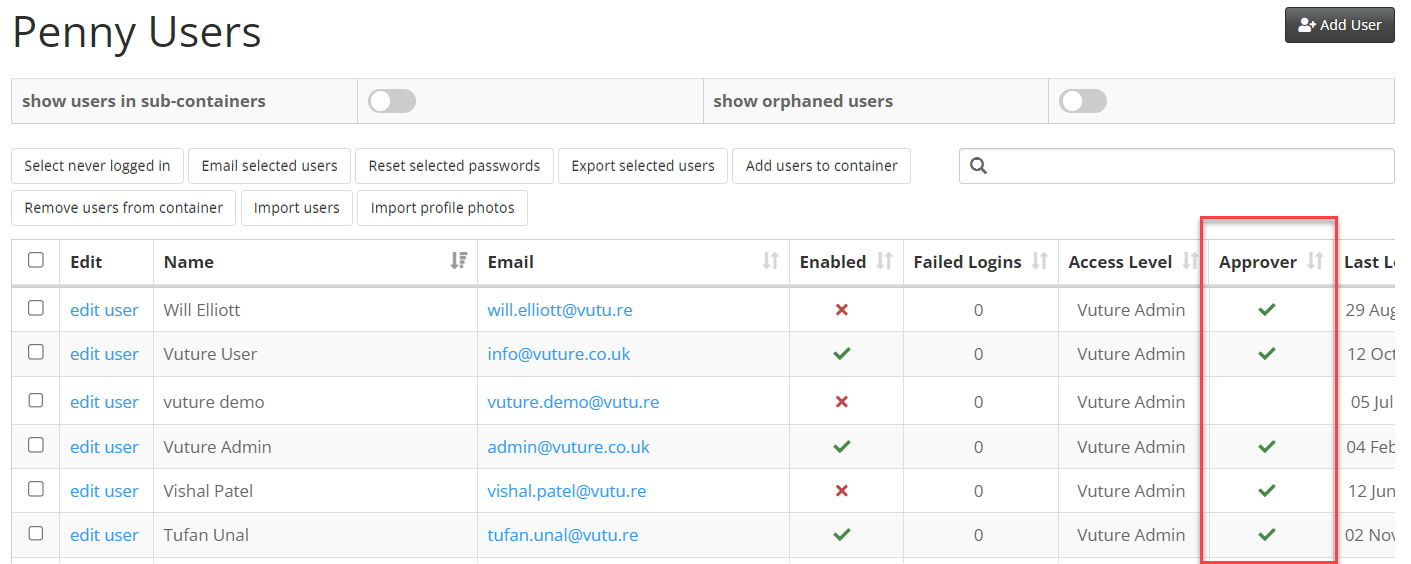
- Be ticked as an Approver for that container in Admin.Containers & Users
- Optionally (rarely), a user can be given Approval Bypass rights. This means that the user can send a campaign for approval but then bypass the approval process and approve the campaign themselves. This is typically reserved for Vuture staff only but can be assigned to client admins by enabling Admin.Roles.Approval.Bypass approval which will make the approve/reject buttons available, to bypass the workflow.
Adding an Approval Workflow to a Container
To set up a workflow click on Admin from the home screen and then select the container on the left you would like to set up workflow for.
Note: Workflow does not cascade down from one container to another – you will need to set up workflow for each container individually.
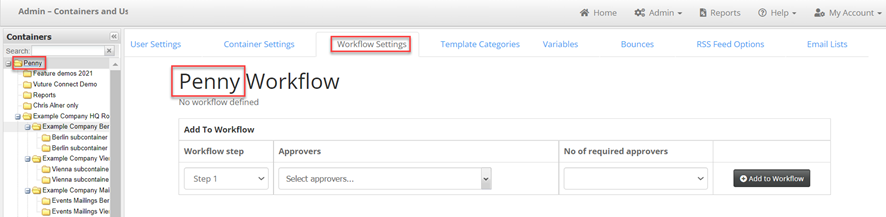
Navigate to the Workflow Settings tab and consider the number of steps you require in this workflow process. The number of steps means, how many times you need a senior user or manager to click Approve before you are allowed to send the email.
In the image below, the Workflow Settings tab has been selected, for the container called Penny.
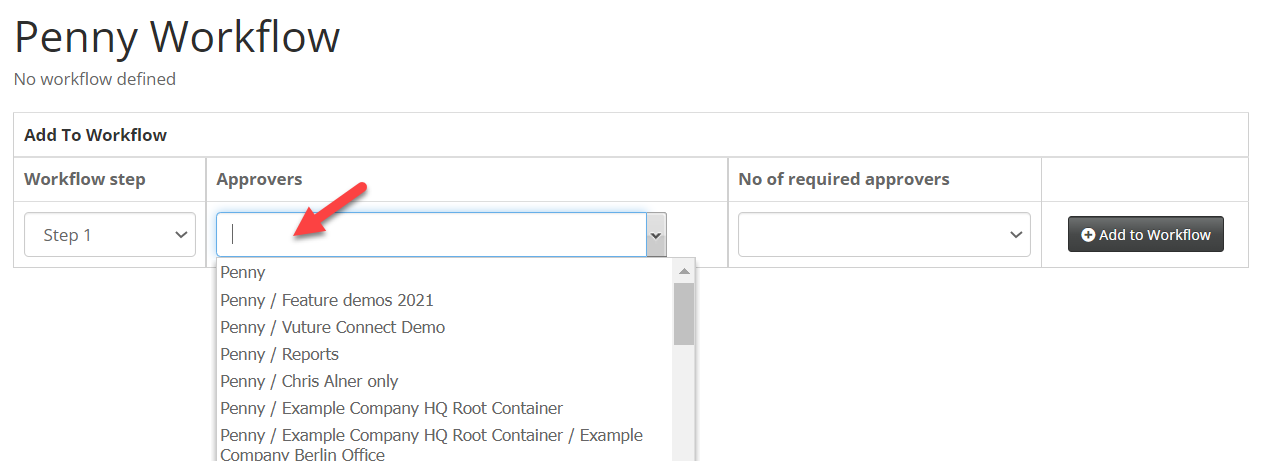
For Step 1 choose the container where the approvers can be found (the red arrow in the image below), and how many people need to approve the new work. Approvers must be Vuture users (they can be Read Only or Approver, i.e. not trained users, but they must be able to access Vuture) and they must be listed as users for the selected container and have the approval tick box checked in their user settings for this container. Check the list at the top of this article for Who can Approve Emails?
A simple, one-stage workflow is set up by choosing approvers from the same container. Here is an image of the Penny container, in Admin.Containers and Users, showing who has been ticked as an Approver:
For multi-step approval (where one person approves the work and another person must also approve the work), you can set up each additional step either in series or in parallel. Approval groups with the same workflow step will be emailed at the same time. Approval groups in subsequent steps will be emailed once all the approvals have been completed in the previous step.
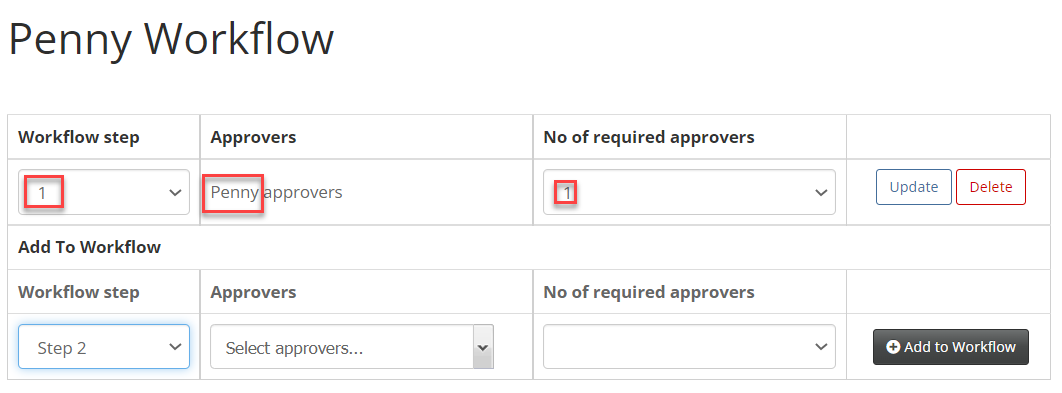
The image above is from Admin.Workflow Settings and it indicates that the approvers for mailings created in the Penny container will be found also in the Penny container. It also indicates that only one approver is required. A step 2 has not been added.
You can now leave the Admin area and return to your campaign editor.
Warning before setting workflow on Training Containers: It is established best practice to click on Publish and Publish Now frequently as you work, to build up a Page History and allow you to rollback to a previous version if a mistake is made. Once you have set workflow on a container, every attempt to Publish is changed to Send for Approval instead – which could be frustrating for users and annoying for approvers. Because of this it is best not to set workflow on Training containers, unless you are training the Workflow process.
This image below shows the campaign editor with workflow set as required. The Send Email button is not available at this stage.
The next steps in the workflow process are taken by the users while editing a page and ready to get it sent. Click the Send for Approval icon.
Indicate first which pages are ready for approval and then who should receive the pages for approval. All users who are marked as approvers for that workflow step are displayed. You must choose at least the required number, as set-up previously for that workflow step.
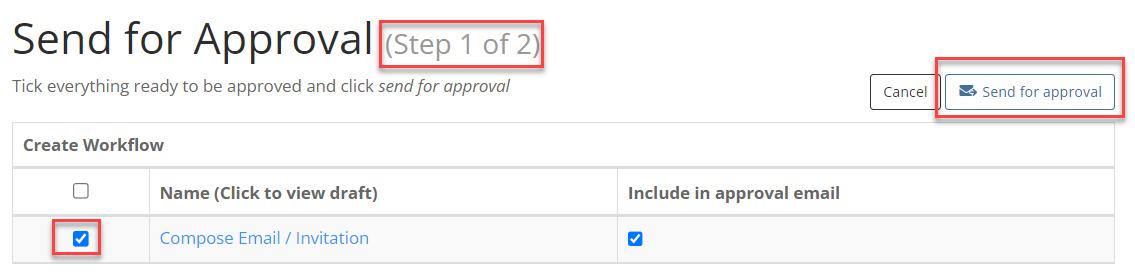
Choose whether or not a copy of the page to be approved should be included in the email requesting approval. If so, check the Include in approval email box.
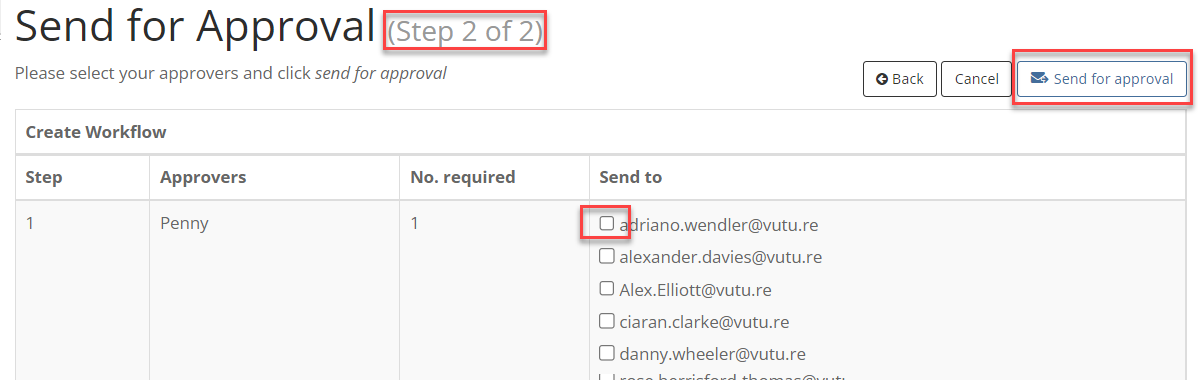
The people listed here on the right are all approvers for the Penny container. The user must tick at least one and click on Send for approval. Ticking two people will mean that either person can approve the page. This will be useful if one person is on holiday. (Note that if two people are asked to approve a page where only one is required, and one does so, both the other approver and the original requestor will receive an email informing them that approval has been given.)
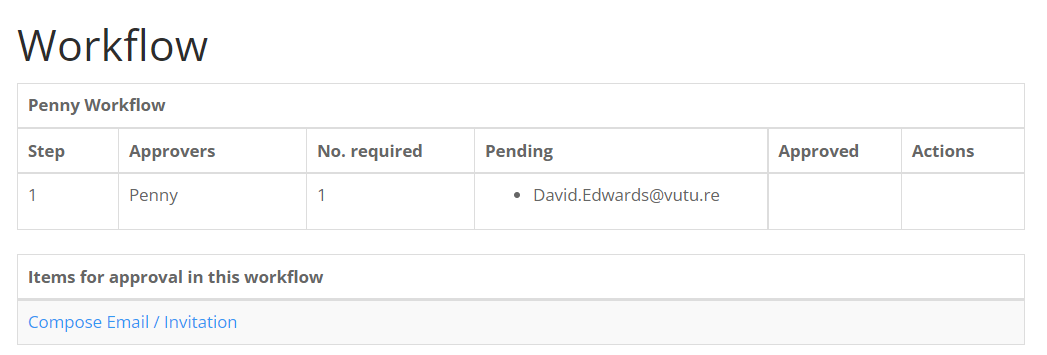
The user will see the Pending status of the approval process as shown below. David has been selected as Approver: Vuture has sent him an email, and is now waiting for David to react.
The approvers who have been selected will receive an email with the pages to be approved. It will look something like this:
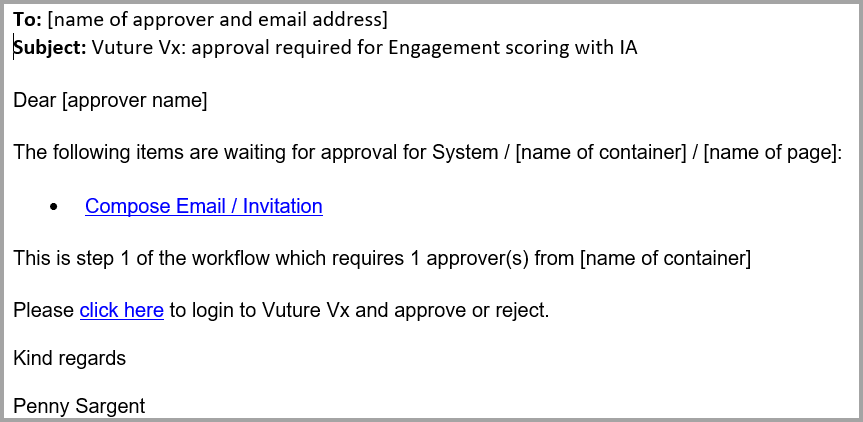
Approvers do have to log in to Vuture to indicate their approval, so they must be Vuture users, but they can have very limited (Read Only) roles. Once sufficient users for each workflow step have approved the content then approvers for the next workflow step are emailed. If the last workflow step is reached (or if there is only one workflow step) then the content will be approved and then published automatically.
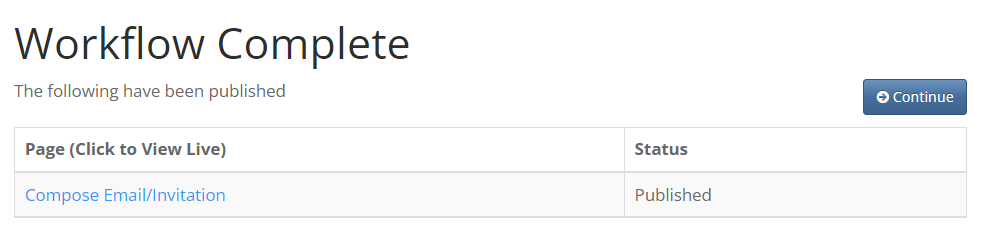
The user who sent the content for approval will receive an email notification that approval has been given and the page has been published. They will also see on the campaign page that the status has moved from Pending to Published.
Campaign Page
Email received by User
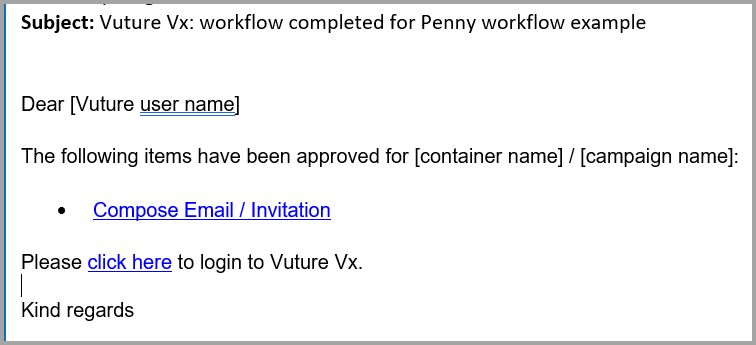
The user will also receive an email if the content is rejected by any single approver - in which case the approval process will be reset, and the page will have to be sent for approval again.
Bypassing the Approval Process
If a user has the right to bypass the approval process (rarely given and typically Vuture Only) they can approve or reject the page themselves by clicking the approval bypass links at the top of the page. This will mean that the send for approval email will still go out, but the user will not have to wait for a reply before proceeding with the publish and send process.
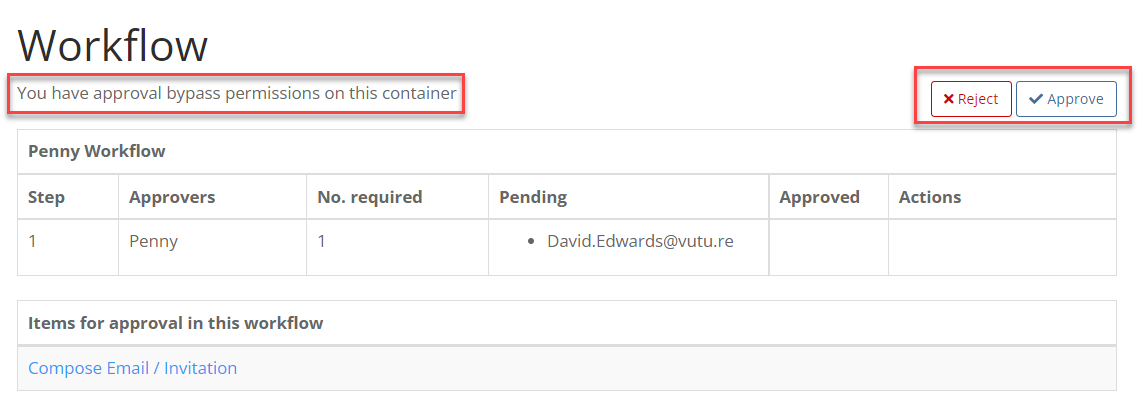
To give a user the right to bypass the approval process, add them to a Role which has bypass enabled, at Admin.Roles.Approval.Bypass approval.
