Keywords: Triggers, Trigger, Form Submitted, registration confirmation, booking confirmation, InterAction, Standalone.
Overview
This article will walk you through how to use a 'Form Submitted' Trigger to send a confirmation email once someone RSVP'd yes to an event.
These instructions are meant for those who are using Vuture with CSV Lists or the Contacts Module, as well as with InterAction.
Important for InterAction: If you wish to use Dynamic Content or personalized data from additional fields on your confirmation emails, you must use a recurring trigger, set to 1 hour increments, instead of a Form Submitted Trigger. This will give Vuture and InterAction enough time to send the data back and forth for Blank RSVP Form Submissions. For detailed instructions, please click here.
Please note, Triggers is a requirement. If you do not have Triggers, please speak with your Account Manager.
Step by Step Instructions
Please follow the below instructions to send a confirmation email once someone RSVP'd yes to an event using the 'Form Submitted' Trigger.
Important note: This involves setting up 2 Form Submitted Triggers: 1 for the Prefilled Form and 1 for the Blank Form. The Prefilled form will use the action of 'Send Email to Matches'. The Blank form will use the action of 'Send Notification'.
1. Create two confirmation emails: one to send to those who submit the Prefilled RSVP form and one to send to those who submit the Blank RSVP form.
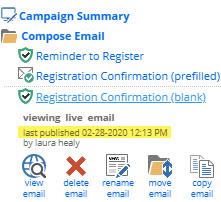
2. Make sure your two confirmation emails are published. Otherwise, click on 'Publish' > 'Publish Now' to publish.
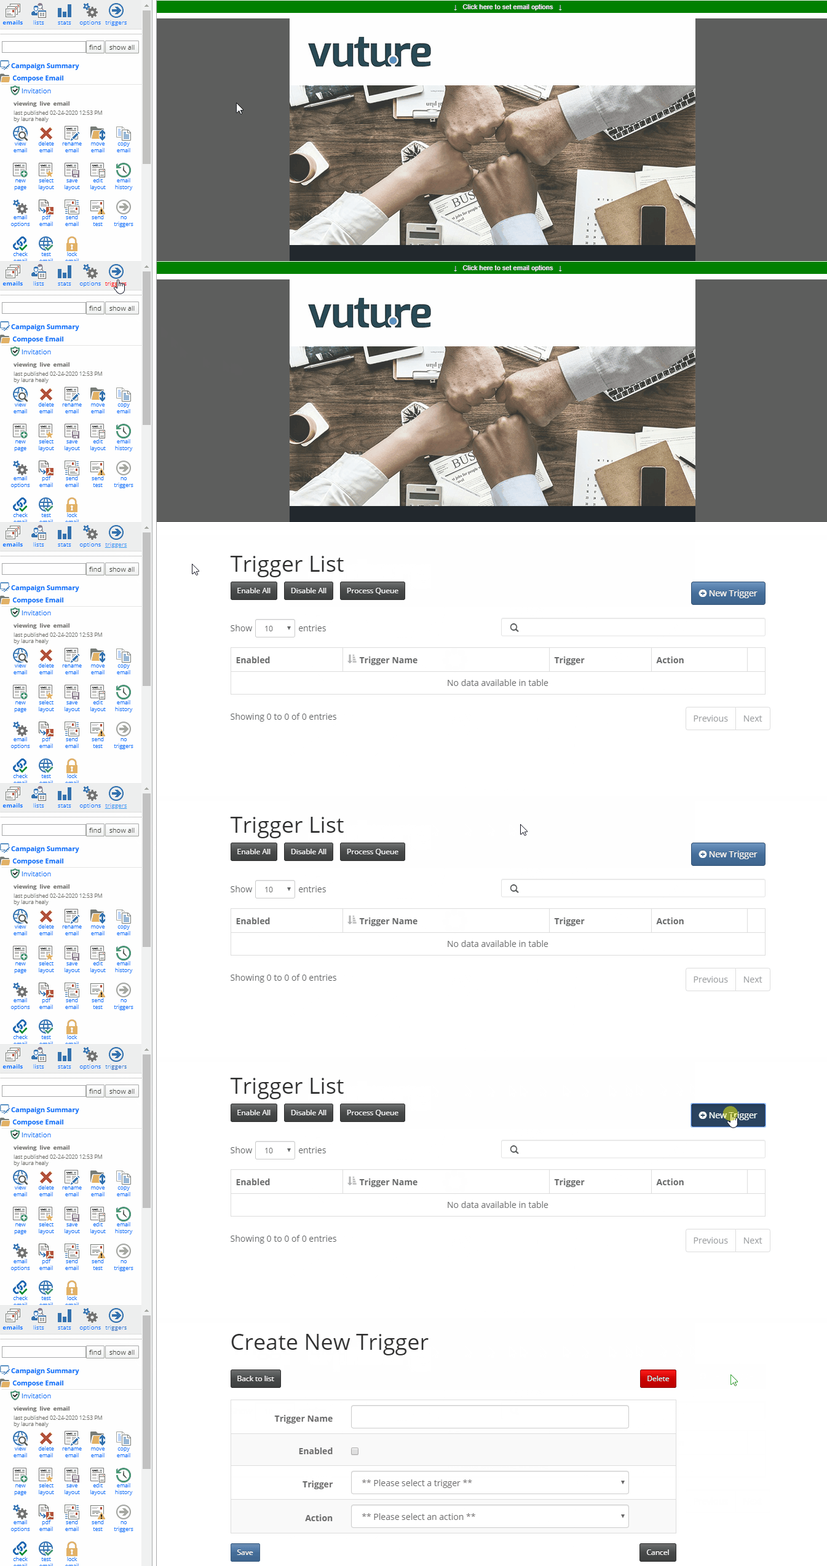
3. Navigate to the Triggers screen and click on '+ New Trigger'.
4. We'll start with the Form Submitted Trigger for the Prefilled form. Give your Trigger a clear name for what this Trigger will do for you. For example, if it is going to send the confirmation email to those who submitted the RSVP Prefilled form, name it "Send registration confirmation (prefilled).
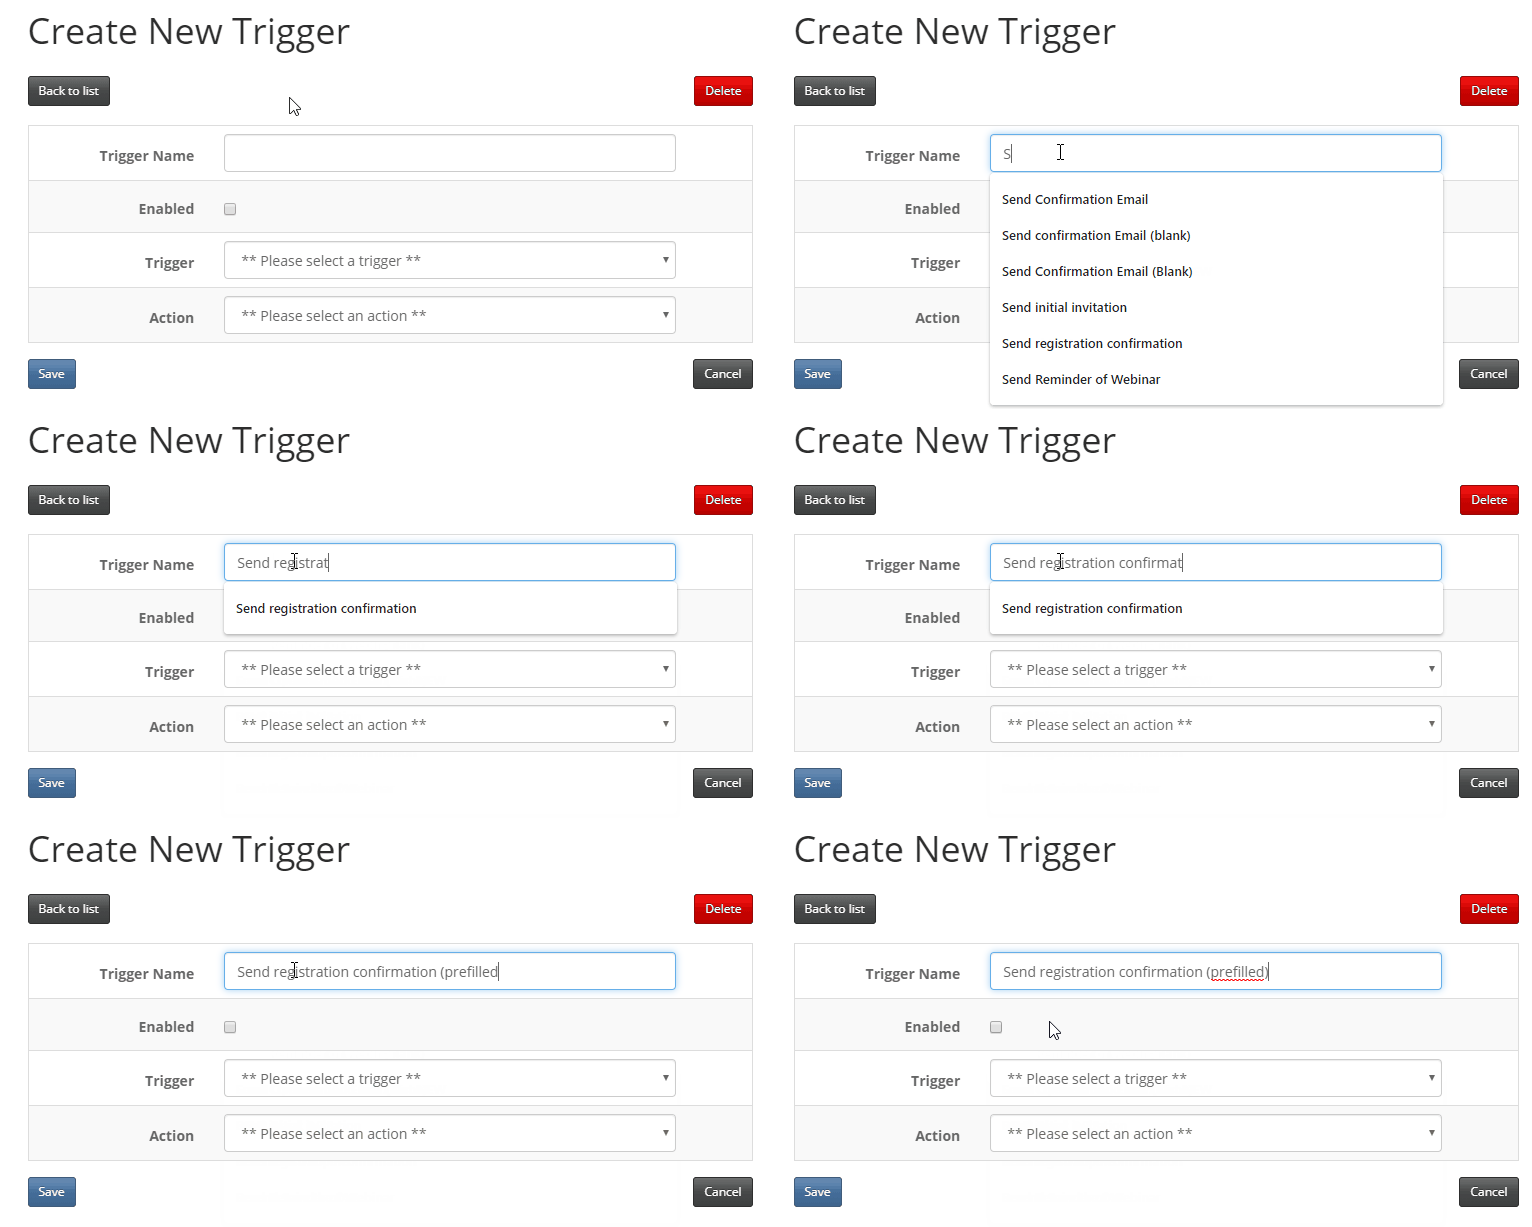
Important: Do not enable the trigger just yet. Wait until this trigger is setup and enable it from the 'Trigger List' screen.
5. Select the 'Form Submitted' Trigger from the 'Trigger' drop-down. Then select the prefilled RSVP form.
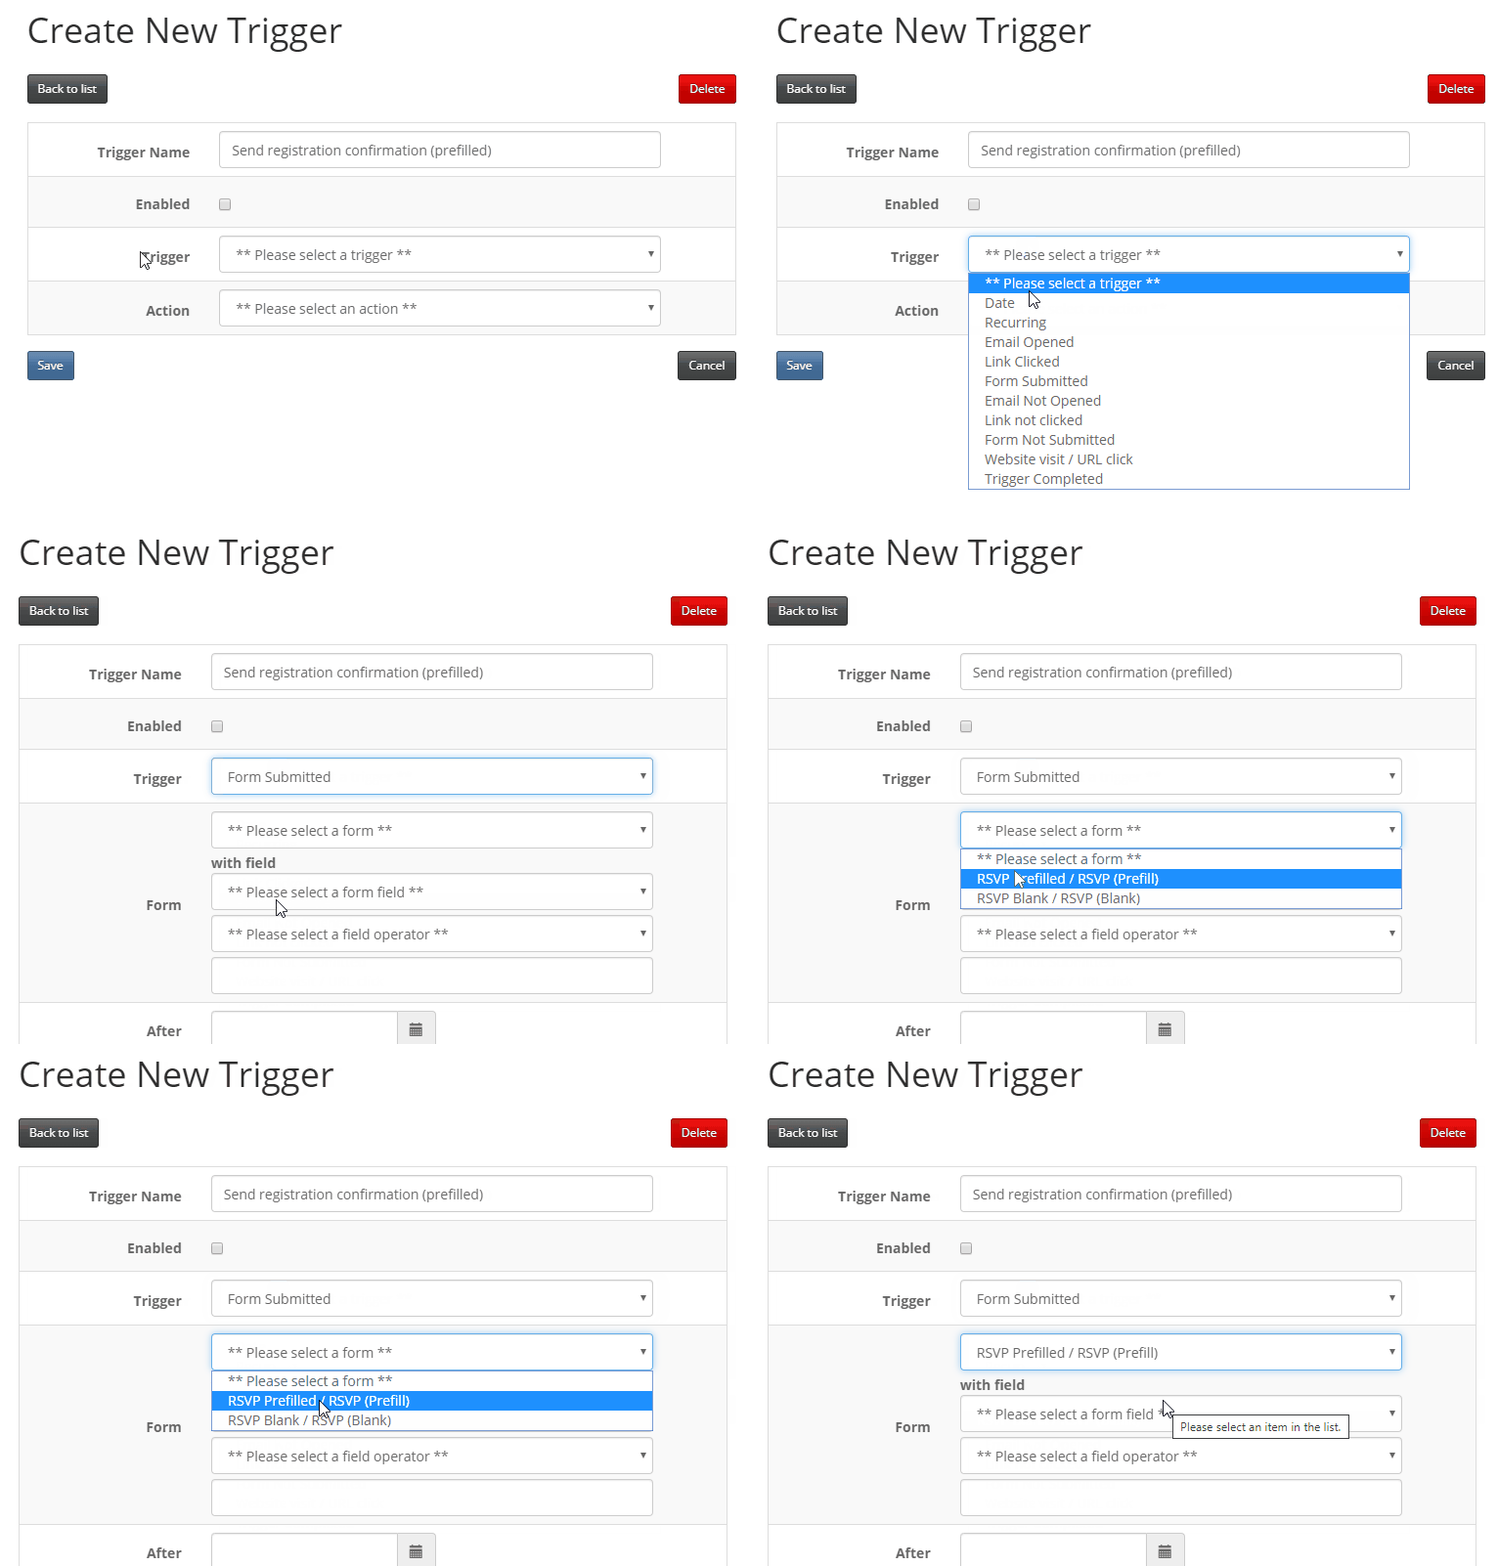
Please note: If you do not see any forms in the drop-down when selecting the "Form Submitted" trigger, please navigate to each of your forms and remove any RSVP field that was there by default from the template. Then go to the "Add a new field" tab and add back in the RSVP field - for InterAction, select the list for this specific event and the RSVP Additional field - then save the form, Publish > Publish now. When returning to the Triggers screen, you should now see the form(s) listed in the drop-down upon selecting the "Form Submitted" trigger.
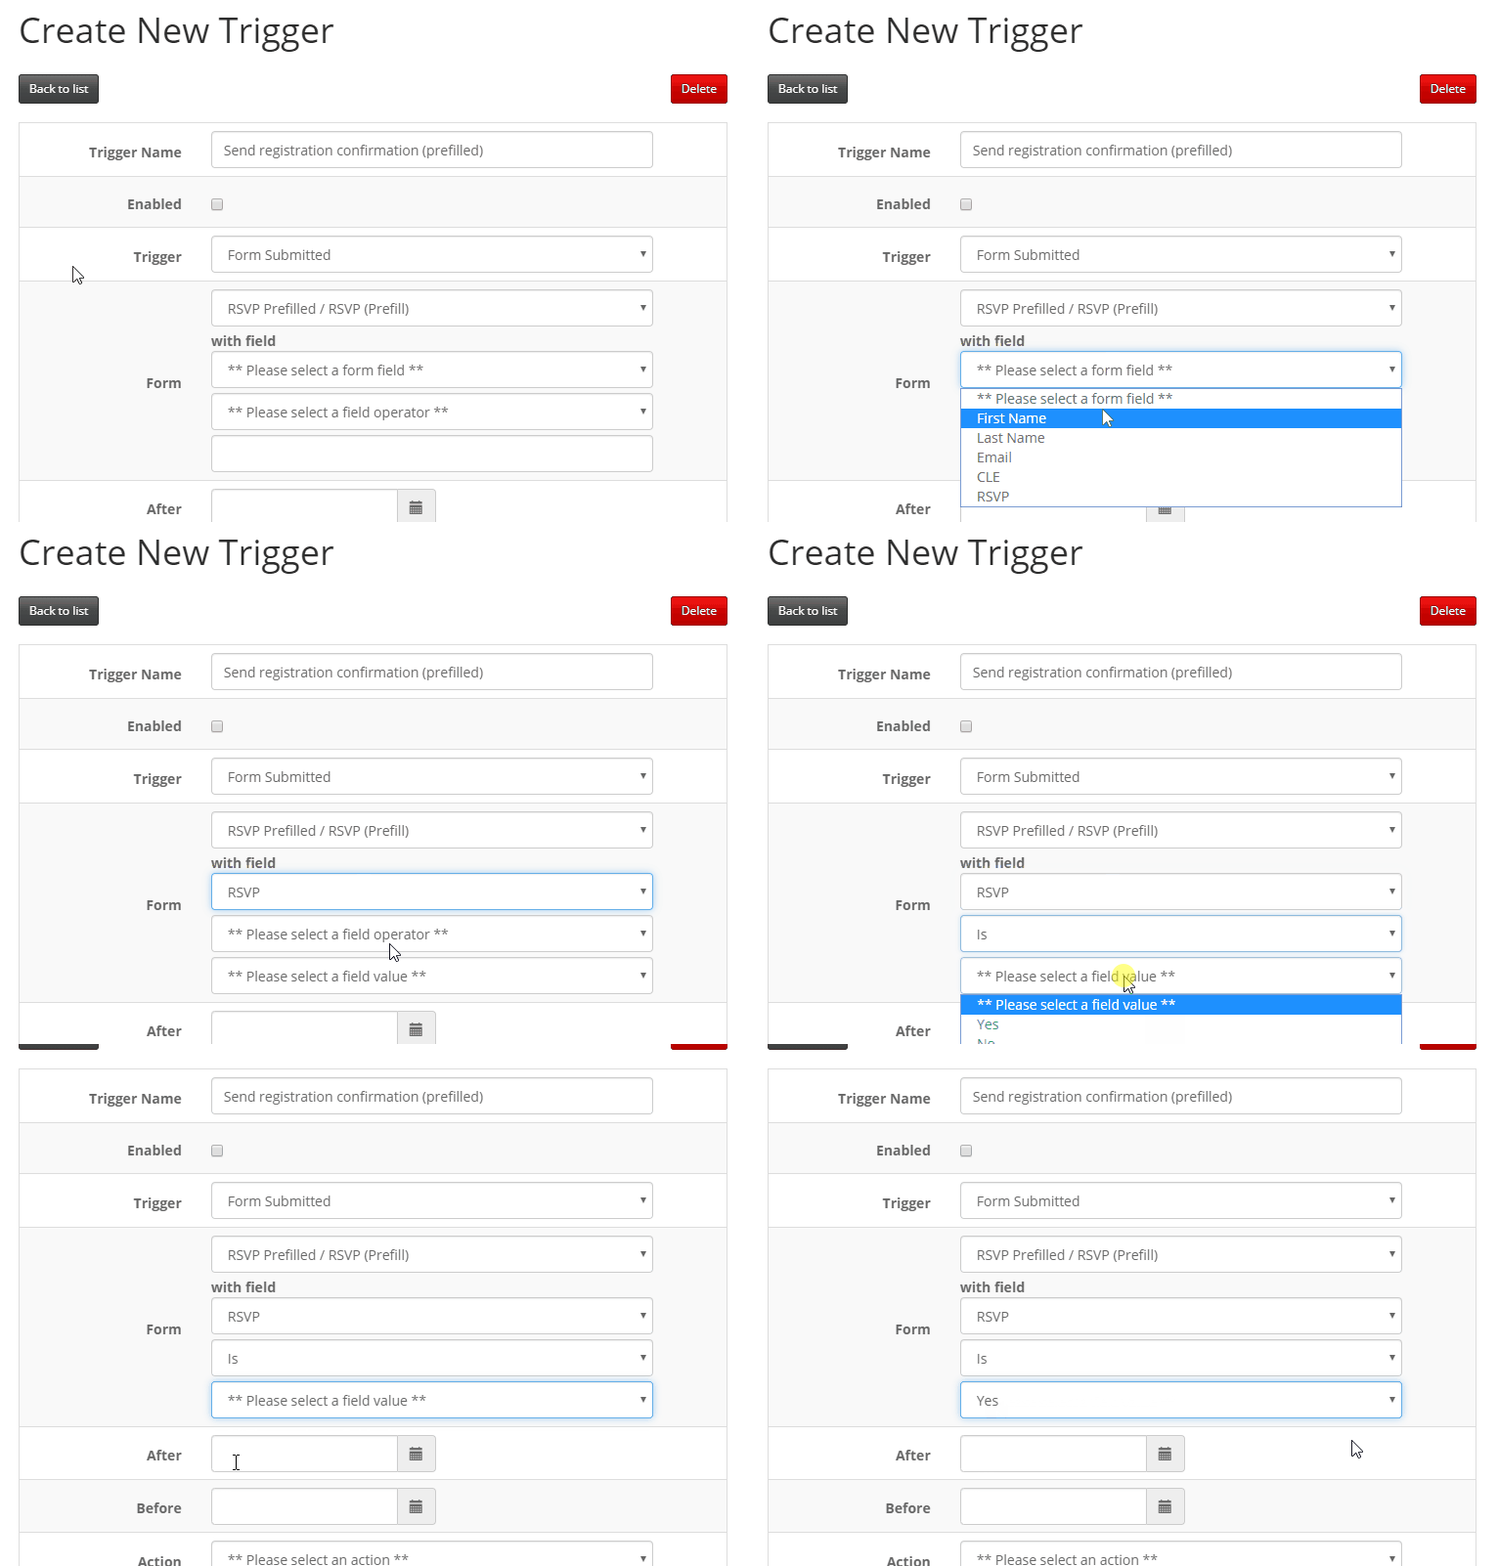
6. Next, select the 'RSVP' field, 'is', 'Yes' (or whatever your yes value is for the RSVP field).
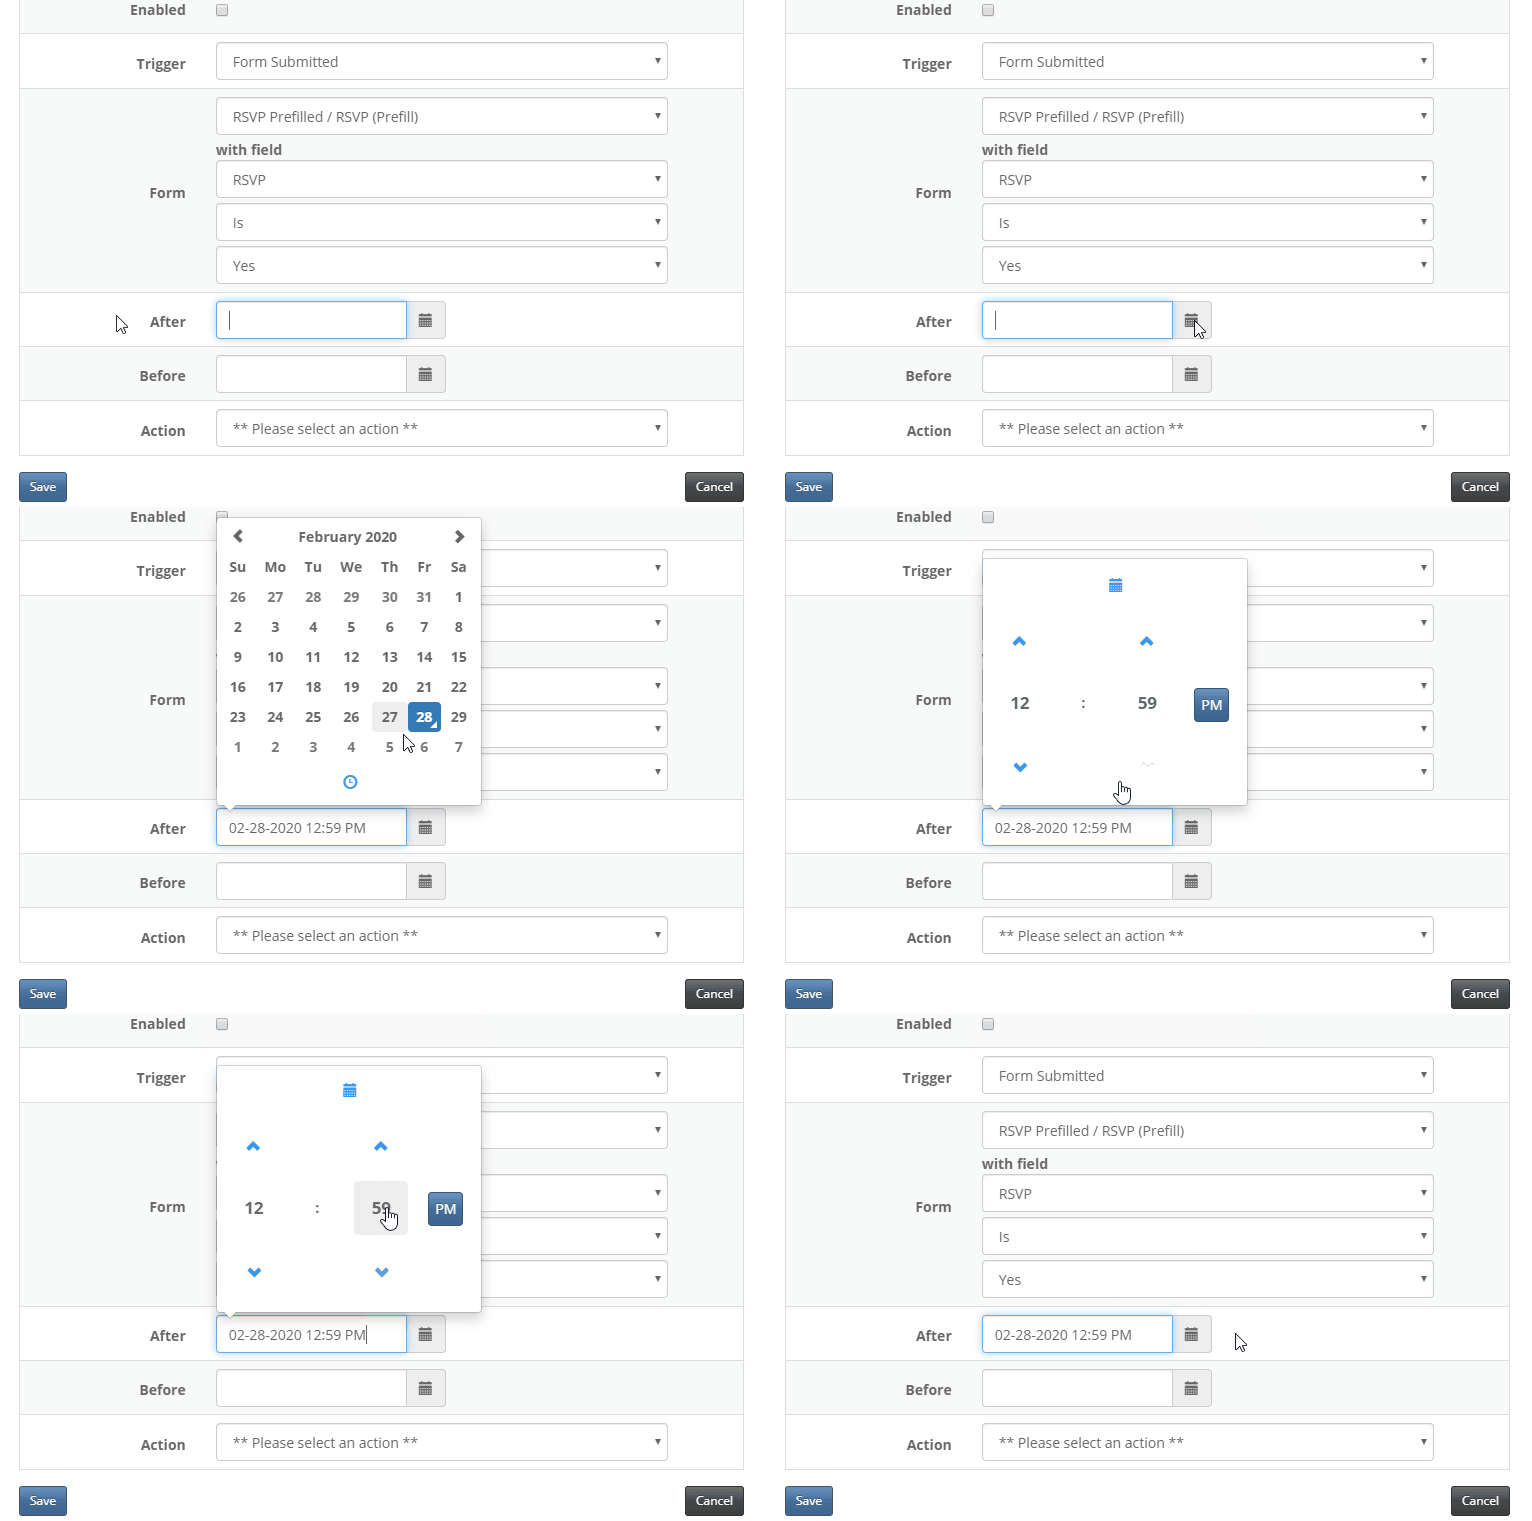
7. For 'After', please select today's date and time or the time at which you'll enable this trigger.
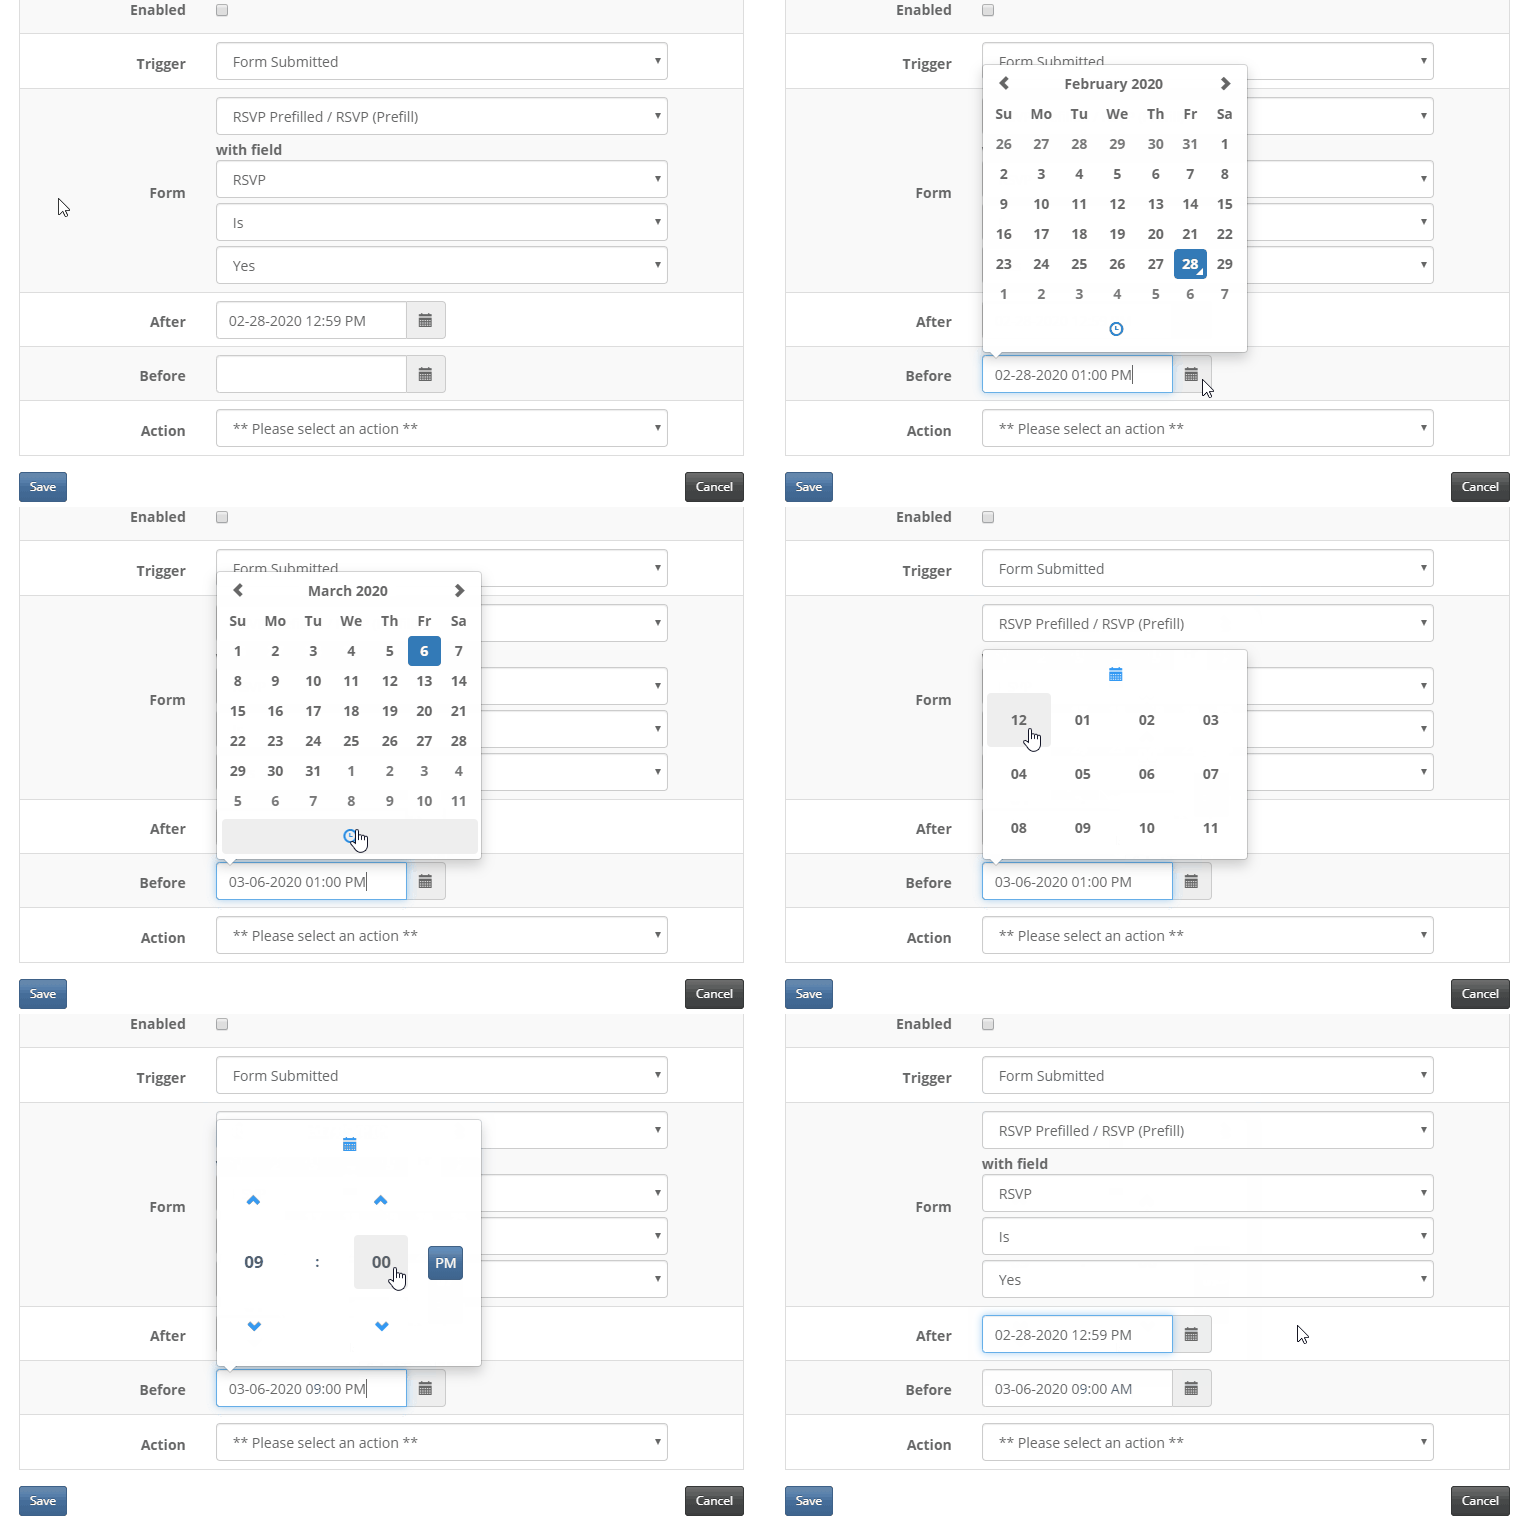
8. For 'Before', please select the date you wish to end this trigger (i.e. when registration closes).
9. In the 'Action' drop-down, you'll need to select 'Send Email to Matches', to send this Confirmation email to contacts who submitted the RSVP Prefilled form and RSVP'd Yes.
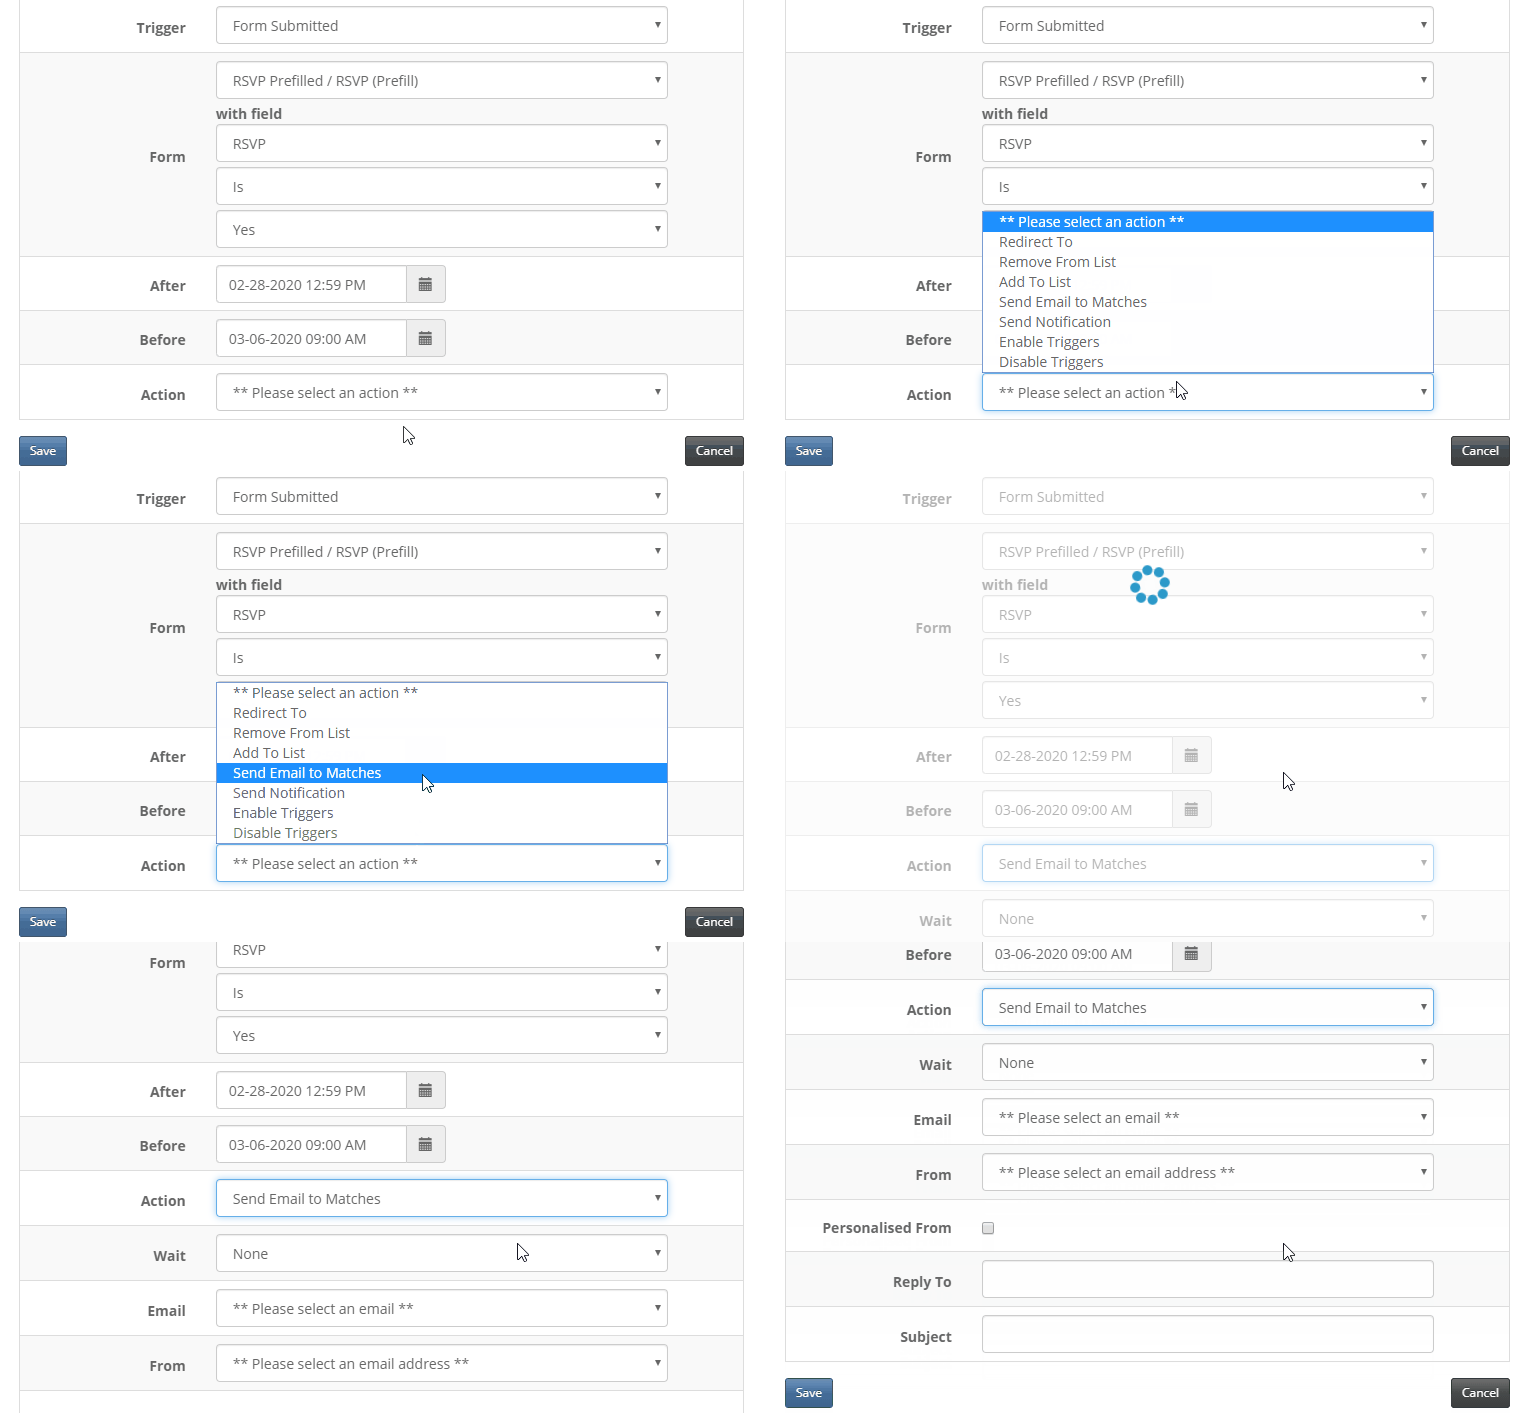
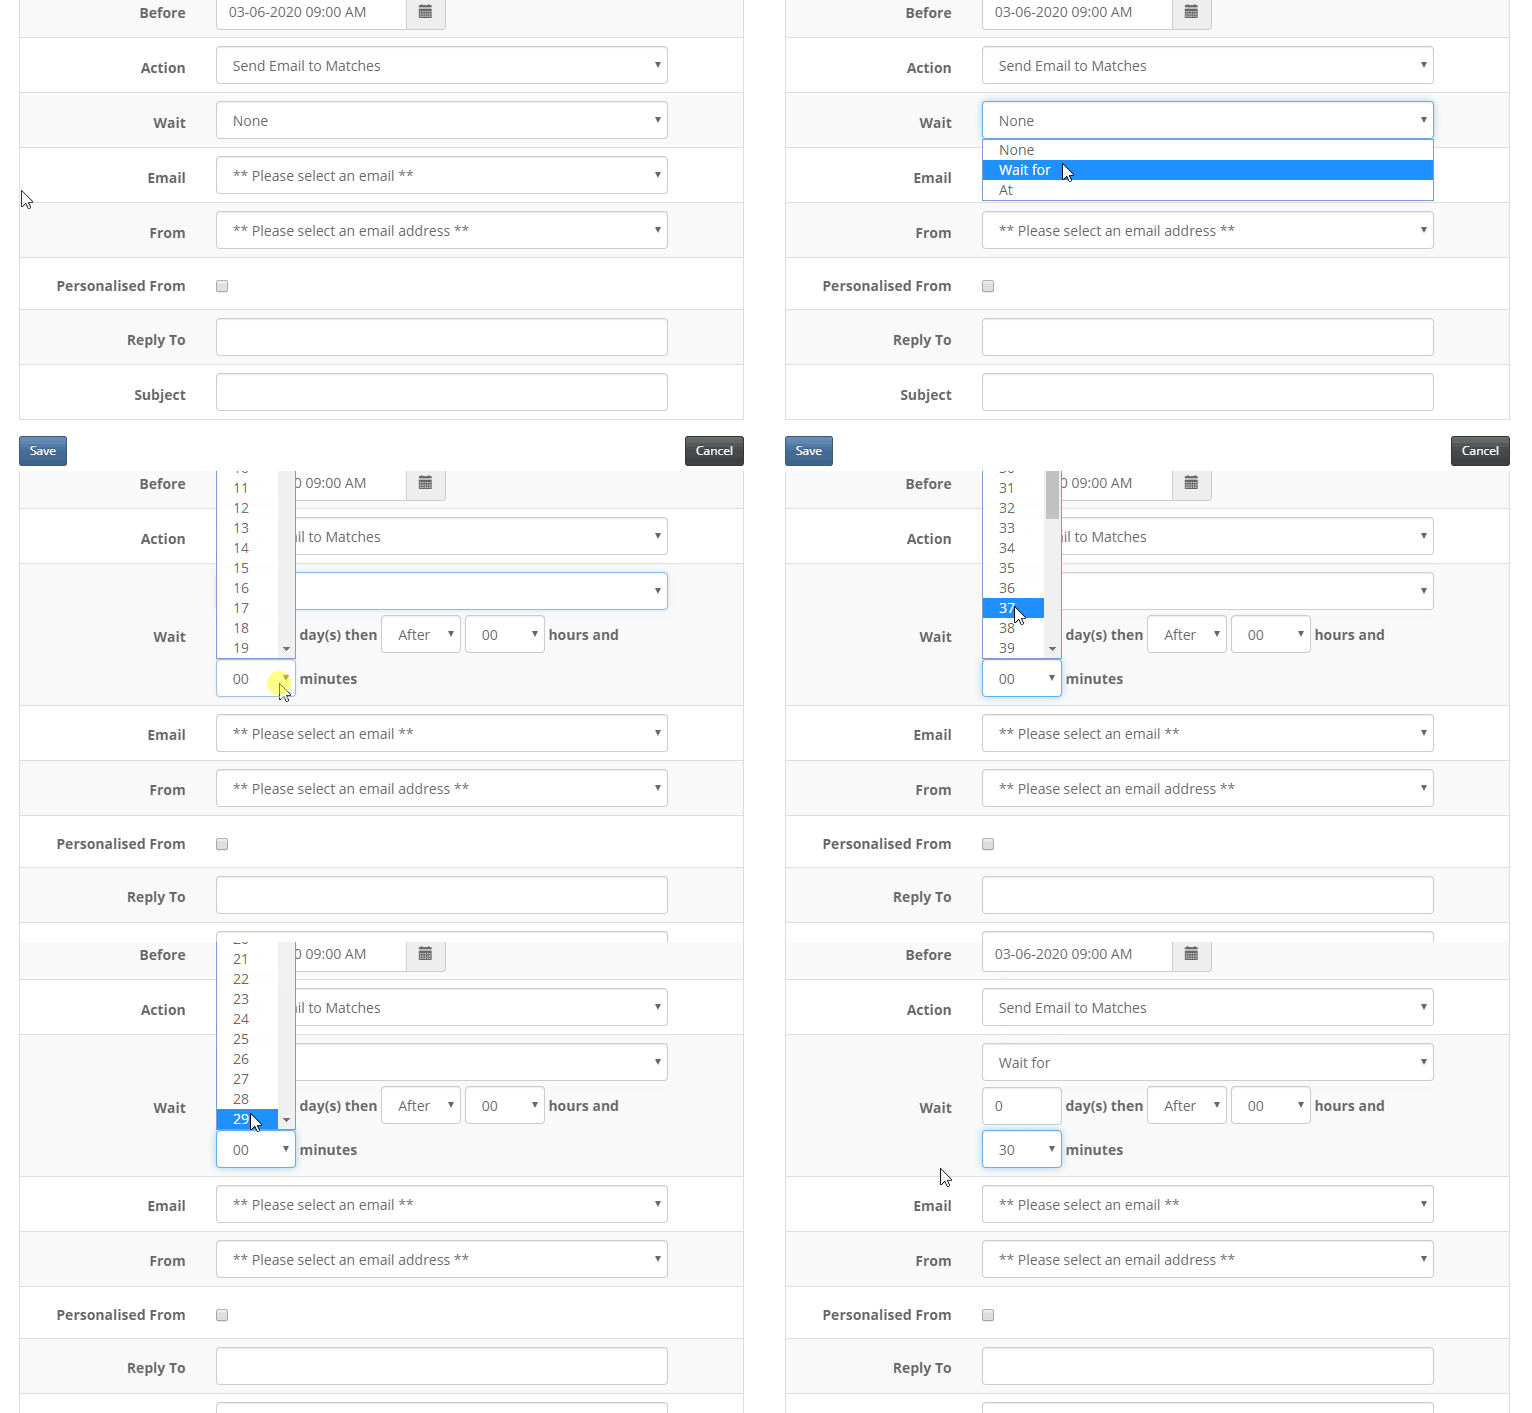
10. (Prefilled Form Only) - For 'Wait', choose 'Wait for' and decide if you wish to send this confirmation days after or minutes after the form is submitted. Please note: For InterAction, we recommend setting this to a minimum of 30 minutes. To set event registrants' expectations, on your Thank You Accept page include the following statement: "You should receive a confirmation email within the hour."
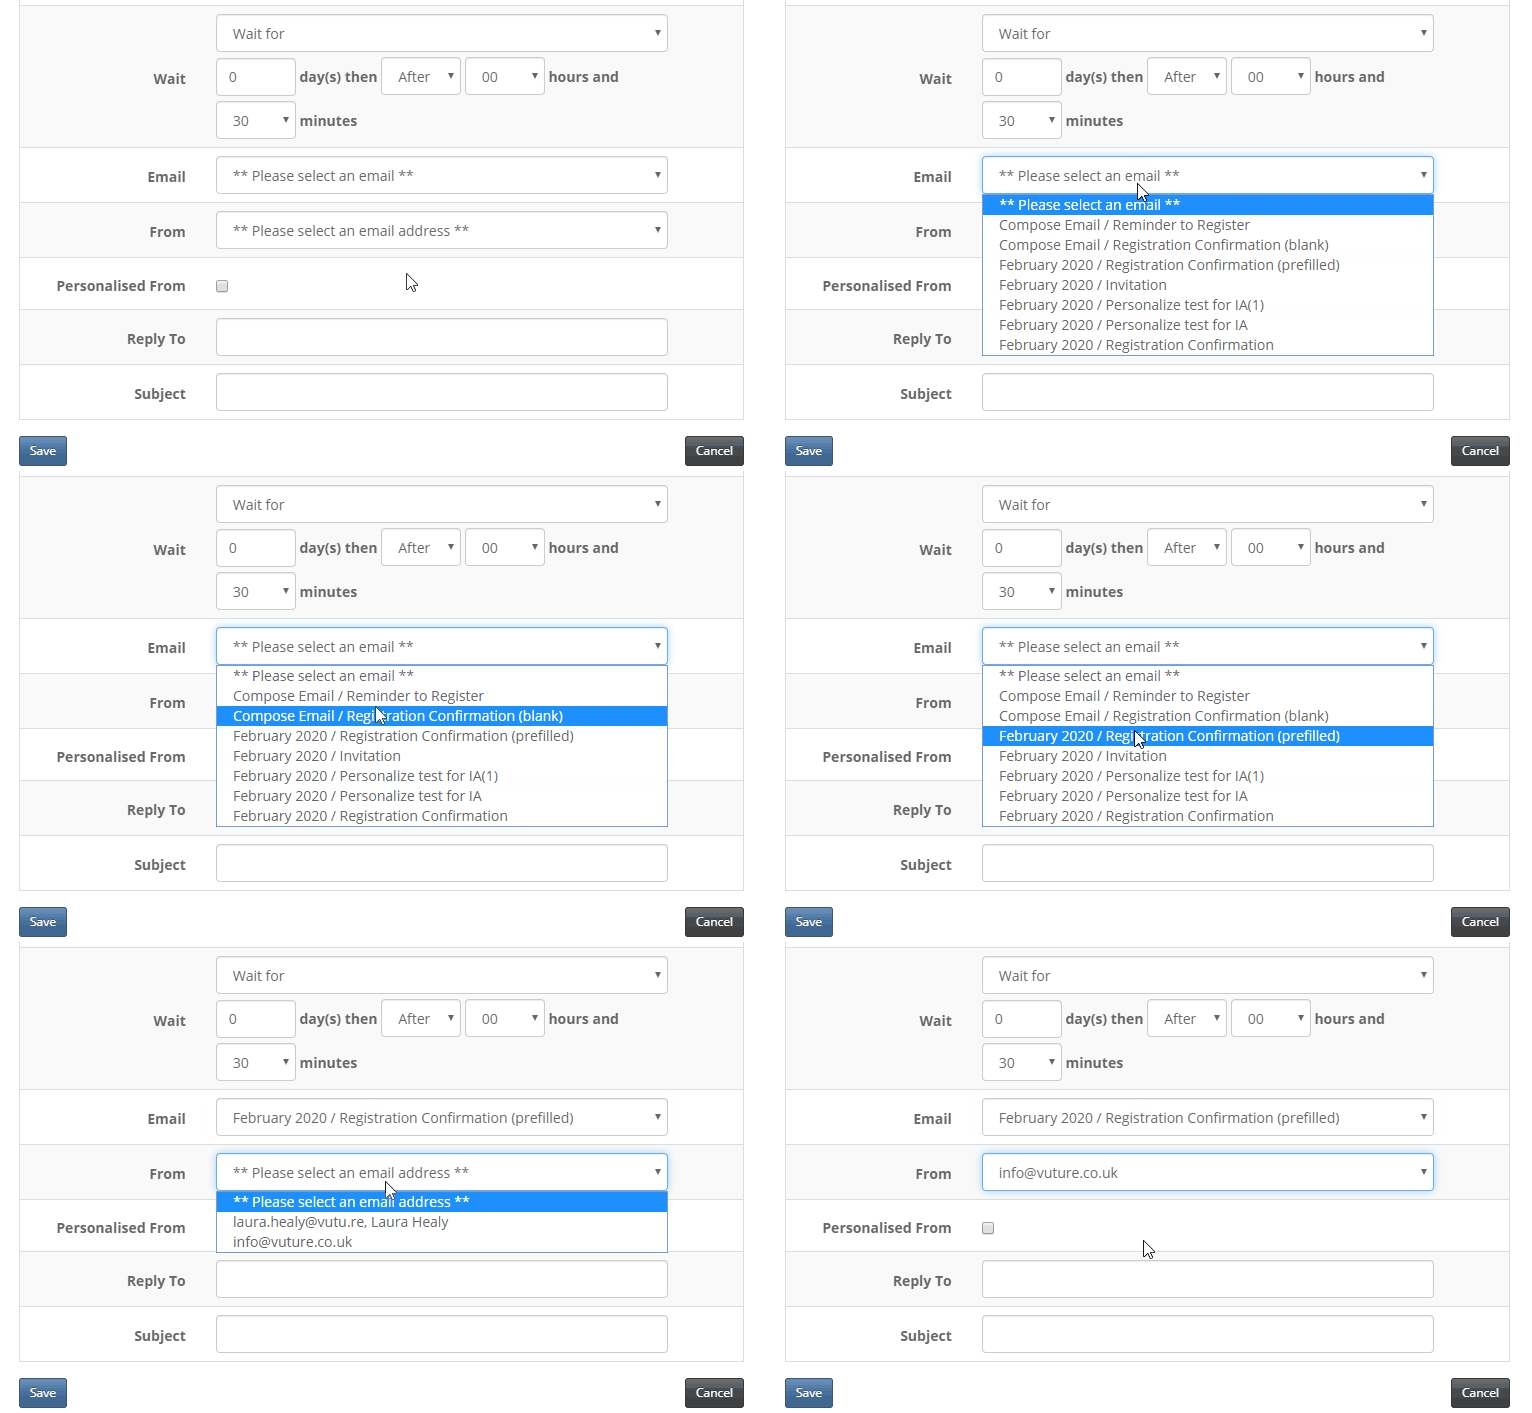
11. In the 'Email' drop-down, you'll need to select your Prefilled confirmation email and select your FROM Address.
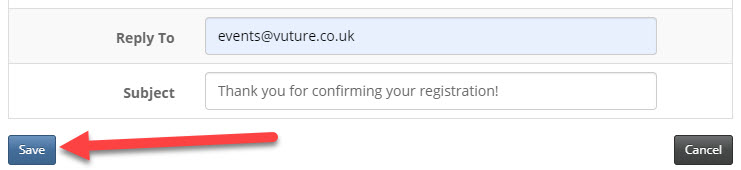
12. (Optional) If you'd like to specify an email address for replies, please enter this email address in to the 'Reply To' field.

13. Type in your Subject Line for this confirmation email send.

14. Click Save to save your Trigger.
15. Now, we'll create a second Form Submitted Trigger for the Blank form. Give your Trigger a clear name for what this Trigger will do for you. For example, if it is going to send the confirmation email to those who submitted the RSVP Blank form, name it "Send registration confirmation (blank).
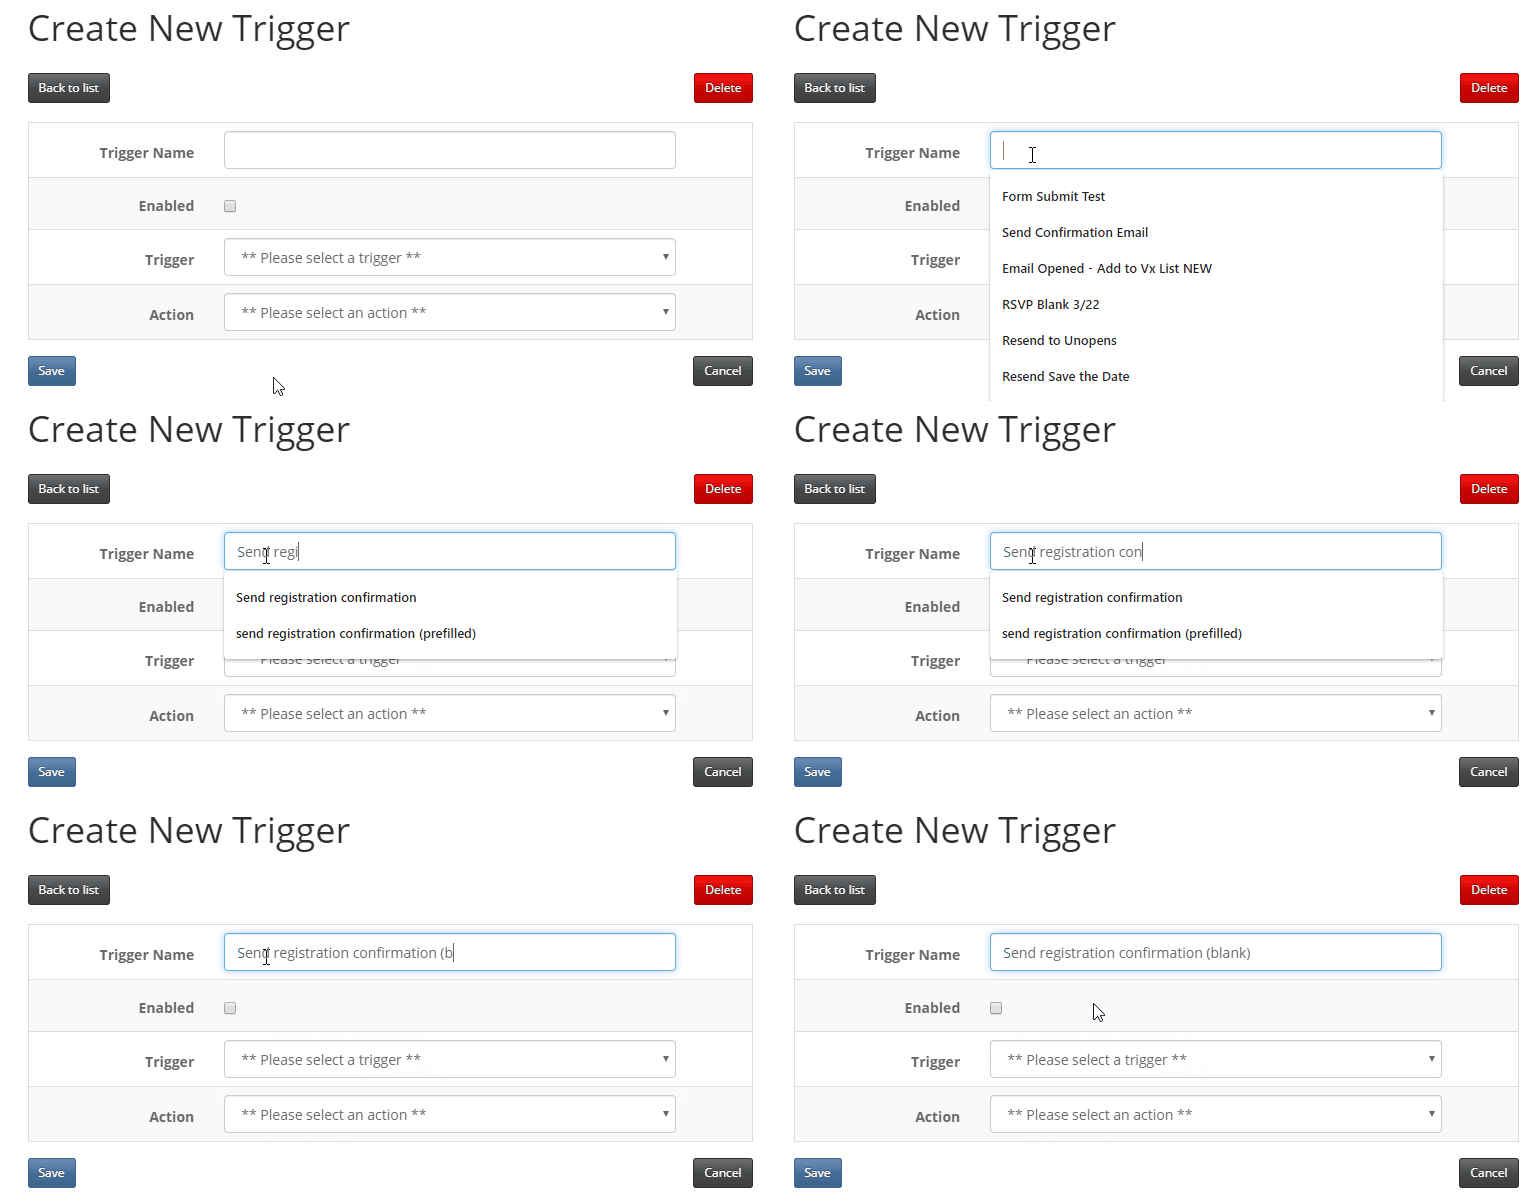
Important: Do not enable the trigger just yet. Wait until this trigger is setup and enable it from the 'Trigger List' screen.
16. Select the 'Form Submitted' Trigger from the 'Trigger' drop-down. Then select the blank RSVP form.
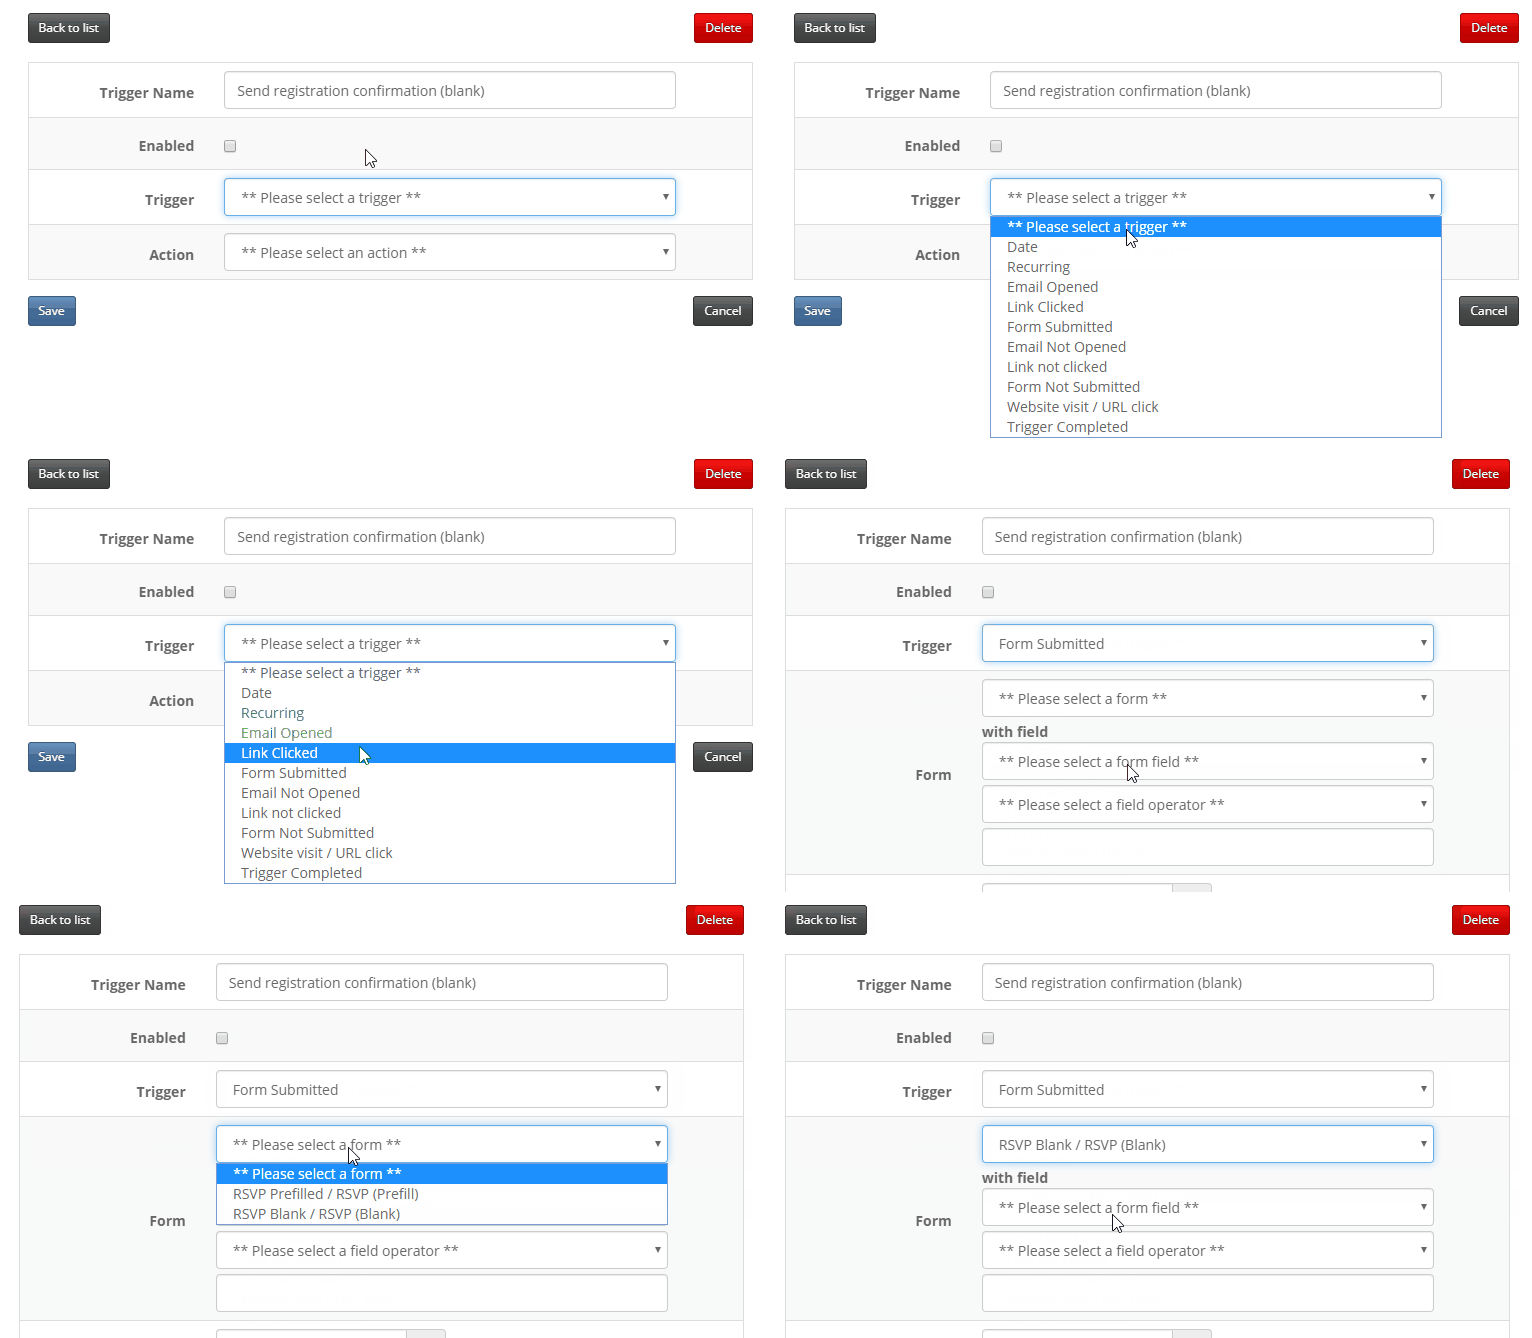
17. Repeat steps 6-8 above then continue to step 18.
18. In the 'Action' drop-down, you'll need to select 'Send Notification', to send this Confirmation email to contacts who submitted the Blank RSVP form and RSVP'd Yes. (Note that the Send notification action will not move the email over to the sent folder. If you need to know whether the email was sent, you can use the Trigger history.)
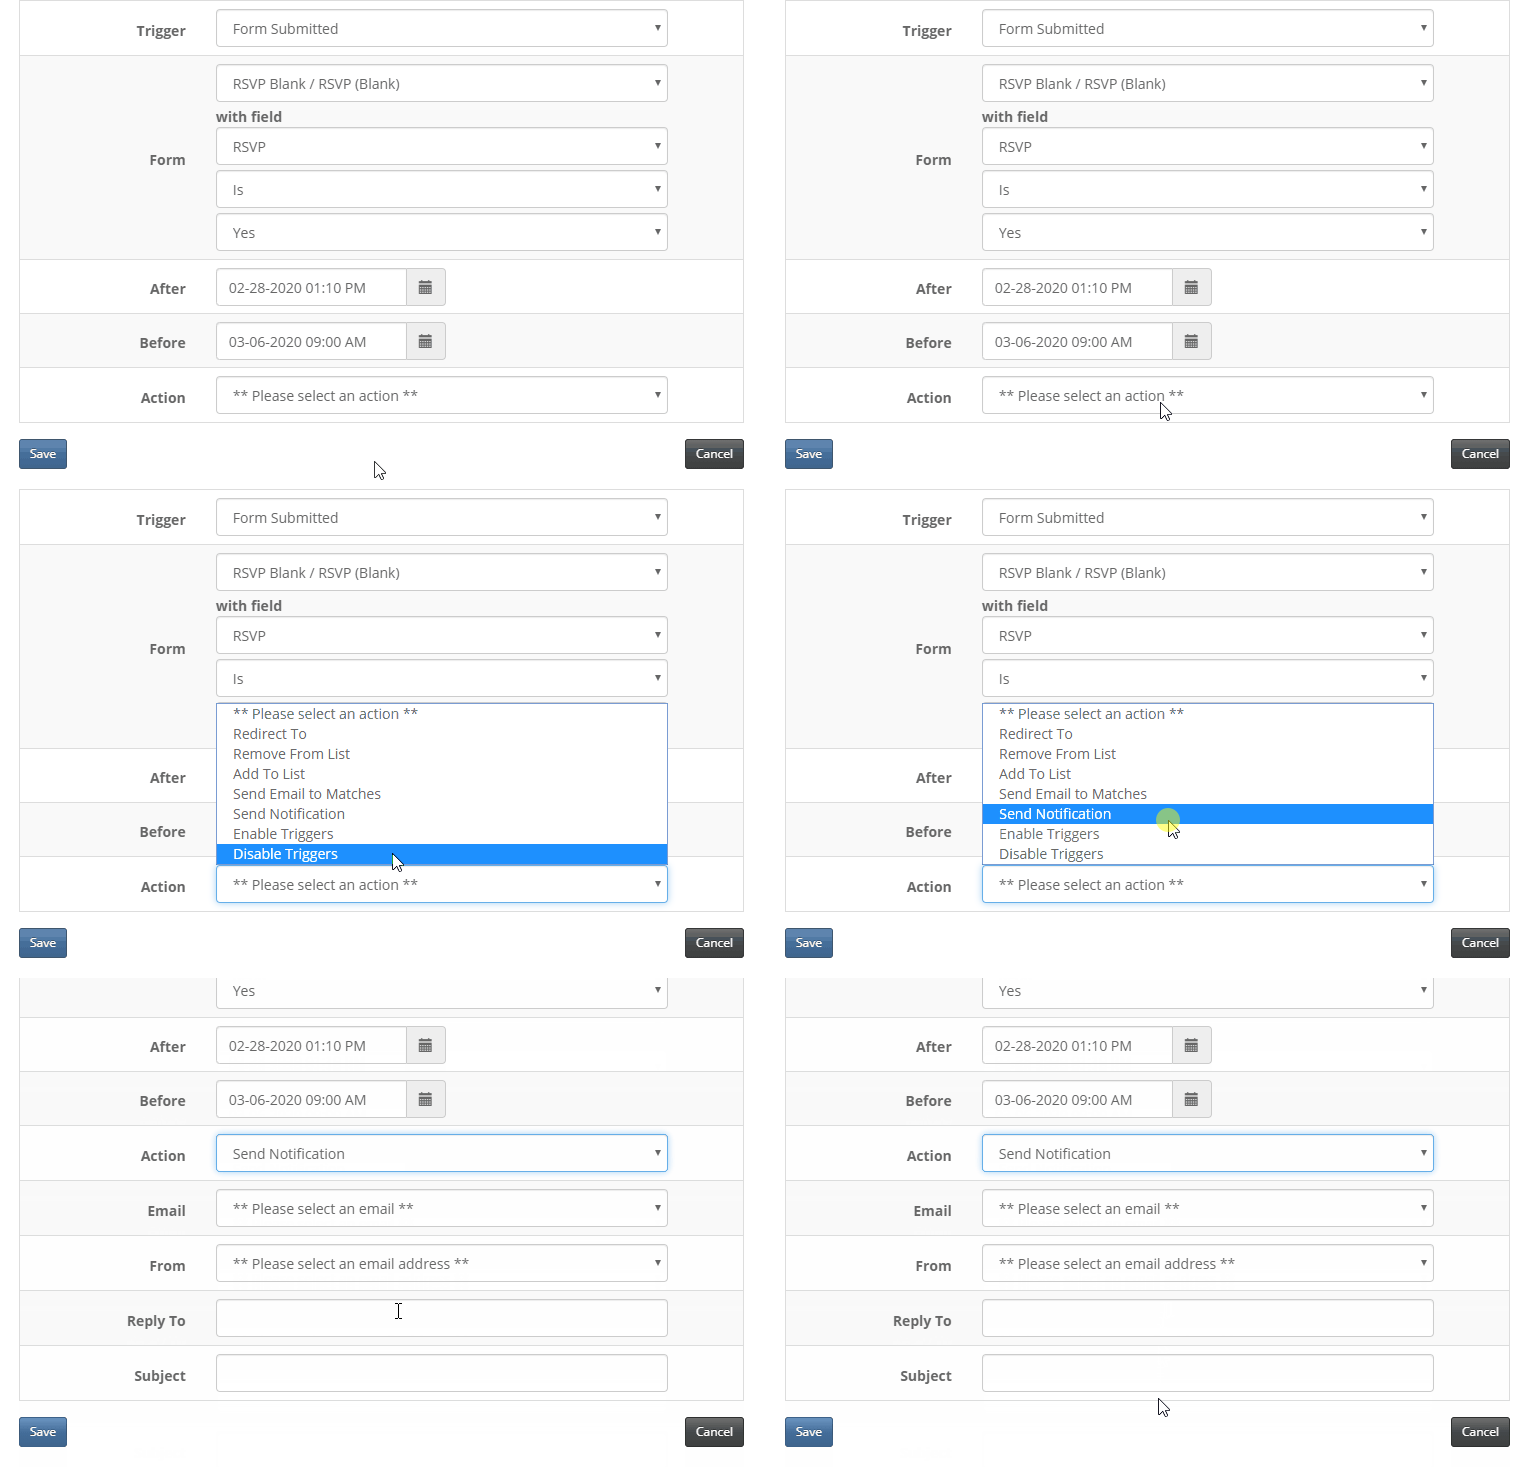
19. In the 'Email' drop-down, you'll need to select your Blank confirmation email and select your FROM Address.
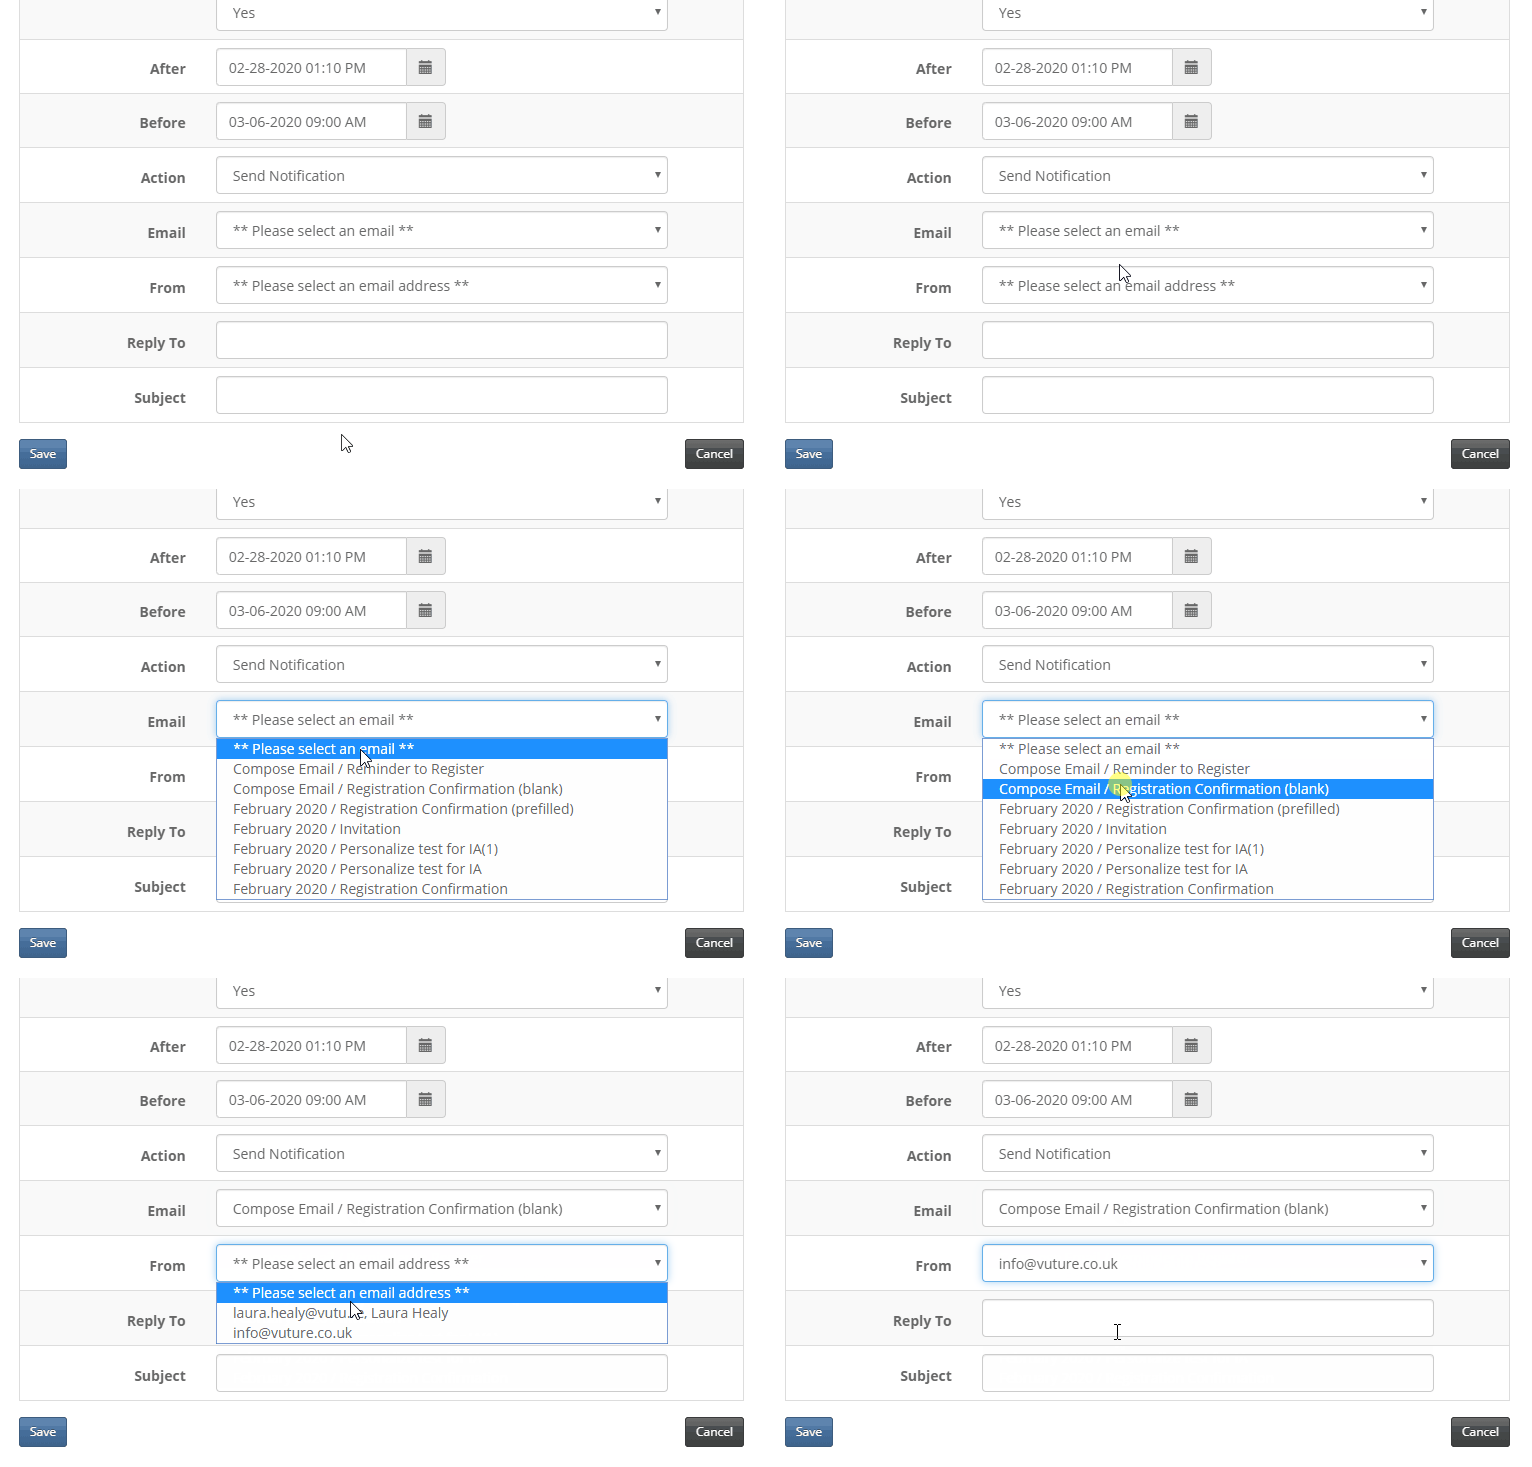
20. Repeat steps 12 to 14 then continue to step 21.
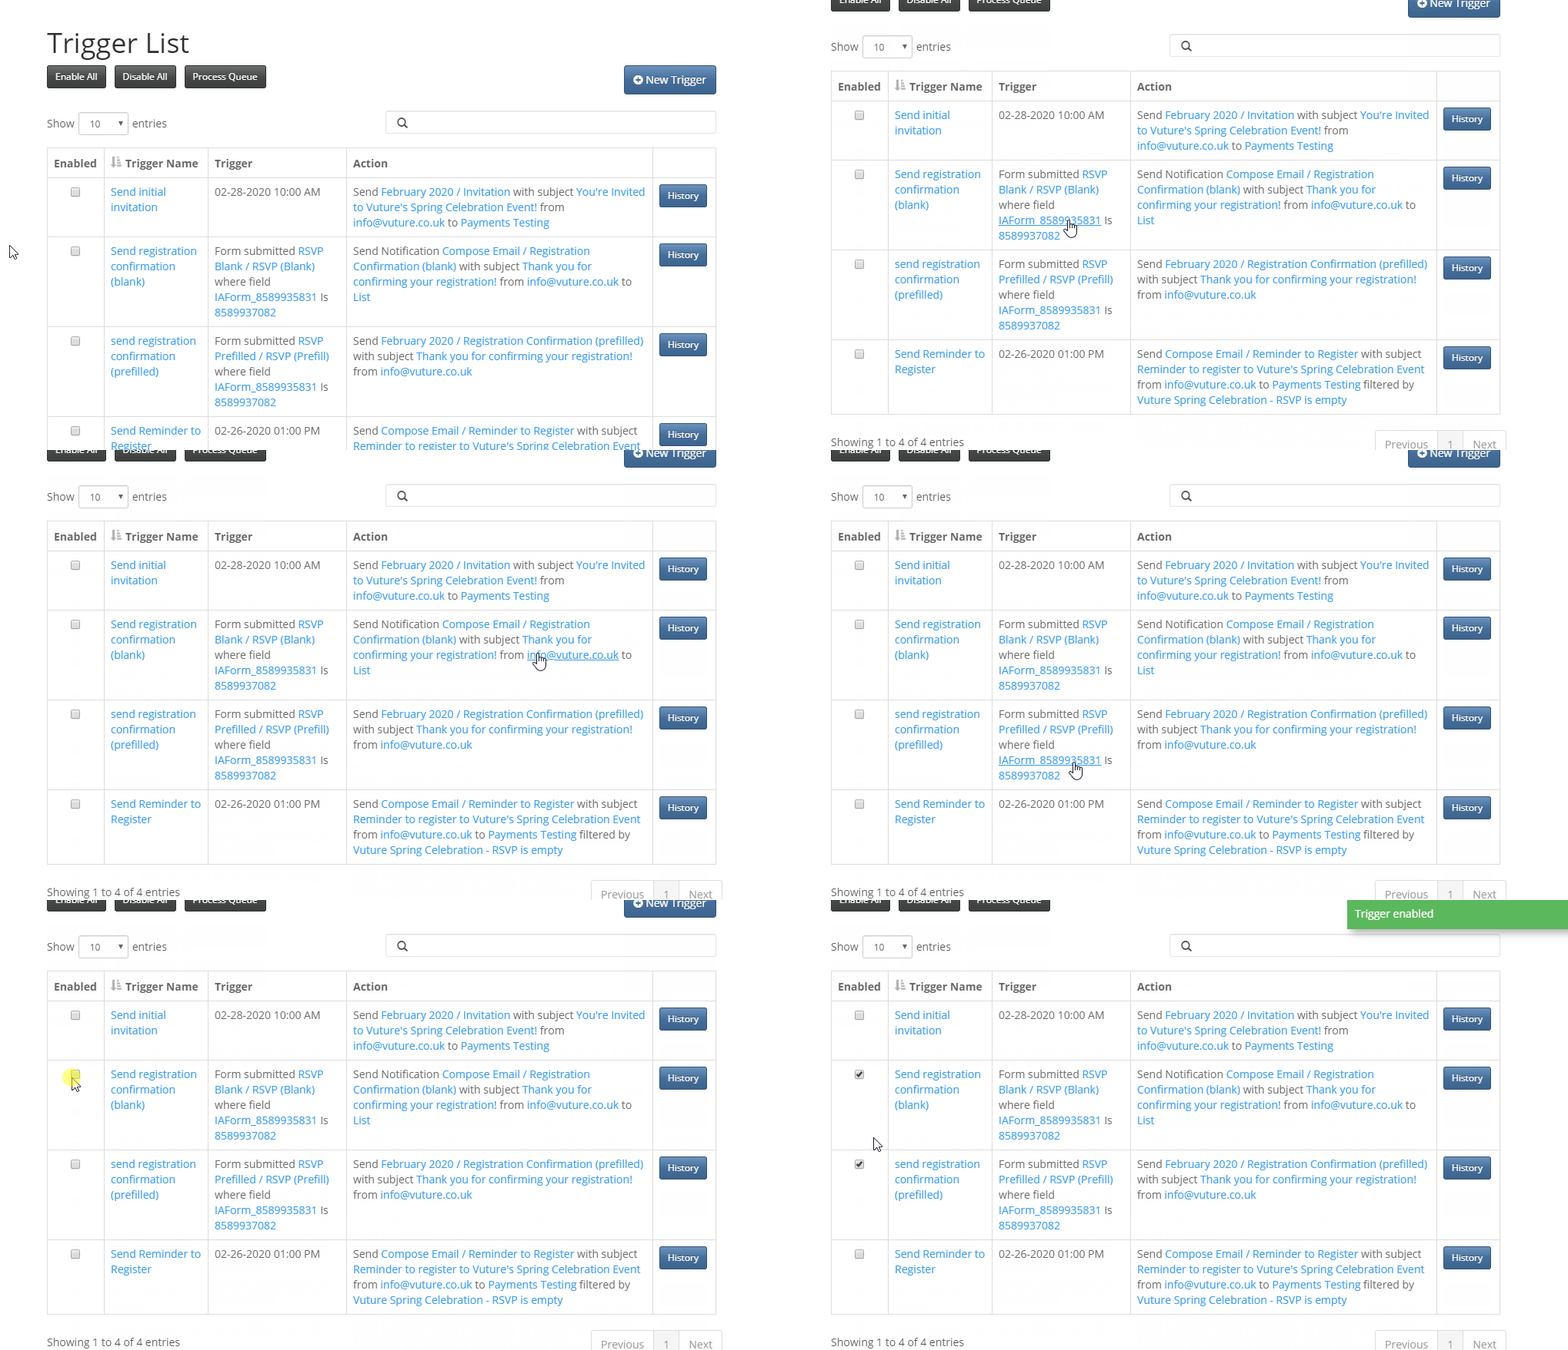
21. Double check both triggers to make sure everything is correct (i.e. Date, Time, Email to send, Subject Line, etc.). Then when you're ready, from the Trigger List screen, check the box for 'Enabled' next to both of your triggers to enable them. Beginning on the date/time you specified, those who submit the Prefilled form and RSVP yes, will received the confirmation email (prefilled) and those who submit the Blank form and RSVP yes, will receive the confirmation email (blank).