Overview
To provide an extra layer of security, any landing page or prefilled form in your Vuture instance can have two-step authentication added to it.
This is designed to ensure that only the intended recipient can view a prefilled form or landing page populated with their personal data.
When a recipient clicks on a link to a page with Automated Access enabled, they are directed to a customisable interim landing page. This page explains that in order to access the page, they must verify that they are the intended recipient by clicking on a temporary link in a verification email that has just been sent to them. This link is only valid for a predetermined time limit which is specified in days. Upon clicking the link in the verification email, they will gain access to the page.
Please note, Automated Access does not work with blank forms.
Contents
Requirements
Ask your Customer Success Manager to enable the following on your Vuture Instance:
- Admin.System.General.Automated Access Enabled
- Admin.System.General.Automated Access Expiry Days - The default setting is for 365 days, in which then the link in the verification email will expire. This default can also be changed for individual landing pages under Page Options > Automated Access > Token expiry.
Optional - It is also possible to limit the number of tokens that a contact is allowed to request in a set period of time. This number can be set in Admin.System.General.Limit Default Messages. The time is given in milliseconds. (Enter 60,000 to give a 1 minute "cooling off period" before a further token is sent).
How to setup Automated Access on a prefilled form / landing page
Summary of steps:
- Decide which prefilled form or landing page in your campaign you wish to setup Automated Access for (i.e. Unsubscribe form).
- Create the Automated Access landing pages:
- Warning Page
- Invalid Access Page
- Create the verification email that contains the link (with token) to allow access to the prefilled form or landing page protected with Automated Access.
- Apply Automated Access to the prefilled form or landing page in your campaign.
Step 1: Decide which prefilled form or landing page in your campaign you wish to setup Automated Access for (i.e. Unsubscribe form). This is the page you wish to protect by sending a verification email to the intended recipient, for them to then click to access the page.
Step 2: Create the Automated Access landing pages
Within the same email campaign as the prefilled form or the landing page you wish to add Automated Access to, you will need to create two new landing pages: the Warning Page and the Invalid Access Page.
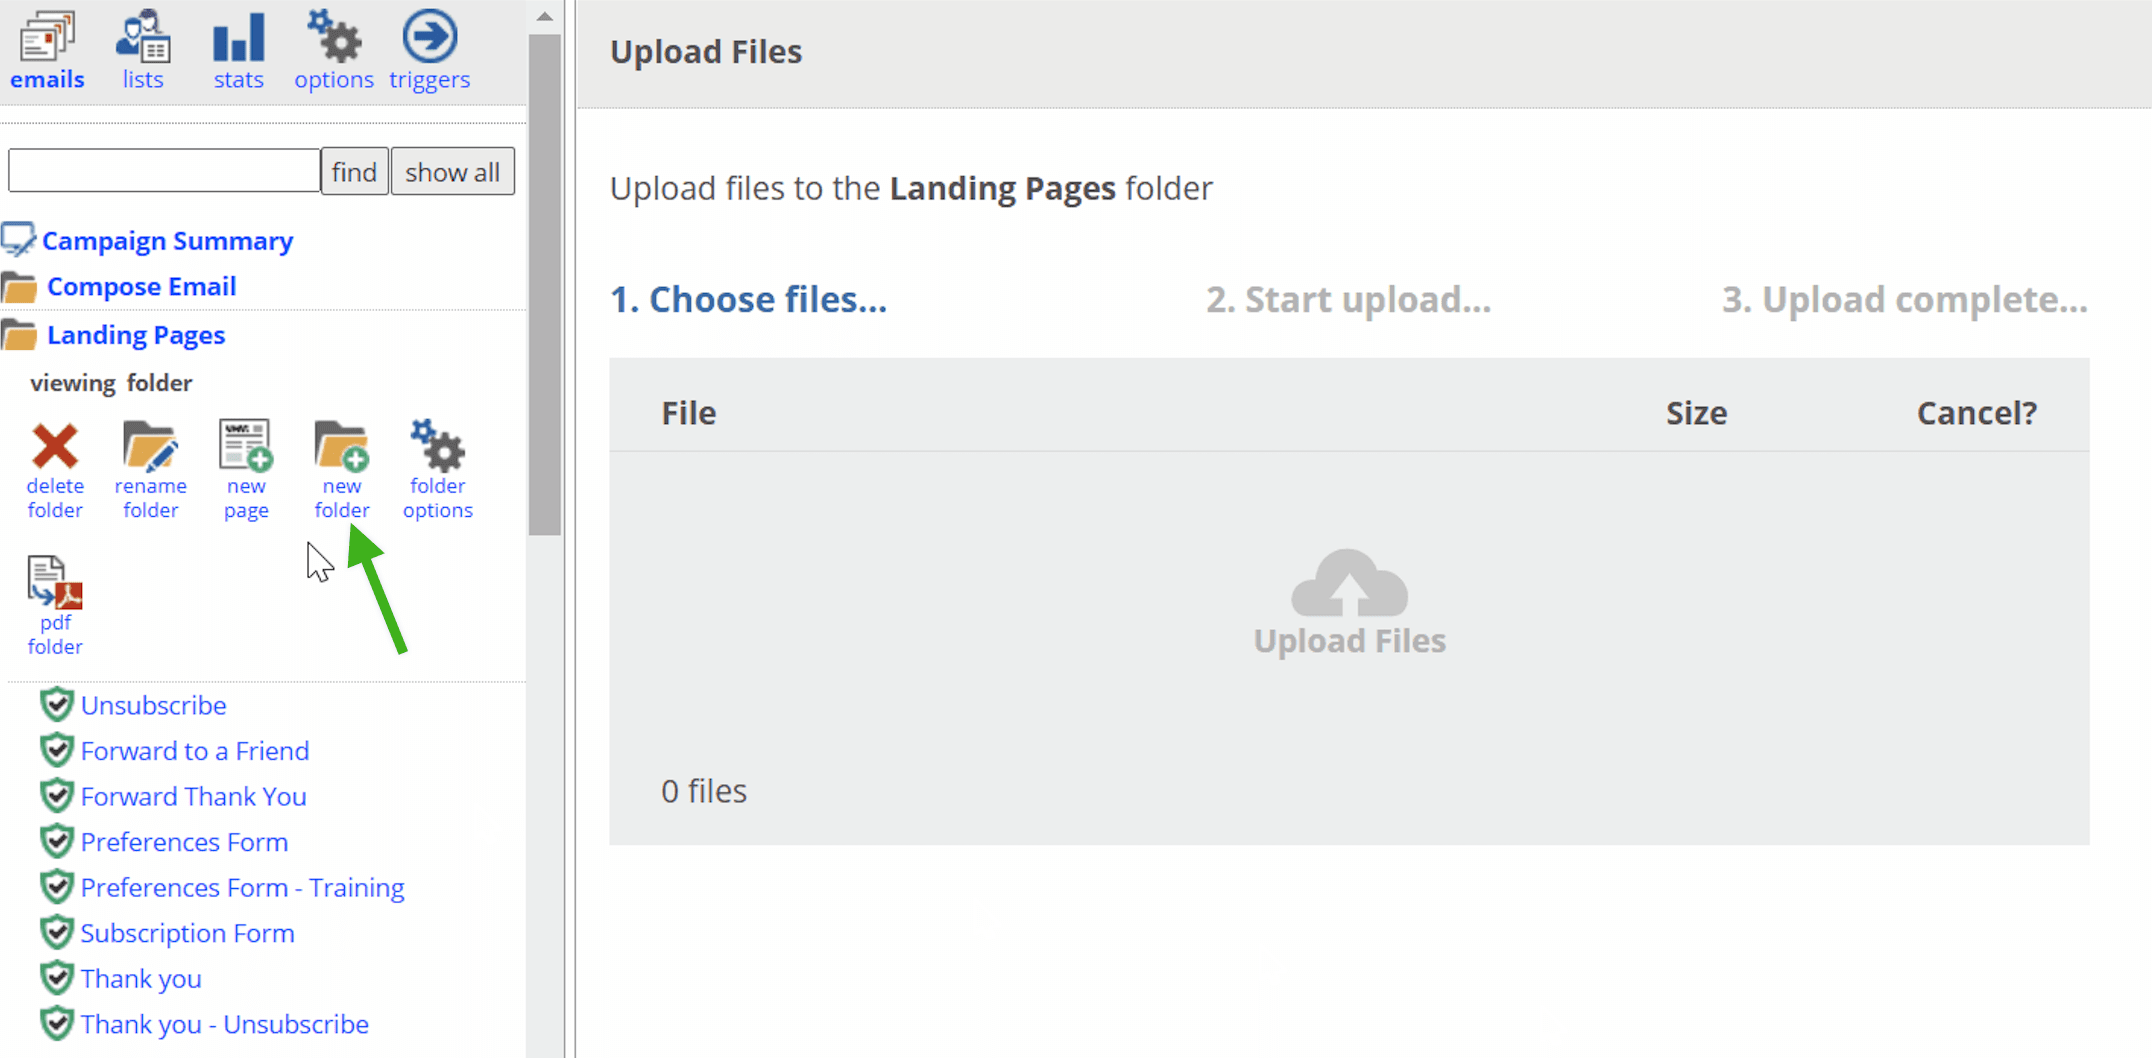
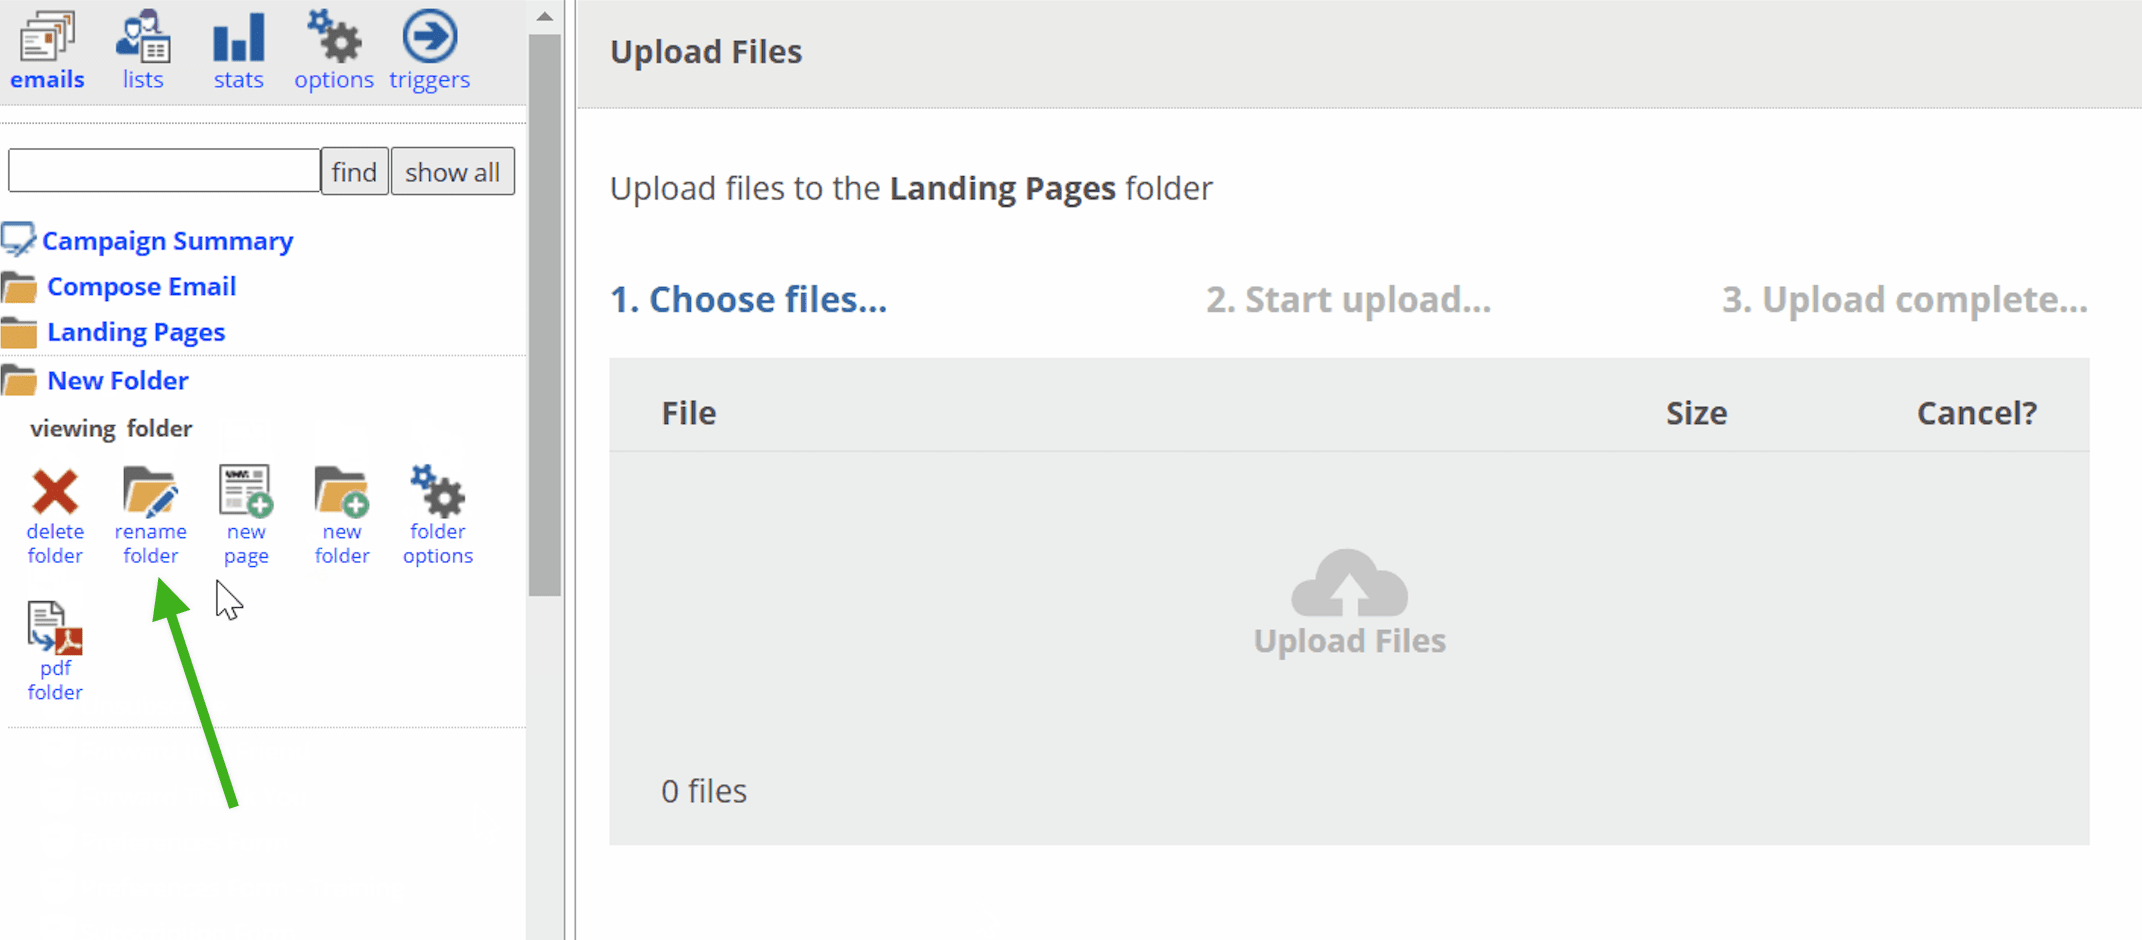
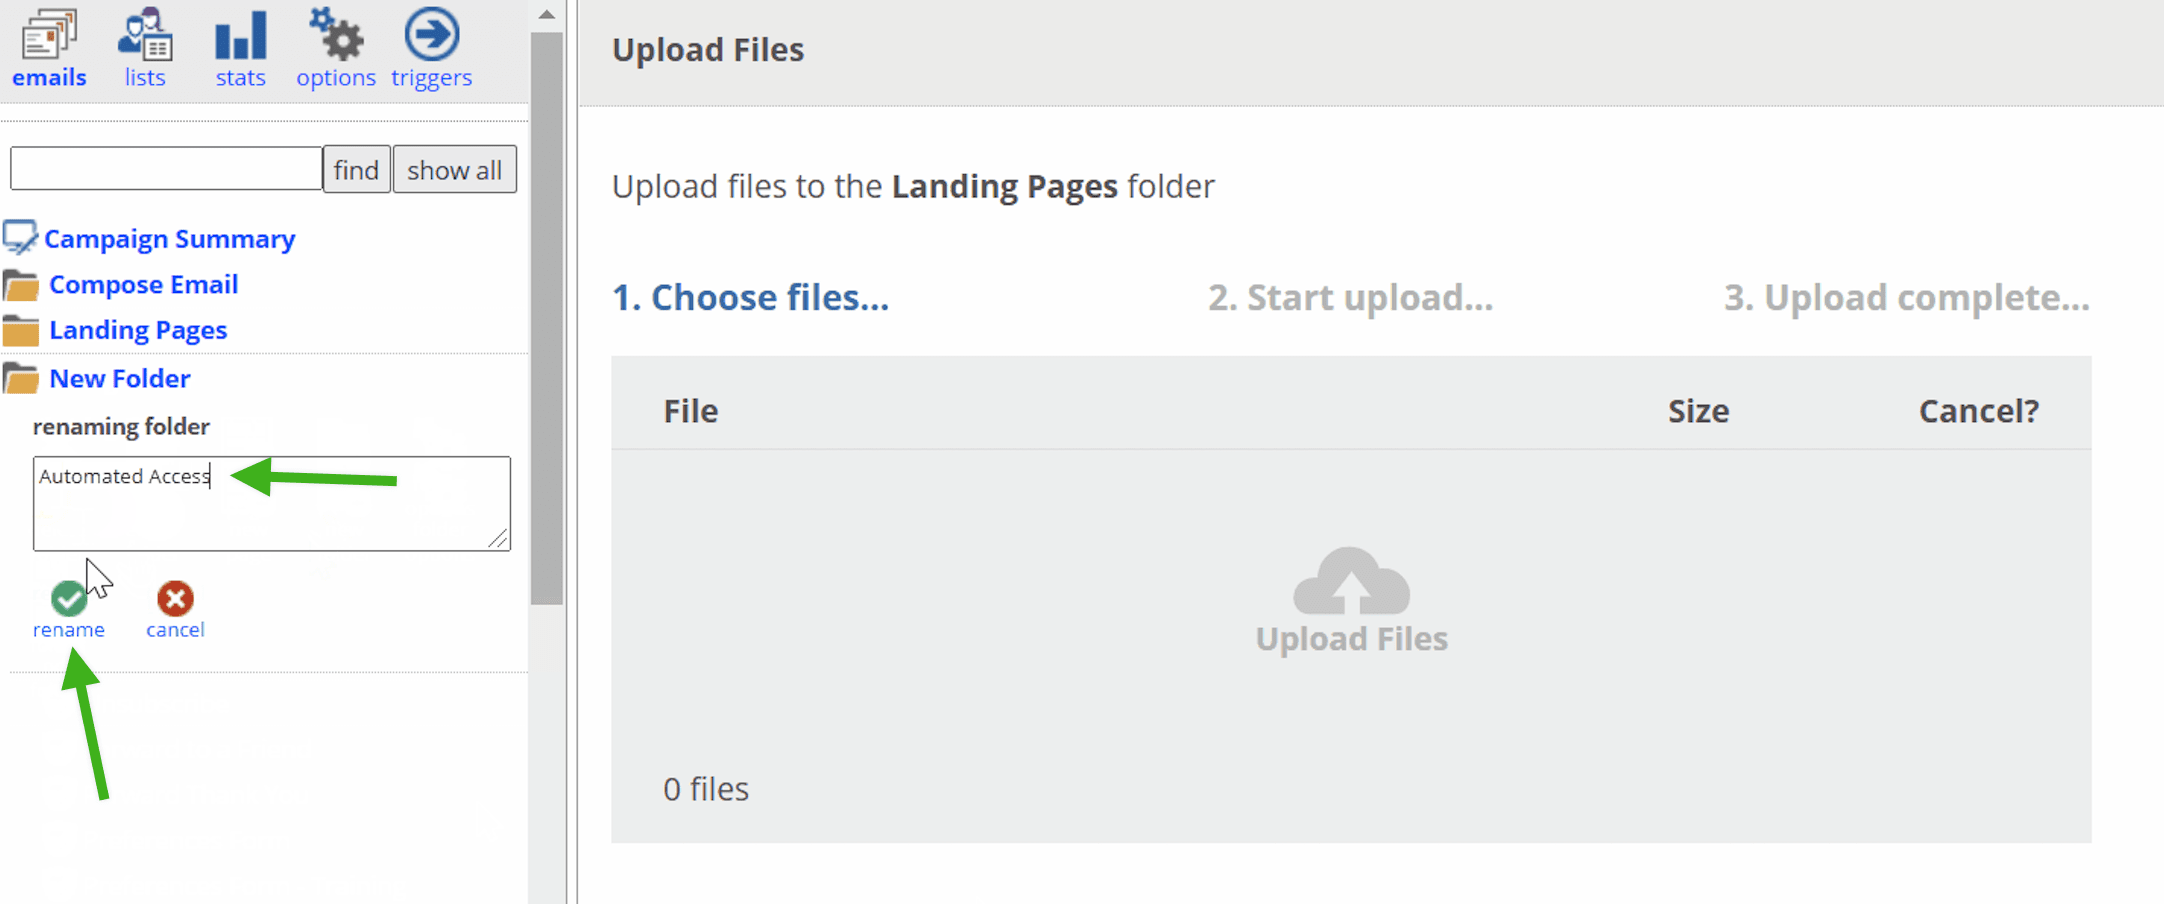
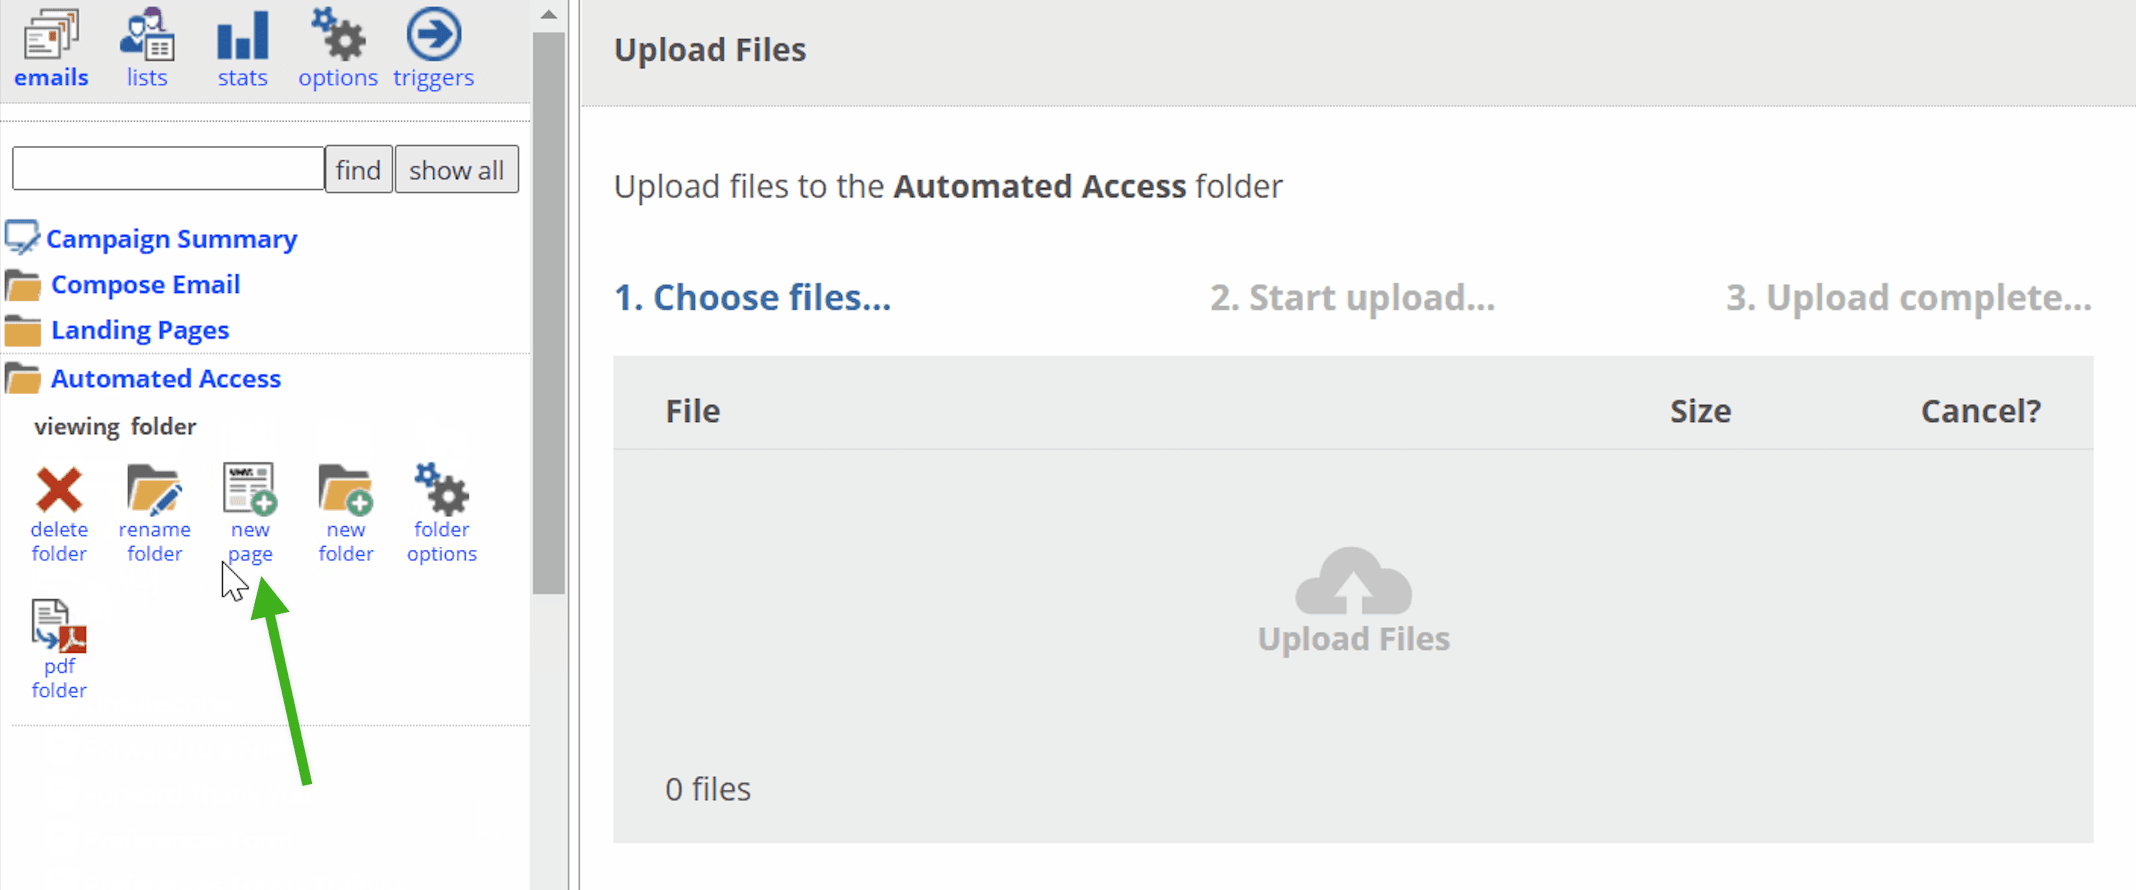
To keep things nice and organized, we recommend creating a new folder called Automated Access for these landing pages:
- Click on the New Folder icon
- Click on the Rename Folder icon
- Change the folder name to Automated Access and click on the Rename button
Warning Page
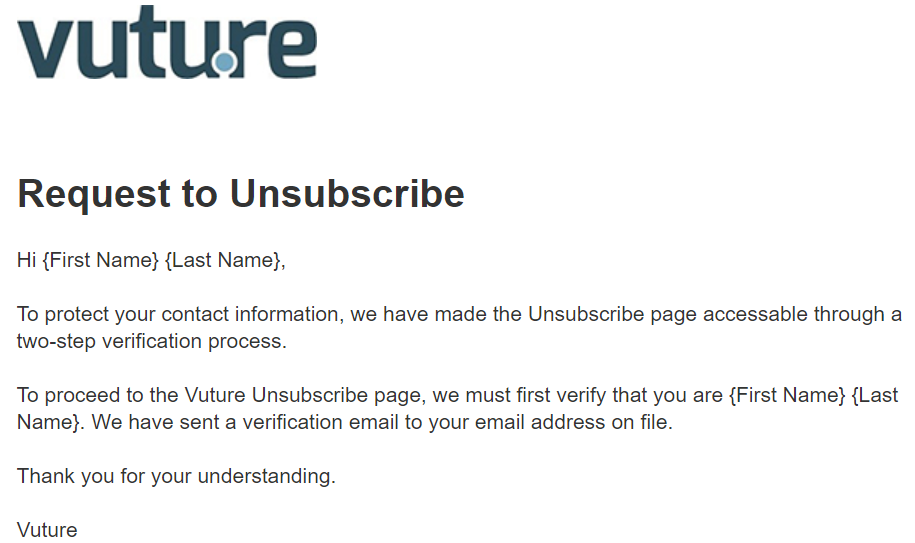
This is the page that the recipient will see once they click on a link to the prefilled form or landing page that is protected with Automated Access. It should provide the recipient with instructions on what they need to do to access the intended page.
For example, if we protected our Unsubscribe page with Automated Access, and someone clicked on a link from an email to the Unsubscribe page, they would see the following Warning Page:
To create a Warning Page:
- Within the Automated Access folder, click on the New Page icon
- Name the new page Warning Page and select a layout
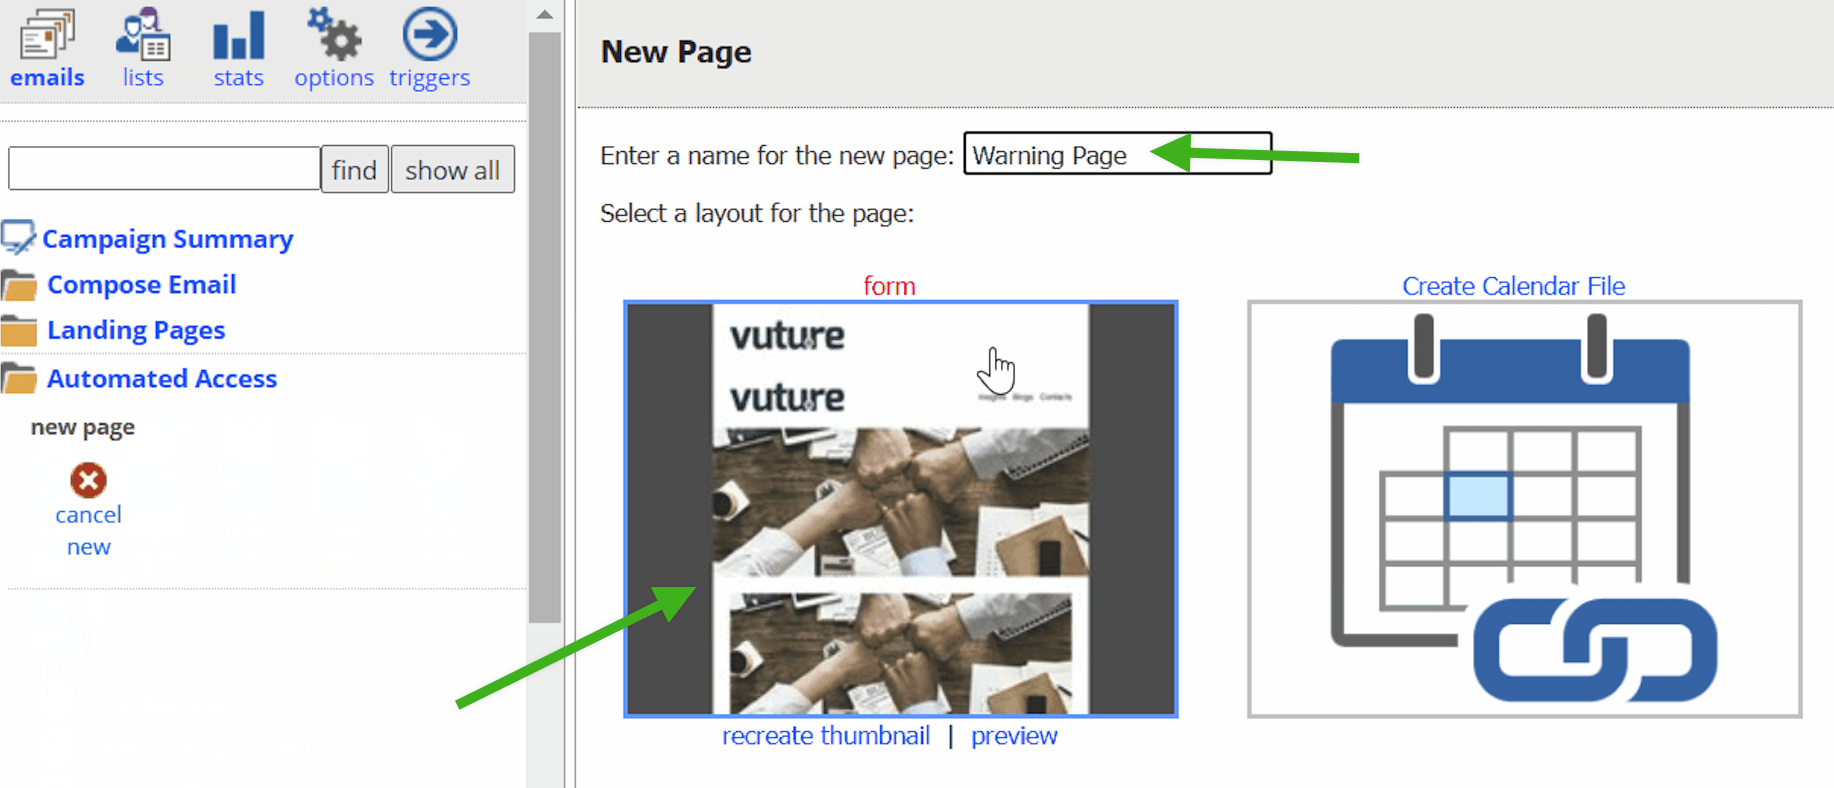
- Modify the layout and content of the new page to your liking
Invalid Access Page
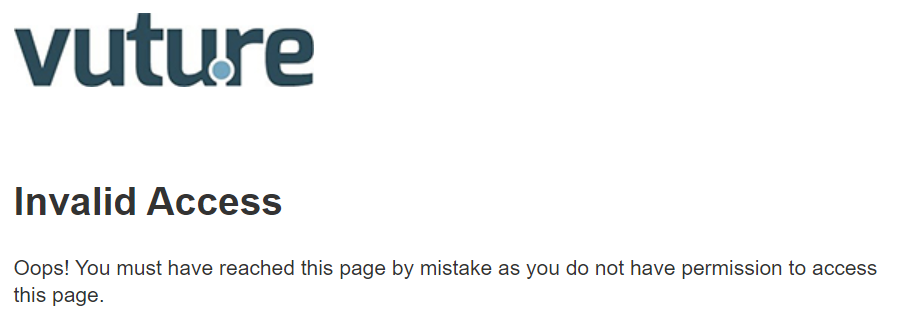
If a person without a security token or with an expired token attempts to go to a page that is protected with Automated Access, they will be directed to this invalid access page.
For example, it might read something like this:
To create an Invalid Access Page:
- Within the Automated Access folder, click on the New Page icon
- Name the new page Invalid Access and select a layout
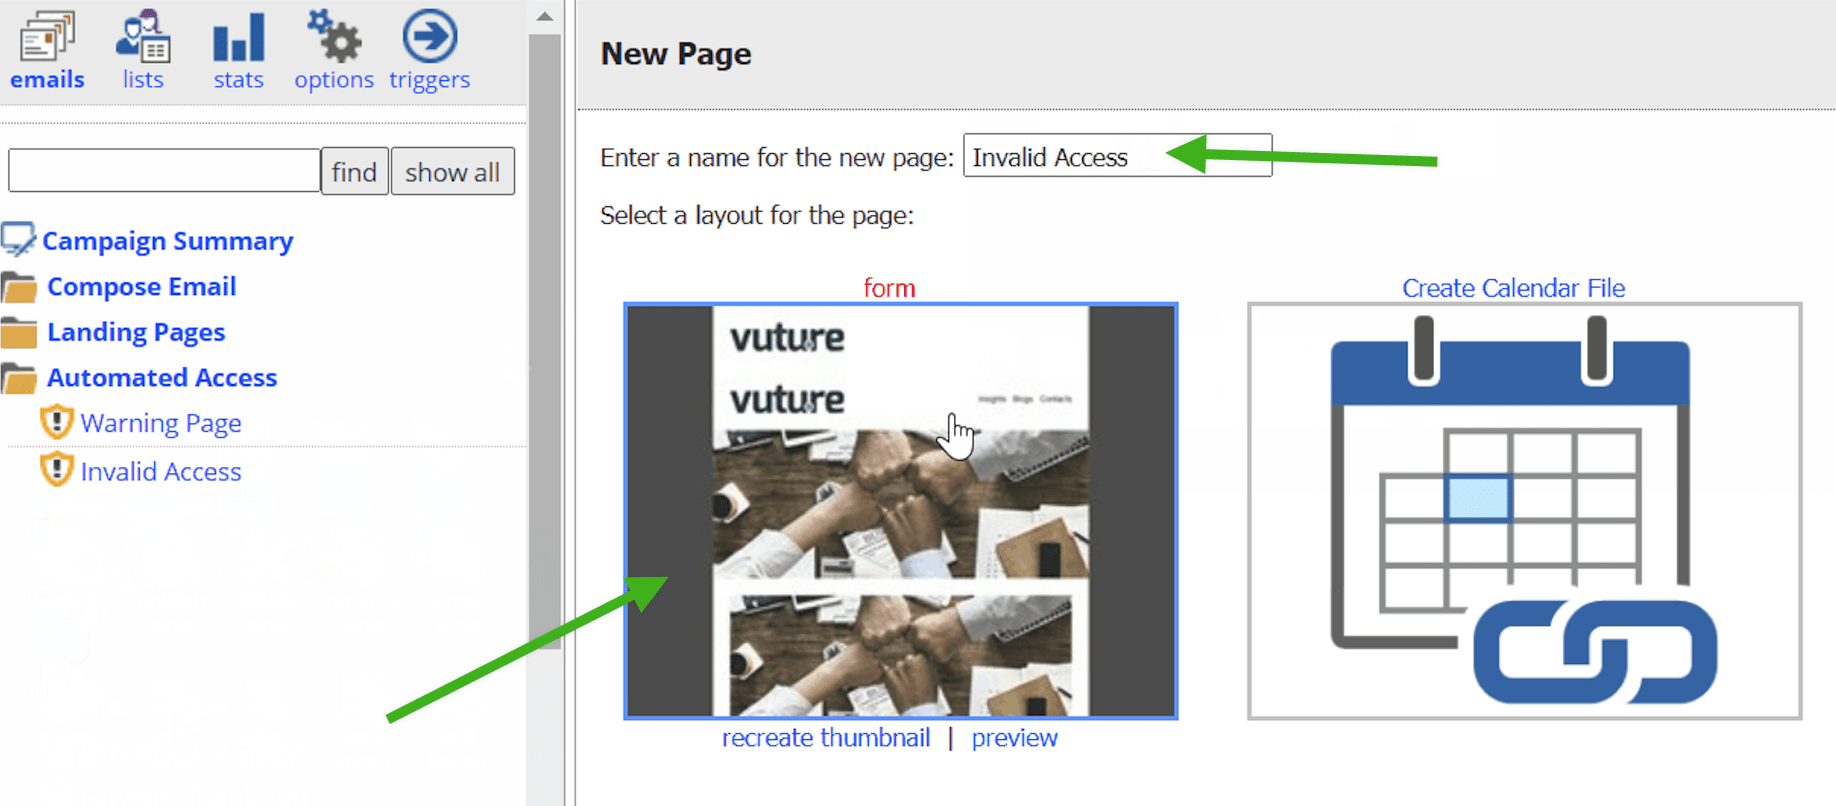
- Modify the layout and content of the new page to your liking
Step 3: Create the verification email that contains the link (with token) to allow access to the prefilled form or landing page protected with Automated Access.
Within the Compose Email folder, create an email called "Verification Email". This is the email the recipient will receive to click through to the page that is protected with Automated Access. This link will also need to include the token.
Below is an example of a verification email outlining the next step to access the intended page.
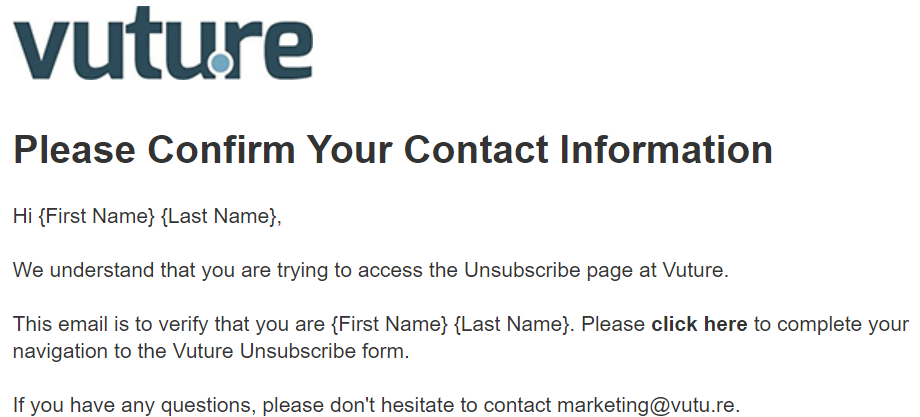
IMPORTANT: You must include a link to the prefilled form or landing page that you are protecting with Automated Access in this verification email and you must append the token to this link. See instructions below.
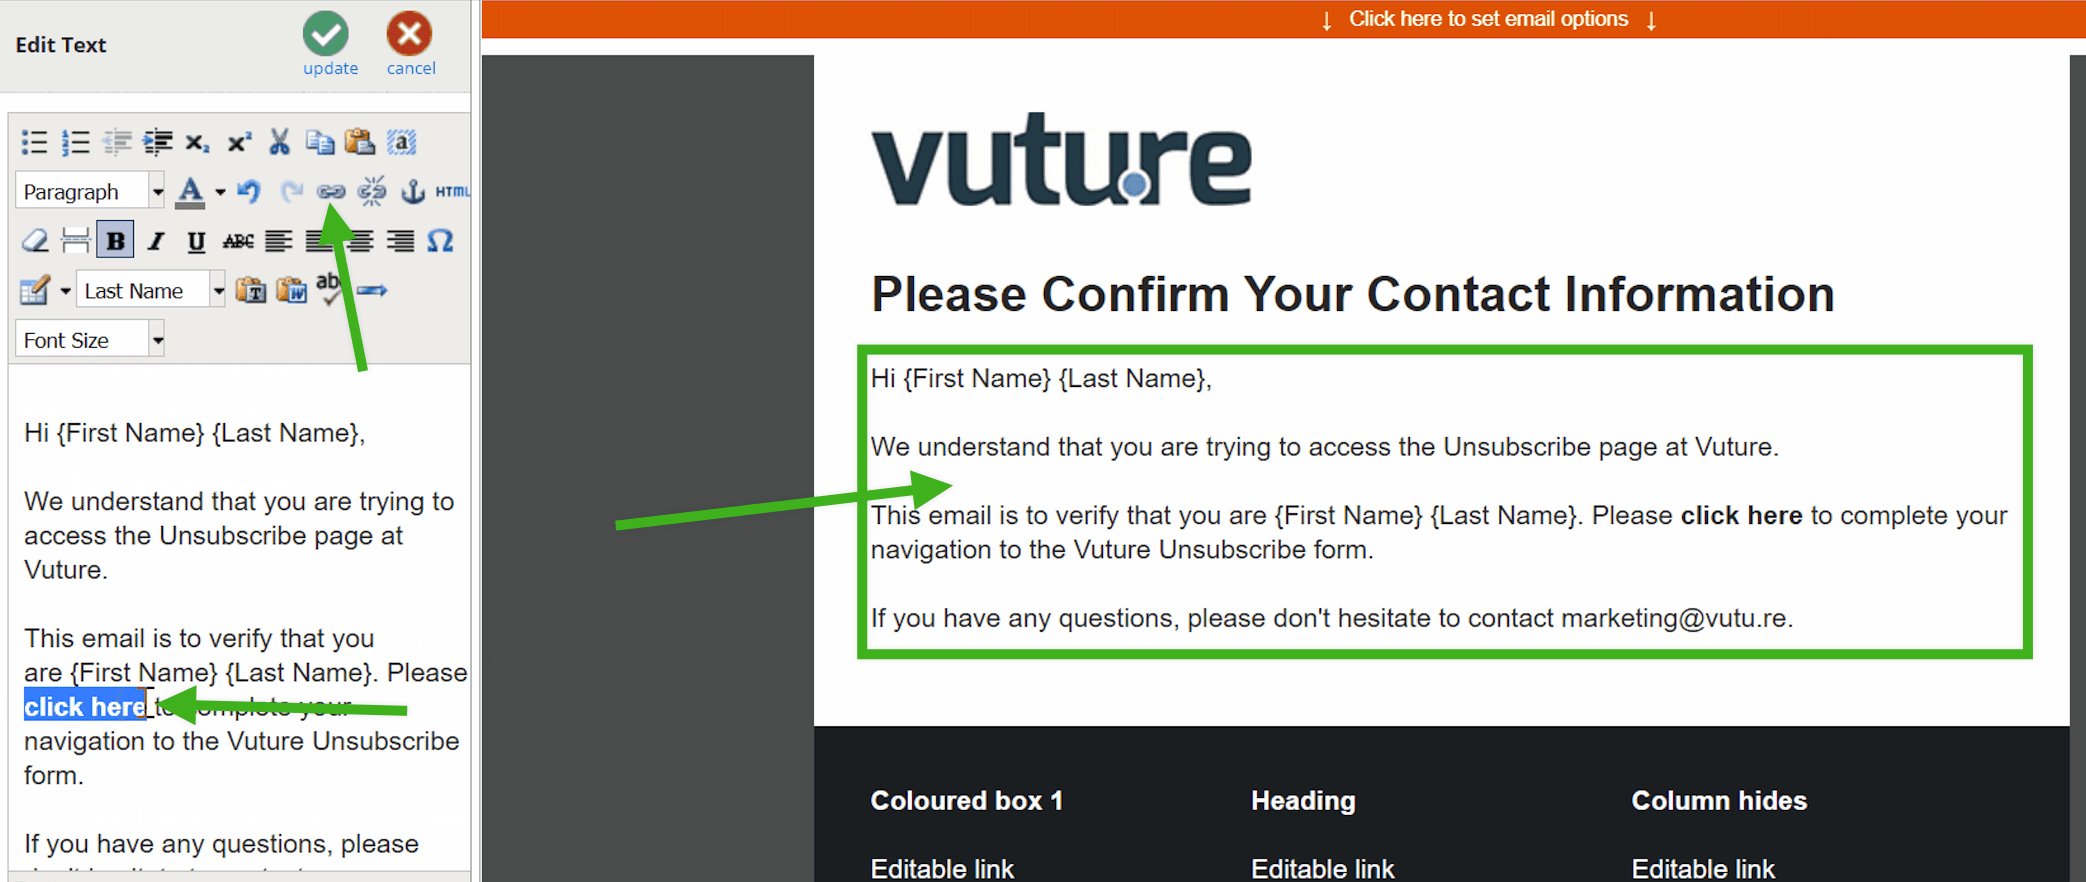
In the example above, we would follow these steps:
- Click on the text block, highlight the text that will contain the link, and click on the add/edit link icon
- In the pop-up window, paste the link to our unsubscribe form in the Link URL field and add in {token} at the very end
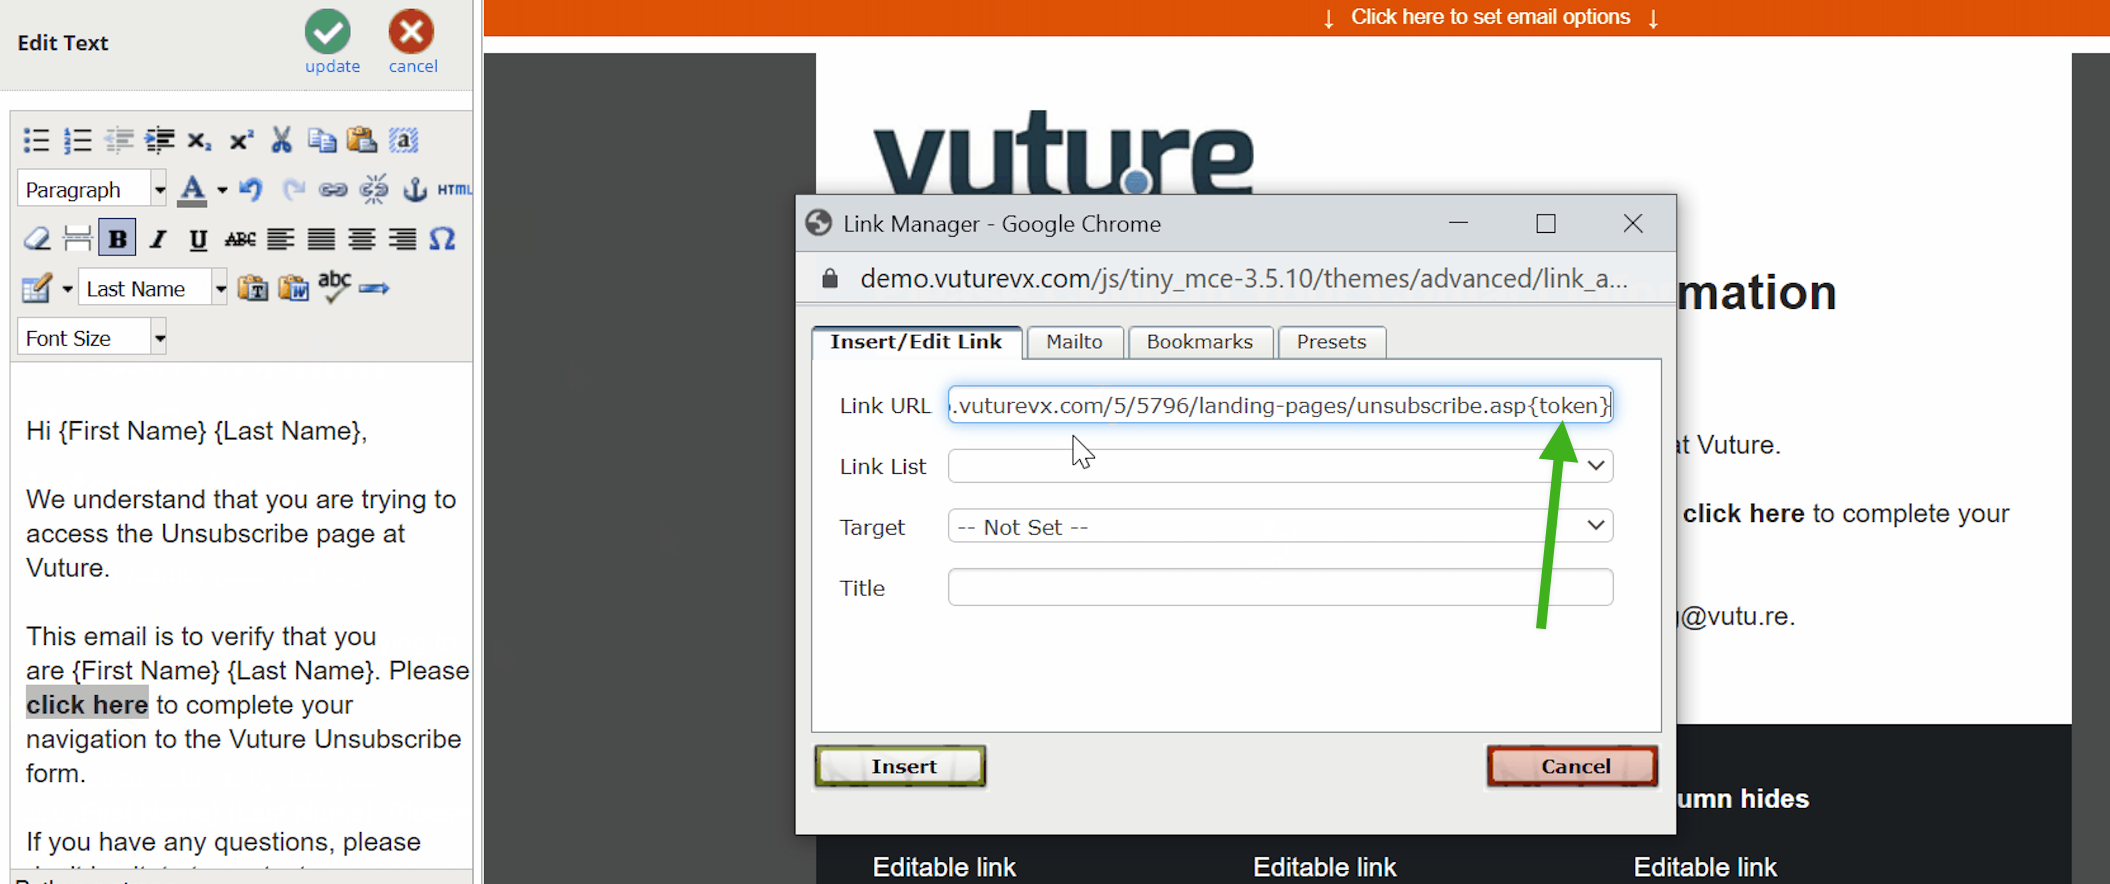
- Click on the Insert button
- Click on the green Update icon
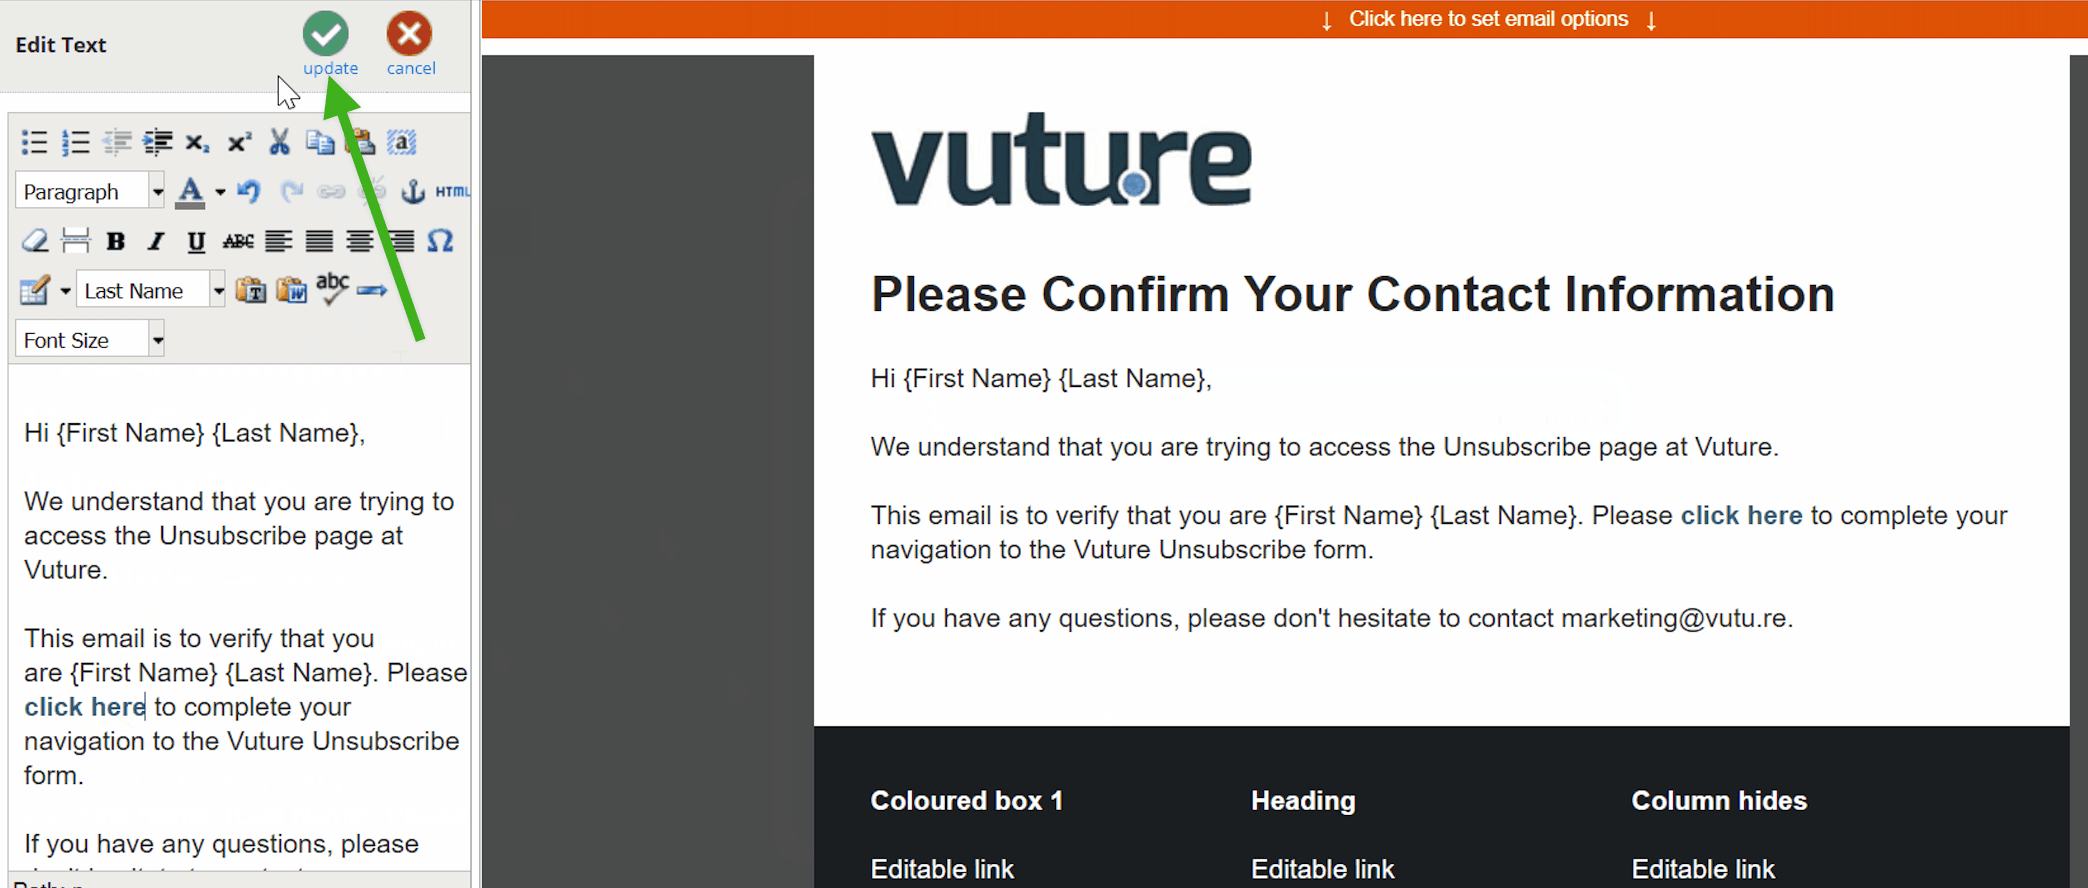
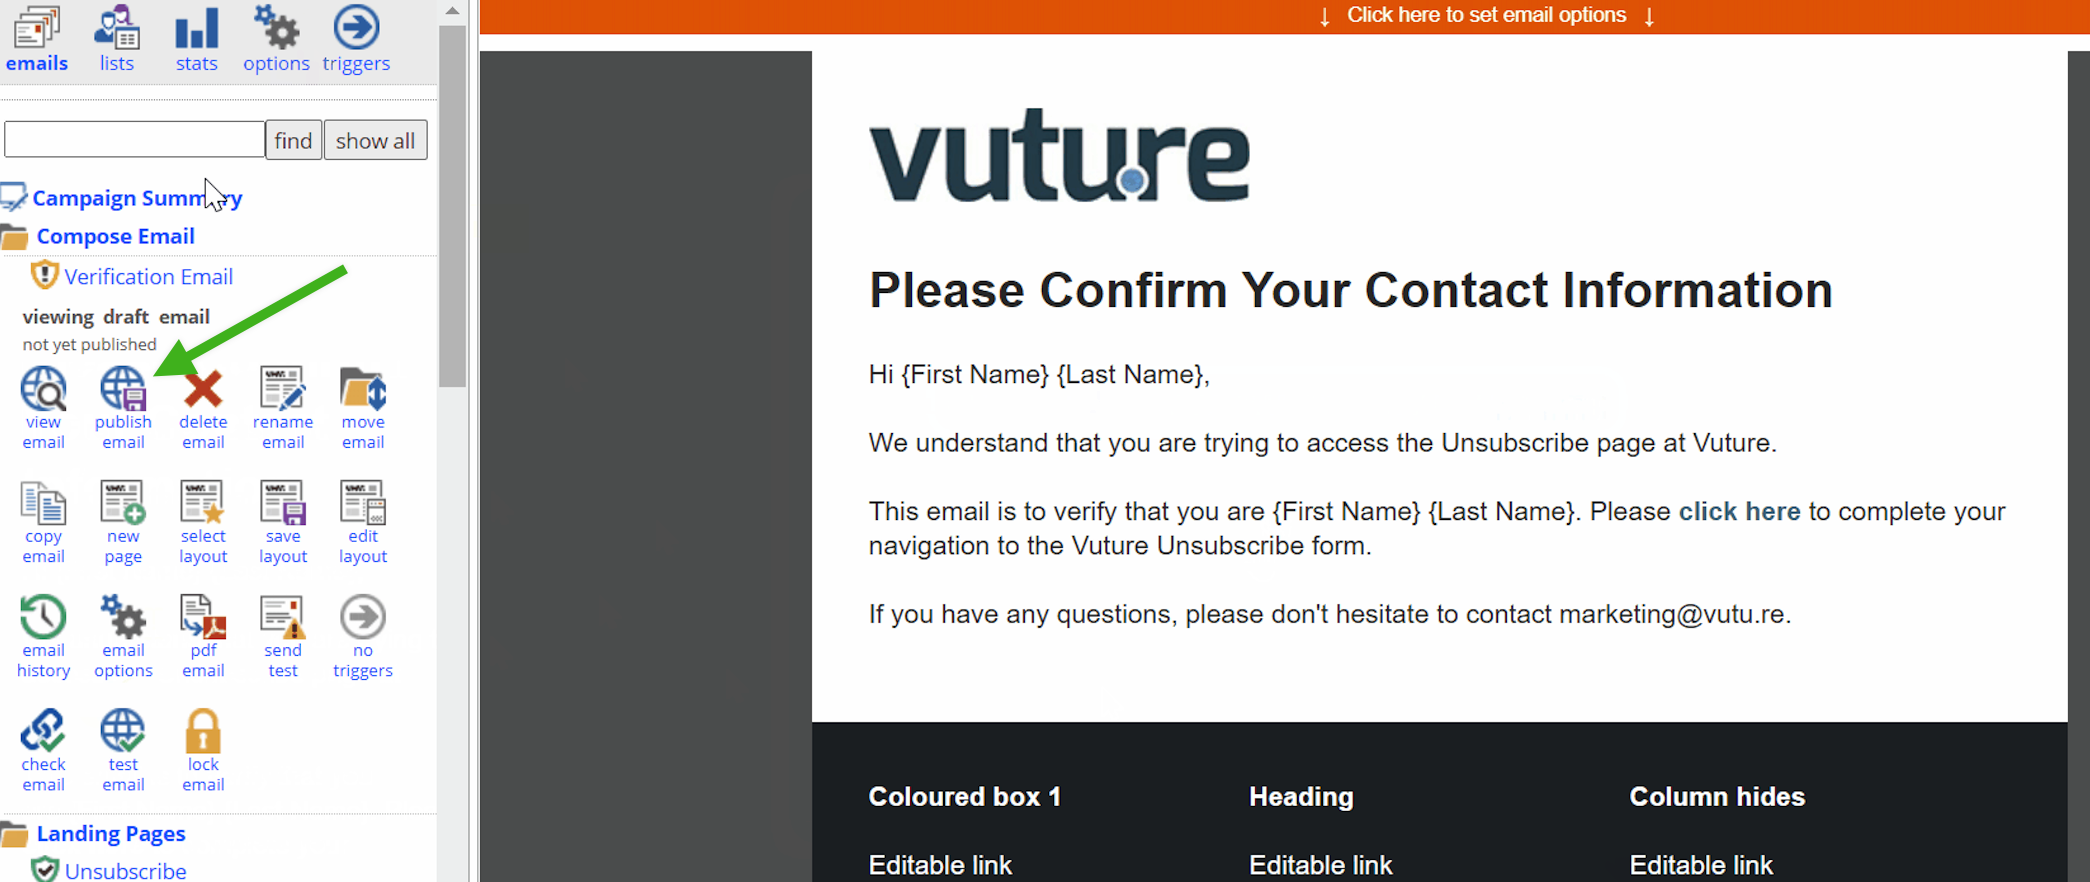
- Click on the Publish Email icon
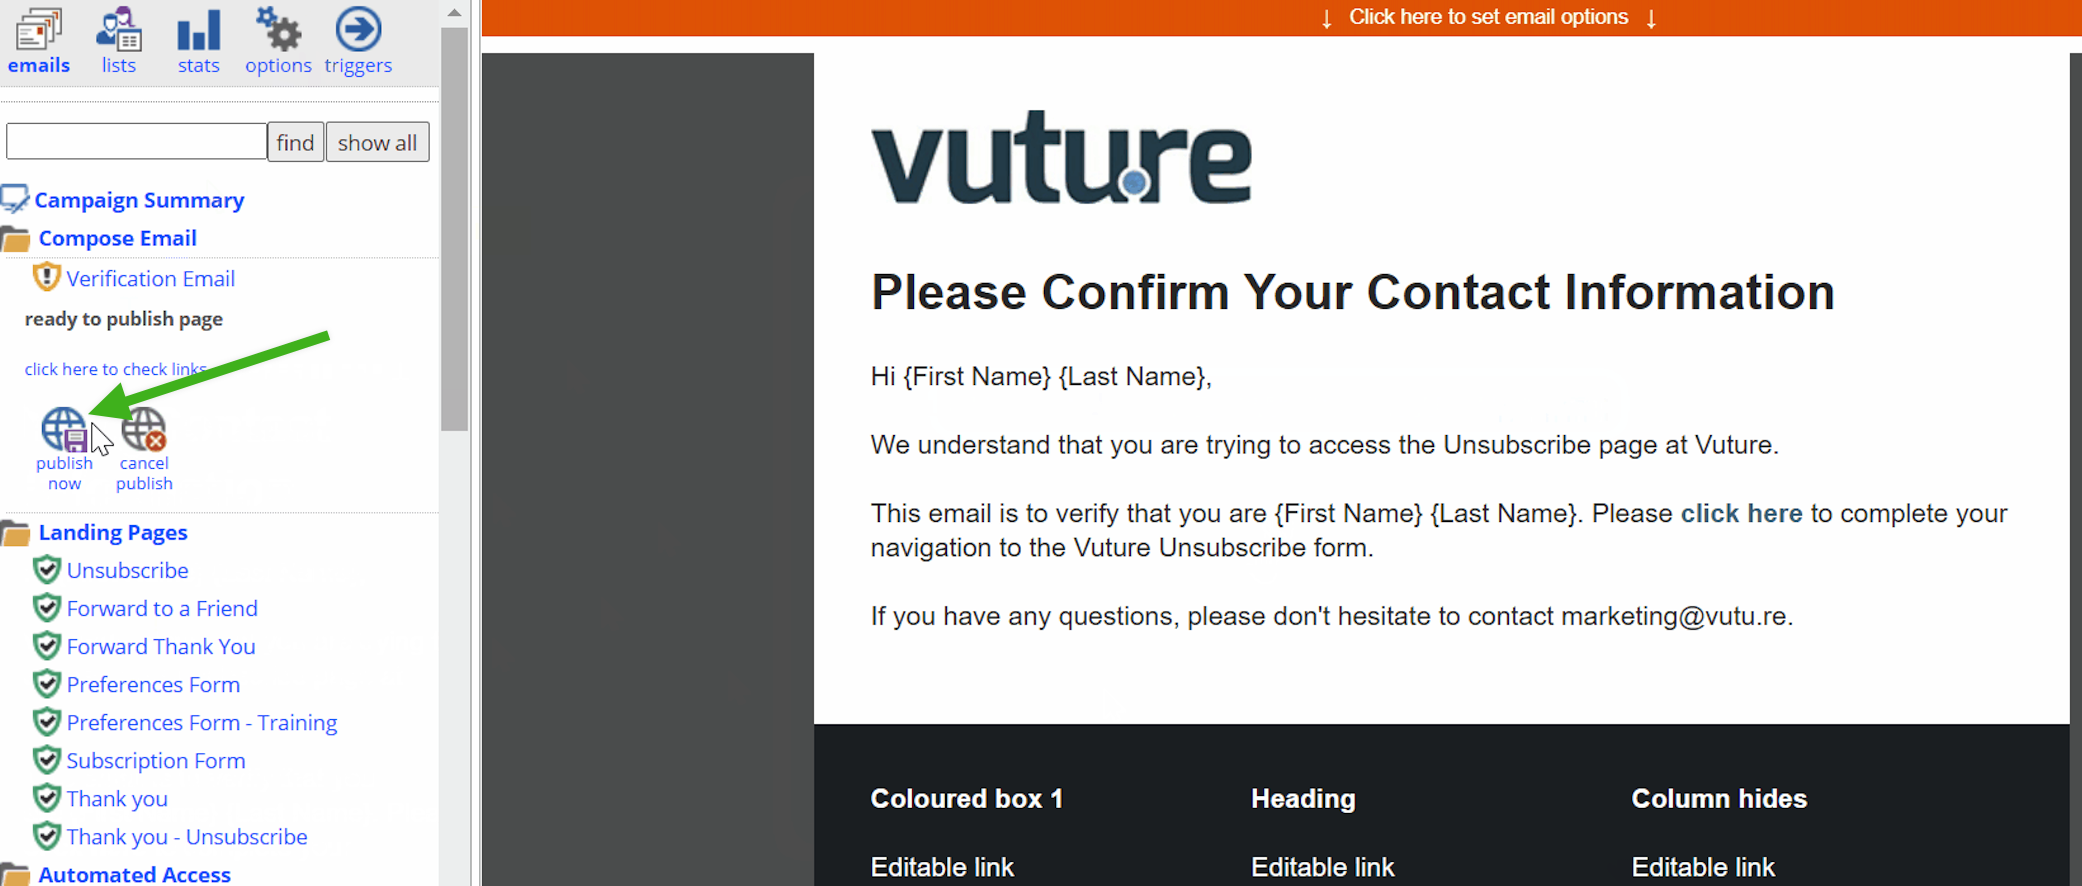
- Click on the Publish Now icon
Step 4: Apply Automated Access to the desired prefilled form or landing page in your campaign (i.e. Unsubscribe form).
Follow the below instructions:
- Select the page you wish to protect
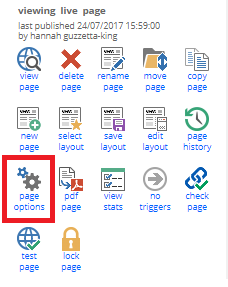
- Click "page options"
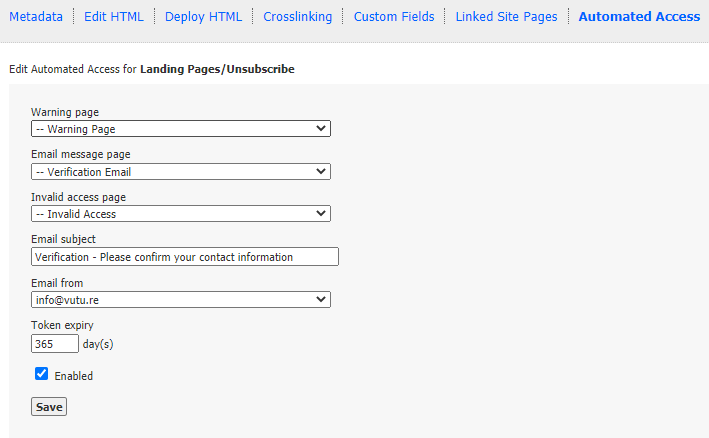
- Click "Automated Access" and then complete the following options and check the "Enabled" box.
-
Warning page: Select the Warning Page that you created in step 2. This is the page to which the contact will be directed when they click on the initial email, notifying them of the authentication process.
-
Email message page: Select the Verification Email that you created in step 3. This is the email that will be sent to the contact once they click on the original link. This email should include a link to the secure page. Once a contact receives this email they will receive a security token.
-
Invalid access page: Select the Invalid Access Page that you created in step 2. If a person without a security token or with an expired token attempts to go to the secure page, they will be directed to the invalid access page
-
Email subject: Enter in the subject for the Verification Email.
-
Email from: Enter the email address from which the Verification Email will be sent. The drop-down will provide you with a list of previously approved FROM addresses.
-
Token expiry: Enter the number of days for which the token will be valid once it is received. For example, if this is set 365 days, the contact will have 365 days to click on the verification link and access the secure page.
Example of using Automated Access
You can add automated access to any landing page in your Vuture Campaign:
Protect Unsubscribe Pages
An example is adding Automated Access to form pages such as an Unsubscribe Form, this will eliminate the risk of a third person who was forwarded an email overwriting the preferences of the initial intended recipient.
In the case of an Unsubscribe form, when a contact clicks on "Unsubscribe" on the email, they are then directed to a warning page and will be sent another mailing with a link to the actual Unsubscribe form. The mailing with the final link is sent to the original recipient of the email that has the clicked link.
Setting templated pages as defaults for Automated Access
You can set up the email messages and warning landing pages each time you set up the security on a page as this article describes, or you can set up default pages with the help of your Customer Success Manager. Your Vuture instance will also require specific setting updates. The process and prerequisites are described in this article.
Avoiding Email Spam Bot Clicks
Inviting users to click a link in an email can open up the opportunity for email Spam Bots to trigger the automated access link.
An alternative would be to place the secure link on a landing page instead. This would add one more click for users, but would prevent Spam Bots from generating access requests.
If you place the link on a landing page, instead of in an email, the process would then be as follows:
If a Bot clicks on a link → It would go to the Landing Page → No email containing a token is sent as the link in the Landing Page was not clicked.
If a User clicks on a link → the Landing Page opens → User has to click on a Secure Page link to generate the email requesting access.
