Keywords: Paid webinar, ON24, Stripe Payment, managing paid webinar, paid events
Overview
This article will walk you through how to use Vuture's ON24 webinar and InterAction integration in conjunction with Vuture's Stripe Payment module.
This will allow you to manage paid for webinars within Vuture by:
- Registering someone in ON24 from a Vuture RSVP Form and writing back to the 'RSVP' IA Additional Field;
- Allowing contacts to complete their registration through the Stripe Payment Module and writing back to a 'Payment Received' IA Additional Field to track payments;
- Sending a Registration Confirmation email with the ON24 details only to those who RSVP'd Yes and Paid;
- Sending a Day Before the Event Reminder email with the ON24 details only to those who RSVP'd Yes and Paid.
Contents
Requirements
This How To article requires:
Step by Step Instructions
Important: You must use Vuture emails to send registrants the ON24 webinar details rather than the auto-generated emails from ON24. This is because Vuture is able to see which registrants have registered and paid within InterAction. Make sure to deactivate any of these auto-generated ON24 emails under 'Email Notifications' in ON24.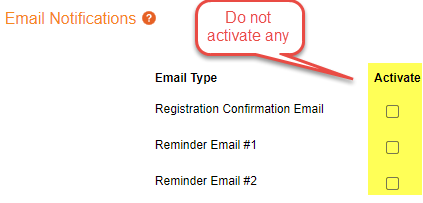
Instructions
The very first step is to create the following emails and RSVP Forms within your Paid Event email campaign:
Emails
-
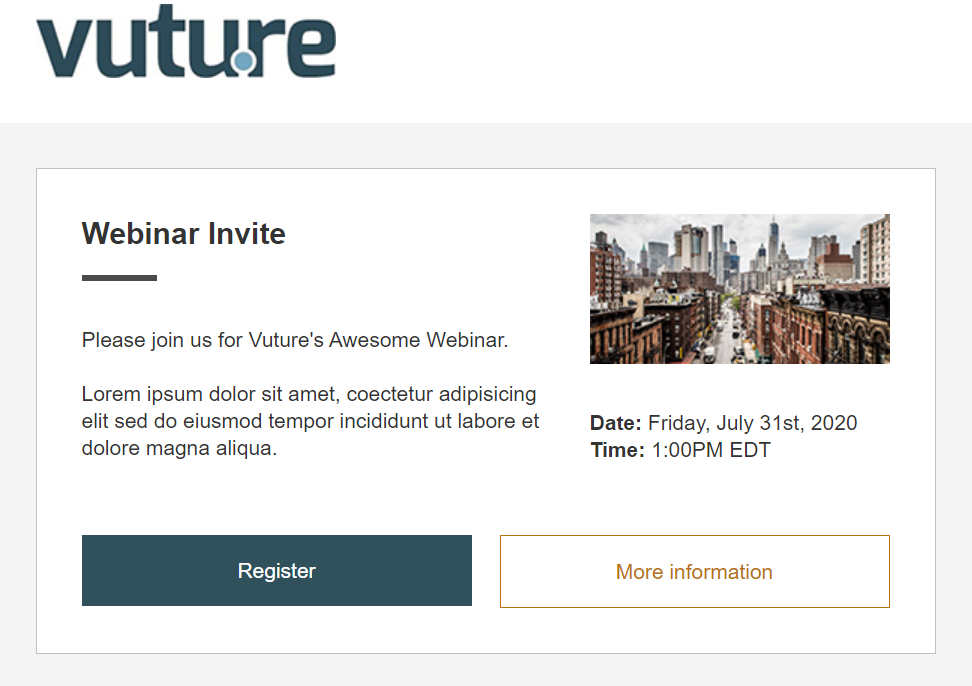
Invitation
- Invites them to register to your paid webinar
- Includes all of the details for the webinar (i.e. Topic, Date, Time, Cost)
- Register Call to Action Button which links to the RSVP Prefilled Accept form
-
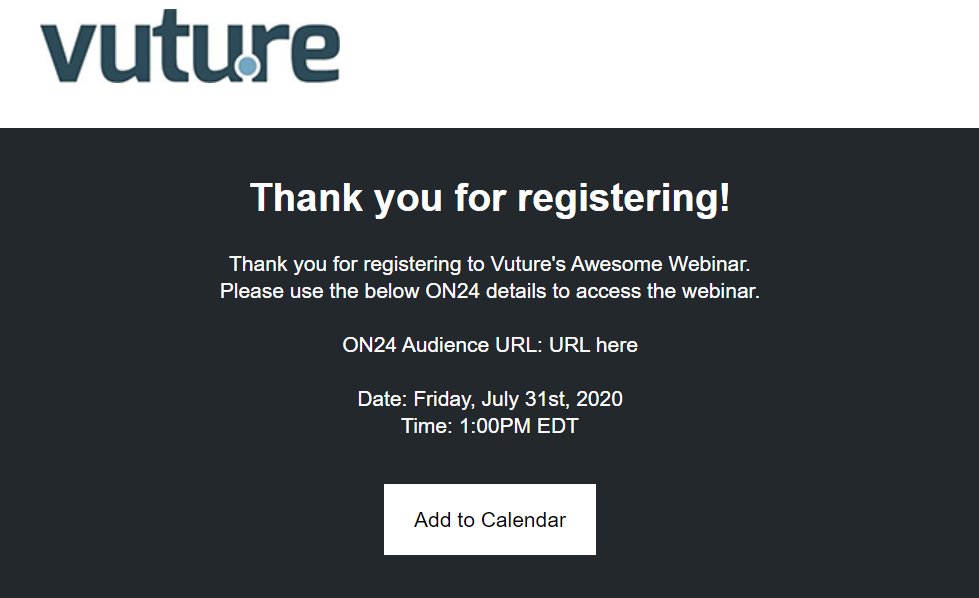
Thank You for Registering
- Gets sent to the registrant after they have RSVP'd Yes and completed Payment
- Should repeat the Topic, Date, Time and include a link to the ON24 Webinar
- You may also wish to include a link to download the iCal with the ON24 Webinar details
-
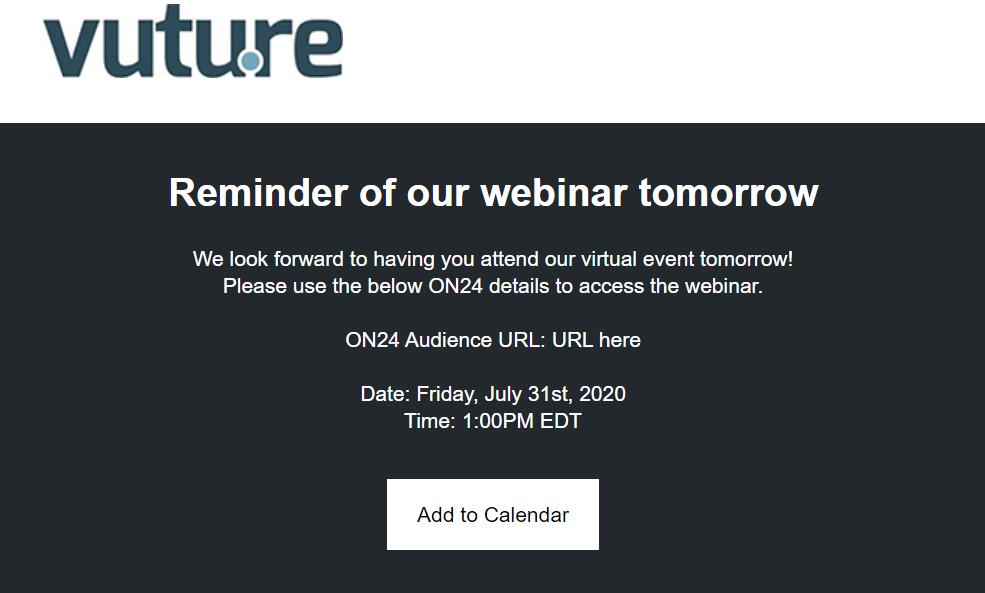
Day Before Reminder
- Gets sent to all registrants who have RSVP'd Yes and completed Payment 1 day before the webinar takes place. This is to remind them to join and repeats the Topic, Date, Time and includes a link to the ON24 Webinar and iCal file.
Best Practice Tip - Build these out into a "Paid Webinar Sub-Template". This way, you don't need to recreate all of these emails each time. You can then also leverage campaign variables and have your iCalendar file already built out.
RSVP Forms
IMPORTANT: Please review this documentation on how to setup your Vuture RSVP Forms with ON24 before continuing.
-
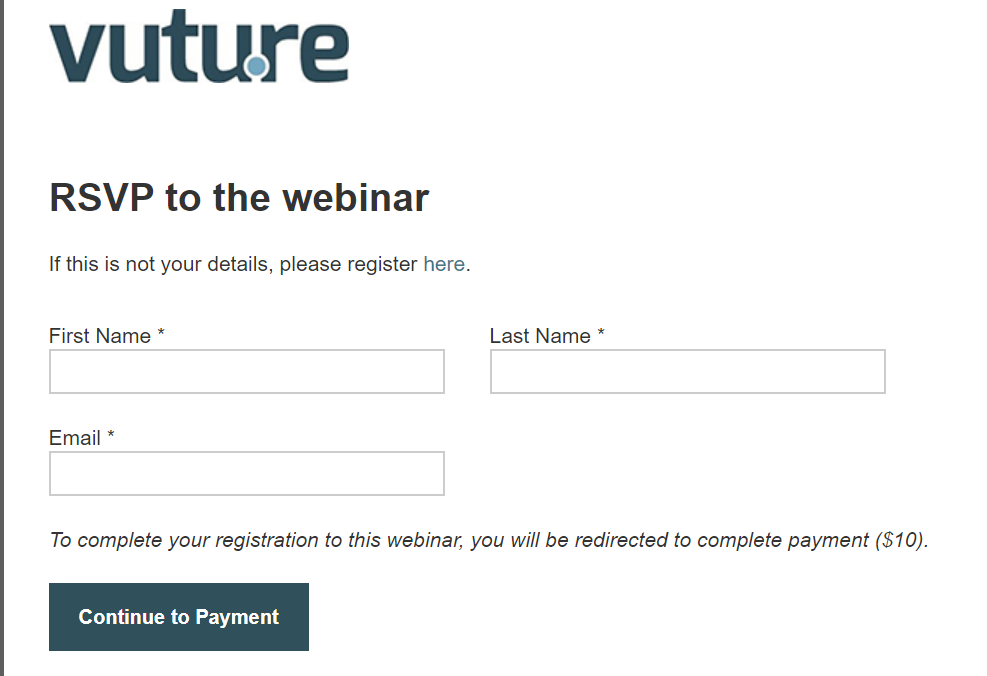
RSVP Prefilled - Accept
- Includes a link to the RSVP Blank - Accept form.
- Includes a hidden RSVP Field with the Yes value checked, as well as, the ON24 Form settings.
- Includes instructional text on what will happen next and how much the registration cost is.
- The Submit Button text reads 'Continue to Payment'.
-
RSVP Blank - Accept
Best Practice Tip - You may wish to build out your RSVP Prefilled and Blank Accept RSVP Forms into your "Paid Webinar Sub-Template". This way, you don't need to change the submit button text each time and can remind yourself to always include instructional text / cost of registration. This will help contacts from abandoning the payments page if they know what to expect.
Optional Landing Pages
The below are optional RSVP Forms and Landing pages if you wish to give your contacts the option to decline an invitation. Please note, there should be a hidden RSVP field with "No" checked and there should be no ON24 settings enabled on the Decline RSVP Forms.
- (optional) RSVP Prefilled - Decline
- (optional) RSVP Blank - Decline
- (optional) Thank You - Decline Landing Page
Step 2. Create your Payments page
Now, its time to create and setup your Payments Page.
If you do not already see a Payments Page available within your campaign, you can create one by:
- Clicking on 'New Page' > giving your page a name (i.e. Payments) > then select the 'Create Payment Page' thumbnail.
- If you do not automatically see the new Payment Page, then click on 'Page Options' > select the Content Type of 'Payments Page' > Save Metadata > then click 'Payments'.
Once your Payments Page is created, we recommend that you setup your page in the following way:
- Label the Page Title to 'Complete Your Payment for [Event Title Here]'
- Take advantage of the “Payment Instructions” and include some text as to what the recipient needs to do on the first page, to help eliminate abandonment. For example, “If you have not already done so, please select '1' below.”
- Leave the Alternate Payment fields and the 'Is this an event?' checkbox blank.
- Take advantage of the “Confirmation Message” and let the registrant know what to expect next (e.g. they will receive a payment confirmation email, and a separate email with all details shortly).
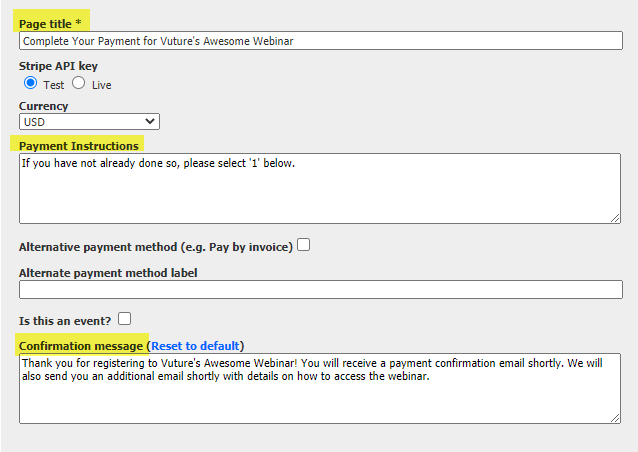
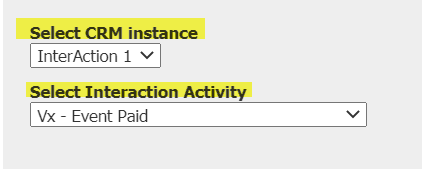
Next, select InterAction as your CRM instance and select the Paid InterAction Activity you'd like to write back when someone completes payment.
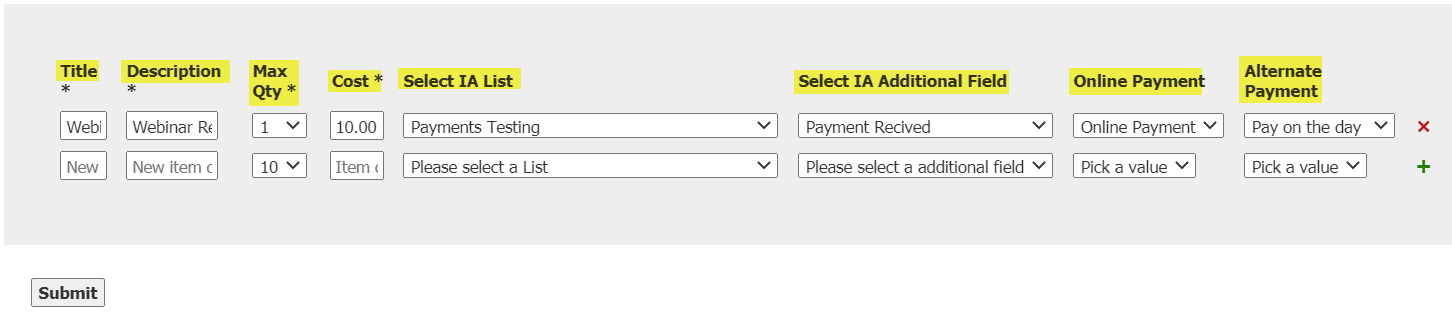
Then, setup your webinar registration options:
- Match your Title & Description fields for your ticket option. The “Description” field will be displayed on the Payments Page. For example, "Webinar Registration Fee".
- Set the Max Quantity to “1”.
- Type in the Cost for the webinar registration (i.e. $10).
- Select the IA Marketing List that you are capturing RSVPs with, then choose the "Payment Received" (or equivalent) Additional Field to write back that someone has paid in InterAction.
- Match your Online Payment (e.g. Credit Card) and Alternate Payment (e.g. Pay on the day) Values for the Payment Additional Field (e.g. Payment Received”).
- Then click 'Submit' and 'Publish' > 'Publish Now'.
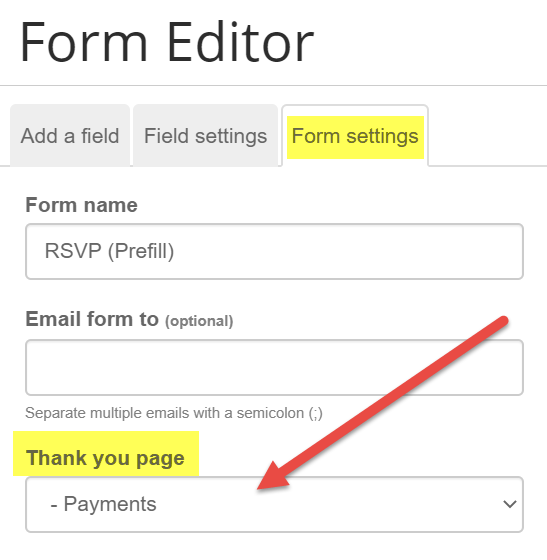
Lastly, go back into your 'RSVP Prefilled - Accept' and 'RSVP Blank - Accept' forms and change the Thank You page to the Payments Page under Form settings. Then Publish > Publish Now.
Step 3. Trigger your registration confirmation email
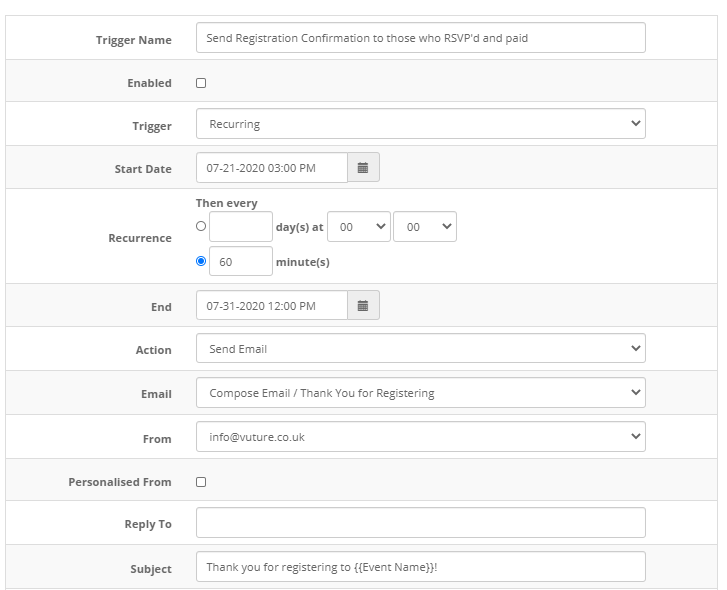
Setup a Recurring Trigger with a filter to send the 'Thank You for Registering' email to those who RSVP'd Yes and completed Payment. This should be set to a duration of 1 hour so as not to overload your InterAction.
Below is an example of the Recurring Trigger you should setup:
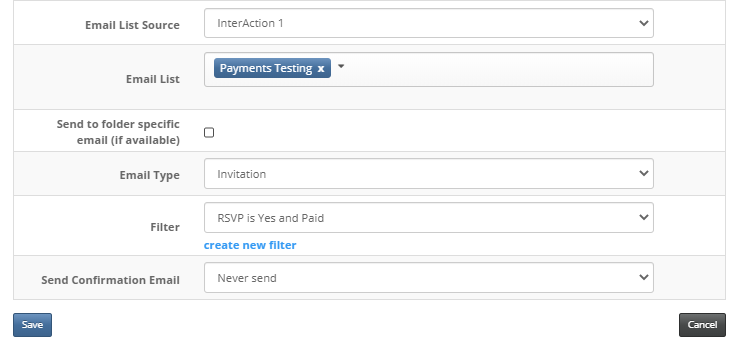
Below is an example of the Filter that should be applied to this Recurring Trigger. Be sure to select the same InterAction Marketing List that your writing the RSVP Additional field and the 'Payment Received' Additional field back to.
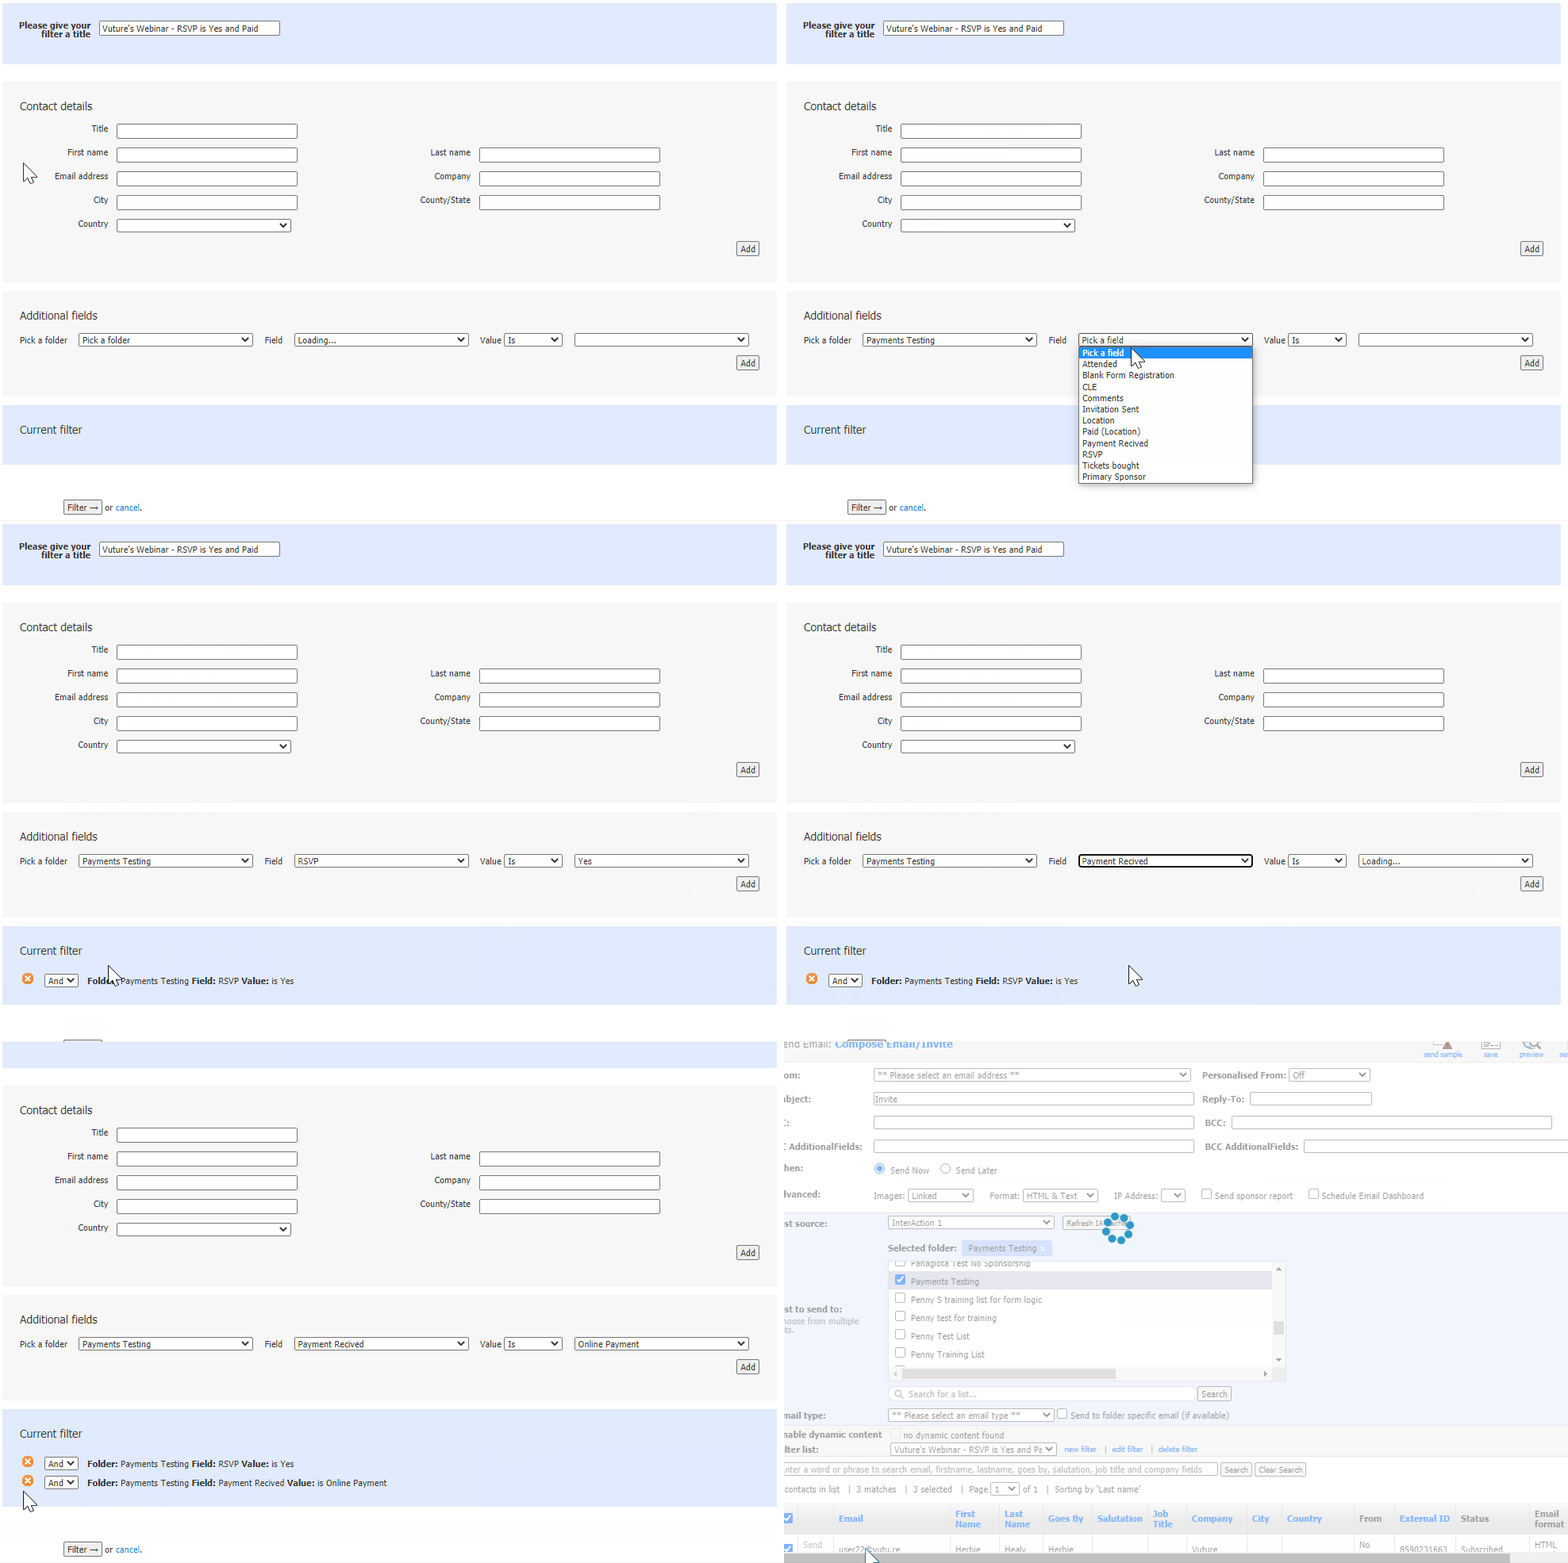
For help creating a Recurring Trigger, please review this article in more detail.
Reminder - When you are ready to use this trigger, please enable it from the Trigger List screen.
Step 4. Trigger your Day before the Event Reminder email
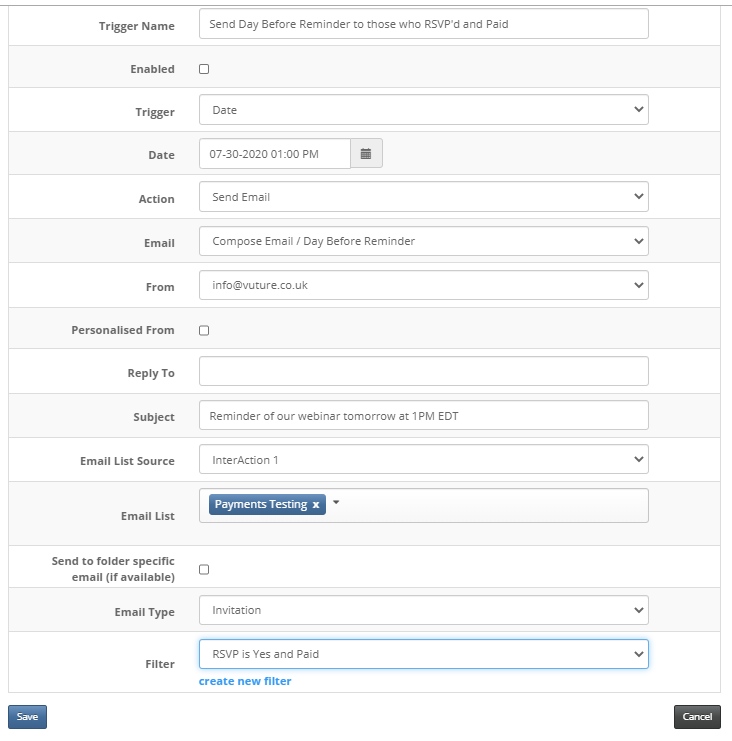
Setup a Date Trigger for 1 day before your webinar with the same filter in Step 3, to send the 'Day Before the Event' Reminder email to only those who RSVP'd Yes and completed payment. This should be set to a duration of 1 hour so as not to overload your InterAction.
Below is an example of the Date Trigger you should setup. Notice that the same filter is applied to this Date Trigger.
For help creating a new Date Trigger, please review this article in more detail.
Reminder - When you are ready to use this trigger, please enable it from the Trigger List screen.
Step 5. Testing
Before you send out your invite to your main marketing list, it is always best to test the full process ahead of time. This means, that you may need to adjust the date of your Date Trigger temporarily, but know that you can change it back once you are completely satisfied with your testing.
It is recommended that you test the full process for both your 'RSVP Prefilled - Accept' Form and your 'RSVP Blank - Accept' form. This should be done by sending a live email, rather than a test email.
During your testing, check to make sure that the following is happening as expected:
- Your RSVP Additional Field wrote back to IA
- You are registered in ON24
- Your Payment Received Additional Field wrote back to IA
- You received the payment confirmation email
- You received the 'Thank your for registering' email with all of the ON24 details
- You received the 'Day Before the Event' Reminder email
The above checks should be done for both your RSVP Prefilled - Accept form and RSVP Blank - Accept form.
Reminder - When you are finished and satisfied with your testing, be sure to adjust your Day Before the Event Reminder Trigger, make sure both triggers are enabled, and that your Payments Page is switched from test to live mode.
