Overview
The Vuture out of the box template is designed to help you tick all the best practice boxes for email. With the number of email clients out there all doing things slightly differently, it's important to get the basics right if you want to maximise the impact of your communications.
When using any template, it's vital to keep this in mind. Things like spacing, text to image ratios, positioning of calls to action (CTAs) have a significant overall effect of your template. To read more about email best practice, download our creative best practice guide.
Although consistently achieving best practice is vital, you also need to create variation in your messaging to keep your contacts engaged. You can use this guide to edit your template for your range of communications.
Contents
Editing snippets
Sometimes you might want to vary content blocks by swapping which side images and text sit on. Remember, keep CTA in the middle or on the left. If you have content without a CTA, all you need to do is click edit layout, add new content blocks below the existing ones within the snippet, and then delete the old elements:
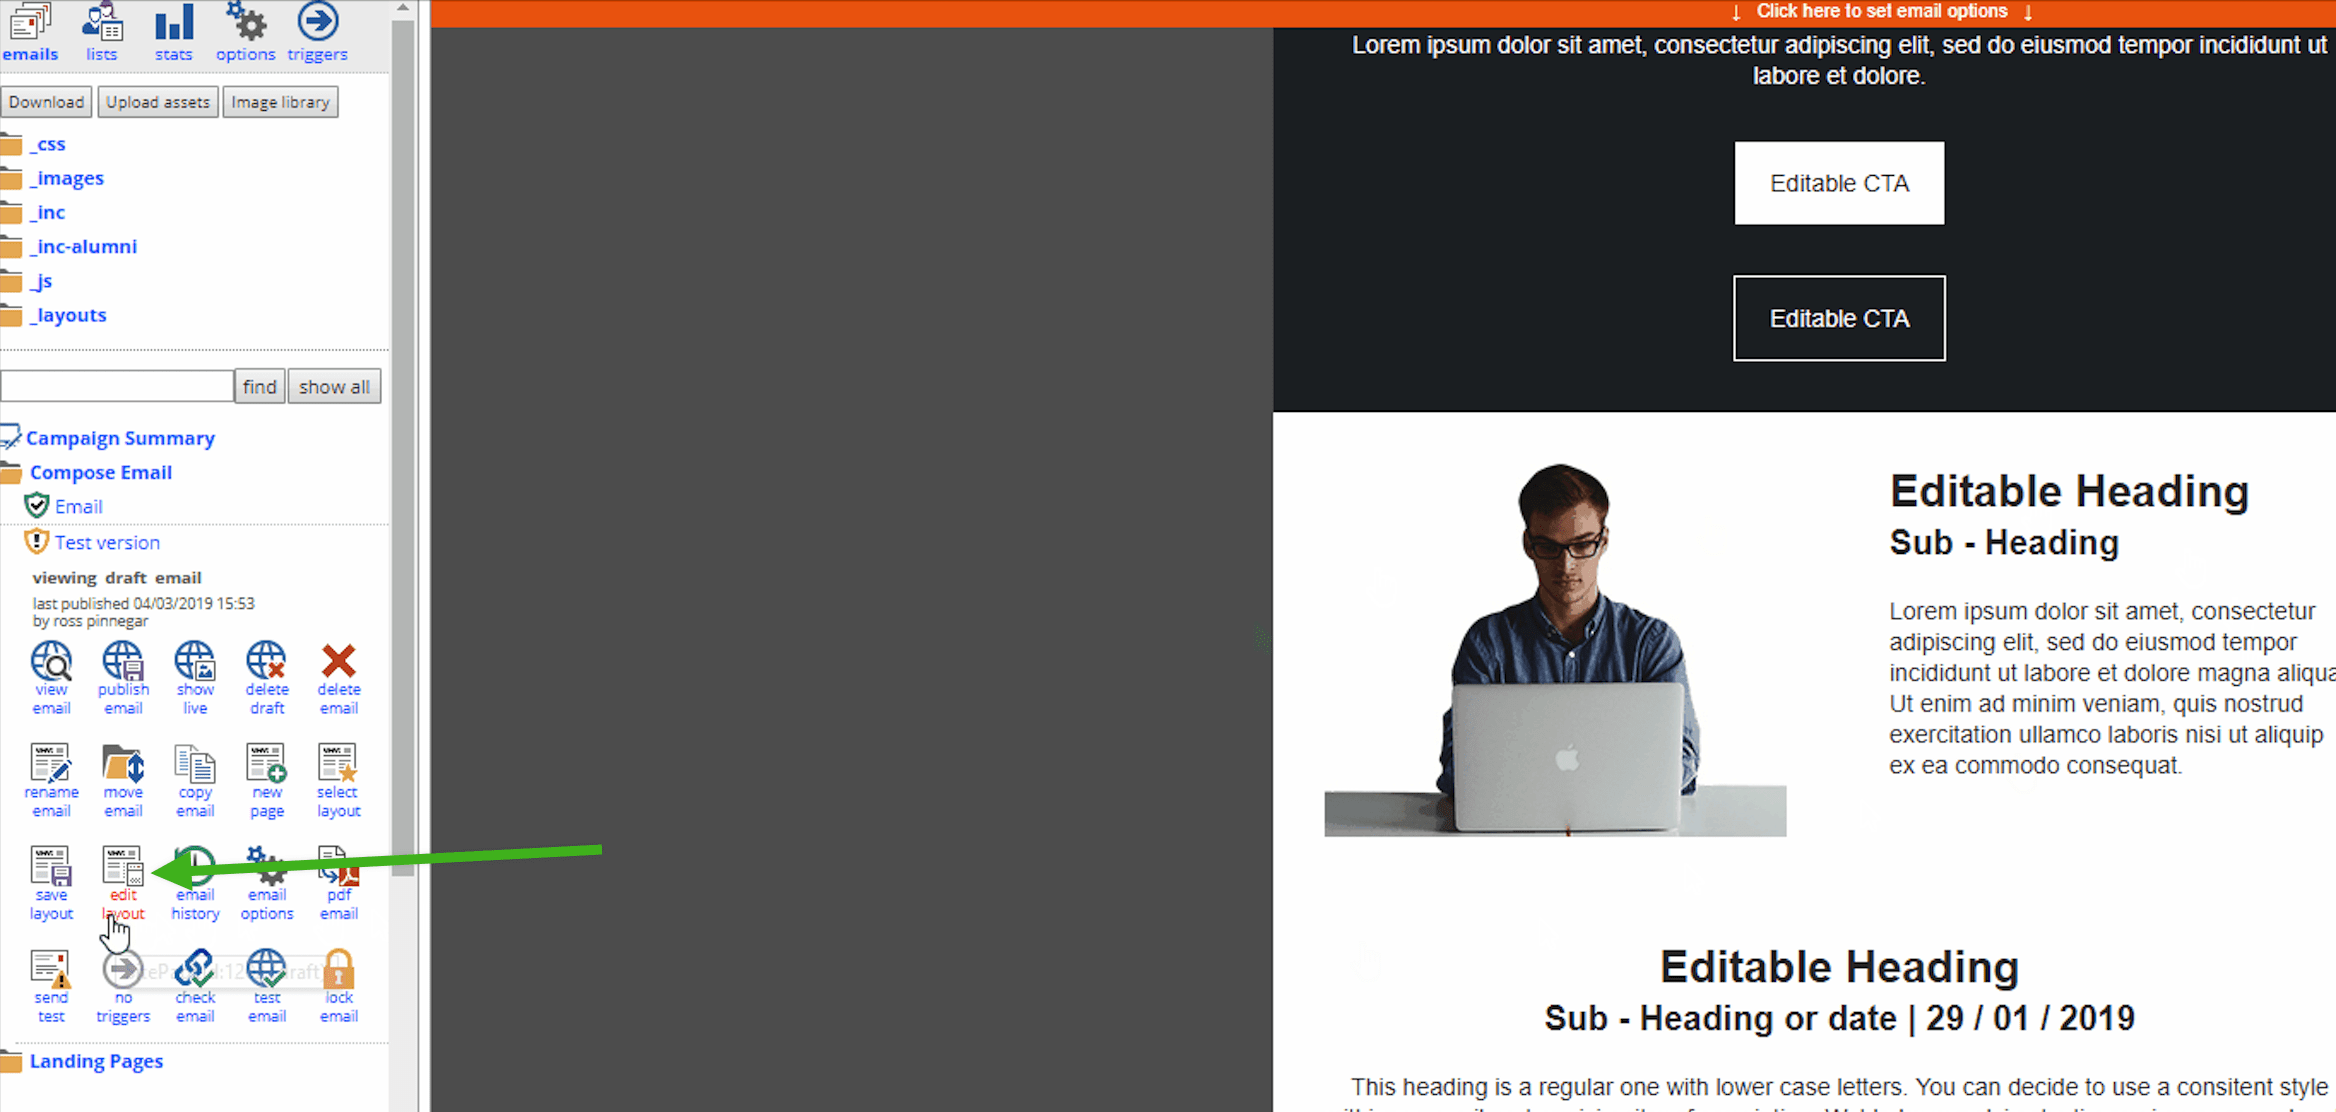
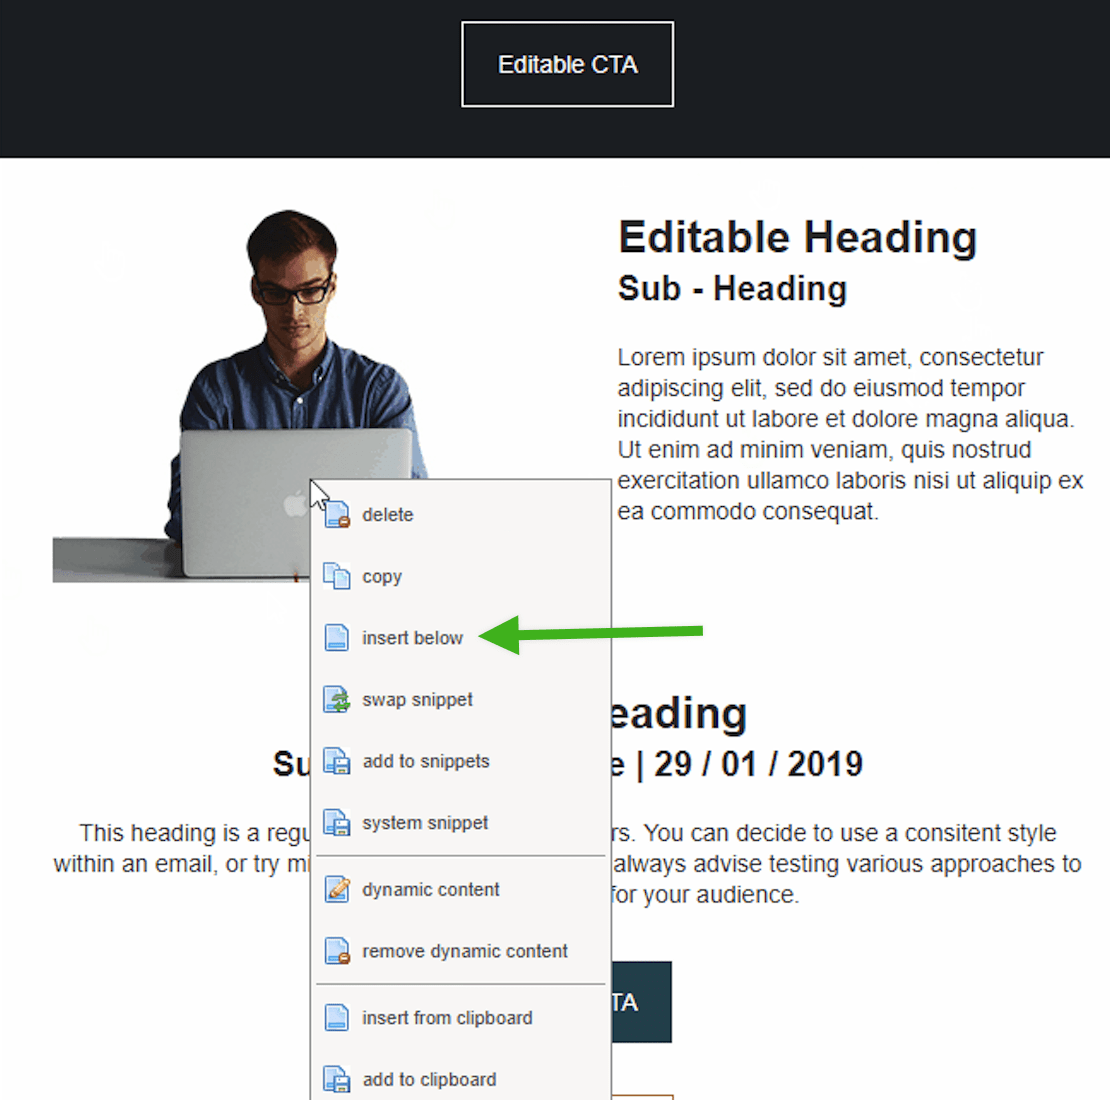
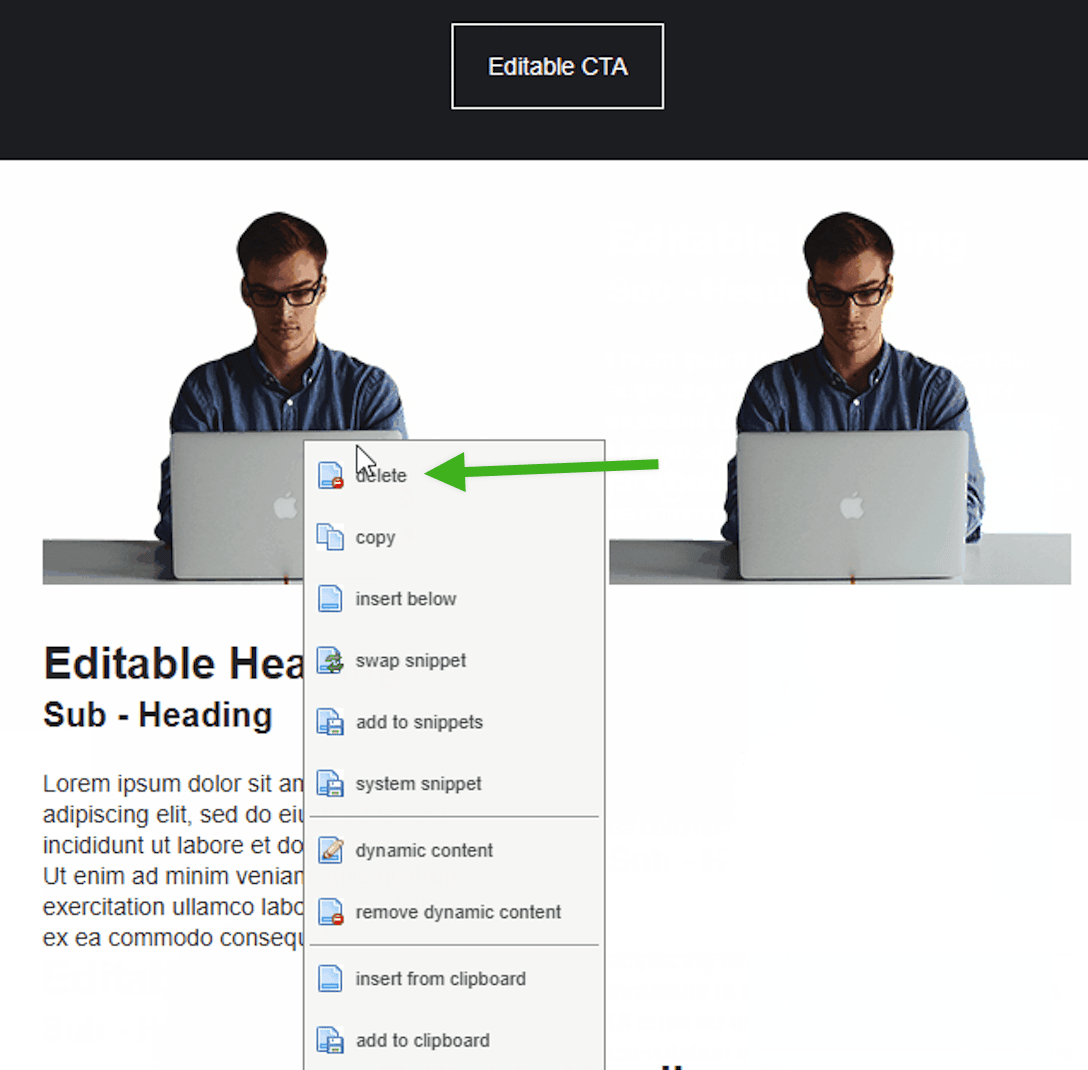
You can also decide to change the order of elements within a snippet, or add more elements to it. Just bear in mind that you can only move elements within the containing snippet, and that some single column elements won't be available in a two column snippet.
Saving snippets
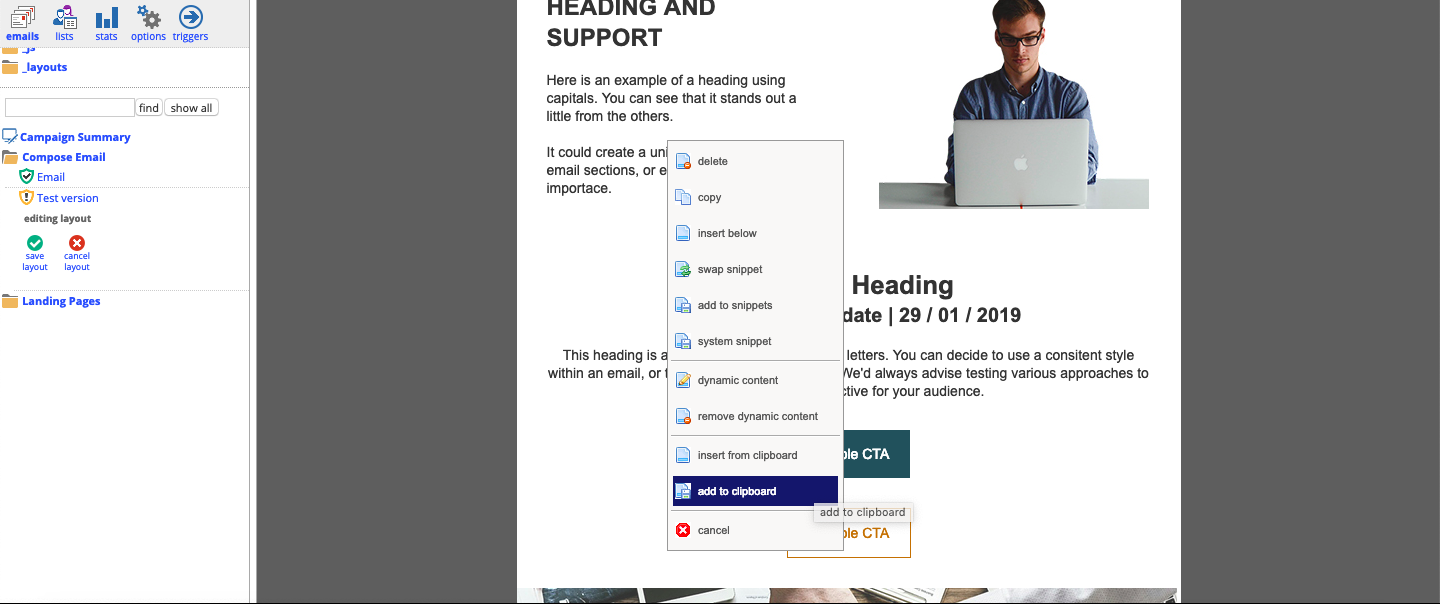
When you've made changes to a snippet you think might be reusable, you'll want to save it. To save a snippet, click edit layout, right click on the snippet you want to save and click add to snippets. This will save it to your campaign.
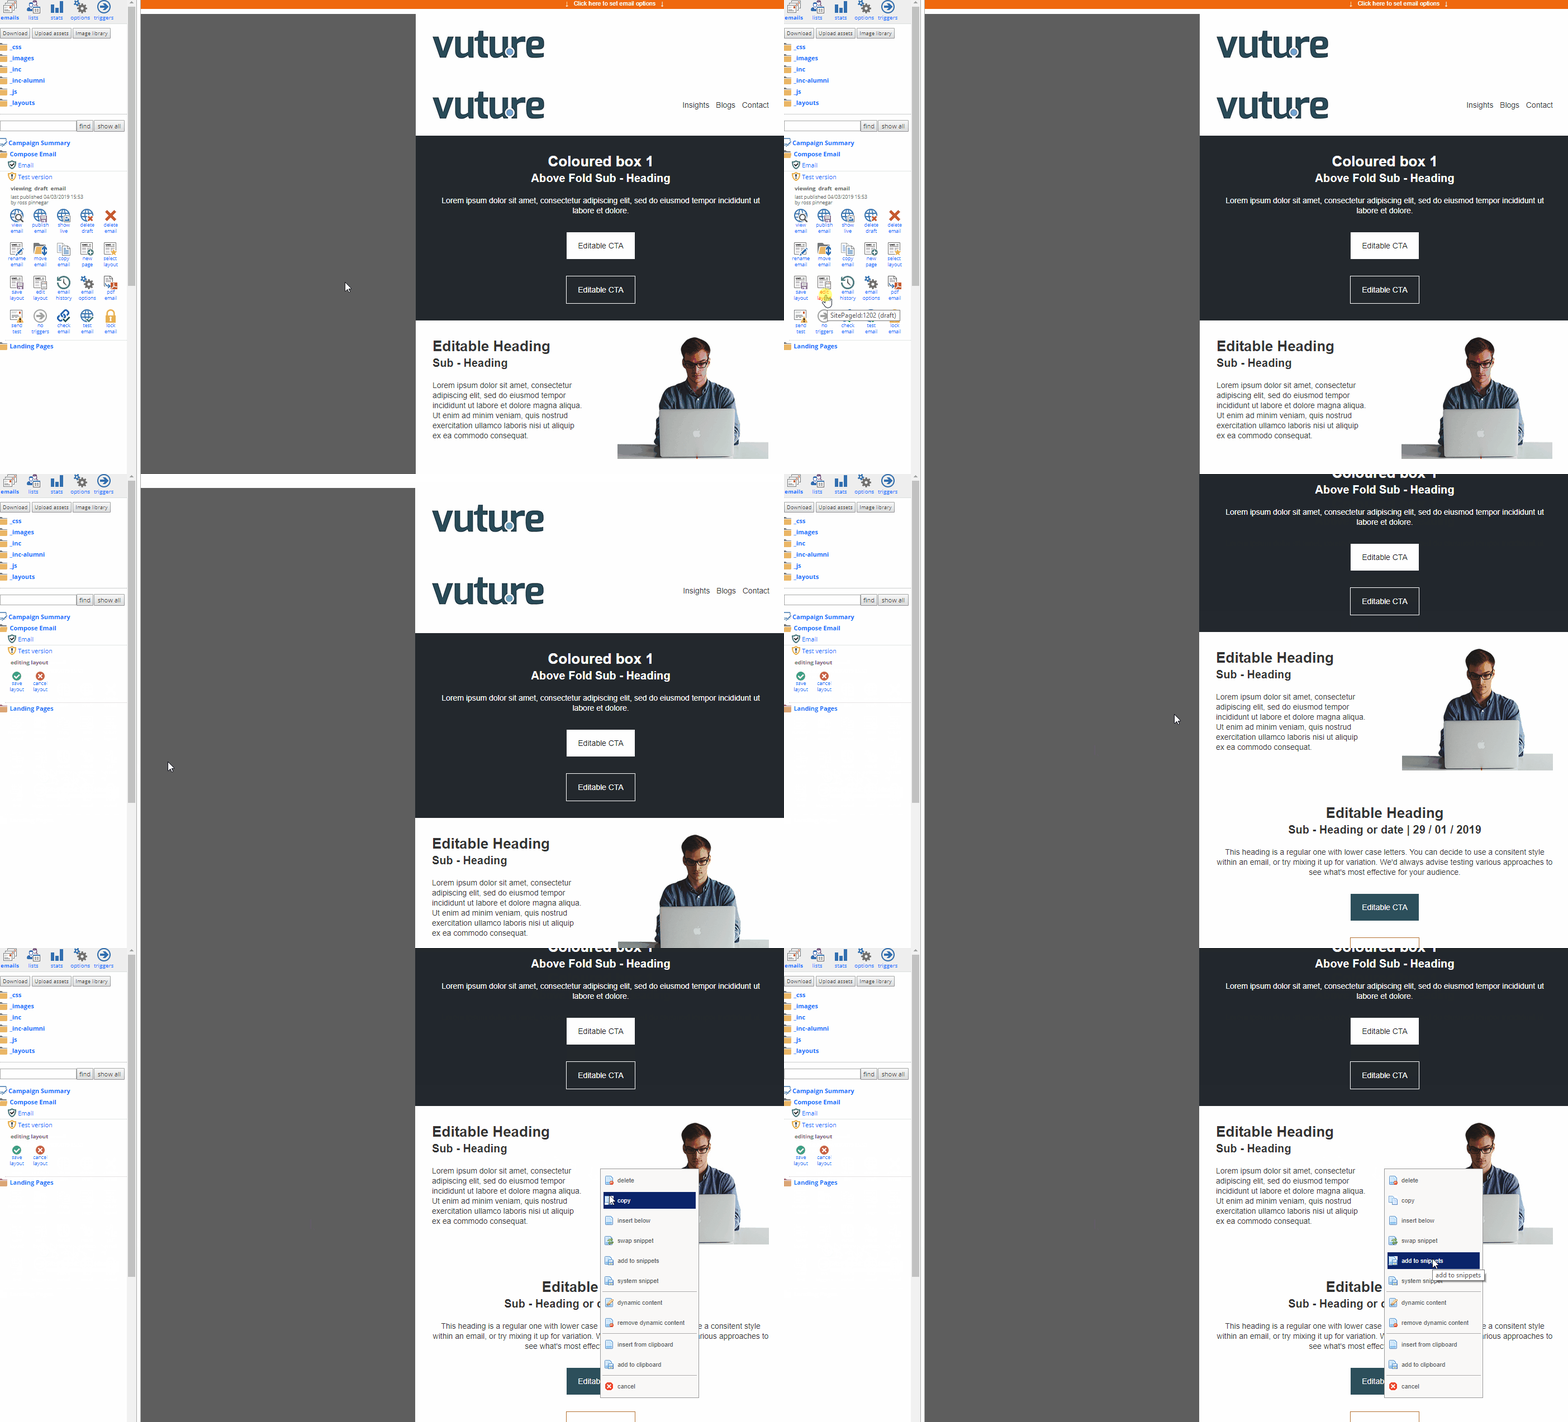
In some cases, you might want to save a snippet to another campaign, or to a template in another container. In order to do so, you can use the copy to clipboard feature.
The clipboard is available through your system configuration. Please contact your Customer Success Manager and they will enable it at Admin.system.General.Enable the user-specific clipboard.
Once enabled, you can make use of it when you are in Edit Layout mode in a page, by right-clicking on the snippet and either selecting “add to clipboard” or “insert from clipboard”. If you select the latter you will see all the snippets currently saved to your clipboard.
Note: If you experience any issues pasting a snippet from the clipboard, ask Vuture Support to check for you that there is a "_blocks.asp" file in the _layouts folder. The clipboard needs that blocks file in order to operate.
Important: Please consider page styling when moving a snippet between campaigns. Page styling can vary from template to template and if the new template is different to the source template, it can change the way the snippet looks.
Saving layouts
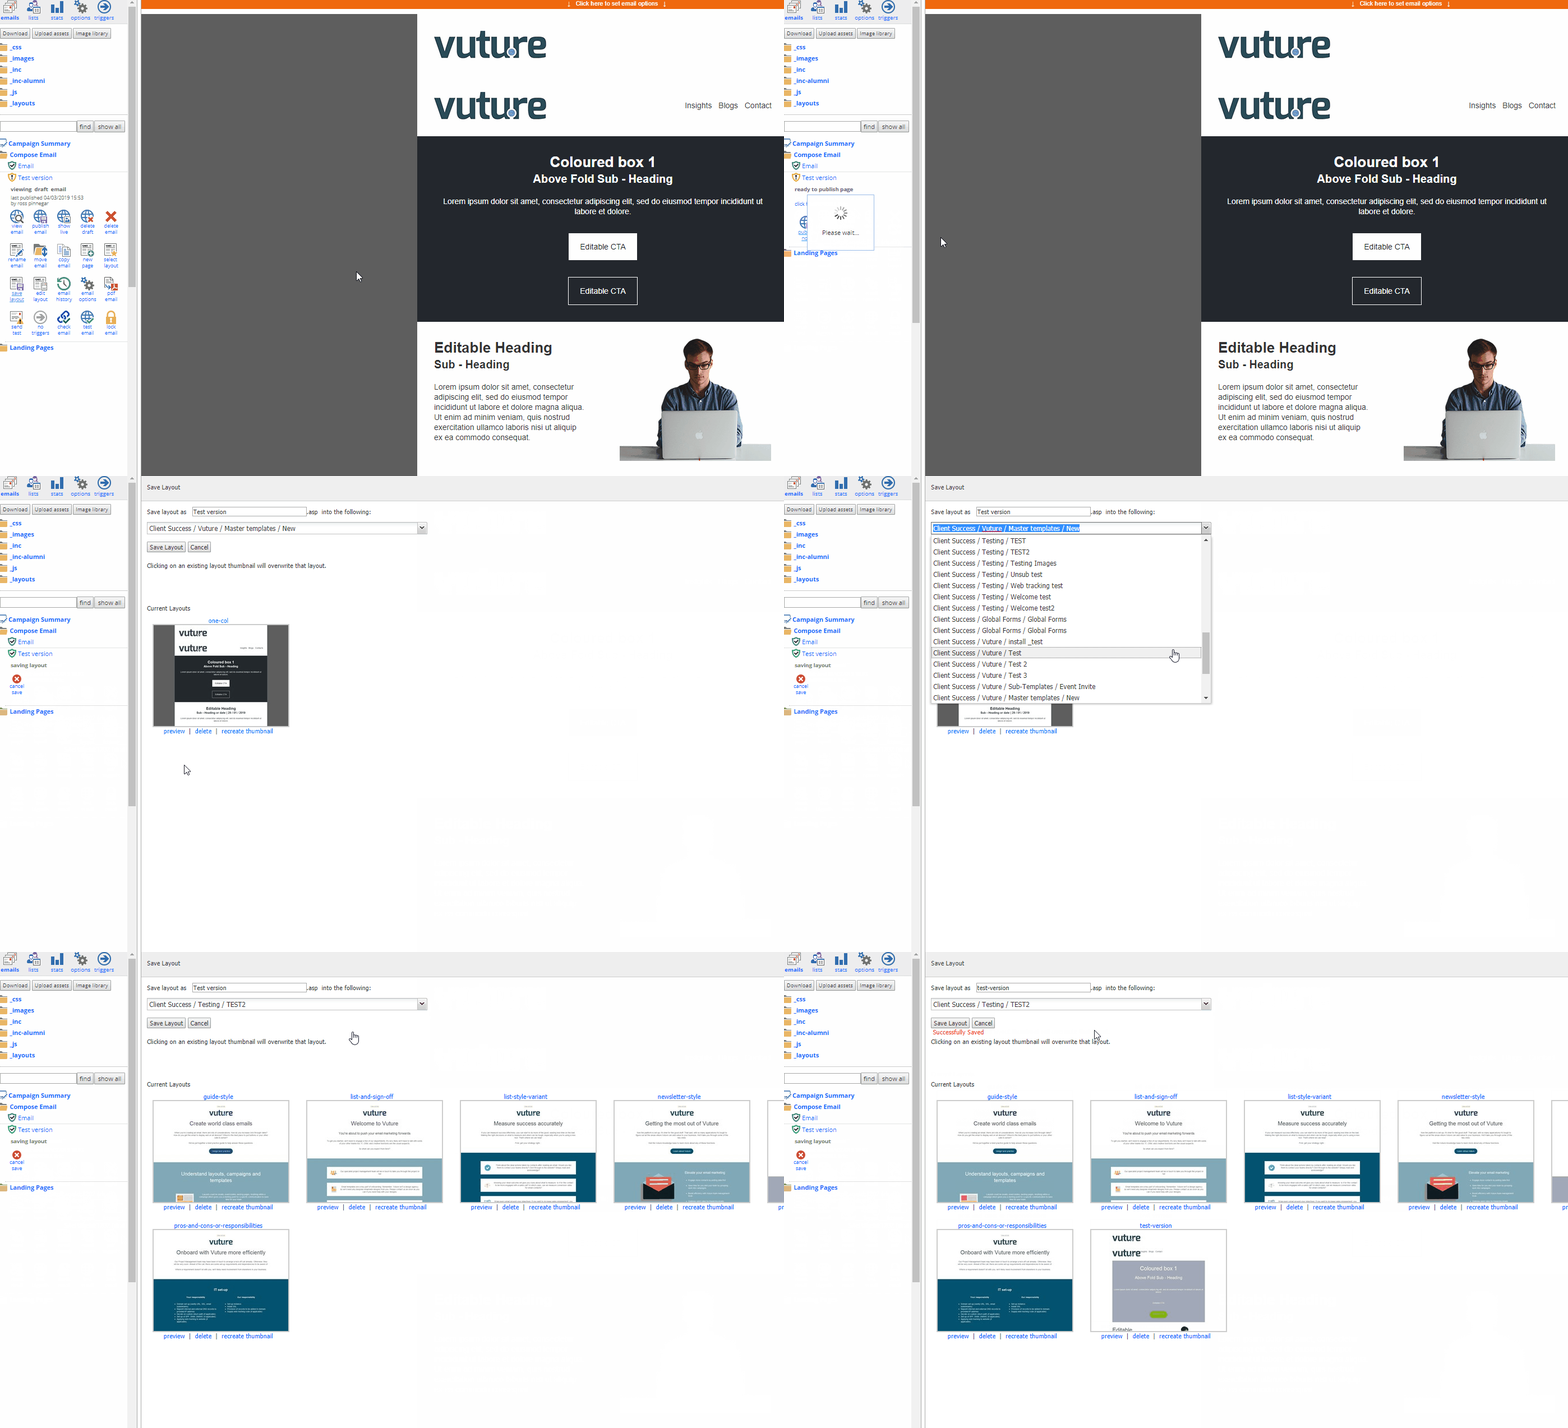
If you're happy with your snippet layout, you can save the layout to your campaign in order to re-use in future. Just click Save layout in the email options and you can save it to any campaign.
Changing colours
Before you change any of the colours in your template, it's worth noting that colours are specific to a campaign. So if you change the colour of an element in one email, it will change the colour of the same snippet in all emails within the campaign.
To change the colours in your Campaigns, your Vuture Role should have the option Colour Scheme enabled. If you wish to "lock this down" to prevent users from changing colours away from your brand palette, talk to your Project Manager, Customer Success Manager or Support. It is possible to remove this option from certain users.
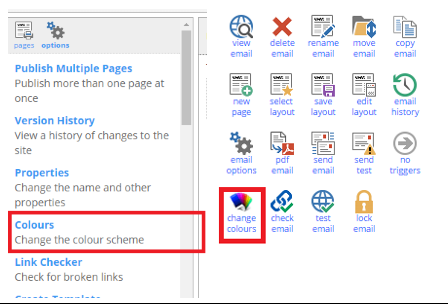
1. Click on the Change Colour Icon within your page options or go to Options.Colours within your campaign
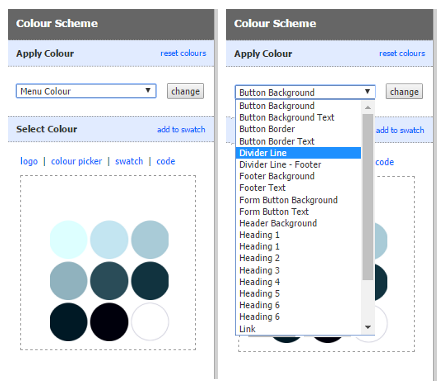
2. Then, you will see your branded colour palette or your logo in the Logo section. You can select the section of the page you would like to change from the dropdown and move the picker to the desired colour.
3. When you have a colour you want to save for quick access click on Save to swatch. This will save them in the Swatch section.
4. Once you are happy with your selection, save your changes.
Your swatch is available throughout your Vuture Instance. You can have one swatch per instance (i.e. you can’t have separate swatches in different campaigns). You can have as many colours as you want within a swatch.
Heading styles
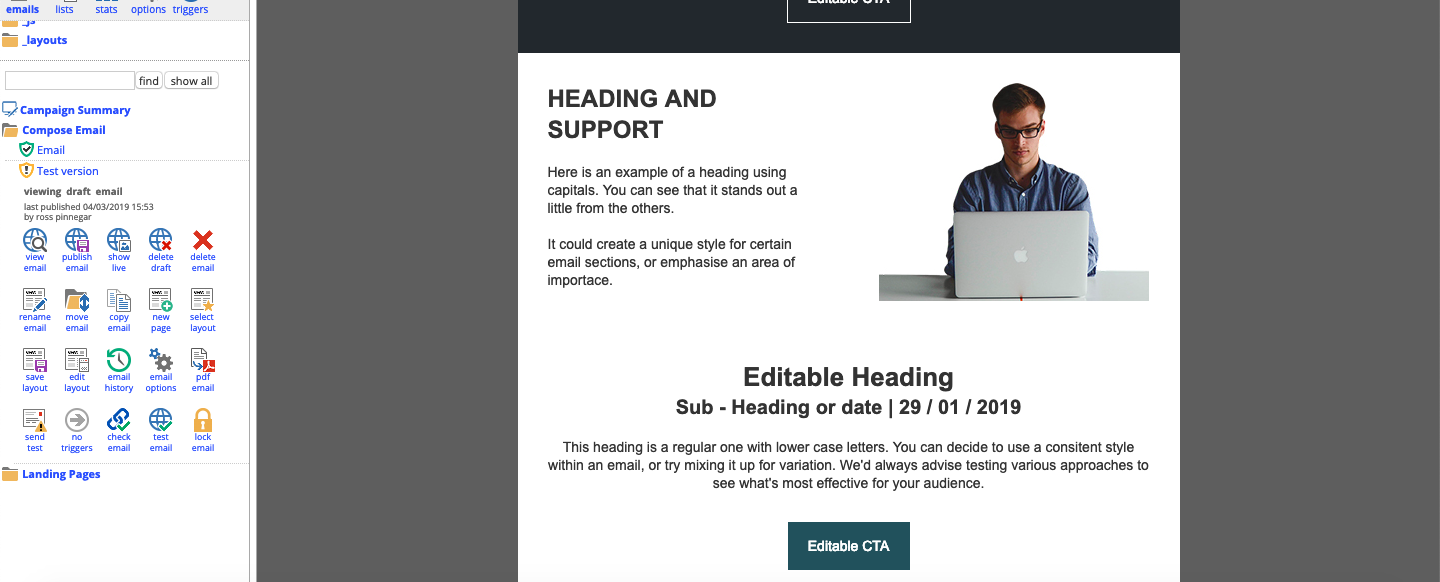
You have 6 heading styles available in the platform as default, plus a paragraph text style and a link style. These will be built into your template to conform to your brand image and style guidelines set by you. There is some flexibility however. First off, you can use the colour picker, details above, to edit the colour of your text in a particular campaign.
To create variation across your email content, try using a combination of capitalised or bold heading styles. This can break emails up, serve to highlight certain key elements, or simply help with the overall aesthetic:
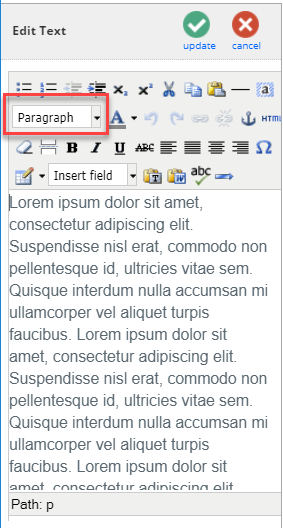
If you are getting unexpected results in your text, try highlighting the body of text you are working with and choosing Paragraph from the drop down list of Heading Styles.
Warning: please be aware that if you copy and paste text directly into your pages, from a Word document or an email for example, it is possible to bring over unwanted formatting with the copy. This extra formatting could affect the appearance of your text.
When copying and pasting text into a text snippet, you may find it helpful to use right mouse click and Paste. Either one of the following:
Right click > Paste, or ctrl +V to paste with formatting
Right click > Paste as plain text to paste without formatting
The first option will replicate the old paste from Word function, and carry over most formatting from the source. This is typically not desirable when pasting onto a Vuture page because it may give unexpected results. It is generally safer and more reliable to paste as plain text and allow the Vuture settings to format your page.
Sometimes you might find that if you insert a hard return into a block of text, it changes its appearance. Here is why: The default style for text when using the text editor is ‘paragraph’ text. That means that whenever you press Enter, while typing, a new tag will be created and will default to paragraph text, regardless of what tag you had used previously.
An example of this might be when you edit a heading snippet that uses the ‘Heading 1’ style. By pressing Enter to go onto a new line and create a new tag this new tag will be the default ‘paragraph’ text which will appear differently compared to the H1 style.
If you wish this new tag to continue as ‘Heading 1’ then you can simply highlight the new piece of text and select ‘Heading 1’ in the drop down (or whichever Heading style you need). Alternatively, you could perform a soft-return (SHIFT+ENTER) instead when typing, which will move the text onto a new line but keep it within the same tag.
Editing images
By clicking on an image, you can access the image editor. Using the image editor you can upload images, overlay text, crop and resize images, and take advantage of other functionality.
To read more about uploading and editing images, visit our image management article.
New snippets
Once you've signed off your template, we can help add snippets or make changes when you need us to. Just contact your Customer Success Manager to get a quote for the work.
