In this Help Desk Article, we'll cover the following:
How to setup a new E-Card Wizard
By default, your Project Manager would have set up an email campaign for you to house an E-Card Wizard. Typically, this can be found in a container named "E-Card". However, you may wish to create a new E-Card Wizard for the upcoming holiday season to keep each year separate.
Create a new E-Card Wizard
In an "E-Card" container, create a new email campaign and name it something like "2019 E-Card Wizard". You may then create an email under the Compose Email folder to serve as a holiday card option in the Wizard. You can populate this email with whatever content is required.
For example, many clients like to have a banner at the top, an image to click that brings the recipient to an animated video or GIF, and a personalized message from the fee earner or a generic message from the firm. See below for an example.
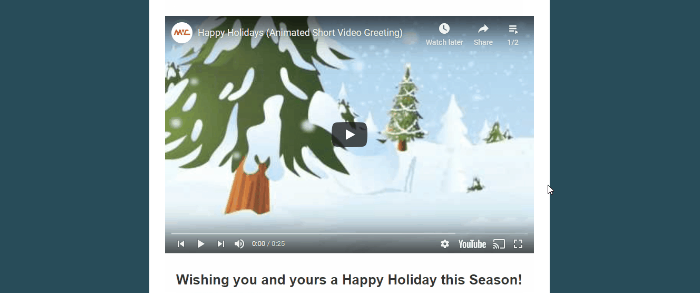
The animated video could be hosted on YouTube and added to a Vuture landing page using our video snippet. Or the animated GIF could be hosted on your firm's site and simply linked from the image of the E-Card.
Add generic text or allow fee earner to add a personalized message
For the personalized message, use the below tags in the body of your email:
<p>{Put Your Text Here}</p>
<p>Please place your custom message here</p>
<p>{/Put Your Text Here}</p>
To add this HTML code, click into a text snippet and select the "HTML" icon in the Text Editor. Then copy and past the above code and click update, then update again in the Text Editor.
Multi Line Messages using HTML
If you want to put a multiple line default message in the Wizard you could use
<br />
tags, rather than
<p>
This is for when line breaks are needed inside a message field.
Alternatively, when creating these personalisation tags you could use Shift Return (which uses BR instead of P) in the text editor, if you want multi-line messages in those fields. This is a simpler way than editing the HTML: use Shift Return ('Shift' + 'Enter') when setting up the original Wizard email if you want a multi-line message in a personalisation field.
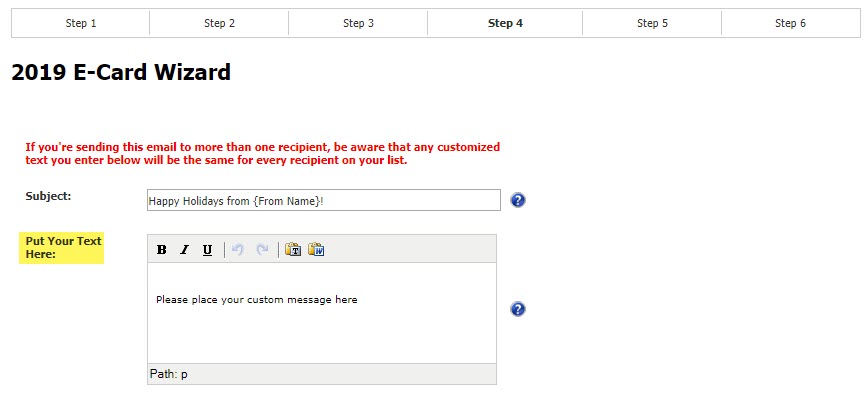
You may also change the "Please place your custom message here" to something more generic that the Marketing Team has agreed on for this year's holiday card. Whatever language you use here will populate in the E-Card Wizard, allowing the fee earner to use this generic text or to include a personalized message.
Here is an example of what this will look like in the E-Card Wizard:
Add a sign off area for the fee earner to add their name
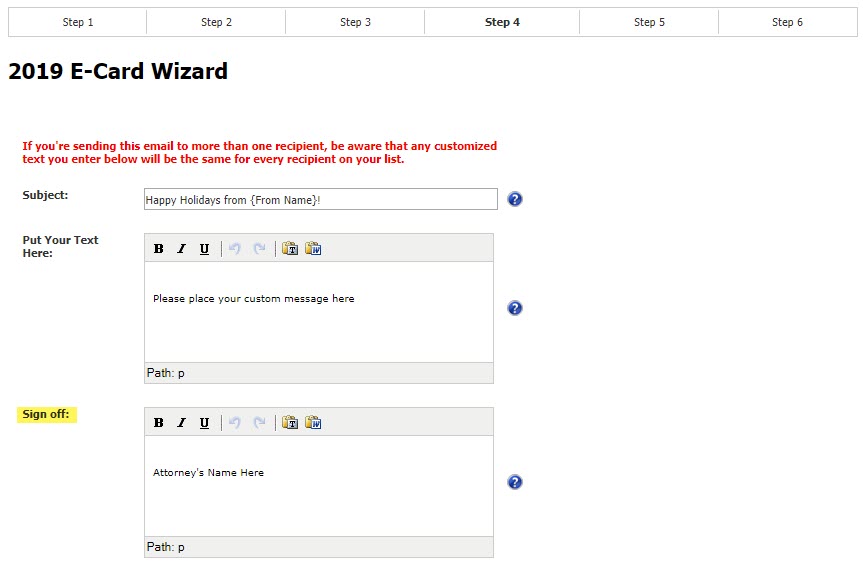
Additionally, if you wish to add a Sign Off in the E-Card Wizard for fee earners to add their name, be sure to use the below tags in the body of your email.
<p>{Sign off}</p>
<p>Attorney's Name Here</p>
<p>{/Sign off}</p>
Here is an example of what this will look like in the eCard Wizard:
Alternatively, you could use the {From Name} personalized token in the body of the email to automatically pull in the sender's name. For example, "Warm wishes, {From Name}".
Below is how this might look in the body of your E-Card Option.
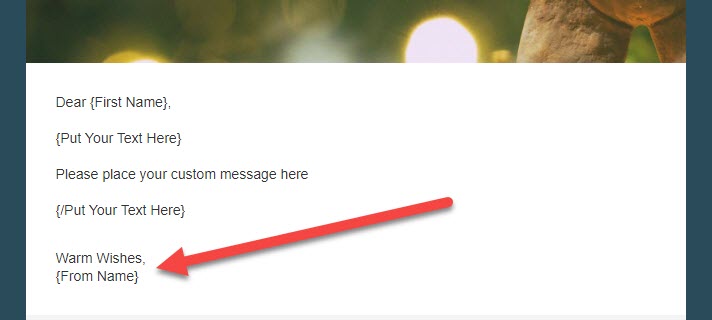
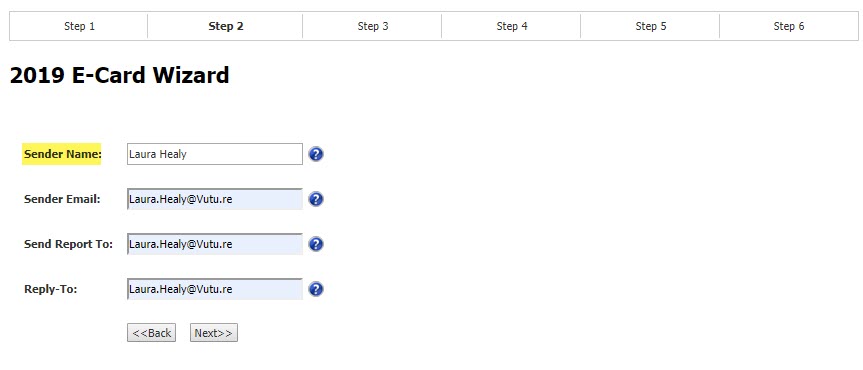
This will then pickup the sender's name from the E-Card Wizard:
Save your E-Card Option
Once you've finished creating your holiday card option for the Wizard, click on the "Publish" icon > Publish Now.
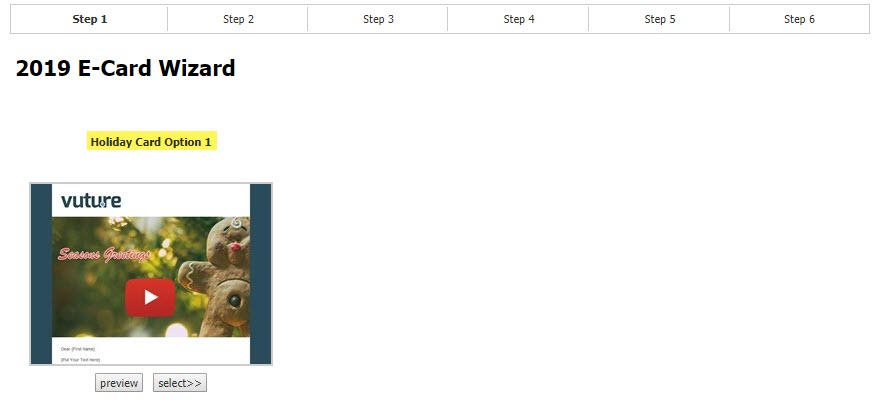
Then, click on the "Email Options" icon, make sure you are on the Metadata tab, and select "Wizard" from the Content Type drop-down, and finally "Save Metadata". This will automatically generate a thumbnail for your holiday card option in the E-Card Wizard.
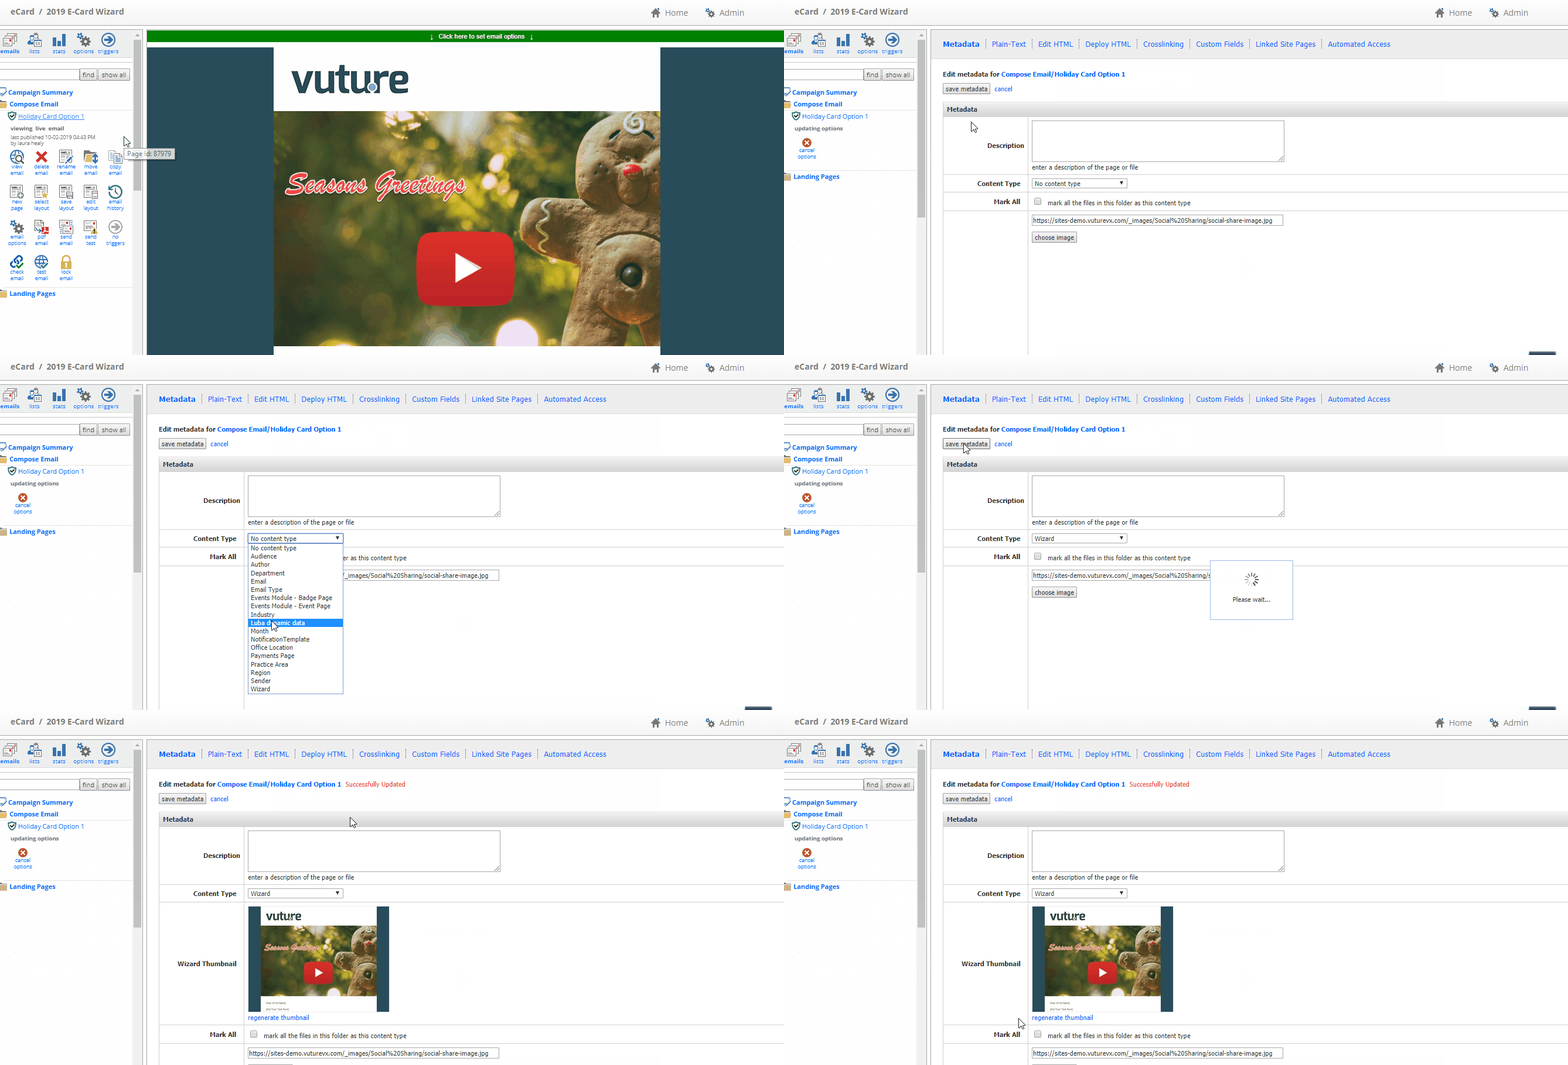
Please note: If for any reason the thumbnail does not generate, click the "regenerate thumbnail link" to recreate the thumbnail. If this does not work then contact Vuture Support who can restart your Vuture application (by clicking on "Admin.Tasks.Recycle Vx Back End" and "Admin.Tasks.Recycle Vx Front End") and then retry "regenerate thumbnail" as described above.
Here is an example of how this will look in the E-Card Wizard:
Add a pre-defined subject line
If you'd like to add a pre-defined subject line for the fee earner in the E-Card Wizard, please follow the below instructions.
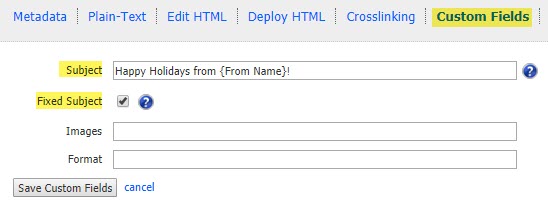
Click on the "Email Options" icon then click on the 'Custom Fields' tab at the top of the page. Then enter in the default Subject for this E-Card option. If you don't want fee earners to be able to change this subject then tick 'Fixed Subject'. Then click "Save Custom Fields".
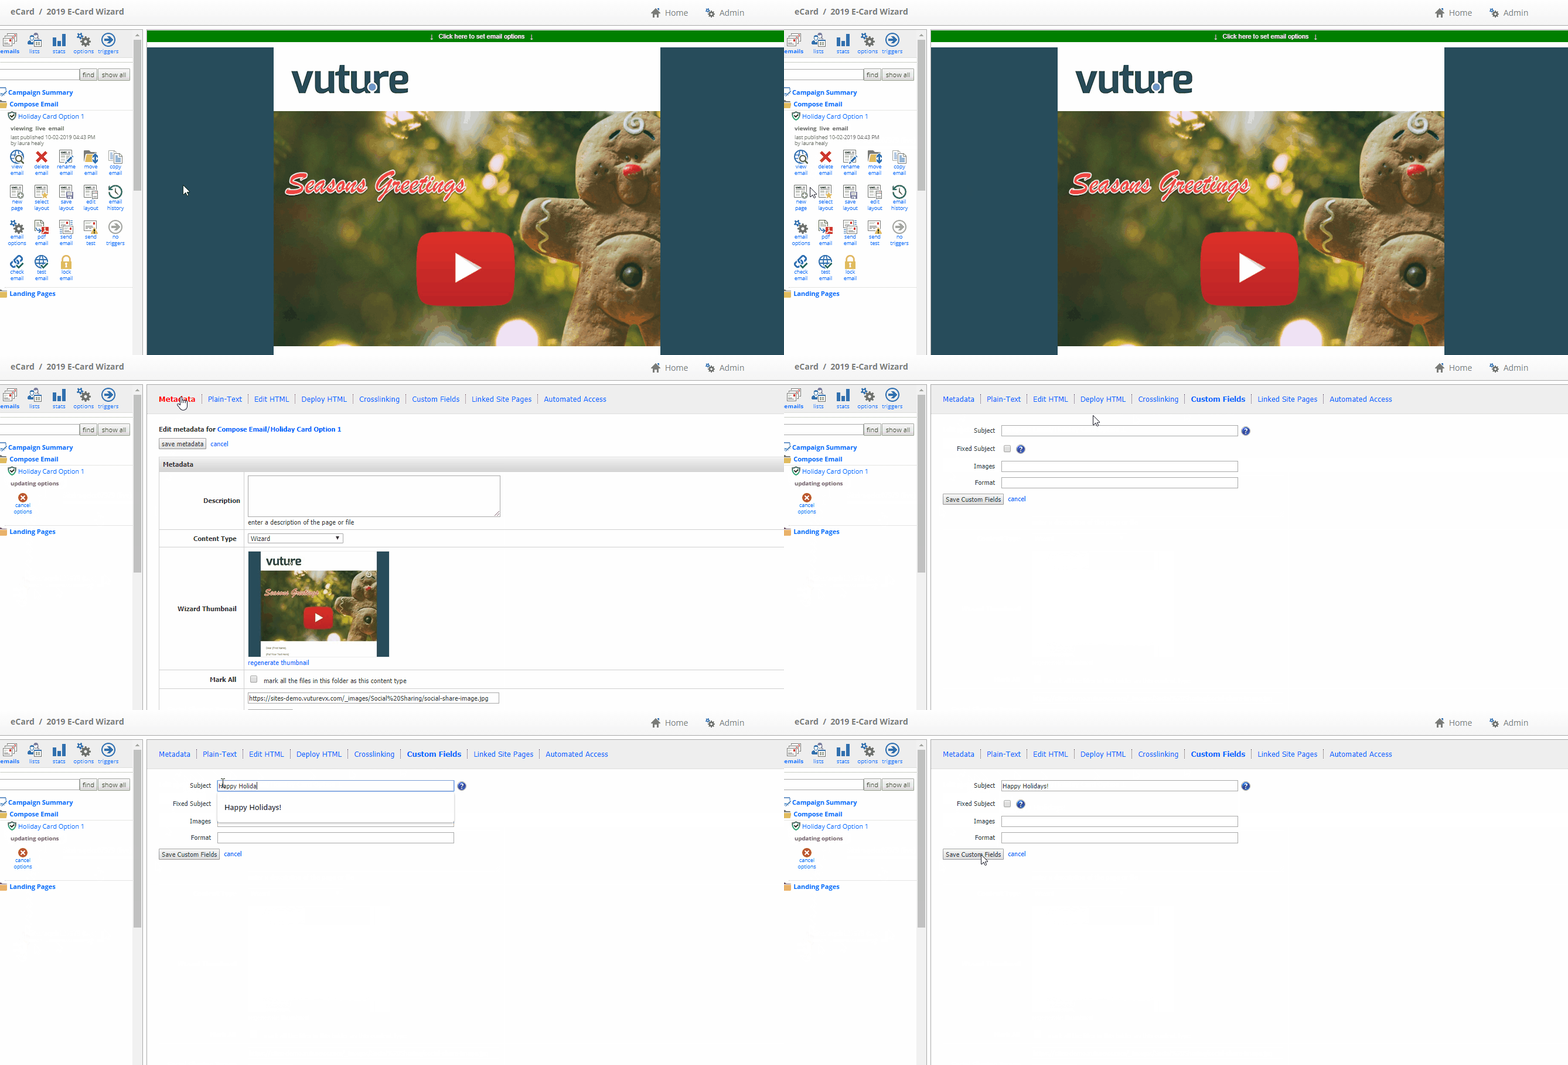
Here is an example of how this will look in the E-Card Wizard:
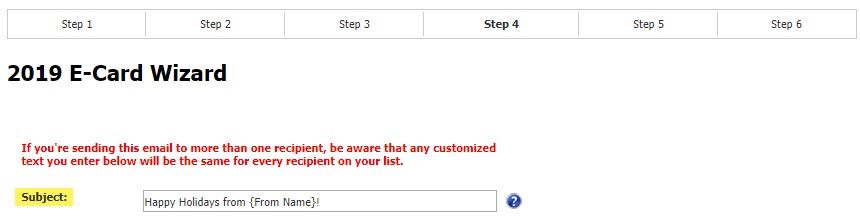
Additionally, you can personalize the subject line with the sender's name. All you would need to do is add {From Name} to the subject line. For example, "Happy holidays from {From Name}!". If using this option, it is recommended to check the "Fixed Subject" check box. That way, the fee earner cannot change the subject line and the {From Name} remains intact.
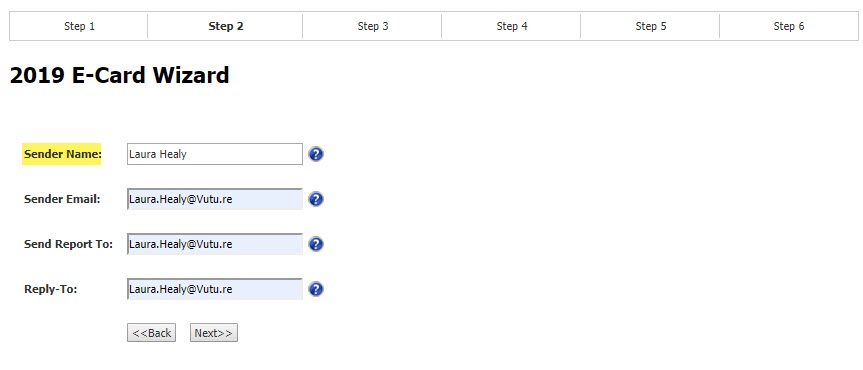
This will then pick up the sender's name from the E-Card Wizard. Below is an example of where the sender's name is specified in the E-Card Wizard.
Reminder: For each E-Card option you want to be offered in the E-Card Wizard, create a new email and repeat these steps.
Enable the Wizard
Now that you've set up your E-Card Options, it is time to enable the E-Card Wizard for this email campaign.
The latest appearance of the E-Card Wizard is in the refreshed UI from September 2023; as in the image below.
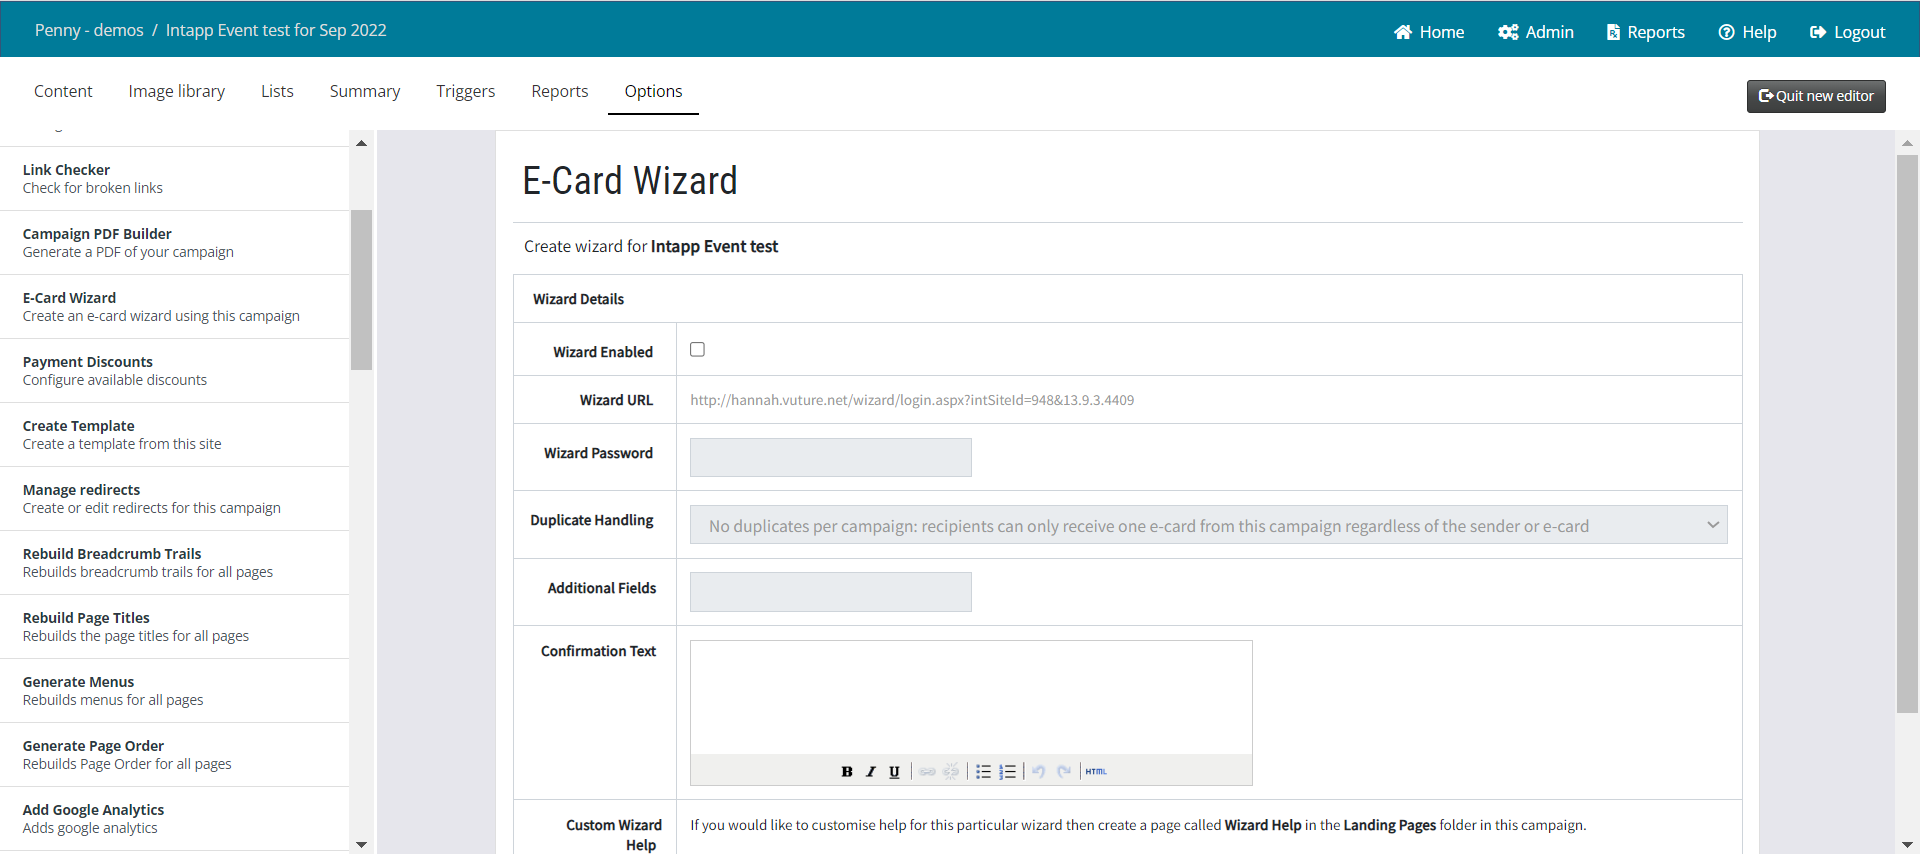
Enable the Wizard to get the URL and password fields to appear.
The Confirmation Text you enter here might be something like; "If you are finished sending your Holiday Cards, please feel free to close this window. If you would like to send more, please click the Send More button below."
Follow the below instructions for the settings:
- While in your email campaign, click on Options at the top of the page.
- Select E-Card Wizard from the options that appear.
- Tick "Wizard Enabled" to enable the Wizard. Please note, you may untick this box at any time to disable the Wizard. Users will no longer be able to login to the Wizard.
- The Wizard URL and Wizard Password should be provided to users who wish to use this e-card Wizard and they are unique to this email campaign.
- The Wizard Password is shared by all users. If you wish to reset it any time click "generate random password". This will update the password to a new value and the old password will no longer be valid.
- Choose the Duplicate Handling option that you require:
-
No duplicates per campaign: Recipients can only receive one E-Card from this campaign: Once an email recipient has received an E-Card from this E-Card Wizard, they will not receive any more from this E-Card Wizard, even if a different E-Card or sender is selected.
-
No duplicates per e-card: Recipients can receive each E-Card in this campaign no more than once: An email recipient can receive one of each E-Card in this E-Card Wizard. Once they have received a particular E-Card they cannot receive it again, even if a different sender is selected.
-
No duplicates per sender: Recipients can receive an E-card from this E-Card Wizard once per sender regardless of the E-Card option that is chosen.
-
No duplicates per sender and e-card: Recipients can receive each different E-Card in this E-Card Wizard once per sender.
-
Allow duplicates (FOR TESTING ONLY): Recipients can receive each e-card in this campaign multiple times: An email recipient can receive an unlimited number of E-Cards from this E-Card Wizard and there is no duplicate handling.
Note on Duplicate Sends: Question - How will the attorney know if contact A already got the ecard?
Answer - The information is in the Email Send Confirmation email which the attorney will receive.
For each duplicate case, there will be a line in that email which says one or more of the following:
The following emails were not sent since they have already received this e-card from the same sender:
The following emails were not sent since they have already received an e-card from the same sender:
The following emails were not sent since they have already received this e-card from another sender:
The following emails were not sent since they have already received an e-card:
- Additional Fields (optional) - If you would like to collect information to be written into text additional fields (InterAction where integrated) enter a comma separated list of Additional Field IDs and click "update additional fields". As an example, you could ask the person sending the e-card to update a field describing a set of contacts. Entering the field ID here will display that field to the user and allow them to complete it while they are sending the card. If you don't choose to use this feature simply leave the Additional Field ID box empty.
- Custom Domain (premium setting) - If you are using the "Populate with custom domain" option for Sender Email or Reply To Email then the system will take the part of this user's email address to the left of @ and combine it with the custom domain entered here. For example, if the user's email is "first.last@mycompany.com" and Custom Domain is set as "comms.mycompany.com" then the value used will be "first.last@comms.mycompany.com"
- Sender Name - This can be left blank if you select "Do not pre-populate" or can be automatically populated with the user's InterAction username.
- Sender Email - This can be left blank if you select "Do not pre-populate" or it can be automatically populated with the user's email from InterAction or it can use the Custom Domain field (See Custom Domain).
- Reply-To Email - This has the same options as Sender Email.
- Enter any Confirmation Text that is required. This will be displayed to the E-Card Wizard user on the final screen after they have sent an E-Card and can include HTML.
