Overview
Filters are used to send an email to part of your list. For example, to resend an invitation to everyone who has not yet replied, or to send a confirmation to everyone who has replied Accept.
Contents
Create your reminder email
You can copy the Invitation email once it has been tested and rename and reword it to create a Reminder to Register email, a Last Chance to Register or an Event Reminder email.
Note: It is recommended that you remove RSVP buttons from Event Reminders, to prevent contacts from trying to register again.
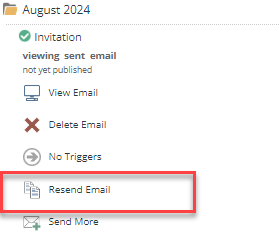
- If the invitation has already been sent, in the Sent items folder, click resend email.
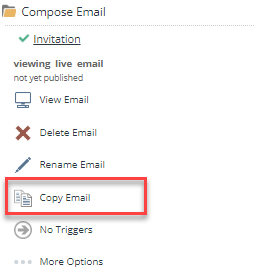
- If you are setting up a reminder ahead of the invitation being sent, in the Compose email folder, click copy email.
- Edit the content of the email, including removing the call to action RSVP button, if they have already registered.
- Publish the email.
Create the filter
- Click Send email
- Complete the Subject Line
- Complete the From field and select the relevant Mailing List
- Choose the Email Type
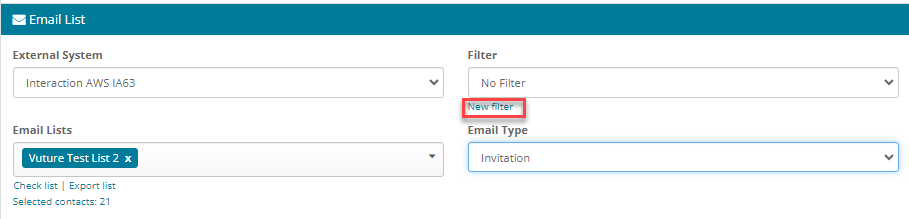
- To specify who on the original email should receive the Email Click new filter
- Clicking new filter will open the Filter create page
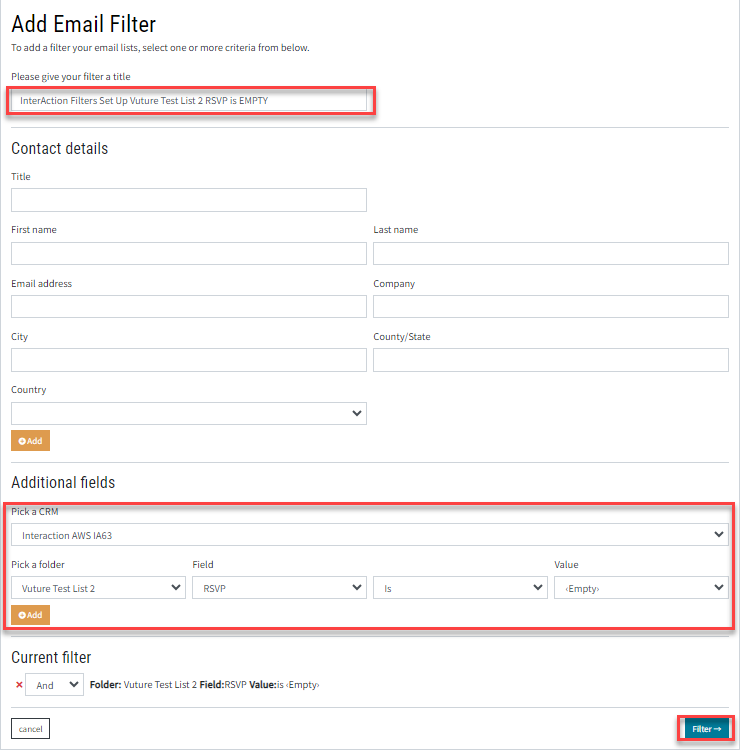
- Type a name for the filter using a clear explanation of what it does.
Warning: Include the Campaign name at the beginning of the Filter name, as Filters are container based (unless you have a check box to select campaign based) to ensure the correct filter is selected that is pointing to the correct Marketing List.
- From the Additional fields pick a folder, select your IA list.
- Select the required field, for example RSVP
- Select the Value from
- Is, Is not, More than Less than
- Select the result from the drop down list
- Yes, No, Empty, Not Empty
- Click Add at the right of the screen
- Click Filter at the bottom left of the screen
This returns you to the send screen, with the filter selected.
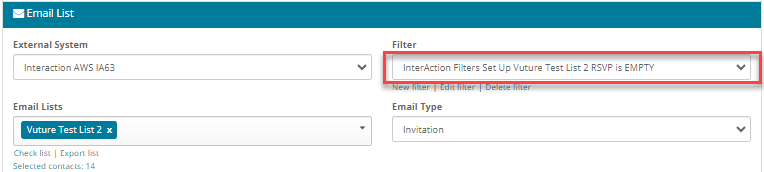
- Click send email to complete the send.
For more information on creating filters, click here.
