This article takes a user through the steps required to add gender-based greetings to emails, using InterAction global additional fields and Vuture variables.
Create Global Additional Fields
Start Interaction Administrator. You will need to use the Admin tool because this solution uses Global Additional Fields not list-specific.
Double click on Global Additional Field
Add a new field (new field is called TitleGreet in the example below) and set the List Items (all possible values)
Or
If using an existing field, click List Items
Make a note of the field Id (1 and 9 are the Field IDs highlighted below)
Make a note of the Values by clicking “Edit” for Yes/No type fields or “List Items” for a List
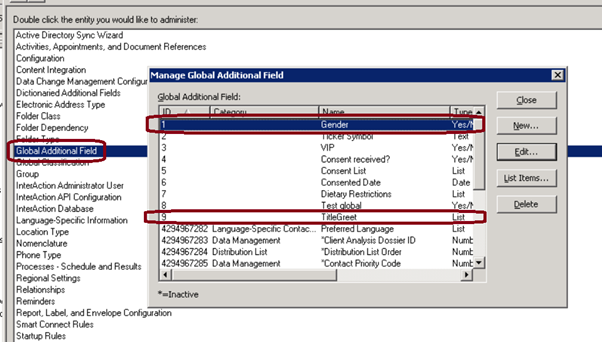
Possible values for Gender are “Male” and “Female” in the example below.
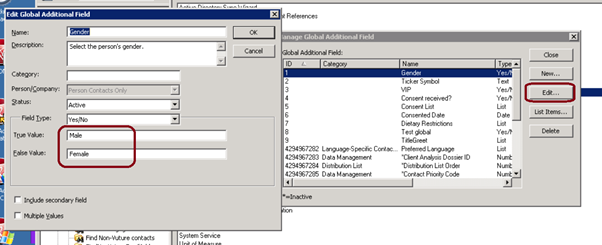
Possible values for TitleGreet are “Mr”, “Miss”, “Herr”, Hr”, “Frau”, “Fr”, “Ms” and “Mrs” in this example, but you may set your own.
Close out of IA Admin tool. Return to Vuture platform.
Creating Variables
Create a variable for each value starting with any text you want and an underscore ‘_’
e.g. GREETING_{value}
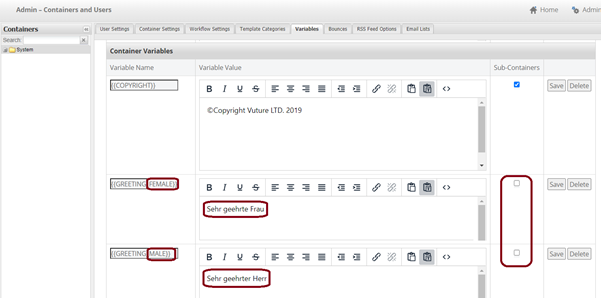
Go to Admin>Containers & Users>Variables
Add required values
Option 1 – using Gender list (Male, Female) Create {{GREETING_FEMALE}} and {{GREETING_MALE}} with the greeting you would like to display under the Variable Value “Sehr geehrte Frau”, “Sehr geehrter Herr”
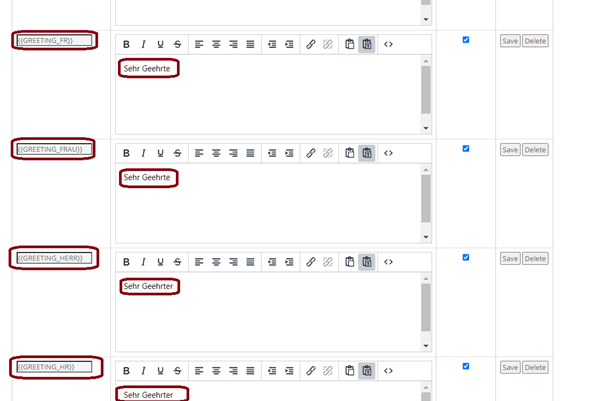
Option 2 – using TitleGreet list (Hr, Herr, Fr, Frau, Mr, Mrs, Ms, Miss) Create the variables {{GREETING_HR}}, {{GREETING_Herr}}, {{GREETING_FR}}, {{GREETING_FRAU}} etc. each with the required greeting “Sehr Geehrte”, “Sehr Geehrter” etc.
Close out of the Admin area and navigate to the Email editor for your campaign.
Adding Variables to an Email.
In Vuture Email editor Add/Edit your required Greeting using the following method:
Edit the text of your Email and add the Greeting as required
{{GREETING_{IA:1}}} {Last Name}, - for Gender (Option 1)
Or
{{GREETING_{IA:9}}} {Last Name}, - for TitleGreet (Option 2)
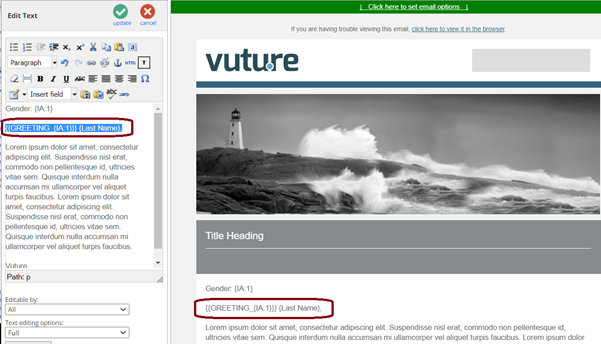
Test that the correct content is displayed
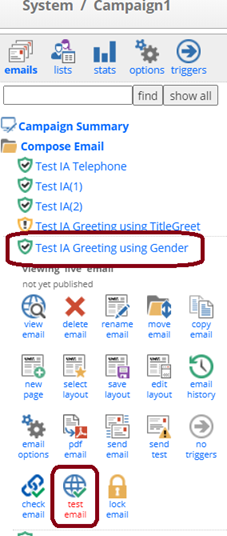
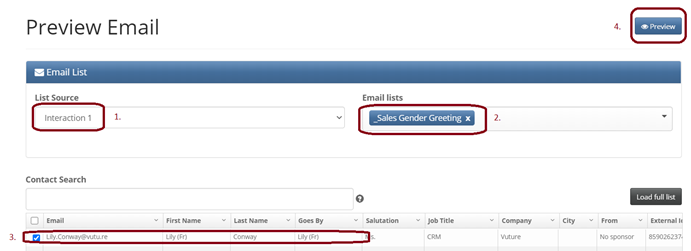
The test preview opens in a new tab
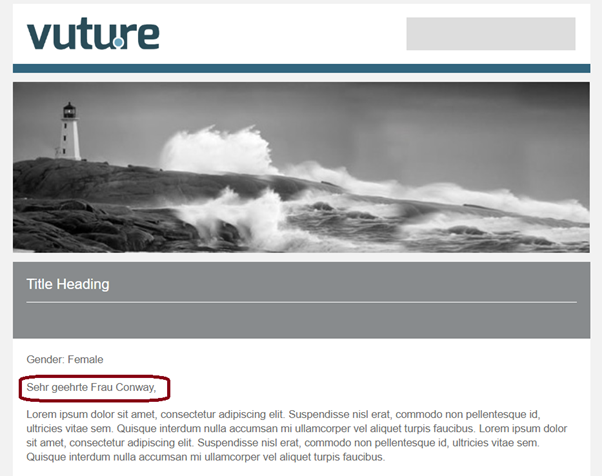
Close the current Tab and test with a different contact with Gender set to Male
Troubleshooting - What to do if Content is not displayed
a) Check Contact's Gender field in InterAction. Try changing it, save and change it back, because sometimes Gender may not show as set when it has a value.
b) Use the Vuture API call to find the contact id
{VutureClienturl}/proxy/Interaction{InstanceId}/interaction/findContacts?emailaddress={emailAddress}
e.g. http://vuturevx.ukl-069:9090/api/interaction/1/Contacts/--------------------/Fields/1.xml
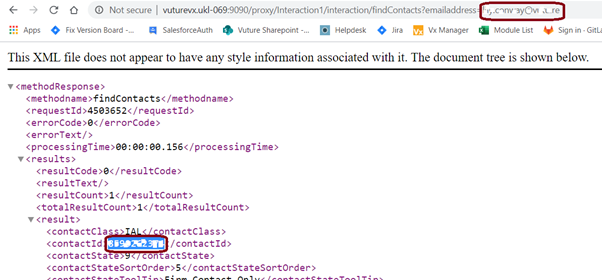
c) Use the ContactId with the Interaction API call to check the Additional Field Value
{ClientInteractionURL}/InterAction/findContactAdditionalFields?accountName={USERNAME}&userPassword={PASSWORD}&maxResultCount=50000&contactId={ContactId}&definitionId={AdditionalFieldId}
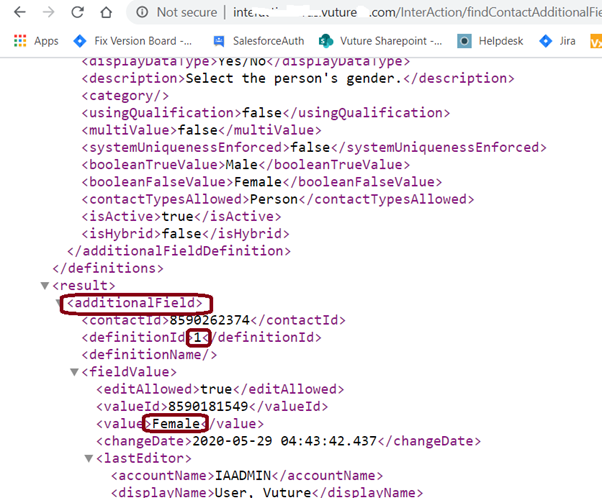
d) Use the Vuture API call with Contact id to check the Additional Field has the correct value
{VutureClienturl}/api/interaction/{InstanceId}/Contacts/{ContactId}/Fields/{AdditionalFieldId}.xml
e.g. when InstanceId is 1, AdditionalFieldId is 1 and ContactId is 9999999999
{VutureClienturl}/api/interaction/{1}/Contacts/{9999999999}/Fields/{1}.xml
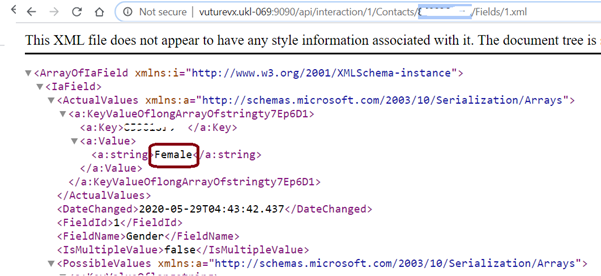
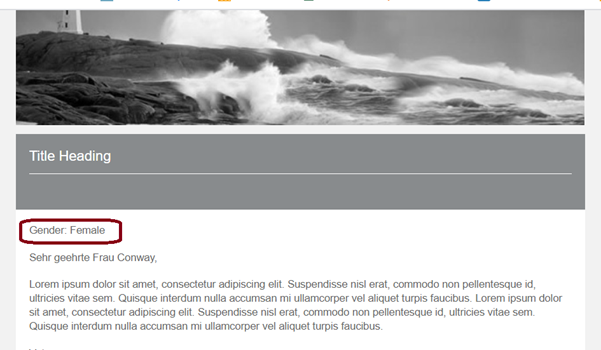
e) Add Additional Field separately on the test email
Try adding a label and the evaluated field to the Email {IA:{FieldId}}
e.g. Gender : {IA:1}
In addition, Global Additional Fields can be added to forms. More information on how to view Global Additional Fields can be found here.
If you are still having Issues, please contact your Vuture Client Success Manager.
