Overview
You need to follow a few steps to create an event invitation. Below is a list in the order we recommend following.
Contents
Prepare a list of contacts
In ContactEase create your category as you would normally.
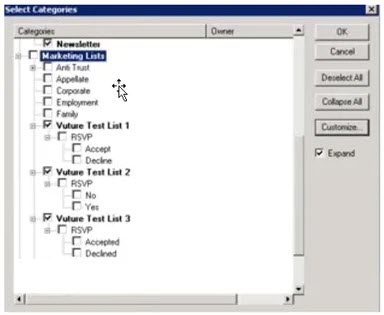
IMPORTANT: Make sure you include a sub-category for RSVP with the values of Accept and Decline to your main category. If you need to add dietary requirements or any other sub-categories, be sure to add them to your main category in ContactEase.
Below is an example of a RSVP sub-category for the main category, "Vuture Test List 1".
Create the email invite
Follow the steps in this article to create your email. Make sure you include a Registration hyperlink / button that links to the RSVP form, so your contact can sign up to attend the event.
Setup the RSVP forms
The RSVP form allows the recipient to confirm their contact details and register for an event. As part of your Vuture setup we have created default RSVP forms for you to use.
There are two types of RSVP forms:
Prefilled RSVP
When your contact clicks the Registration button on the invitation, the RSVP Prefilled form pre-populates their contact details in the form, they simply accept or decline.
Blank RSVP
Is used when the invitation is forwarded and does not pre-populate the contact details.
To setup the RSVP Prefilled form
- In the Landing pages select the RSVP Prefilled
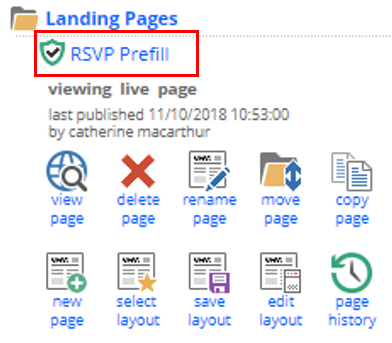
- Click on field on the form to open the Form Editor window
We recommended to make the First and Last name, and Email Address fields on this form Read only. That way if your recipient forwards or shares the invite with another person, the other person doesn't override the data. The forwarded recipient would instead, click on a link to access the Blank RSVP Form, to submit their contact information and register to the event. We also recommended that you make these fields required.
Step 1: Click on the First Name field, place a check mark beside Read only and also select Required, then repeat for the Last Name and Email Address field.
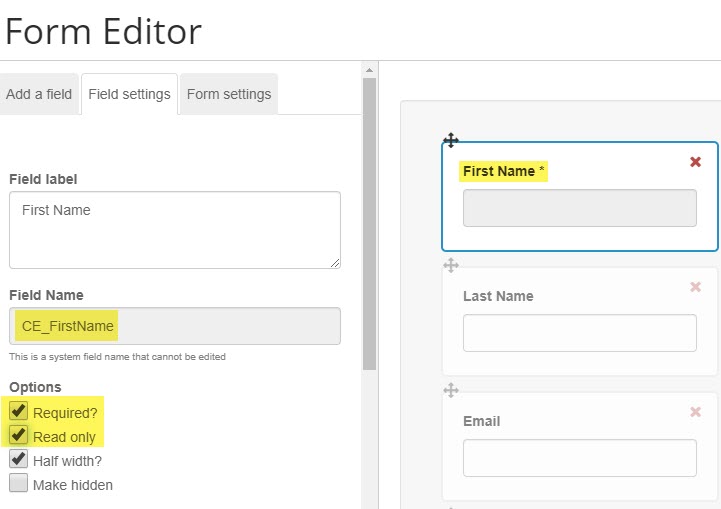
Step 2: We now need to add a RSVP Field.
- Click any field in the form to open the Form Editor.
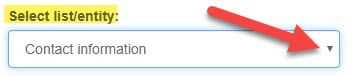
- Choose Add a field tab and make sure you have the ContactEase instance selected, not Vx. Please note, this may be named differently in your Vuture instance.
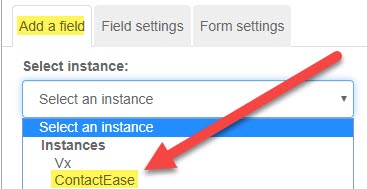
- From select list drop-down, select your Category with the RSVP.
-
For example, if your main category is named "Vuture Test List 1" and your sub-category is "RSVP", it should read something like "Vuture Test List 1:RSVP". (see screenshot below for example)
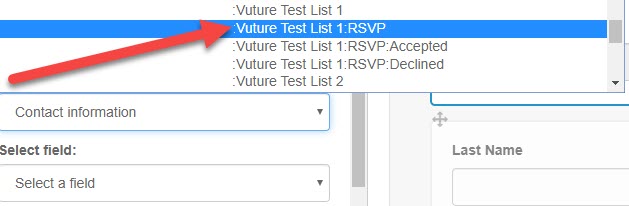
- Then click the "Add Field" button. This will add the RSVP field to the bottom of the form. You may then drag and drop it to place it higher up in the form if necessary.

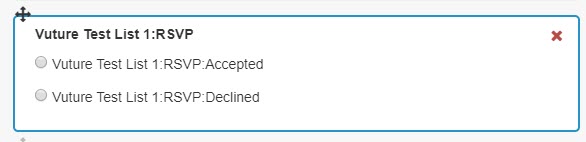
- We'll want to clean this up to make it a bit more friendly for your contacts.
- First, click into the newly added RSVP field to make edits.
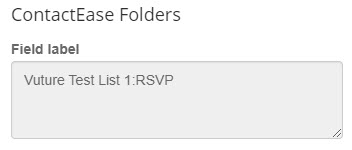
- Then, change the Field label to something more friendly, "RSVP" or "Will you join us for this event?".
-
Before:
-
After:
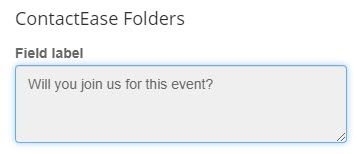
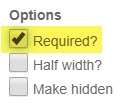
- Next, check the box for "Required?" to make this field required to submit the RSVP form.
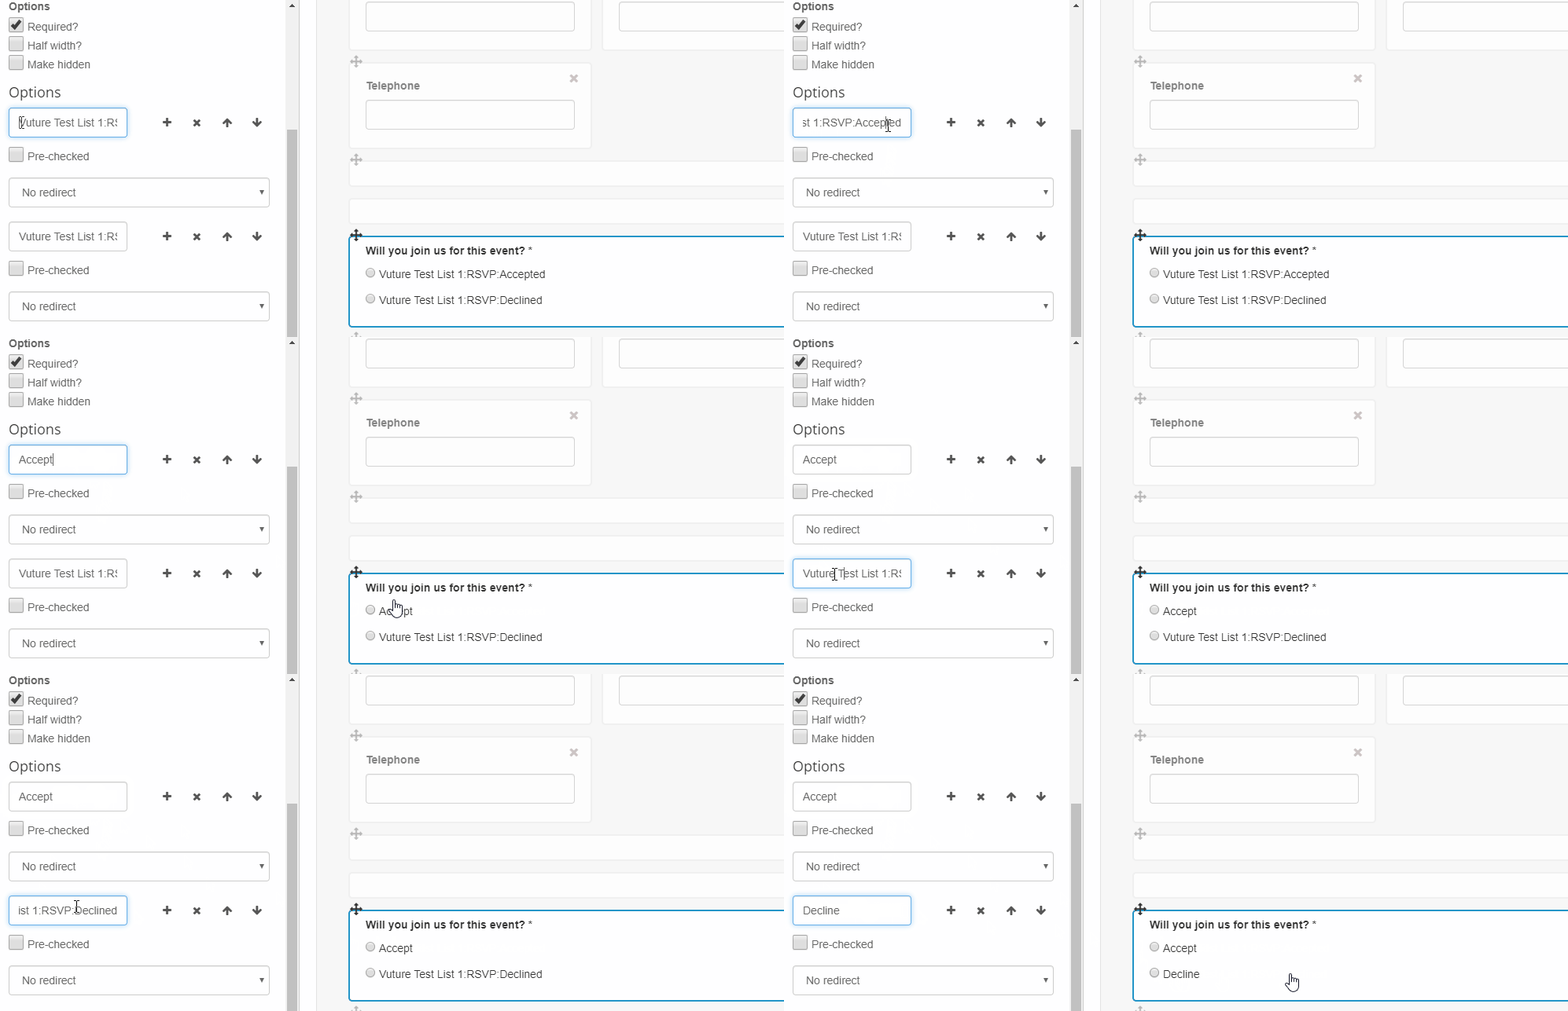
- Under "Options", we want to change these RSVP options into something more friendly, too.
- For the Accept: You could change this to "Accept" or "I accept", or "Yes".
- For Decline: You could change this to "Decline" or "I regretfully decline", or "No".
- Still under "Options", we want to set our "Redirect" pages for the "Accept" and "Decline" option. This will show the correct landing page depending on how someone responded to your RSVP field.
- For example, if someone Accepts, we want to redirect them to the "Thank you Accept" landing page. Please select this one in the drop-down.
- If someone Declines, we want to redirect them to the "Thank you Decline" landing page. Please select this one in the drop-down.
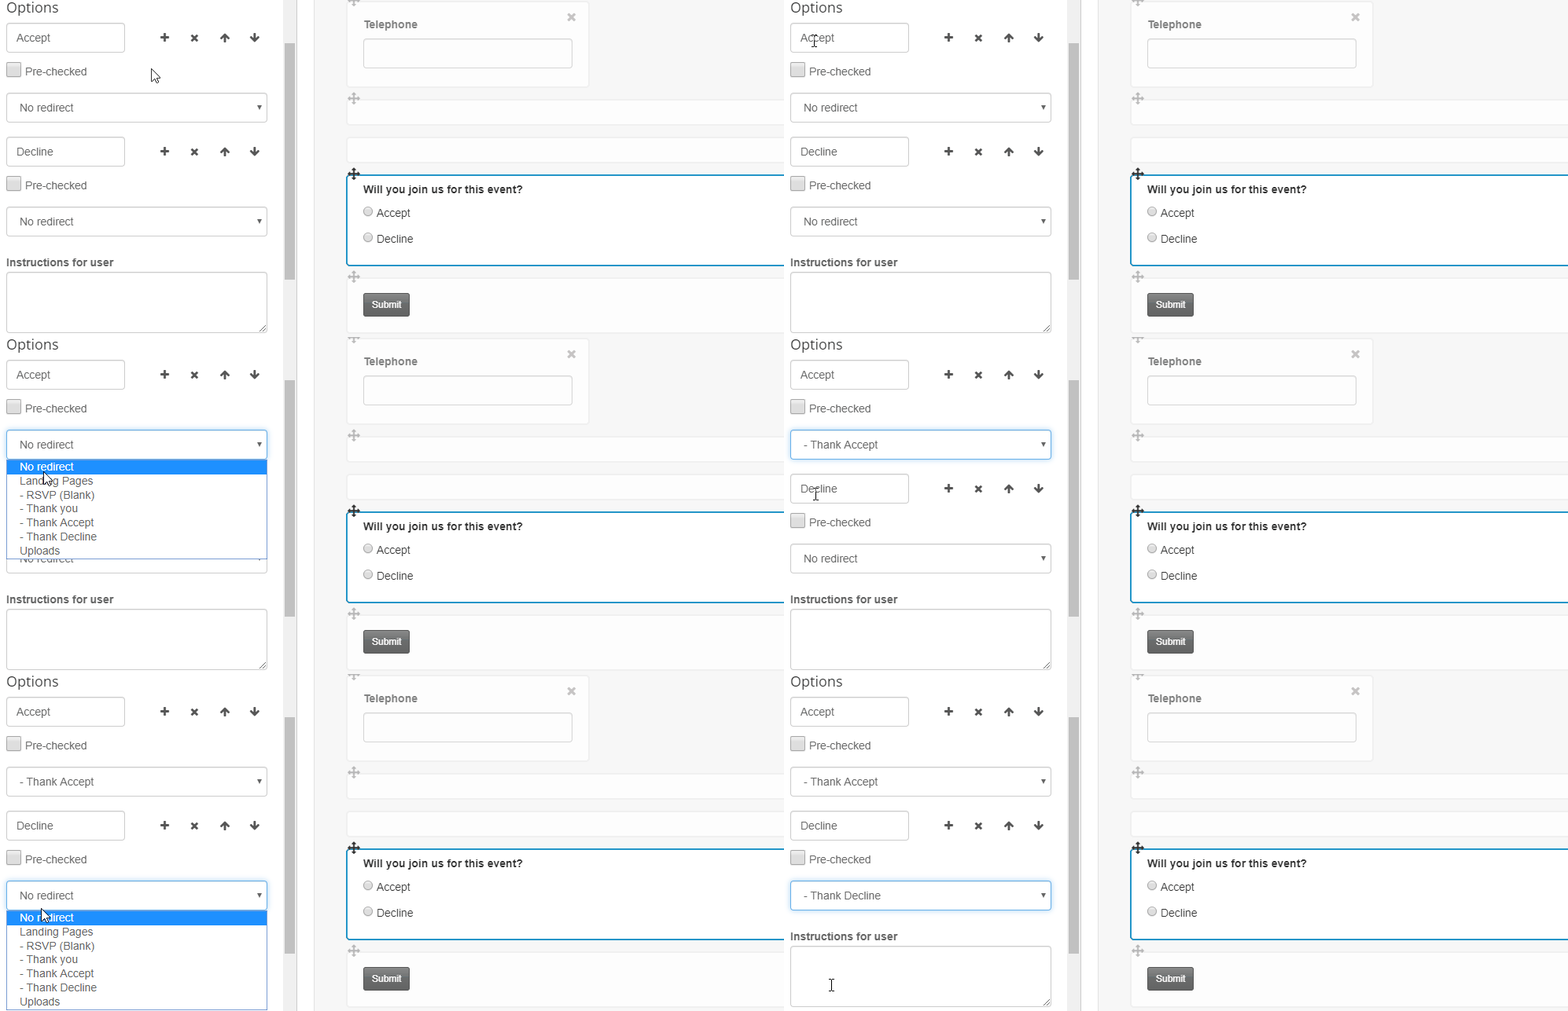
Note: If you do not have a "Thank You Accept" or "Thank You Decline" landing page, you can skip this step and come back to it after you've created them. To create these pages, you can simply copy your "Thank You" landing page twice and rename them to "Thank You Accept" and "Thank You Decline". This way, you could include an "Add to Calendar" link on your Thank You Accept landing page.
Step 4: Click on the Form Settings Tab and scroll down until you see "Form data options". Make sure that this is set to "Pre-fill contact details".
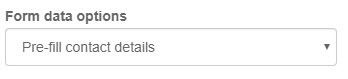
Step 5: Click Save when complete, then publish your RSVP Prefilled landing page.
Edit the link in your RSVP Prefilled form
You might want to give your recipient the option to complete a blank form because they are not on your category.
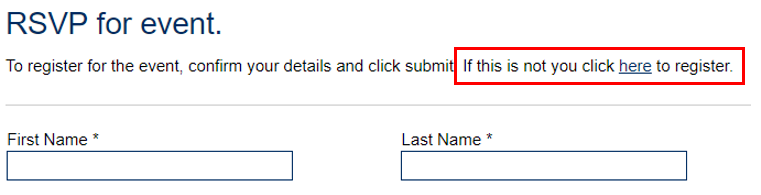
Add a text box with text like ‘If this is not you please click here to register’
- Use the word here as the hyperlink
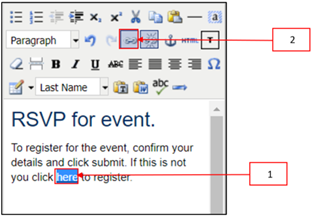
- The Insert/Edit Link window will open
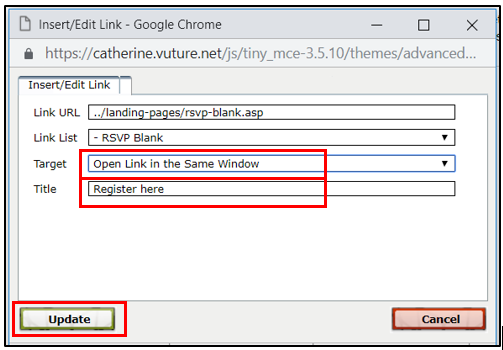
- From the Link List select the RSVP Blank, and edit the Title field to ‘Register here’ or similar
- You may personalise this Landing Page using the Insert field, for First and Last name to say ‘This invitation is meant for {First name} {Last name}, if this not you click here’
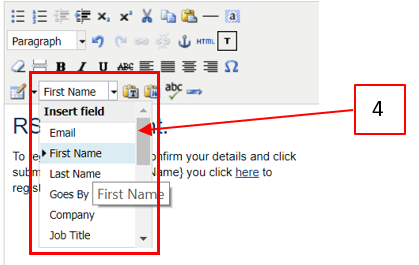
To setup the RSVP Blank form
The Blank Form is disconnected from original contact and is used if the Invitation is forwarded to or shared with another contact. Select the RSVP Blank form under your Landing Pages folder.
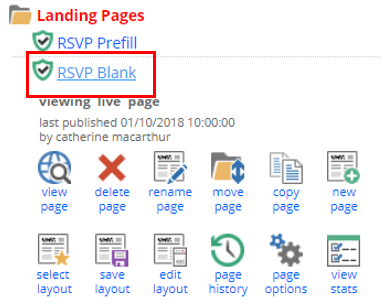
Step 1: Click on the First Name field, place a check mark beside Read only and also select Required, then repeat for the Last Name and Email Address field.
Step 2: We now need to add a RSVP Field.
- Click any field in the form to open the Form Editor.
- Choose Add a field tab and make sure you have the ContactEase instance selected, not Vx. Please note, this may be named differently in your Vuture instance.
- From select list drop-down, select your Category with the RSVP.
-
For example, if your main category is named "Vuture Test List 1" and your sub-category is "RSVP", it should read something like "Vuture Test List 1:RSVP". (see screenshot below for example)
- Then click the "Add Field" button. This will add the RSVP field to the bottom of the form. You may then drag and drop it to place it higher up in the form if necessary.
- We'll want to clean this up to make it a bit more friendly for your contacts.
- First, click into the newly added RSVP field to make edits.
- Then, change the Field label to something more friendly, "RSVP" or "Will you join us for this event?".
-
Before:
-
After:
- Next, check the box for "Required?" to make this field required to submit the RSVP form.
- Under "Options", we want to change these RSVP options into something more friendly, too.
- For the Accept: You could change this to "Accept" or "I accept", or "Yes".
- For Decline: You could change this to "Decline" or "I regretfully decline", or "No".
- Still under "Options", we want to set our "Redirect" pages for the "Accept" and "Decline" option. This will show the correct landing page depending on how someone responded to your RSVP field.
- For example, if someone Accepts, we want to redirect them to the "Thank you Accept" landing page. Please select this one in the drop-down.
- If someone Declines, we want to redirect them to the "Thank you Decline" landing page. Please select this one in the drop-down.
Note: If you do not have a "Thank You Accept" or "Thank You Decline" landing page, you can skip this step and come back to it after you've created them. To create these pages, you can simply copy your "Thank You" landing page twice and rename them to "Thank You Accept" and "Thank You Decline". This way, you could include an "Add to Calendar" link on your Thank You Accept landing page.
Step 4: Click on the Form Settings Tab and scroll down until you see "Form data options". Make sure that this is set to "Blank form, disconnect from contact".
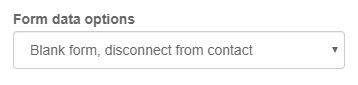
Step 5: Click Save when complete, then publish your RSVP Prefilled landing page.
Create iCal
Follow the steps here to create an iCal with the details of your event.
Setup the Thank you pages
You'll want to make sure your Thank You Pages, “Thank you Accept” and “Thank You Decline”, are relevant to this event and include your iCalendar file.
- Under Landing Pages, click the default Thank you Accept Landing page
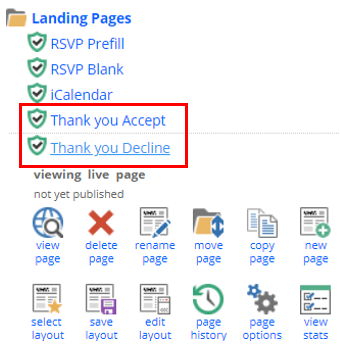
- In the Text Editor update the content to provide details about the event and hyperlink to the iCalendar
- Repeat the previous steps to create a second page called Thank you – Decline, updating the content to reflect their declining the event
-
Publish both pages
Testing the process
Hyperlinks check
To ensure all hyperlinks are working and you email is not going to be stopped due to broken hyperlinks it is recommend checking all emails and landing pages.
- Click the email check email button

- Any links with issues will have a red X beside them and need investigating.
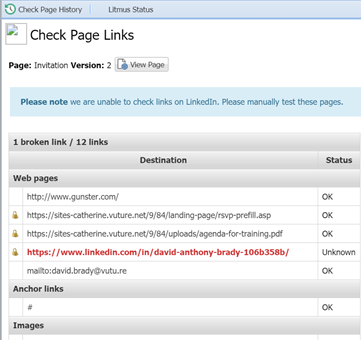
Note: Vuture is unable to check links for LinkedIn. However, these can be manually checked by clicking the hyperlink to test it does indeed to go the correct LinkedIn page.
Testing and sending
Before sending out the newsletter or invitation you should always send a test to yourself and a few colleagues internally. Please follow instructions here on how to test. Then follow these steps to send your final email.
Go back: Getting started - editing your email
Need more information on using forms with ContactEase?
