Introduction
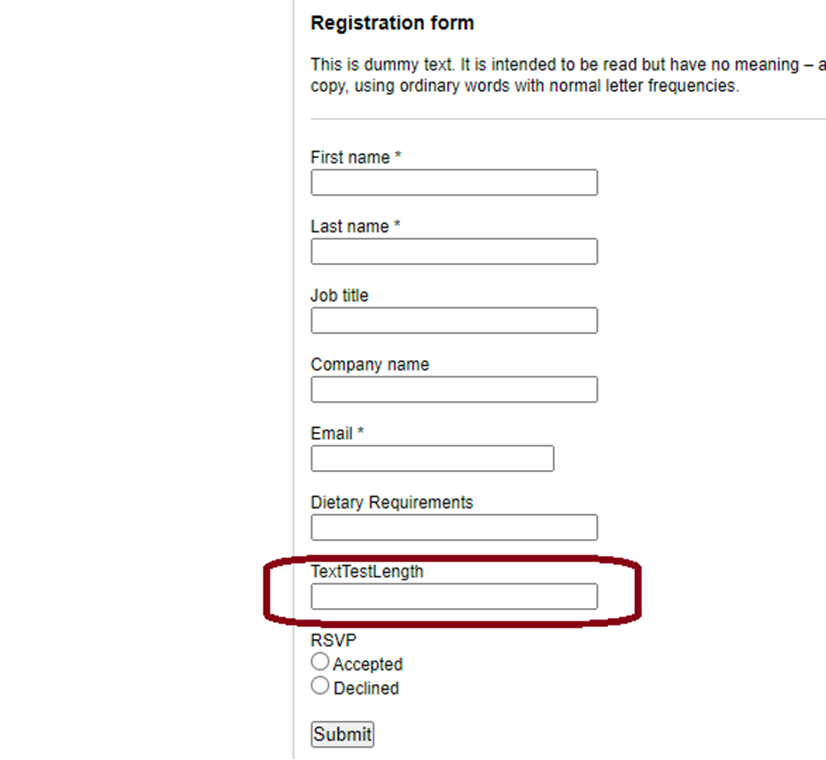
It is sometimes useful to add an additional field to the Invitee object to assist in tracking an event. Once Vuture has linked these fields via the CRM Metadata Manager, they can then be pulled onto Vuture forms and used as part of the RSVP process. The data in these linked fields, as submitted via the Vuture form, will write back to the CRM.
Prerequisite
To add a custom field to the Invitee object the client user will need to have Admin access for Intapp. If the client user does not have Admin access for their CRM they will need to ask Intapp for help.
Step by Step
1. In Intapp, click the arrow to the right of “Admin” - “Object Management”
2. Find “Invitee” and click the pencil as shown below:
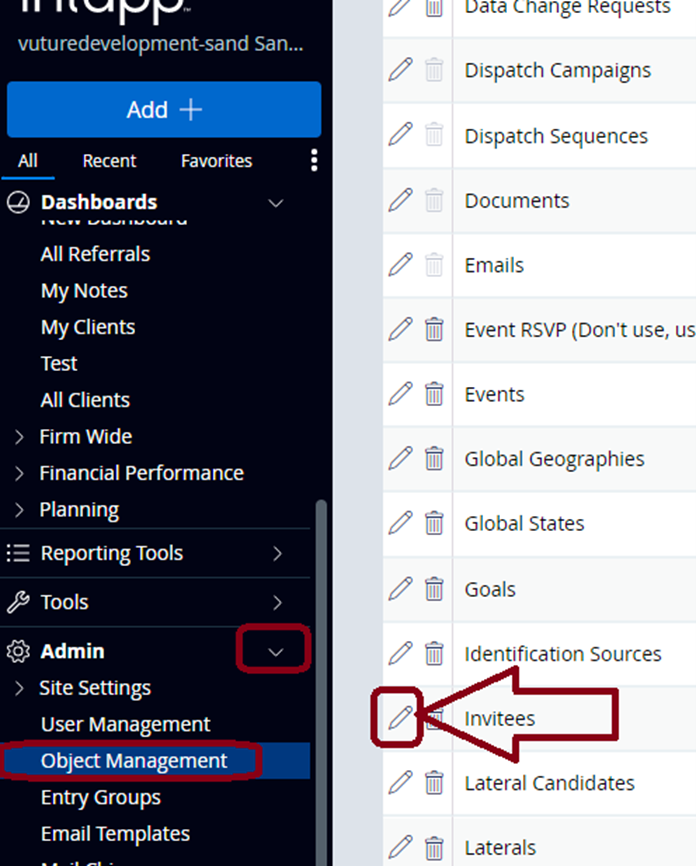
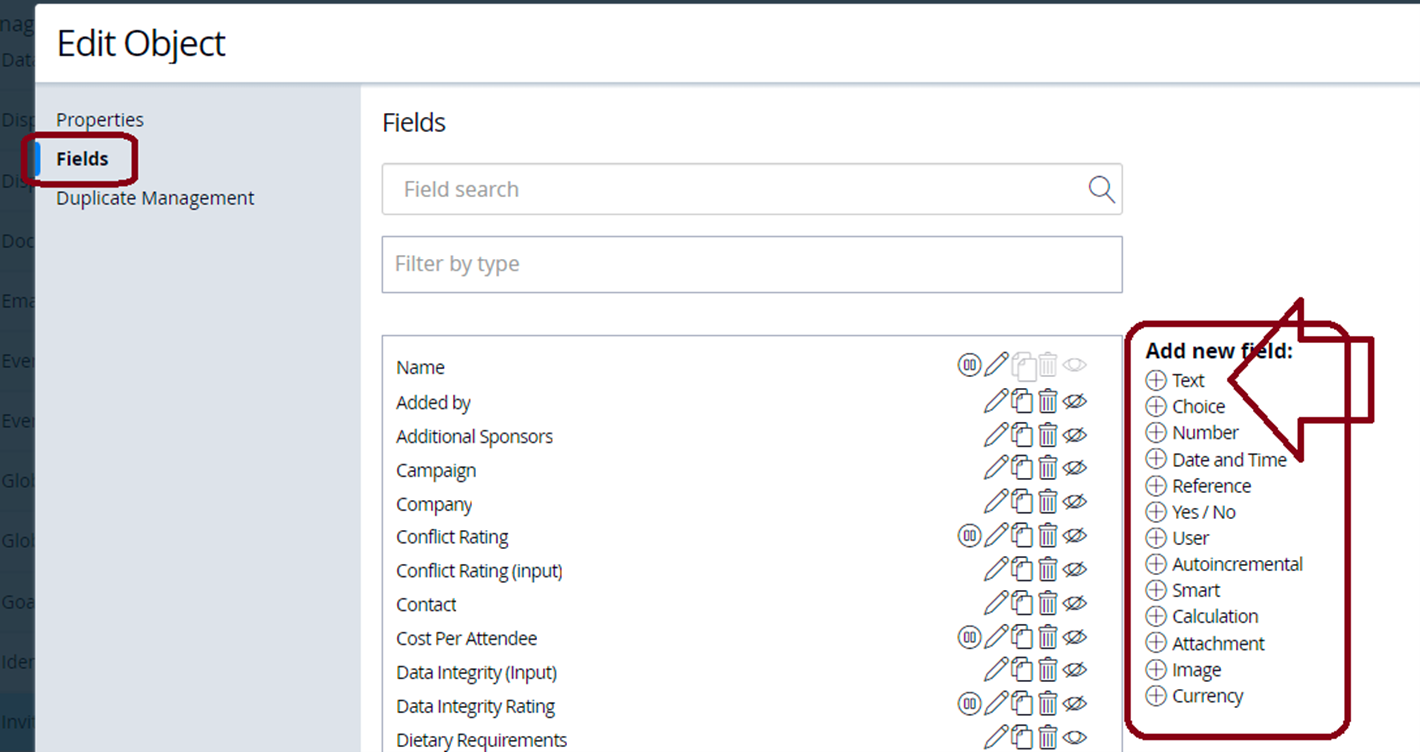
3. Click “Fields” then “Add new field” by clicking the plus sign next to the Data Type required (for example, Text).
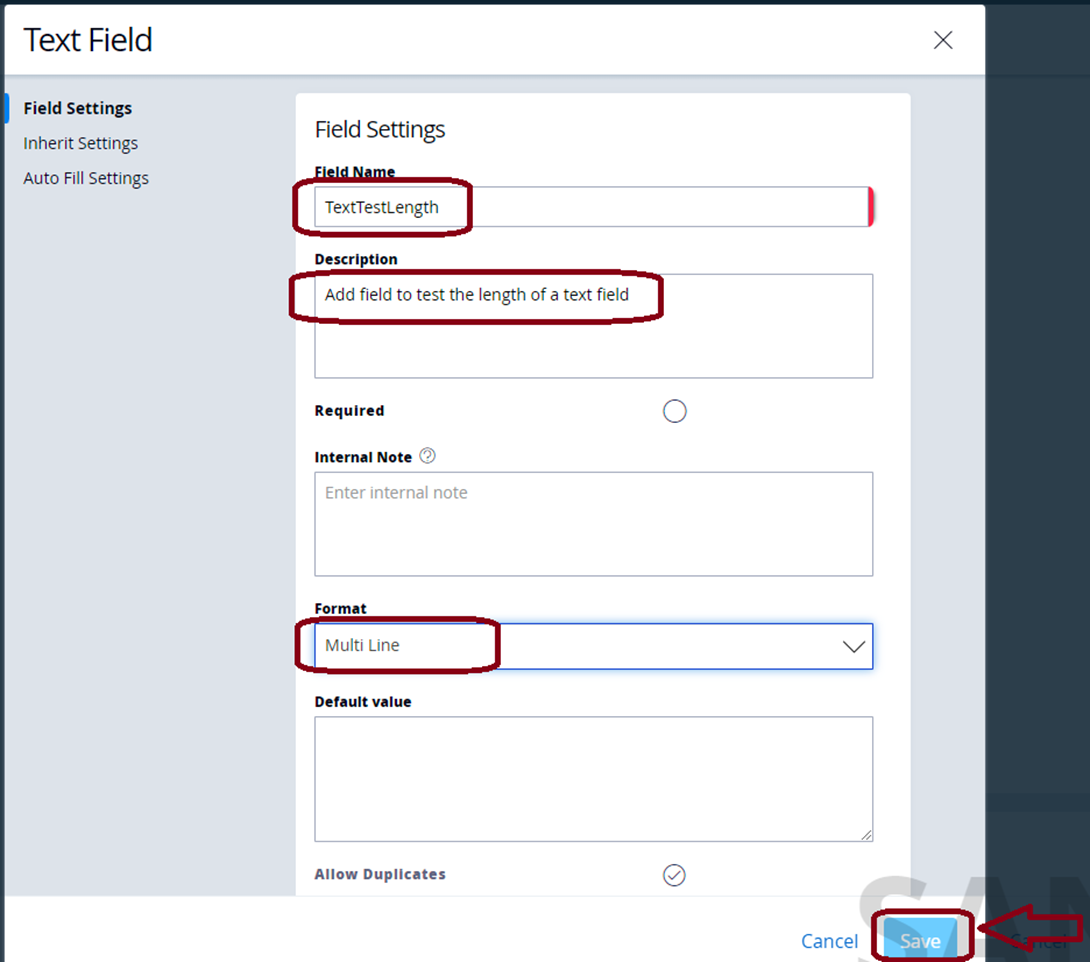
4. Enter the requested details as shown and click “Save”
Field Name should be unique if possible.
Description will be a description of the data expected in that field. (Do not use the test data shown in this image)
Multi Line will warn the CRM to expect more than one value. If you make the field Multi Line here, you will be able to make it Multi value on the Vuture form later.
5. Please ask Intapp how you can add the new field to the Event/Invitee screen as shown below:
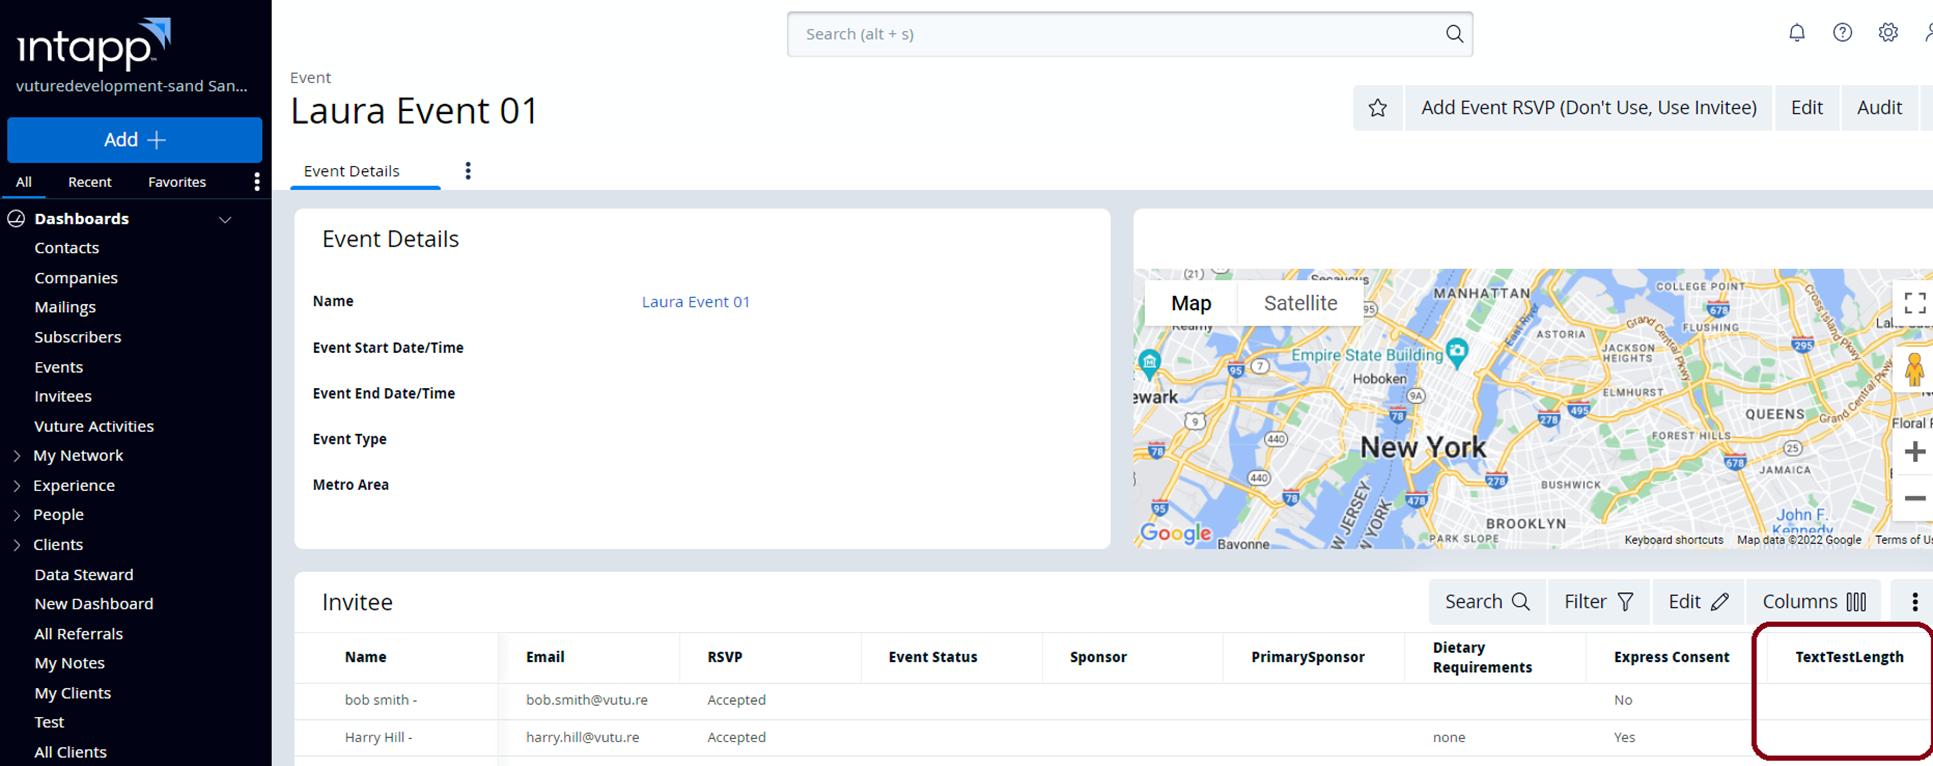
6. Once the field has been added in Intapp Vuture will map the new field using CRM Metadata Manager. Please raise a support ticket to request this, detailing the Invitee Object and the new field name (e.g. TextTestLength in this example below).

7. In Vuture, go to your campaign and the Landing Pages/Forms folder. Open a Form in Form Editor; you will see the new field in the Invitee dropdown list:
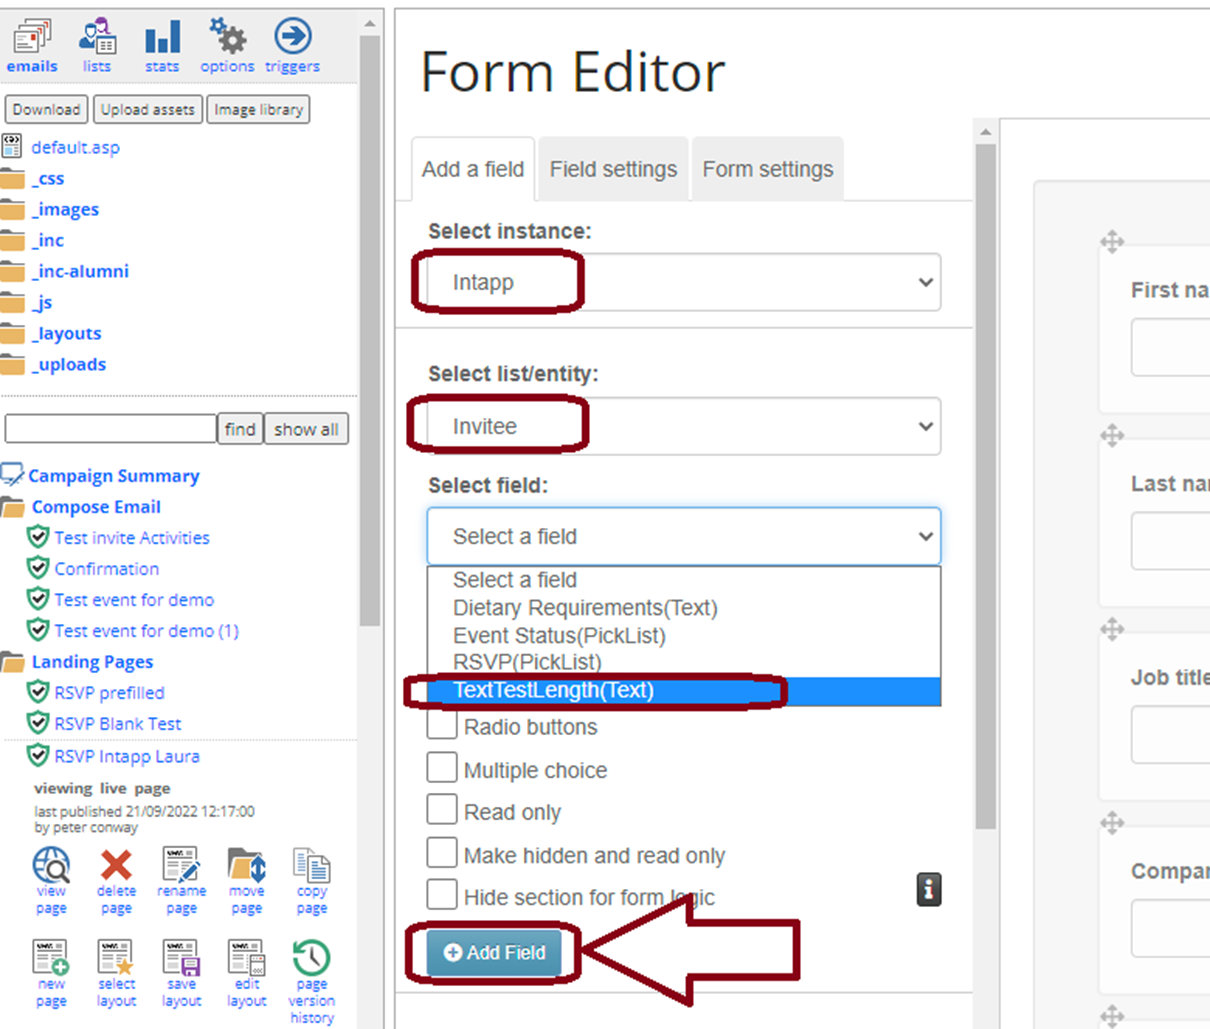
8. Click “Add Field”
When you publish the form you will see the new field (for example; TestTextLength)