*** For InterAction, ContactEase, OnePlace, Salesforce, and Dynamics.
Overview
Form Notifications (also called Notification Template) are a special type of email, attached to a Vuture Form, which will be sent automatically to the contact as soon as they click on Submit. By applying conditions (like filters), the email will be sent only to those contacts who fulfil a condition such as RSVP is Accept. This email acts as a more permanent record of their registration than a Thank you landing page which will disappear once closed.
Once sent, the notification email will not move over to the sent folder. They sit in the Compose Email folder with a different content type which lets Vuture know not to move them, and are therefore available to be sent out again and again as different contacts submit the form to which they are attached.
Contents
Creating the Notification email (Notification Template)
Always build your main Invitation email first. Get all the details correct and the design approved internally before you then make a copy of it to use as your notification template using the Copy Email icon.
Notification emails sit in the Compose Email folder with a different “content type” (Metadata) that instructs Vuture that the Confirmation email is a notification template. This template can be attached to a form and sent out automatically. It is generated by the contact submitting a form.
- In the Invitation email click copy email.
- Rename the email “Booking confirmation” (or similar).
- Edit the layout to remove the call to action RSVP button.
- Amend the text to reflect that it is a booking confirmation,
for example, “Your booking is confirmed” or "Thank you for registering" instead of “You are invited”.
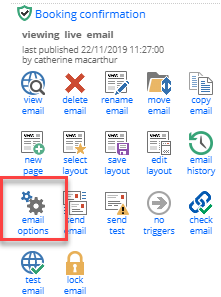
- Click the email option button.
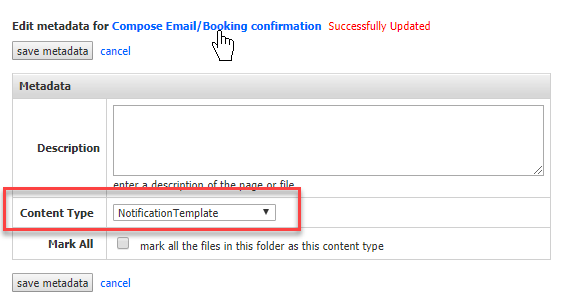
- Change the content type to Notification Template and click save metadata.
A Successfully Updated message will appear near the top of the screen.
- Click the email to return to the email view.
Now the Notification has been created Vuture needs to know when to send it out. This is done in the Form Editor of the RSVP Landing page, so when the recipient clicks Submit the email is sent to them automatically.
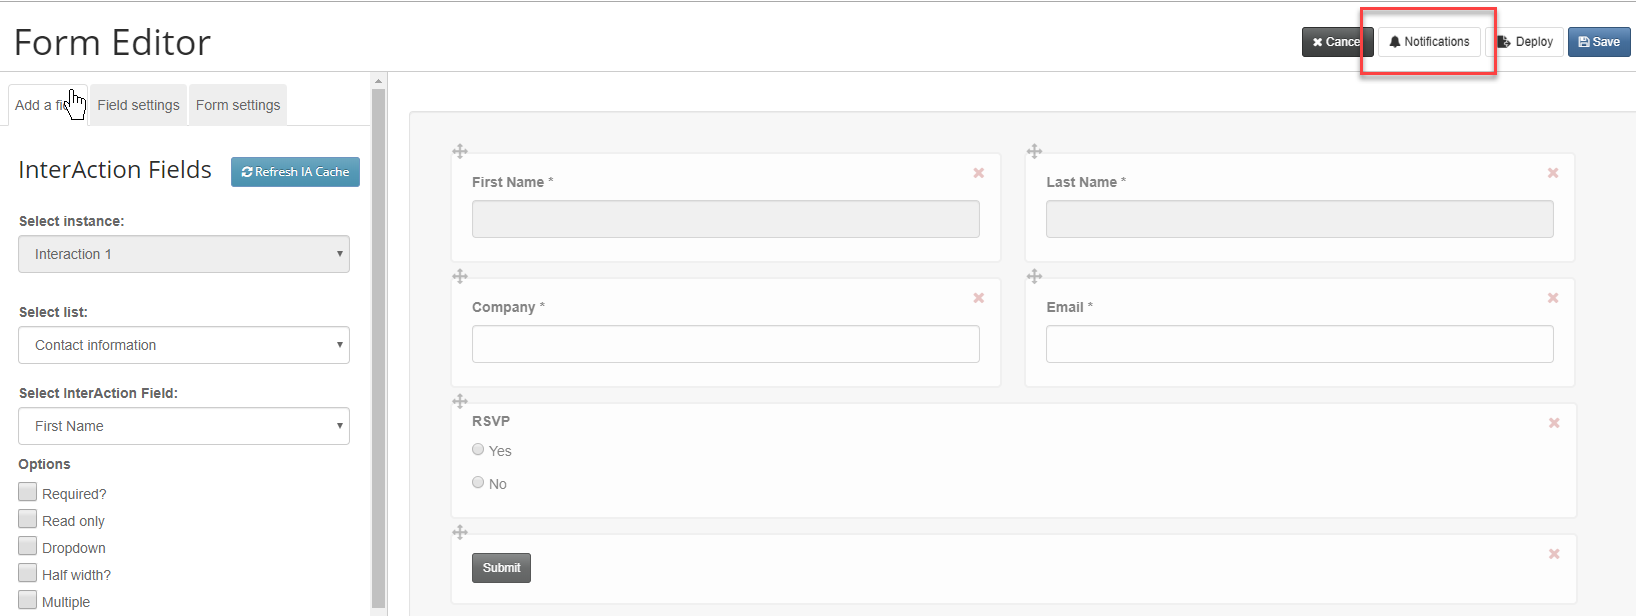
- In the RSVP form click into any form box to access the Form Editor.
- Click the Notifications button in the top right-hand corner.
- In the Notifications window click Add Notification.

-
Description: Type a description for the Notification, for example Booking confirmation or Registration confirmation.
-
Email Notification: Select the email template already saved as a notification template from the drop-down list. Emails that have not had their metadata content type saved as Notification Template will not be displayed in this list.
-
From: This must be a valid email address. The email address you want the notification to come from. It will often be the same email as sent the original invitation. You can now lock this section down so that only approved email addresses can be used here. Ask your Account Manager for more details.
-
Subject: Type the subject of the notification email, for example Event (+ date) Confirmation.
Note: Campaign variables can be used in the Subject line of the Notification email for example 'Booking confirmation for {{Event name}} on {{Date}}.
To learn more about Campaign Variables click here.
-
To: This field displays “Form Submitter” automatically to send the notification to the submitter of the form and but you can add further addresses here if you wish, separated by a comma.
Note: your form must have an email address field to use Form Submitter.
Now a Condition must be added for when the Notification should be sent.
- At the lower section of the Notifications window click Add Condition.

-
Form field: Select a field from the drop-down list, for example RSVP.
-
Operator: Choose the comparison you want to use between the form field and the value field. This will typically be Is.
-
Value: The value to compare the form field to. This will typically be Yes or Accepted.
- Once you have added the condition you can click Done and Publish the page.
When a respondent accepts an invitation, for example, the Notification email will automatically be sent to them.
