Overview
This Help Desk Article is meant to give you a good understanding of how the 'Unsubscribe from email type' works. It will also outline what you'll need to provide your Project Manager or Account Manager to set this up for you.
Contents
How does the 'Unsubscribe from email type' work?
Most emails can be categorized by type (i.e. Newsletter, Invitations, Holiday Cards, etc.). With this in mind, you could offer your contacts to unsubscribe from a specific type of email, rather than unsubscribing from all marketing email communications.
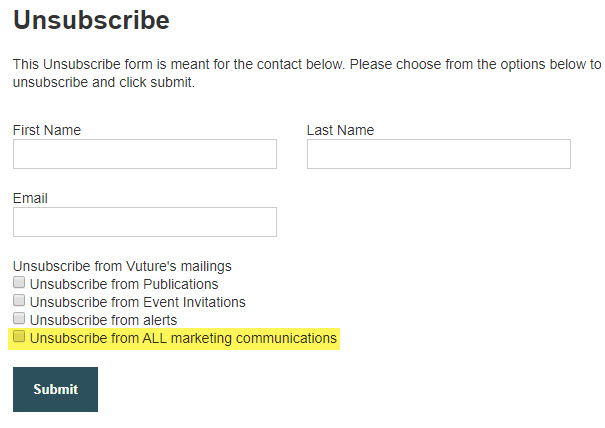
Please see an example of how this will look on your Unsubscribe Form:
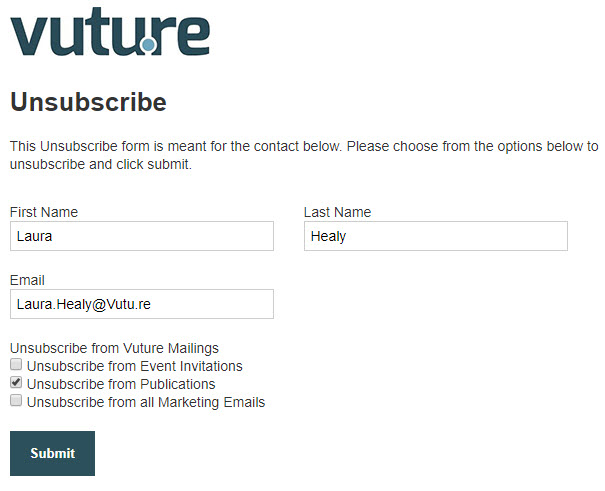
Best Practice Tip: Use read-only IA fields for First Name, Last Name, and Email to make it clear who this Unsubscribe form is intended for - in case of forwarding.
If a contact were to select 'Unsubscribe from Publications' then click submit, they would be added into a '*Send No Publications' Folder in InterAction.
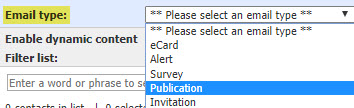
Afterwards, if that contact were to end up on a Publications Marketing List, and you select the email type of "Publication" on the Send Screen (See screenshot below), the contact would be suppressed from that mailing.
Requirements for setup
You will need to complete the following:
- Define your email types (i.e. Newsletters, Invitations, Holiday Cards, etc.) that will appear in the "Email Type" section of the Send Screen.
- If you already have these setup, you can move on to the next step.
- Create a corresponding InterAction Folder for each email type. This will need to be in the format of "*Send No {Email Type Name}.
- For example, if your email type is 'Publication' your InterAction Folder would be named '*Send No Publications'
- Take note of the 10-digit InterAction Folder ID # for each folder you create.
-
Optional - If you'd like an activity to be written back for when a contact unsubscribes from that specific email type, you can also create an activity (i.e. Publication Unsubscribed). Take note of the InterAction Activity ID #.
You will need to then provide your current Project Manager or Account Manager with the following:
- The name of each email type
- The corresponding Folder Name
- The corresponding Folder ID
- (optional) The corresponding Activity ID
Feel free to use the below table to provide this information to us. The first row is completed as an example.
| Email Type | Folder Name | Folder ID (10 digits) | Activity ID |
| Publication | *Send No Publications | 1234567890 | 12345 |
| | | | |
| | | | |
Your Project Manager or Account Manager will find instructions on how to set this up on the backend here.
Once the Project Manager or Account Manager has set this up for you on the backend of Vuture, it will be time to update your Unsubscribe Form.
How to set up your Unsubscribe Form for this process
You can set this up yourself if you have access to Global Forms, or ask your current Project Manager or Account Manager to help you.
Please follow the below steps for adding the 'Unsubscribe from email types' to your Unsubscribe Form.
1. Navigate to your Global Forms campaign. This is typically located in your Global Forms container.
2. Click on your Unsubscribe form in the Landing Pages folder. Then click into the form itself to get to the Form Editor Screen.
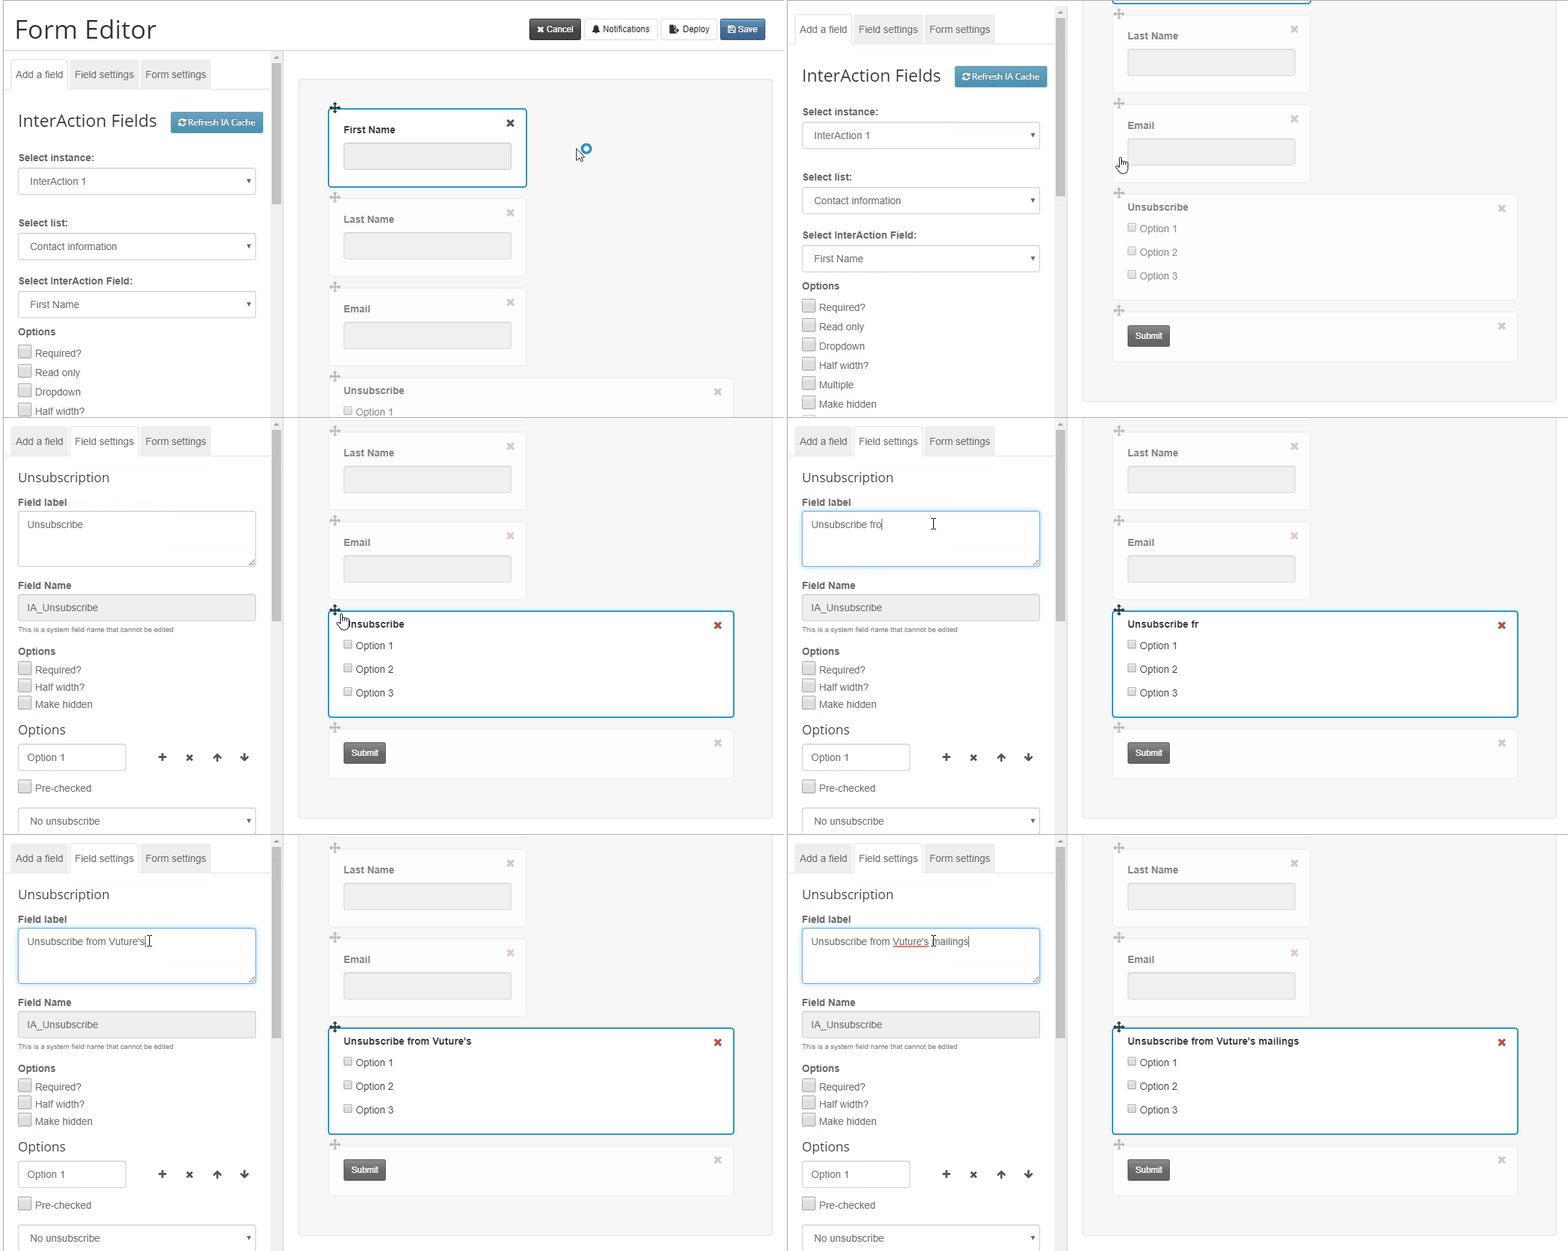
3. Most clients should already have an 'Unsubscribe Field' with the option to 'Unsubscribe from all Marketing Emails'. However, if you are setting up a new form, you'll need to add an 'Unsubscribe Field' by making sure you are on the 'Add a field' tab and scrolling all the way to the bottom until you see 'Interaction' > 'Unsubscribe options'. Click on 'Unsubscribe options' to add this new field to your form. See animated GIF below.
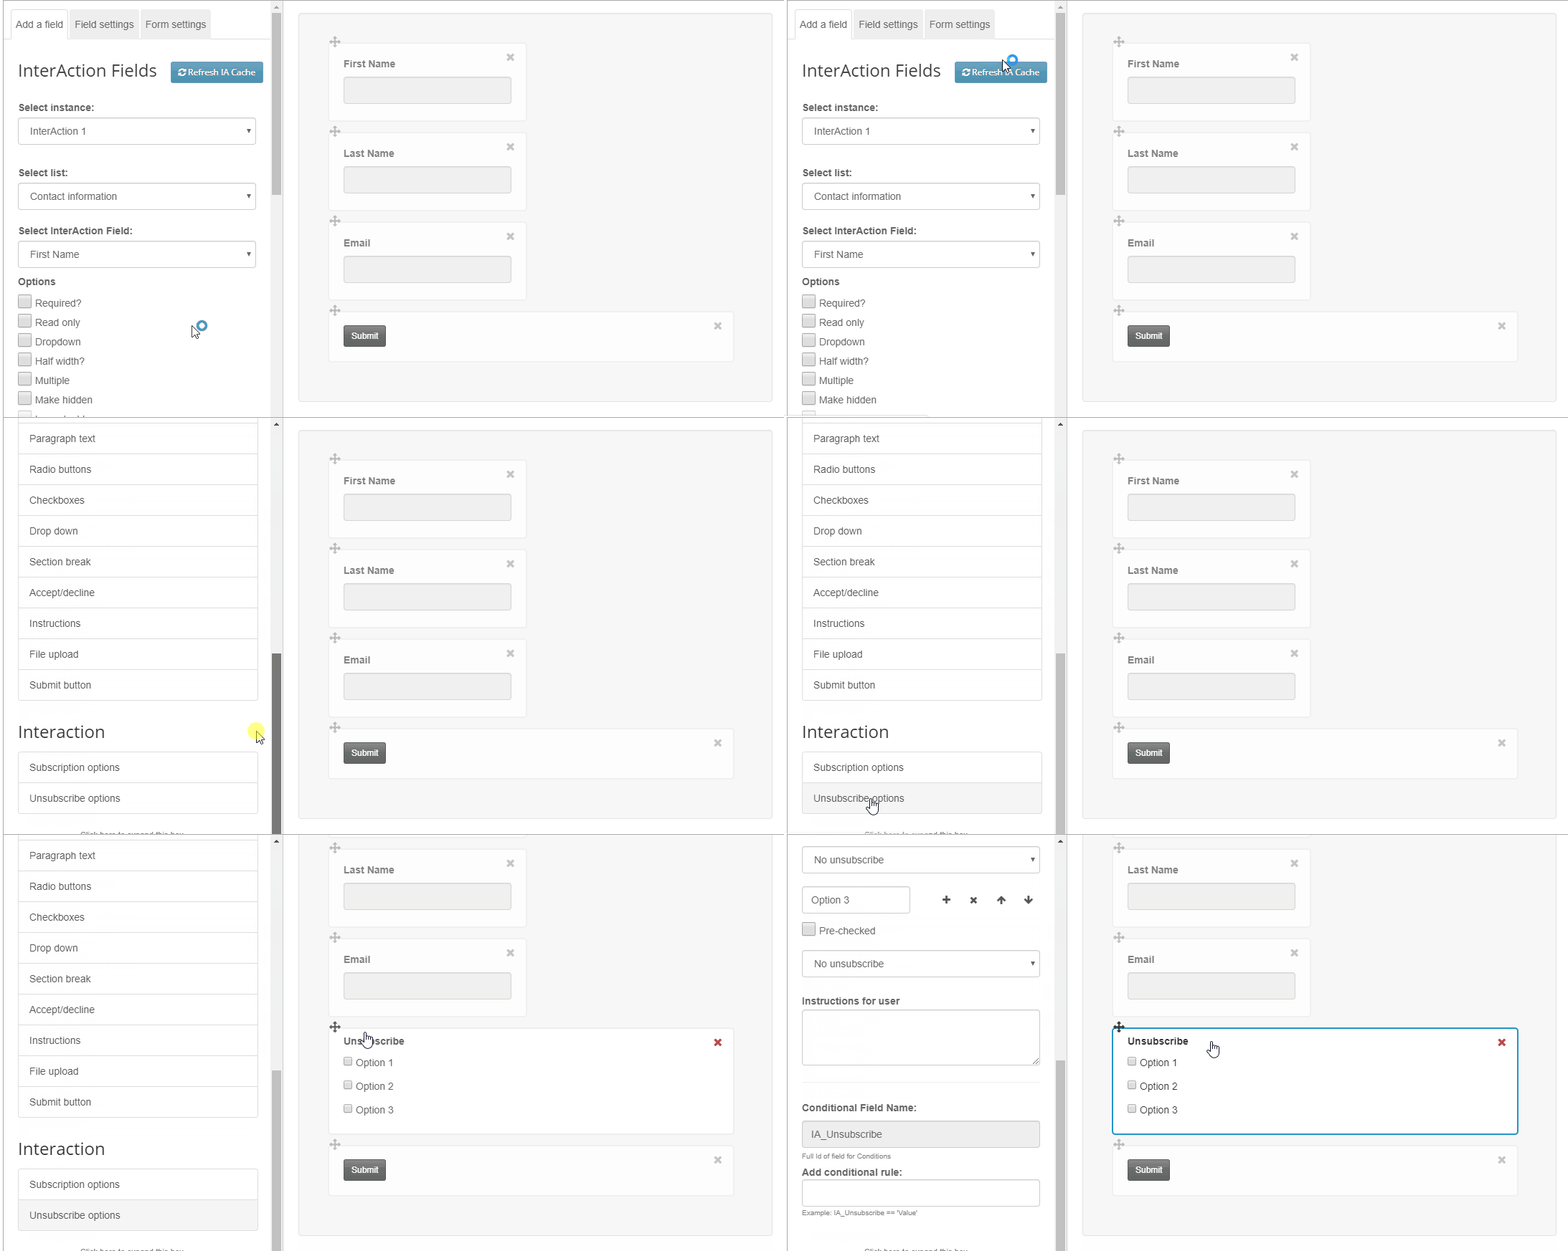
4. If you already have the 'Unsubscribe field' added to your Unsubscribe form, skip to step 6. Otherwise, click into your Unsubscribe field. You can change the 'Field label' from "Unsubscribe" to something like "Unsubscribe from [Company Name] Mailings". See animated GIF below.
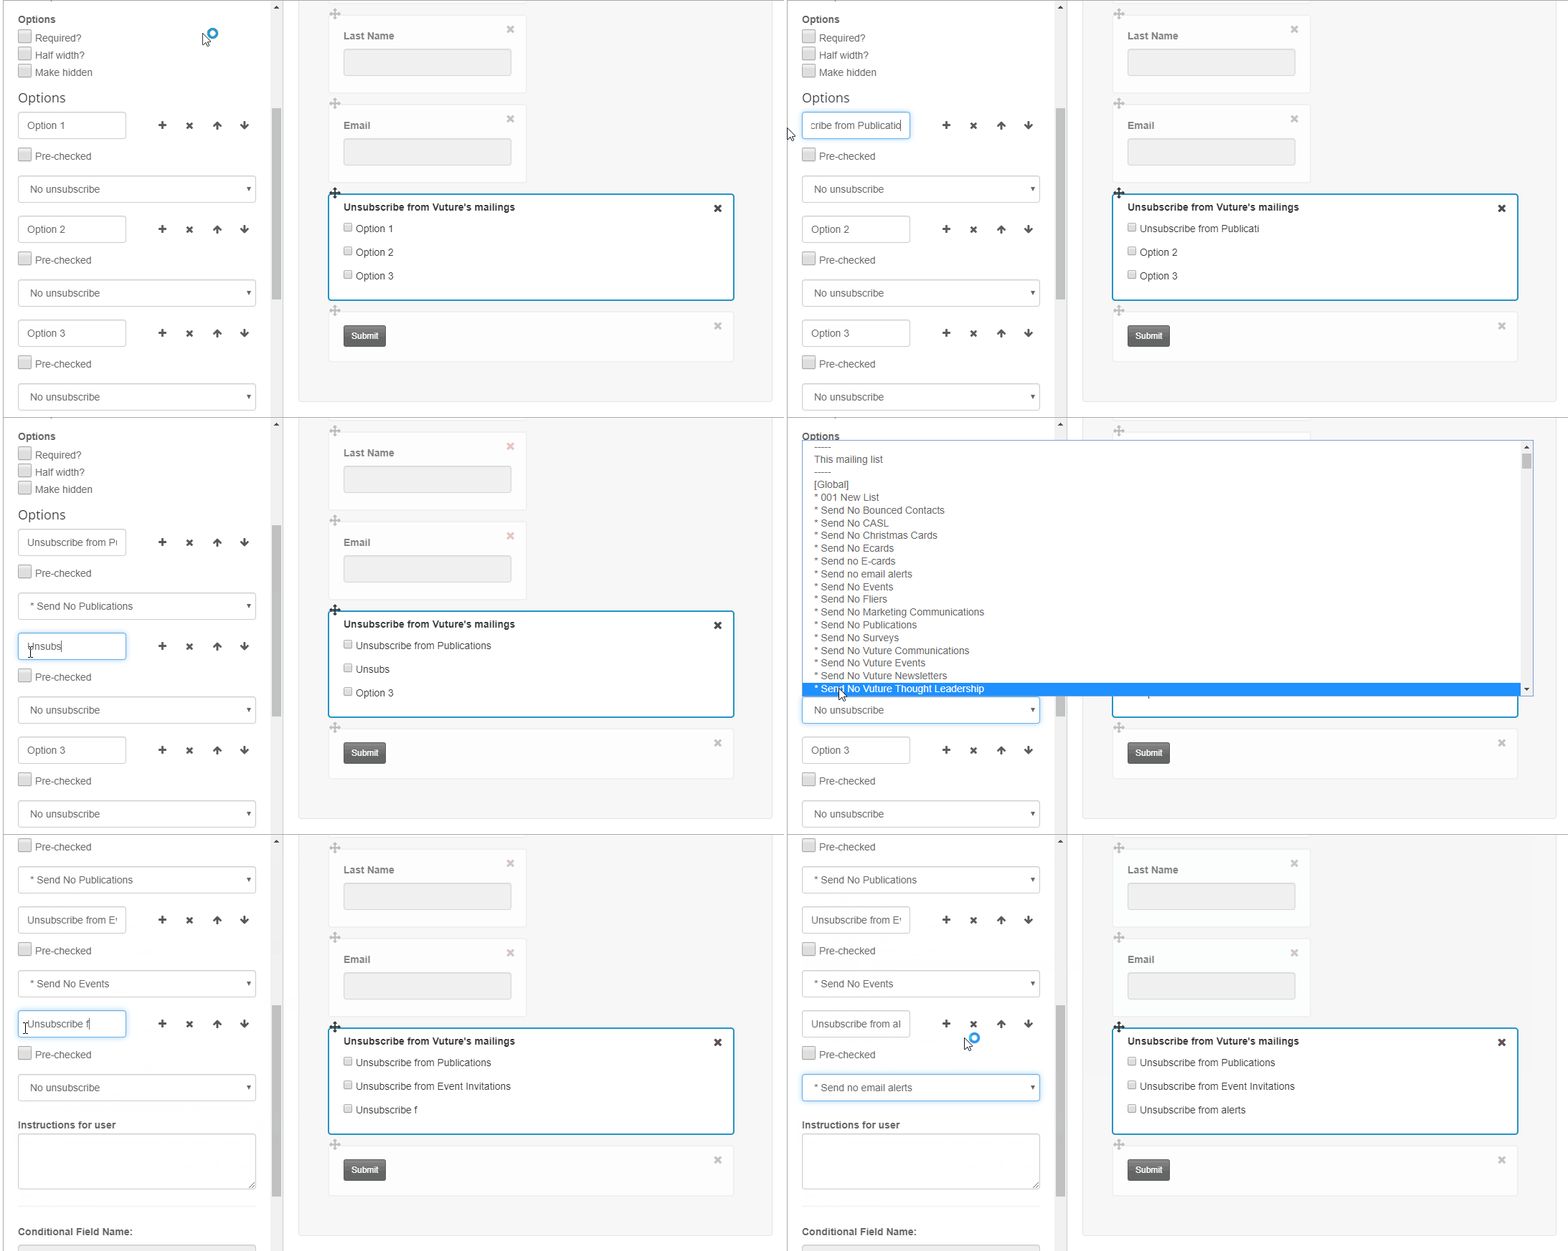
5. To add the 'Unsubscribe from email type' options, click into "Option 1" and rename it as "Unsubscribe from [Email Type Name]" (for example: "Unsubscribe from Publications"). Then, choose the '*Send No' Marketing List you created for this email type in the InterAction drop-down (i.e. '*Send No Publications'). Repeat for each 'email type' for Options 1-3. See animated GIF below.
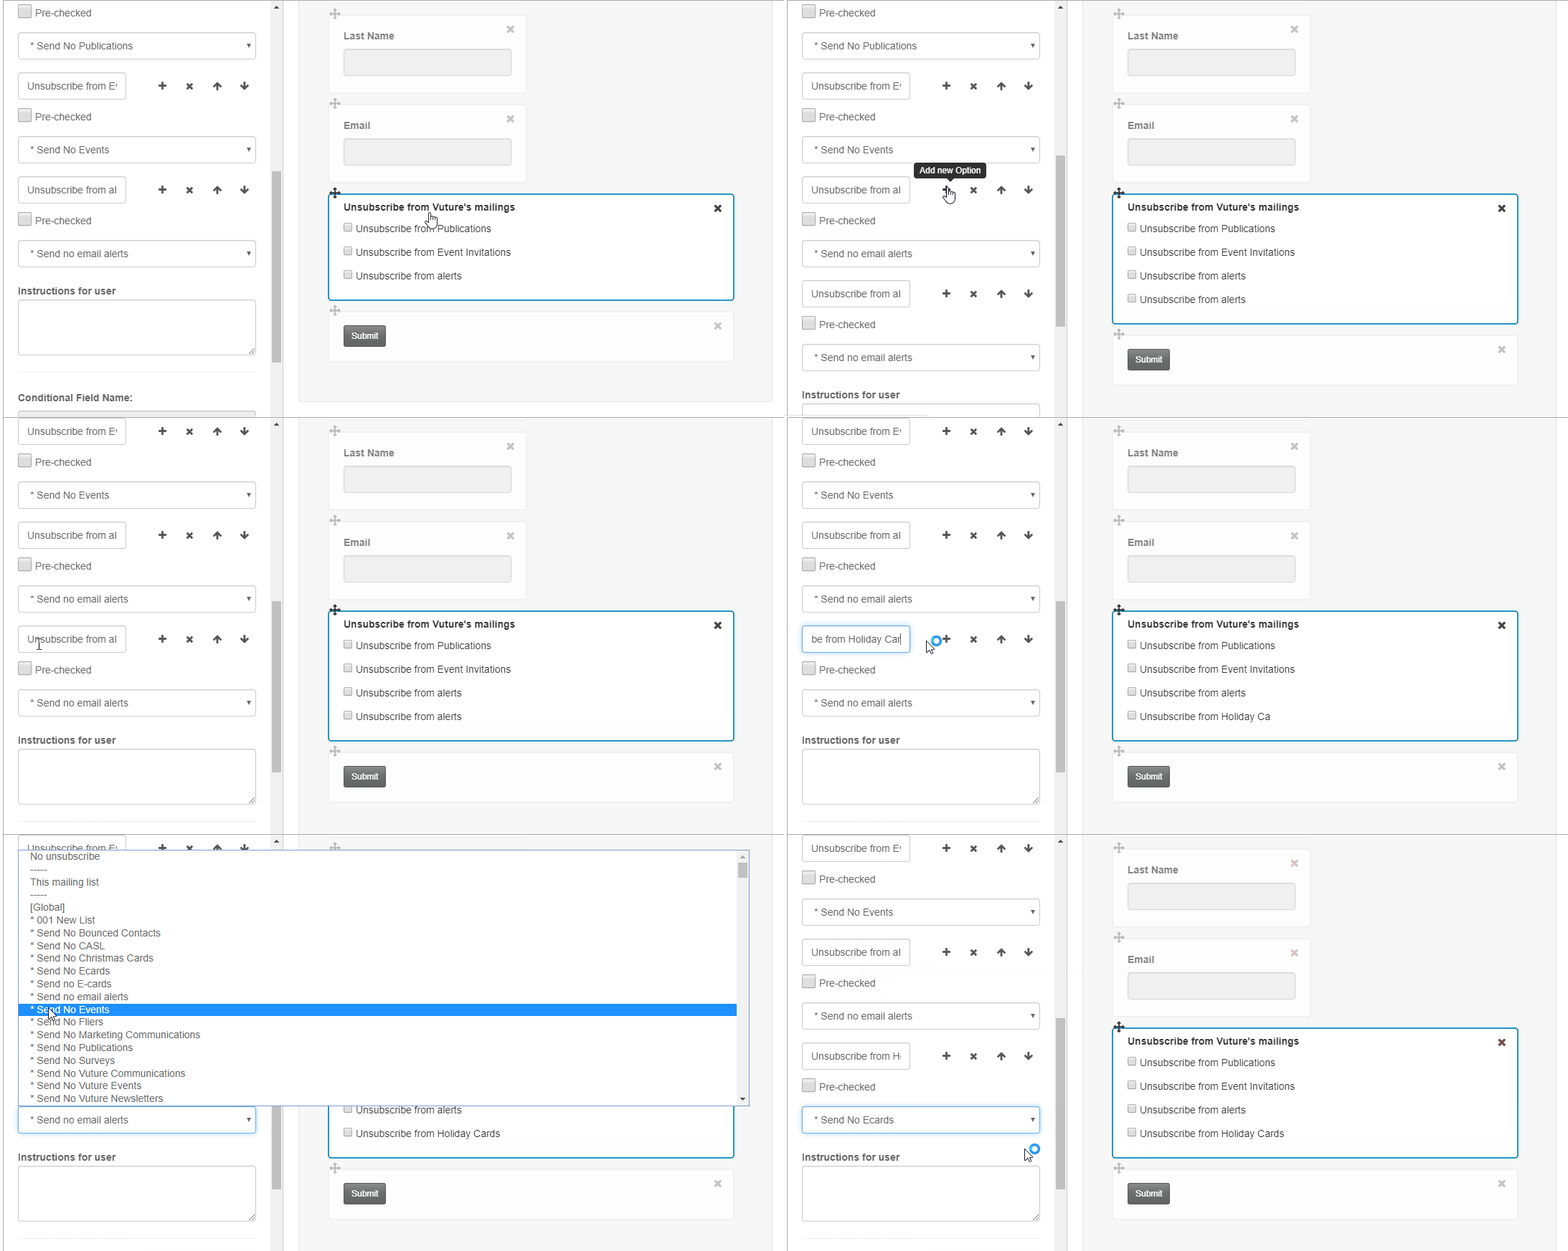
6. To add more then three 'Unsubscribe from [email type]' options, click on the '+' icon to make a copy of that 'Unsubscribe from [email type]'. Then rename it as a new "Unsubscribe from [Email Type Name]" (i.e. "Unsubscribe from Publications"). Choose the '*Send No' Marketing List you created for this email type in the InterAction drop-down (i.e. '*Send No Publications'). See animated GIF below.
7. To remove an 'Unsubscribe from [email type]' option, simply click the 'x' icon. See animated GIF below.
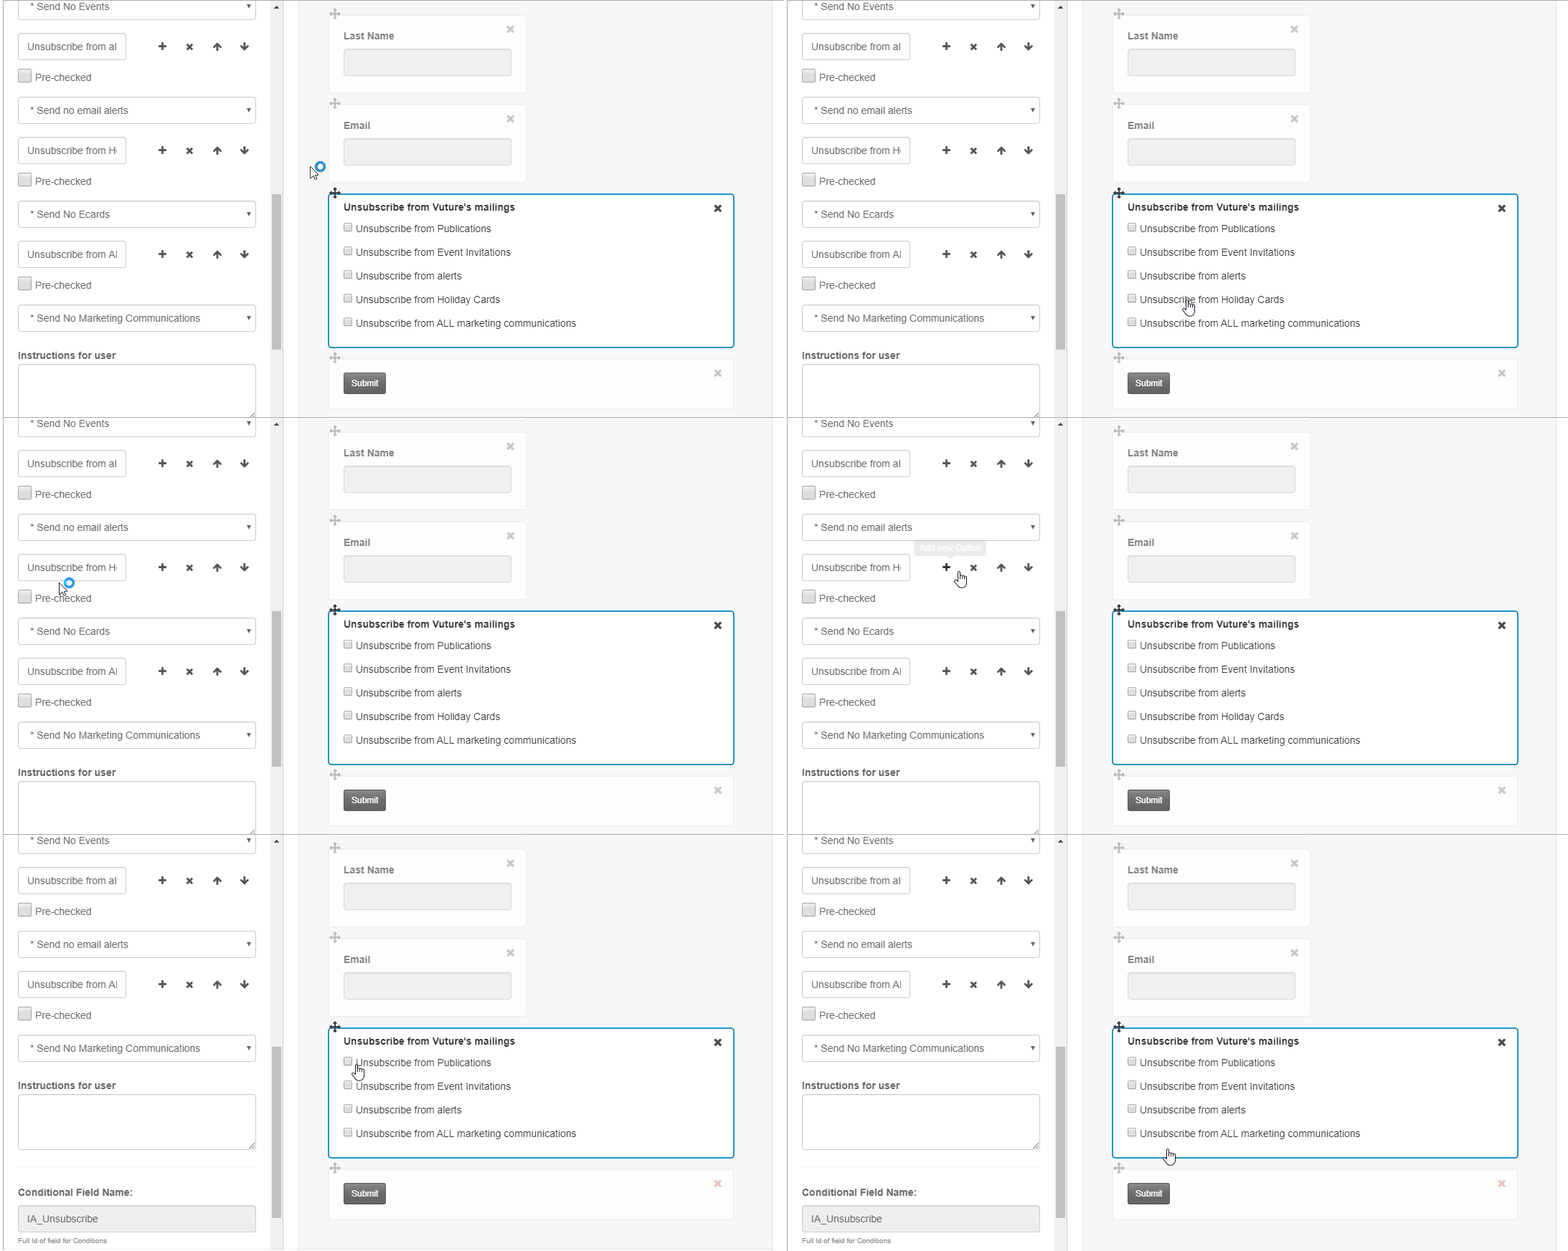
8. Important - If you do not have an 'Unsubscribe from all email communications' option, please ask your current Project Manager or Account Manager for help. (See screenshot below for reference)
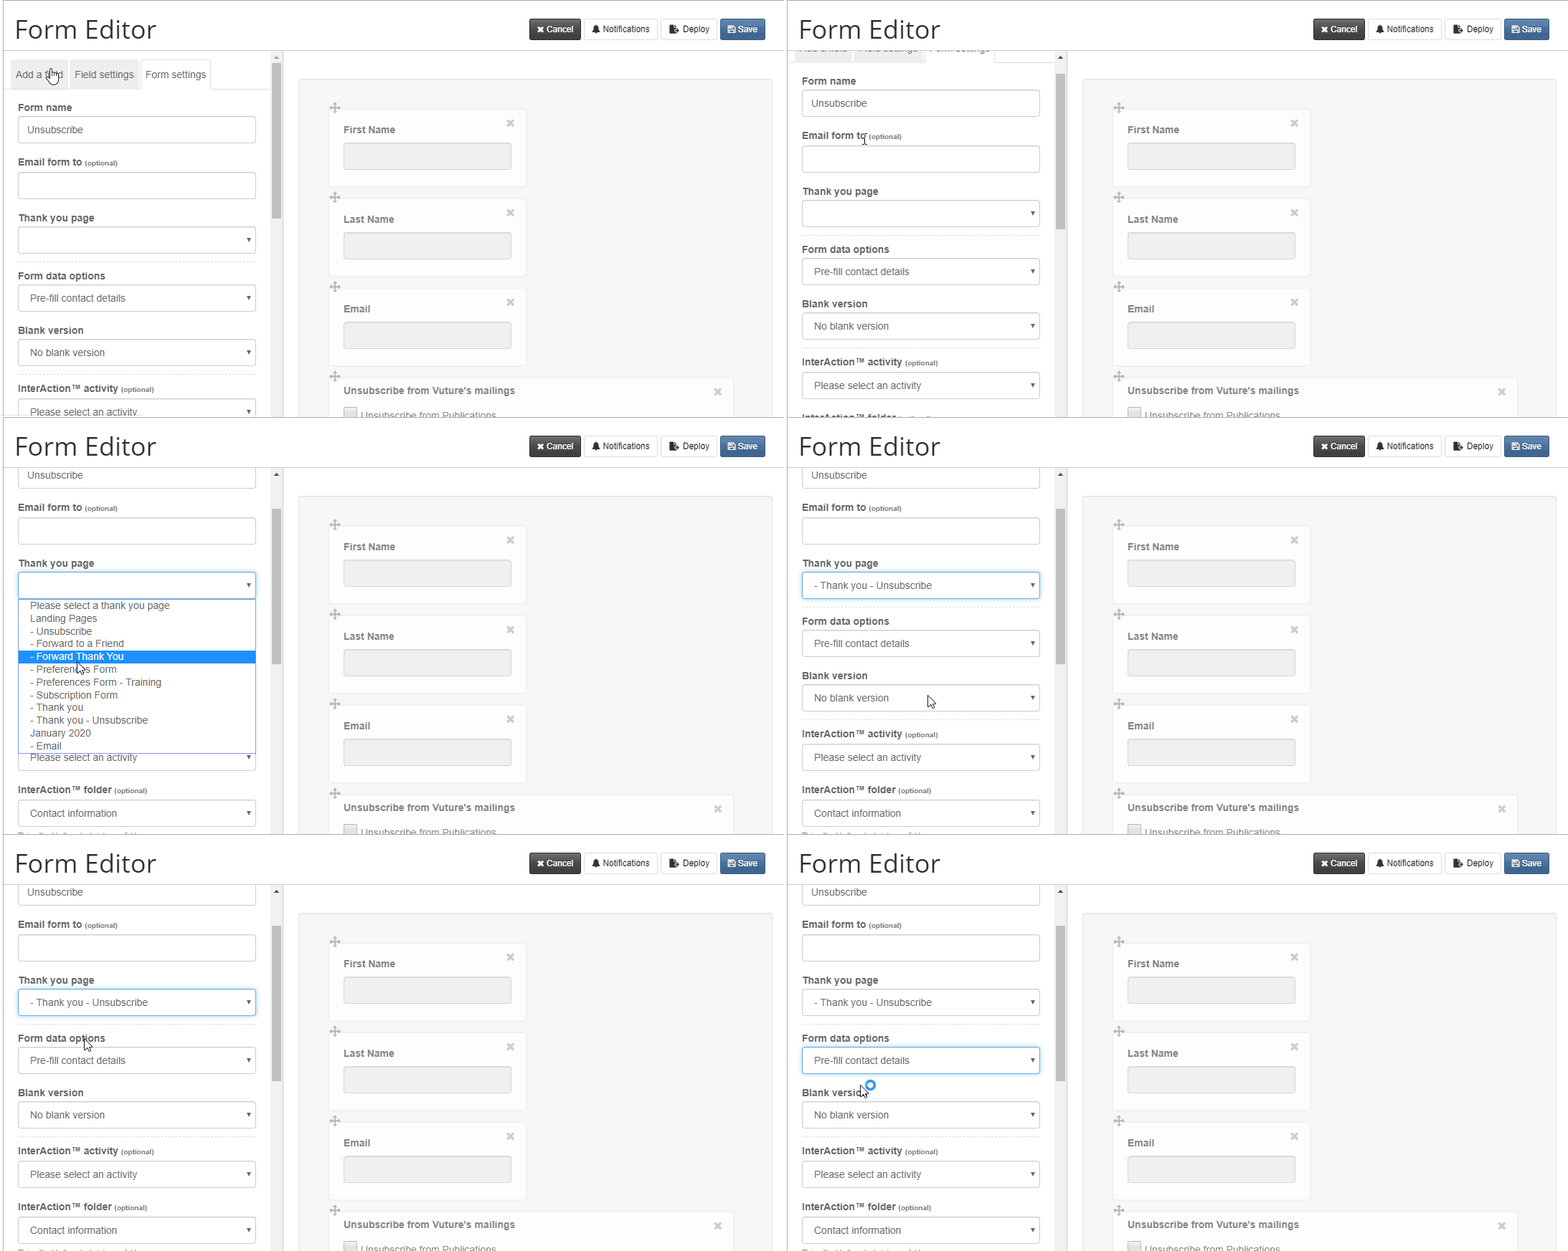
9. Once you're finished adding your 'Unsubscribe from [email type]' options, please confirm the following is setup in your Form Settings Tab:

- Make sure a 'Thank You Page' is set for the contact to see upon submitting the form.
- Make sure your form is set to 'Pre-fill contact details'
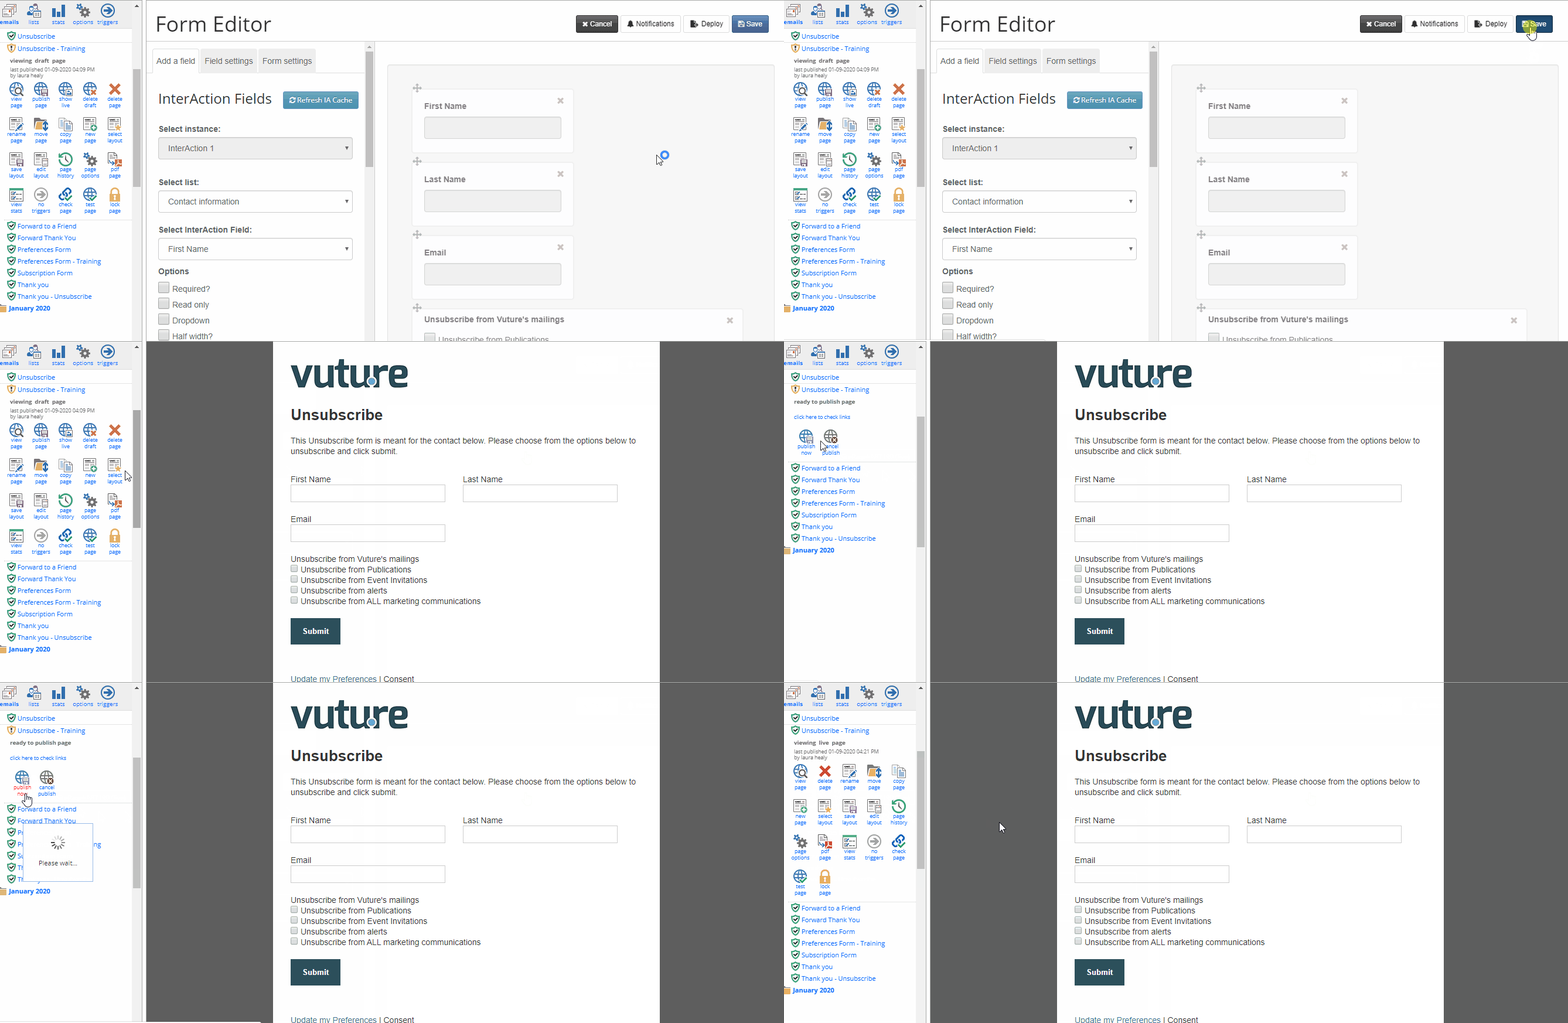
10. Save your form. Then Publish > Publish Now.
11. Test your Unsubscribe Form. Send yourself a live email from Vuture with a link to your Unsubscribe Form. Click through to the form, unsubscribe for an email type, then submit the form.
How did it write back to InterAction? Were you added to the '*Send No' Marketing List? If using activities, did the Unsubscribe activity write back?
Once confirmed in InterAction, try to send yourself a live email using that email type in the "Email Type" drop-down on the Send Screen. The send will process and you should be filtered out of the send once completed.
Were you filtered out of the send as suppressed?
Repeat this for each email type.
If you added the "Unsubscribe from all email communications" option, test this with your current Project Manager or Account Manager.
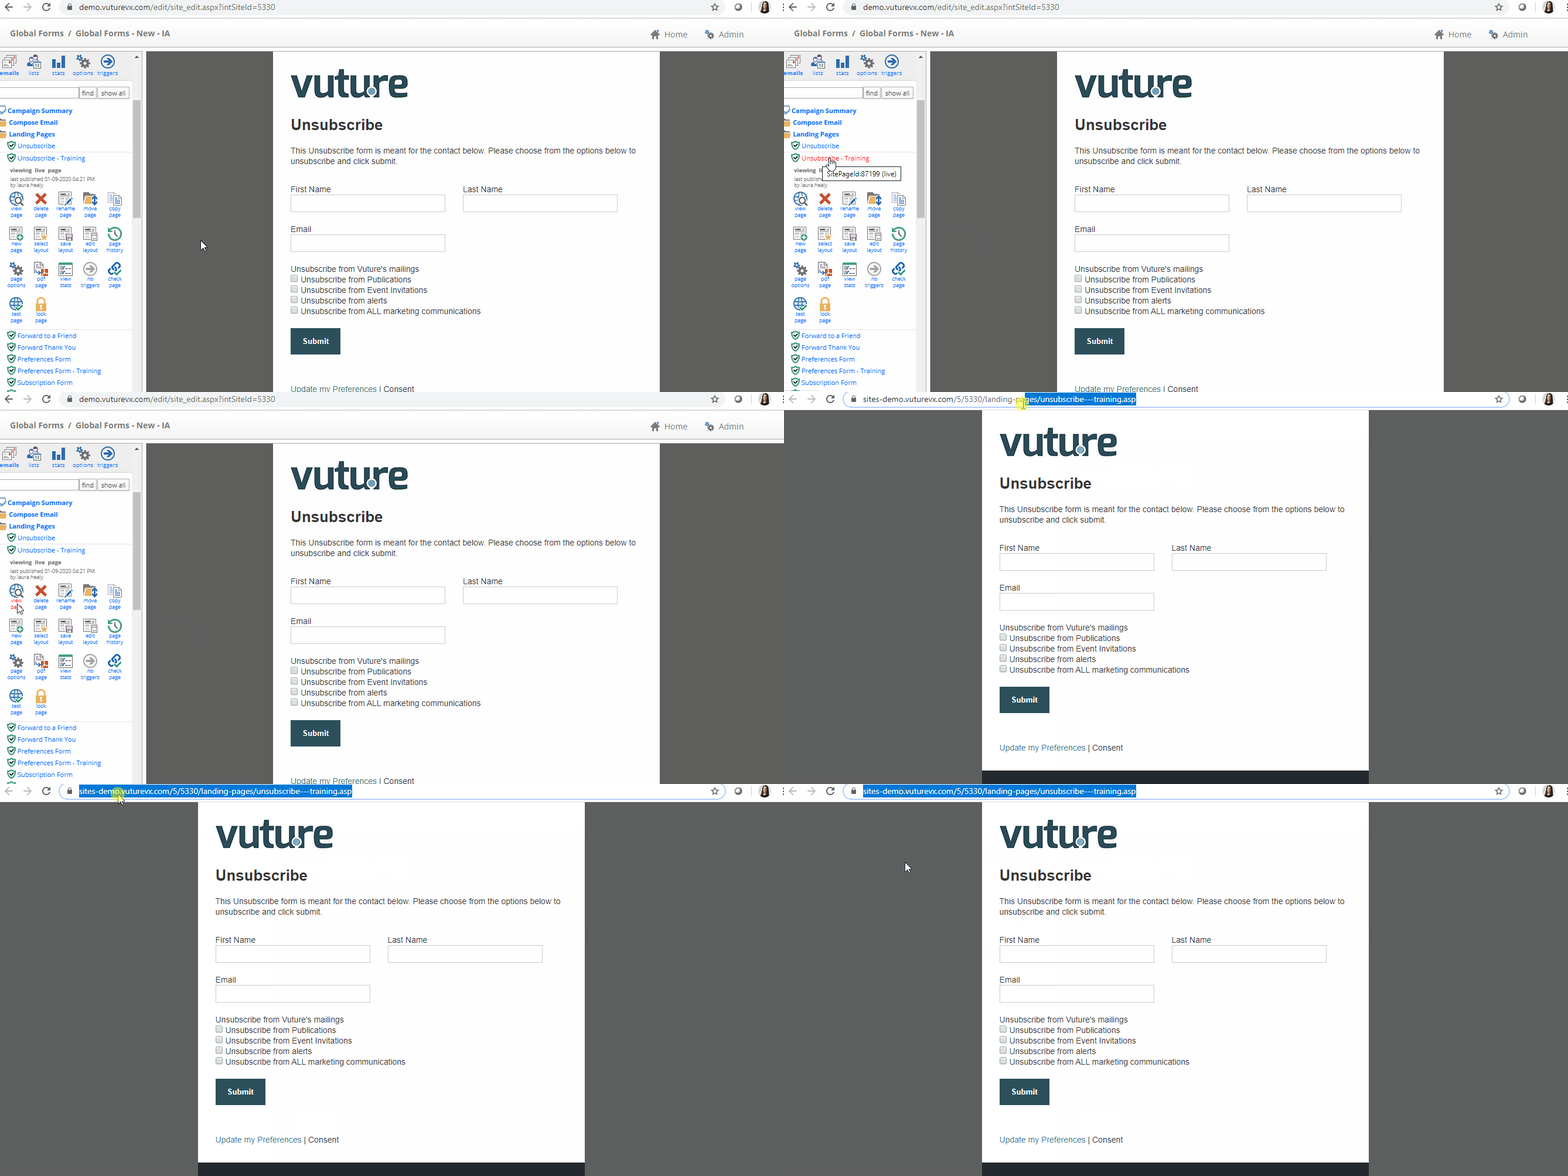
If this is a new form and you're not sure what link to use to include in your test email, click on the "View Page" icon then copy the URL and paste it into your live test email. See animated GIF below.