Vuture supports Single Sign On (SSO), a process that allows users to authenticate themselves against an external Identity Provider (IdP) rather than obtaining and using a separate username and password handled by Vuture.
Under the SSO setup, Vuture can work as a Service Provider (SP) through SAML (Secure Assertion Markup Language) allowing you to provide Single Sign On (SSO) services for your domain.
What you will need, is a ADFS 2.0 Identity Provider (IdP) which will handle the sign-in process and will eventually provide the authentication credentials of your users to Vuture. Vuture users authenticated through your ADFS 2.0 IdP are handled from your IdP . The only user data that is necessary for Vuture is a unique identifier for each user, user's Email. Vuture does not store passwords.
Step 1. ADFS 2.0 Configuration
Consider that for the current procedure, your ADFS 2.0 server is hosted in {adfs domain url}
Open the ADFS 2.0 Management through Start→Administrative Tools→ADFS 2.0 Management.
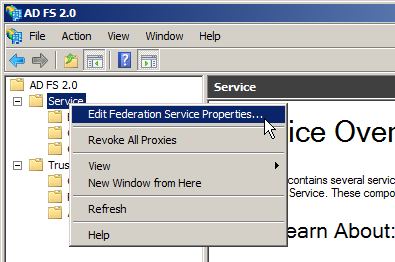
- Right-click on Service from the left tree-view and click on Edit Federation Service Properties.
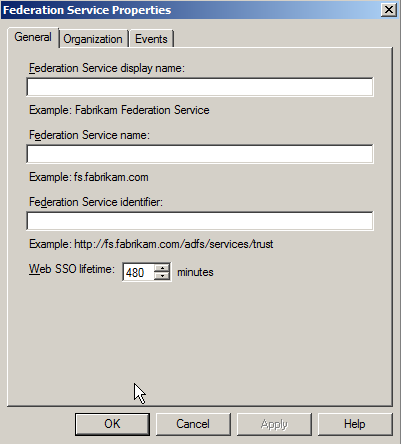
- In the General Tab you can find the Federation Service Identifier, which is the Identity provider URL. You’ll need to fill this up in the Vuture Single-Sign-On (SSO) configuration page. For the current procedure the Identity provider URL is http://{adfs domain url }/adfs/services/trust. Check the rest values in General Tab and confirm that they match your DNS settings for your server.
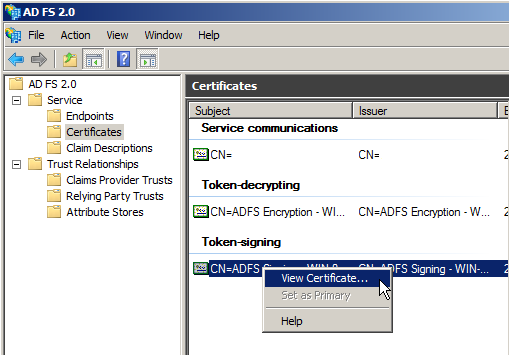
- Click on the Certificates Entry from the left tree-view, right-click on Token-Signing certificate and then click on View Certificate
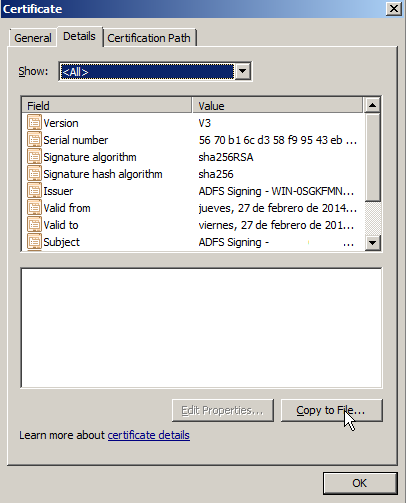
- In the Details Tab click on Copy to File and the Certificate Export Wizard launches. Click on Next, select DER encoded binary X.509 (.cer) format, and then click Next. Choose where you want to save the certificate and click on Finish.
- Vuture requires a PEM format certificate. Convert the certificate from DER to PEM format. You will need it during Vuture configuration in Step 4. Keep in mind that Vuture will work with RSA certificates. DSA certificates are not supported.
Step 2. ADFS 2.0 Relying Party Trust Configuration
At this step you are going to define the Vuture endpoints in your ADFS. You can do this manually.
- Select Relying Party Trusts from the left tree-view under the Trust Relationships,right-click on the Relying Party Trusts and click on Add Relaying party Trust. The wizard launches.
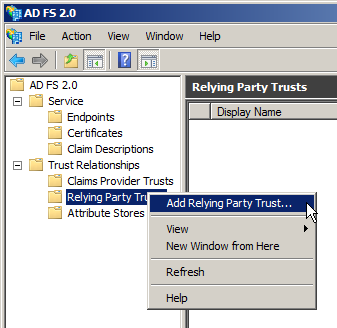
- Click on Start and follow the steps in wizard.
- Select Permit all users to access the relying party and click Next to Finish.
- On the center Column right-click on the relying part you’ve just created and the select Properties.
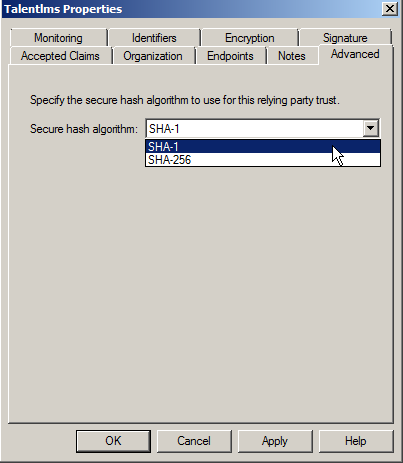
- On the Advanced Tab select SHA-256 for the Secure hash algorithm and click on OK
Step 3. ADFS 2.0 Claim Rules Configuration
In order to configure a proper communication between your ADFS and Vuture, you should define the Claim Rules
- On the center Column right-click on the relying part you’ve just created and then select Edit Claim Rules.
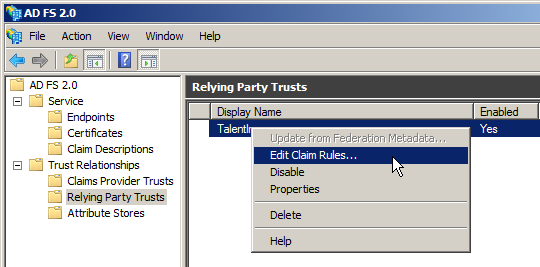
- On the Issuance Transform Rules Tab click on Add Rules. The wizard launches.
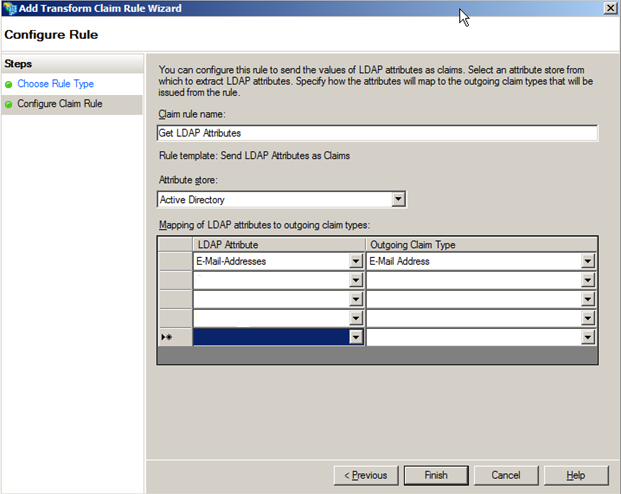
- Select Send LDAP Attribute as Claims and click on Next
- Define the Claim rule name (eg. Get LDAP Attributes) and select Active Directory in Attribute Store. In the Mapping of LDAP attributes to outgoing claim type select the following:
LDAP Attribute: Name ID, Outgoing Claim Type: E-mail Address
and then click on Finish
- Add a second Rule following the same procedure. Select Transform an Incoming Claim and click on Next.
- Define the Claim rule name (eg. Email to Name ID) and set Incoming claim Type as E-Mail Address (the same one from the previous rule), Outgoing claim type as Name ID and Outgoing name ID format as Email. Then click on Finish. Have in mind that the email should be defined in all users to achieve a proper communication between your ADFS and Vuture.
Step 4. Configure authentication policies
In order to ensure that single logout (SLO) works properly, especially in the case where multiple users login from the same machine, you need to configure authentication settings for the relying party trust you've just created.
Expand Authentication Policies from the left tree view, and click on the Per Relying Party Trust option. Then in the center Column, right-click on the Vuture relying party trust, and select Edit custom Primary Authentication. At the Primary tab, check the option Users are required to provide credentials each time at sign in and then click on Ok.
Step 5. Enabling SAML SSO in your Vuture domain
Send your project manager the IdP’s Metadata XML that can be found in the following URL:
https://{adfs domain url}/FederationMetadata/2007-06/FederationMetadata.xml
