Overview
This article will walk you through how to use a 'Date Trigger' to send a 'Reminder to register' email to those who haven't responded to your RSVP by a specific date/time.
Please note, Triggers is a requirement. If you do not have Triggers, please speak to your Account Manager.
As an introduction, please watch the below video before continuing. Please note: This video will use InterAction as the data source to filter the list, but there are step by step instructions on how to do this with a Vx list below.
Step by Step Instructions
Please follow the below instructions to send a 'Reminder to register' email to those who haven't responded to your RSVP by a specific date/time using a Date Trigger.
Please note: These instructions assume that you have already sent out an invitation with a link to your RSVP Form. To trigger this, please refer to this Help Desk Article first.
1. Create your 'Reminder to Register' email. This could be a copy of your initial invitation and you update the language to something like, "There is still time to register to [Event Name]!".
2. Make sure your email is 'Published' otherwise click on 'Publish' > "Publish Now' to publish.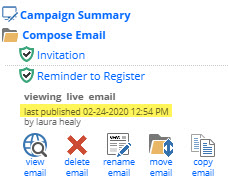
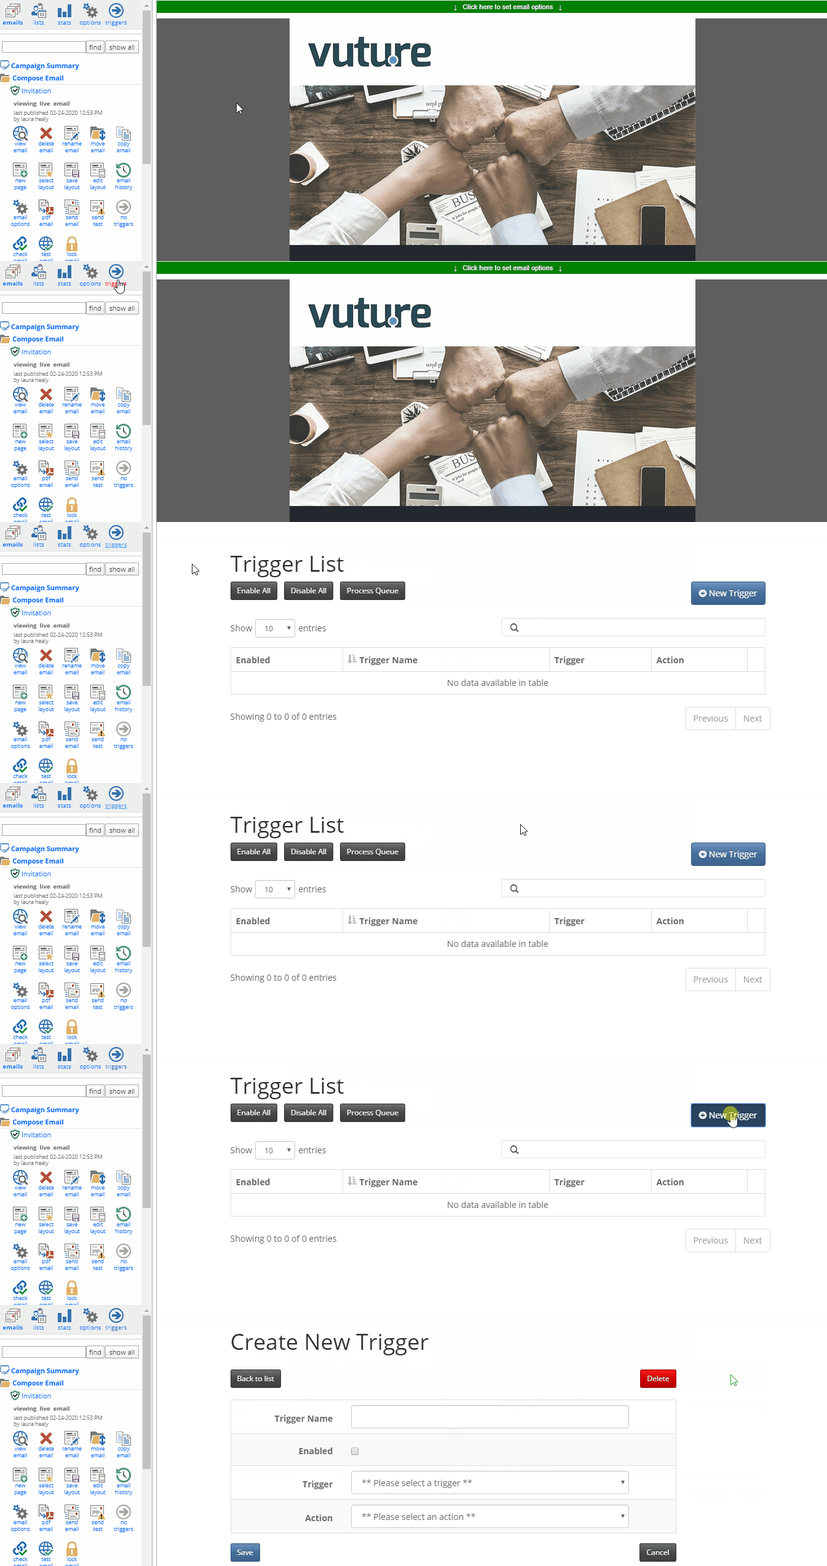
3. Navigate to the Triggers screen and click on '+ New Trigger'.
4. Give your Trigger a clear name for what this Trigger will do for you. For example, if it is going to send the 'Reminder to Register' email, name it 'Send Reminder to Register'.
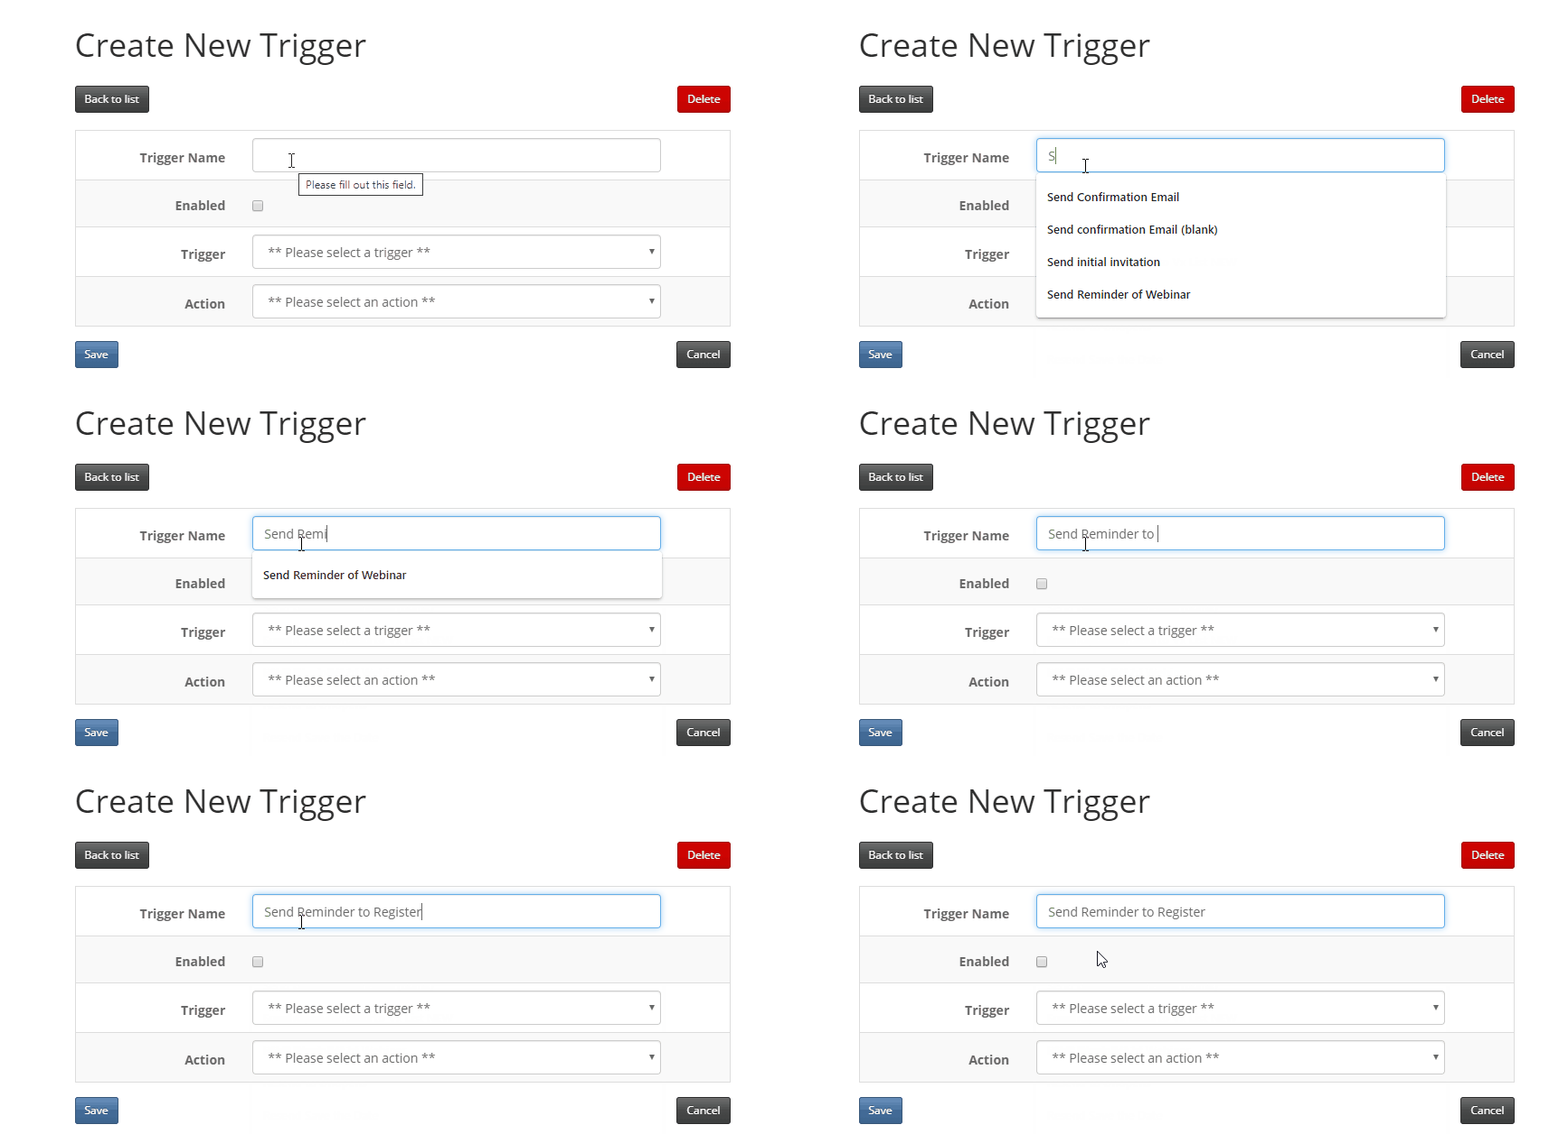
Important: Do not enable the trigger just yet. Wait until this trigger is setup and enable it from the 'Trigger List' screen.
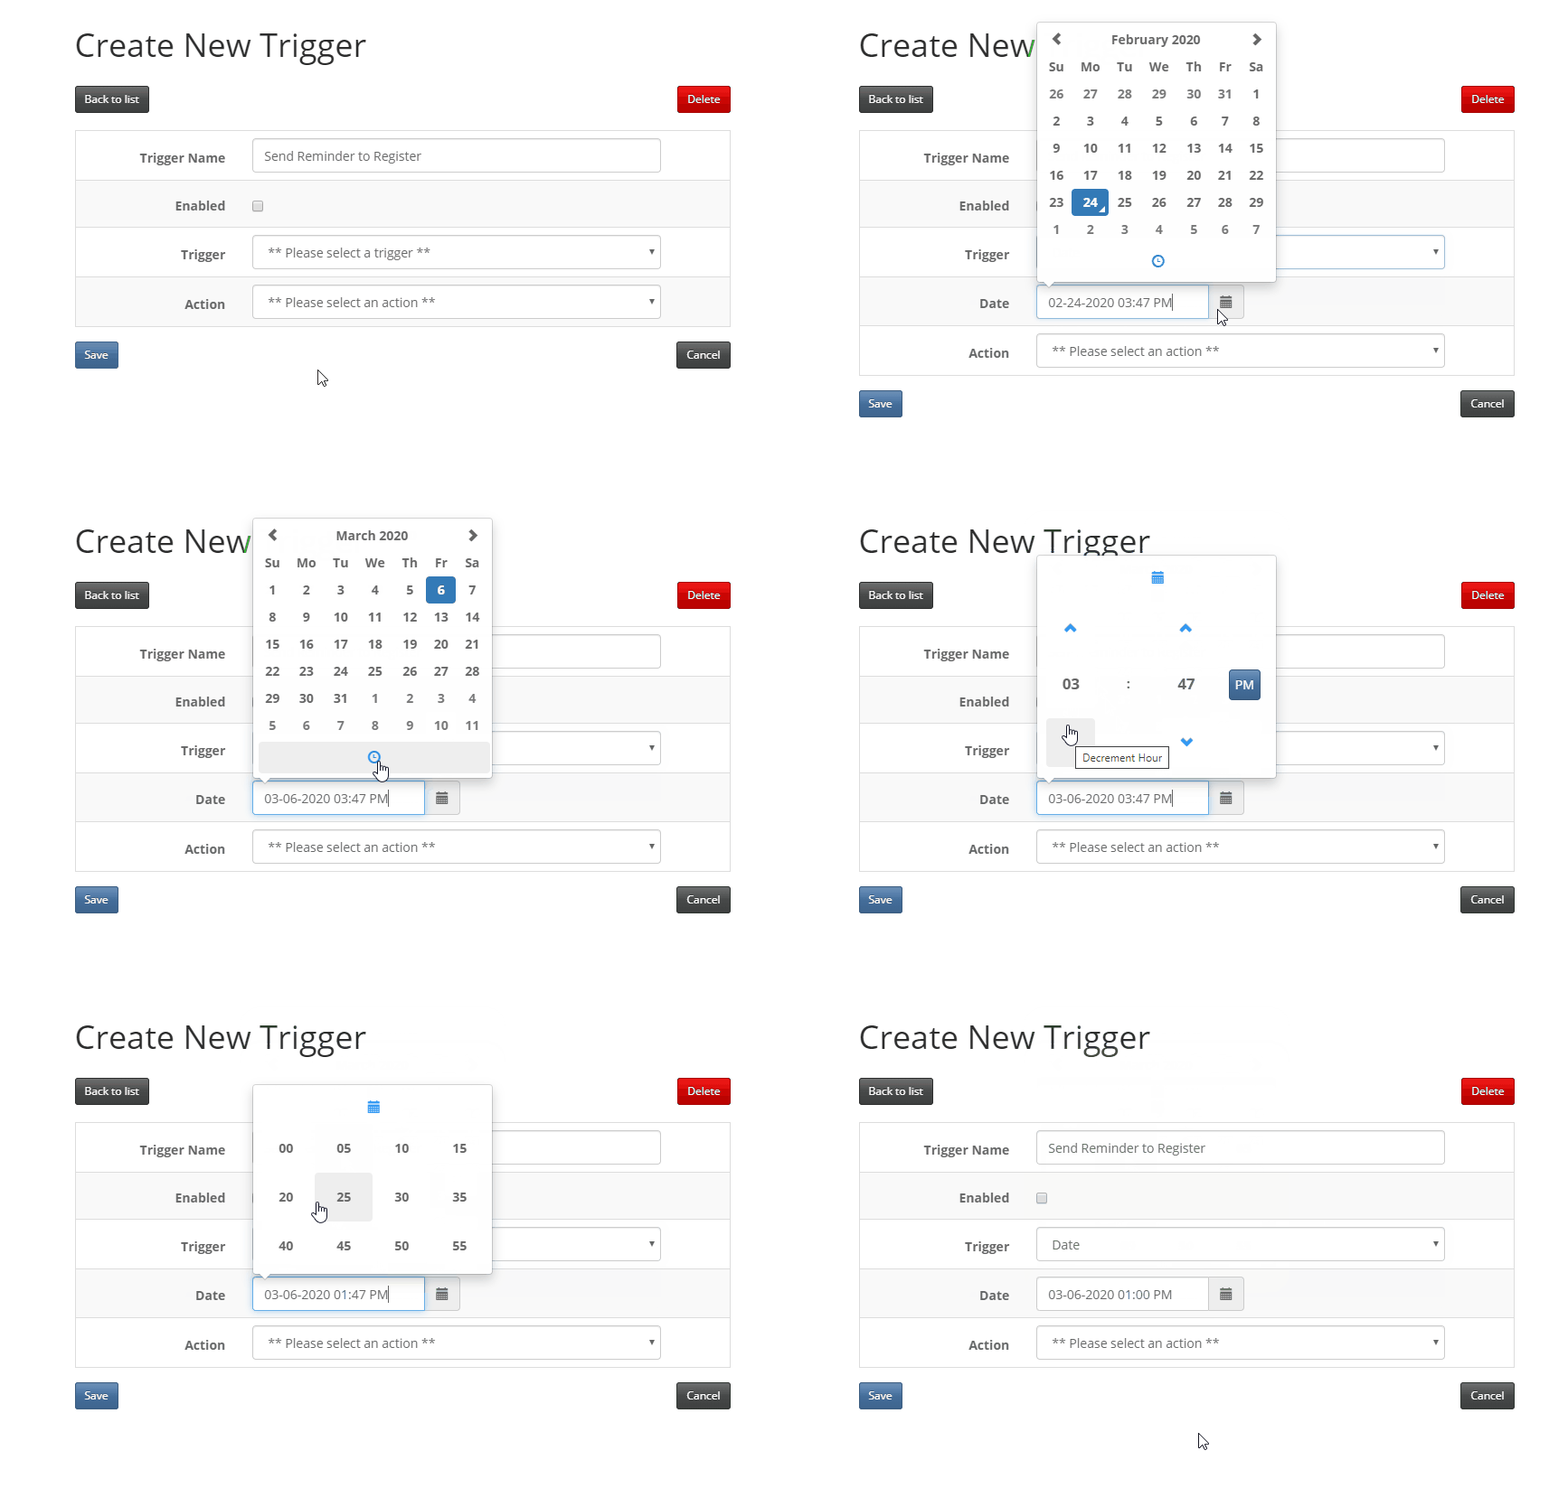
5. Select the 'Date' Trigger from the 'Trigger' drop-down. Then select the specific date/time you'd like to send this 'Reminder to Register' email (i.e. 1 week before the event takes place or registration is closed).
6. Next, select 'Send Email' from the 'Action' drop-down. Then select the Reminder email you wish to send on the date/time you specified in the previous step and choose your FROM address.
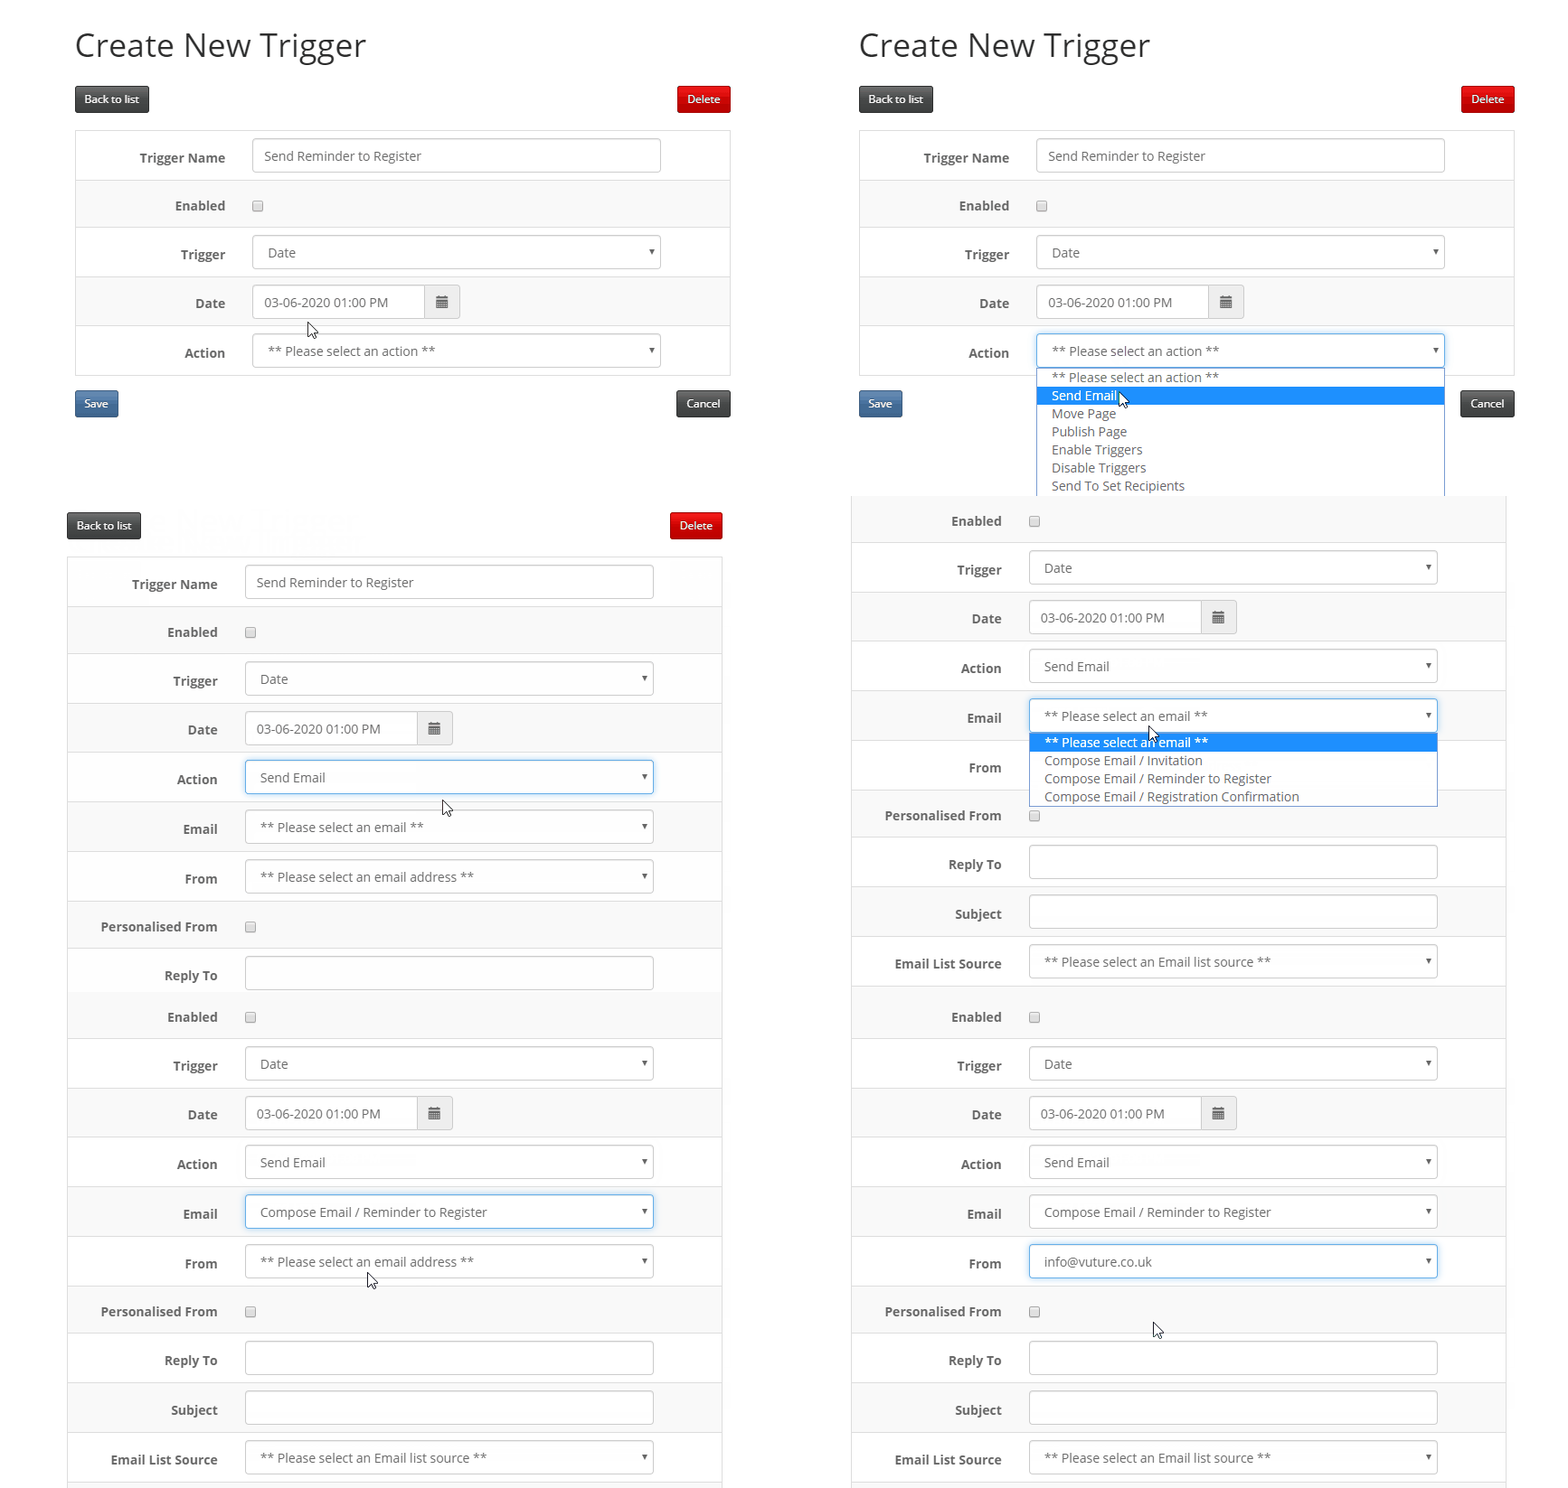
7. (Optional) If you'd like to specify an email address for replies, please enter this email address into the 'Reply To' field.

8. Type in your Subject Line for this 'Reminder to Register' email send.

Note: You may wish to use a Campaign Variable in your subject line instead (i.e. {{Event_Name}}. For more information on using campaign variables, please click here.
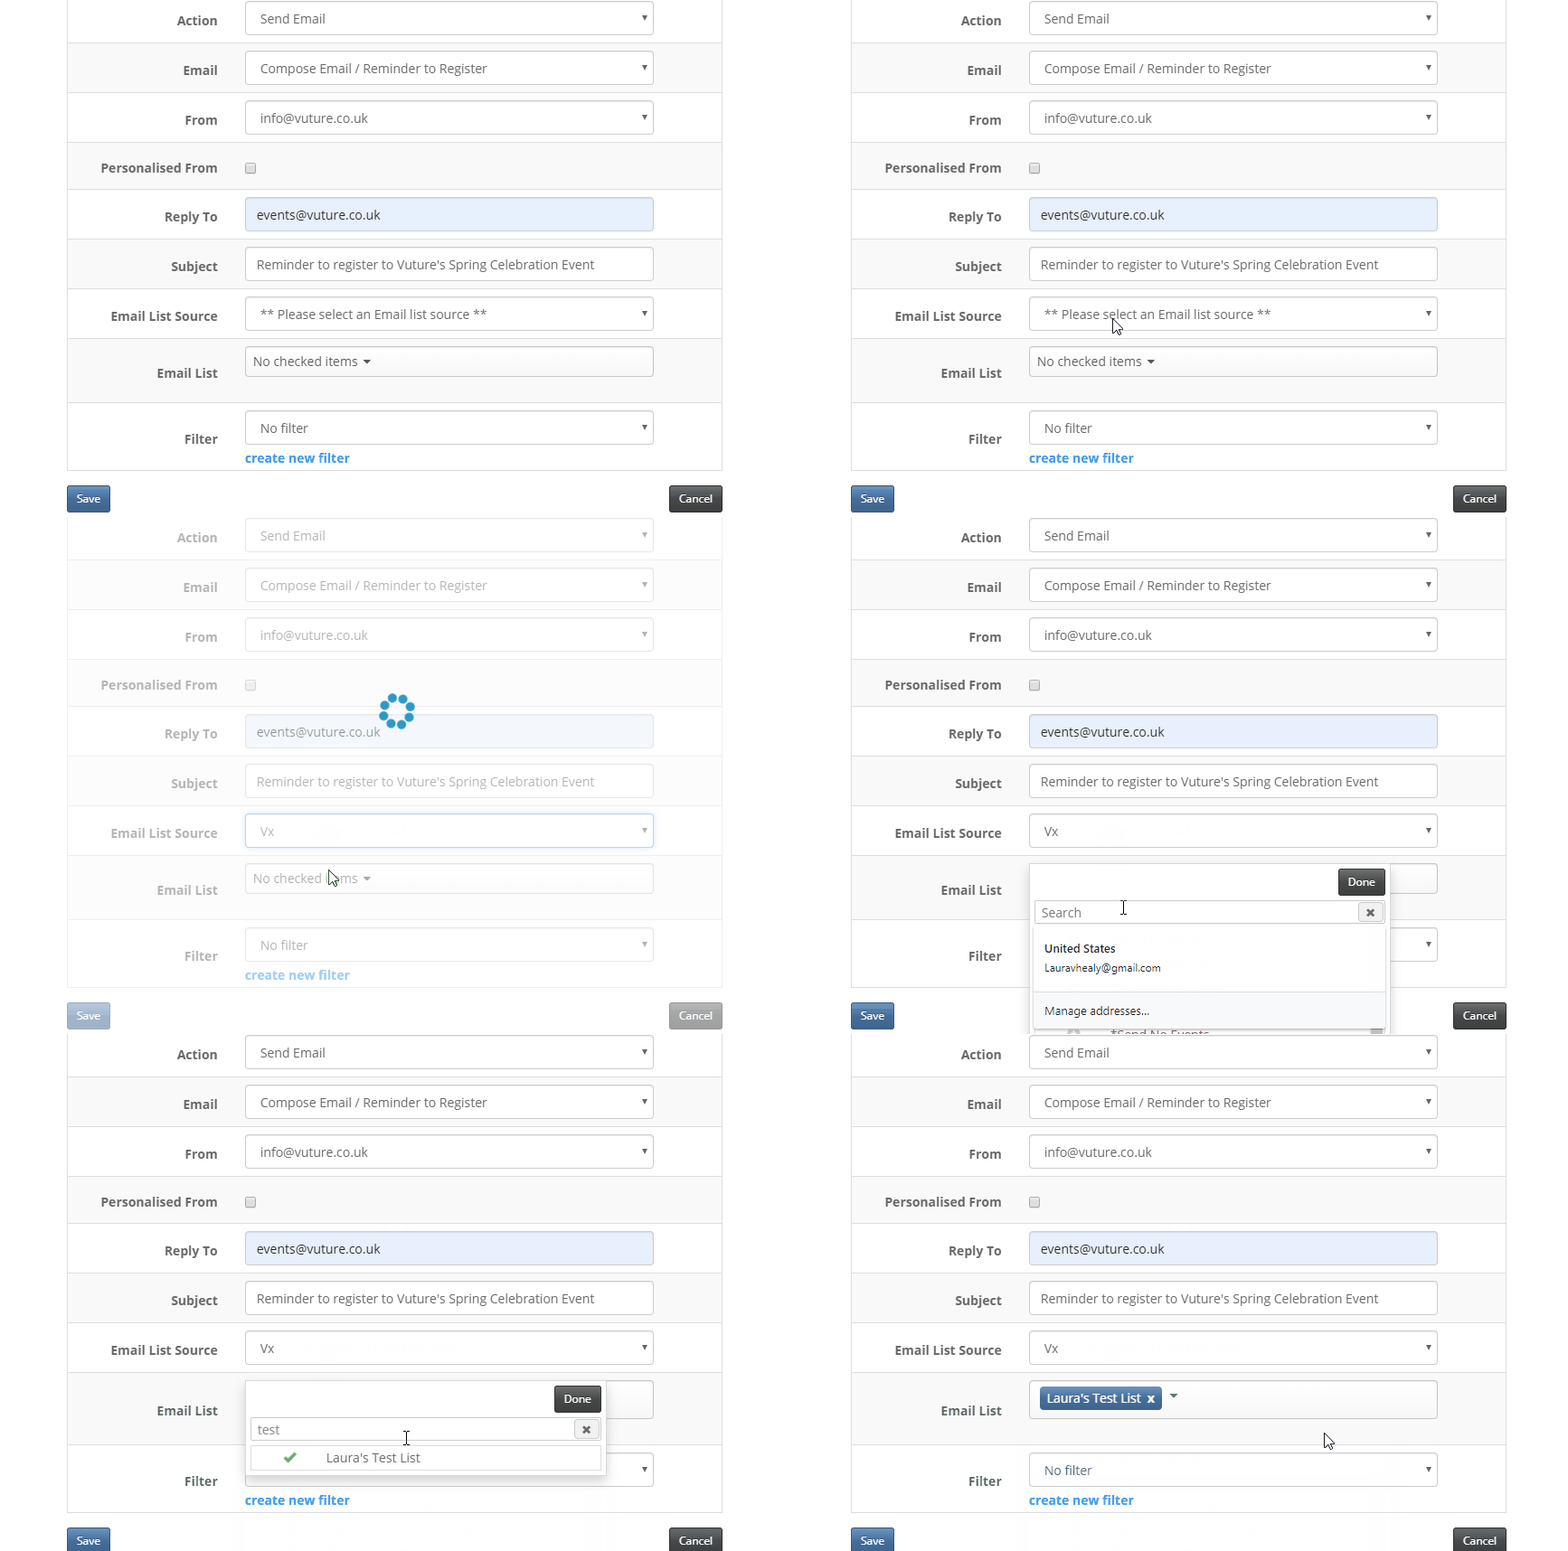
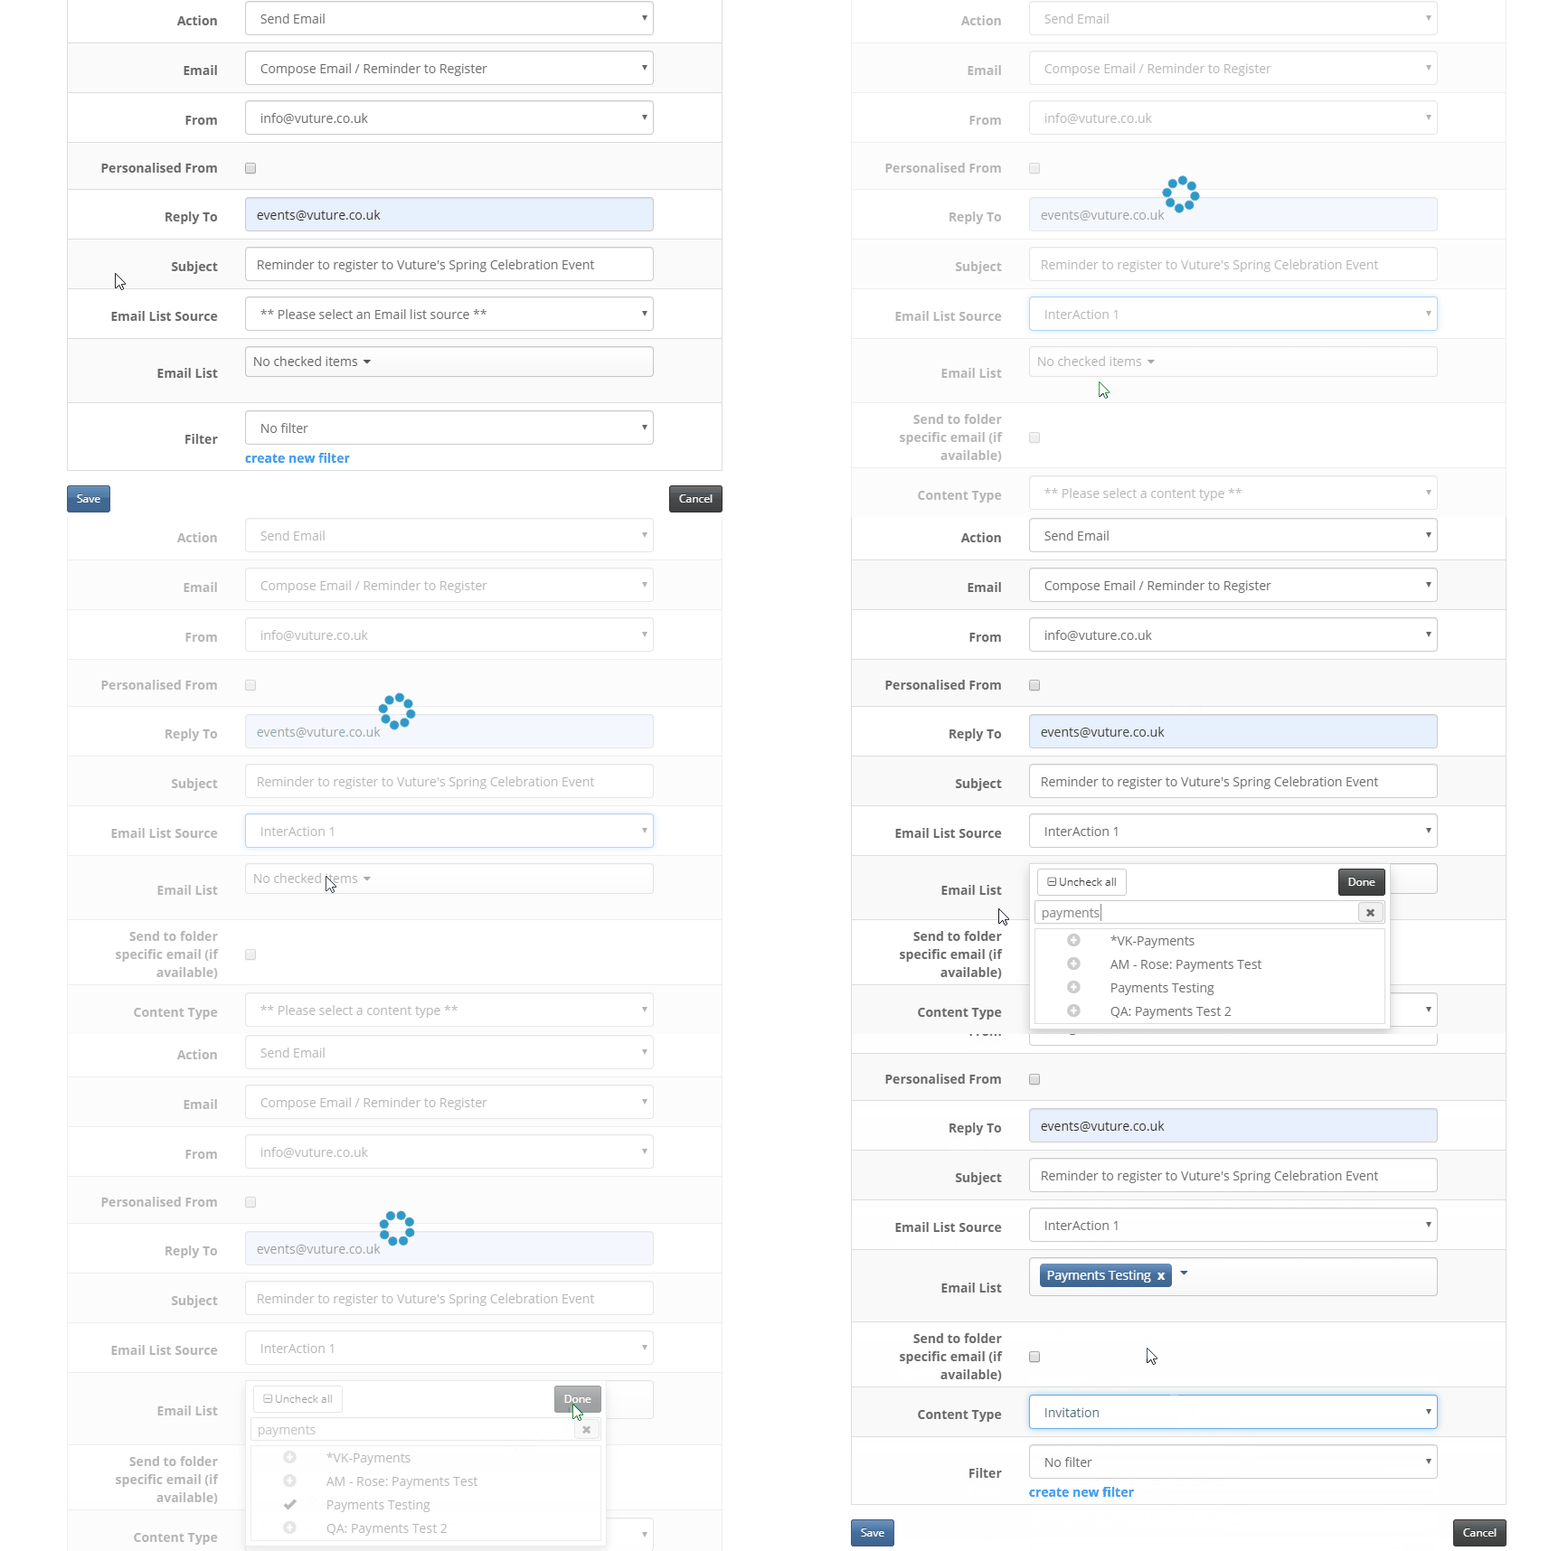
9. Choose the 'Email List Source' and 'Email List' you wish to send this 'Reminder to Register' email to (this should be the same list you sent the invitation to) at the specified date/time.
-
Standalone (Vx List & Contacts Module): Select 'Vx' as your 'Email List Source' then the 'Email List' you wish to send this email to. This should be the same list you sent your invitation to.
-
InterAction: Select 'InterAction' as your 'Email List Source' then the 'Email List' or Marketing list you wish to send this email to. This should be the same list you sent your invitation to. Then, select your 'Content Type' for this specific email.
10. Create your filter to only send this email to those who have the RSVP field as empty. Make sure to give your filter a unique name with a description of what the filter will do (i.e. 'Event Name' - RSVP is empty). This will make it easier to find to select this new filter for your Date trigger.
-
Standalone (Vx List & Contacts Module): Note: There must be at least one form submission to setup the Filter for this trigger. After you've named your trigger, scroll down to the 'Form Submissions' section. Find the RSVP field (this may be an Accept-or-decline field) that you've used on your form(s), and set it equal to '<Empty>'. Then click on 'Filter' at the very bottom of the Filter screen. Important: Once your filter has been created, you'll need to select your new filter from the drop-down to set it for the Date trigger.
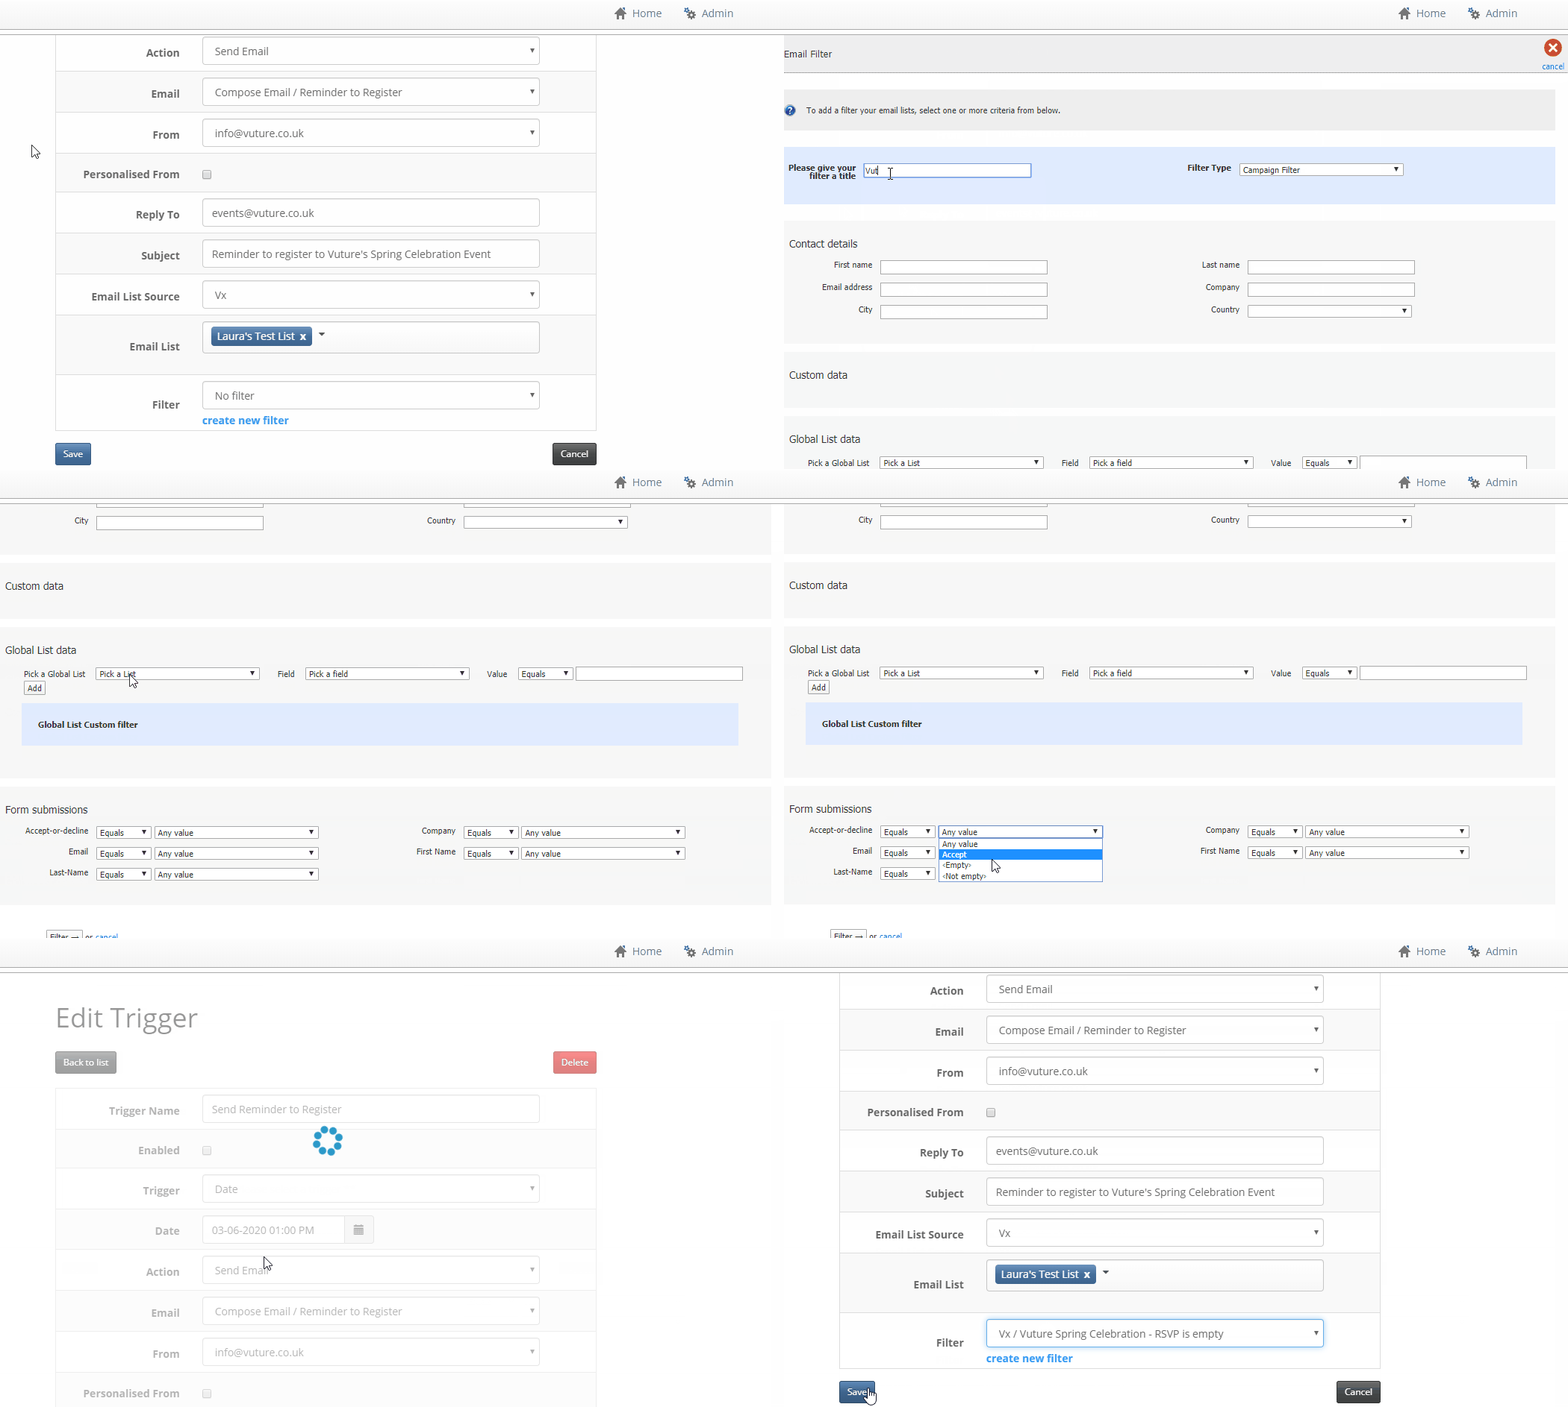
-
InterAction: After you've named your trigger, scroll down to the Additional Fields section. Select the list you'll be sending this Reminder to register email to (this should be the same list you sent the invitation to and where RSVPs are being collected). Select your RSVP Additional Field. Then choose 'Empty' and click 'Add'. Then click 'Filter' at the very bottom of the Filter screen. Important: Once your filter has been created, you'll need to select your new filter from the drop-down to set it for the Date trigger.
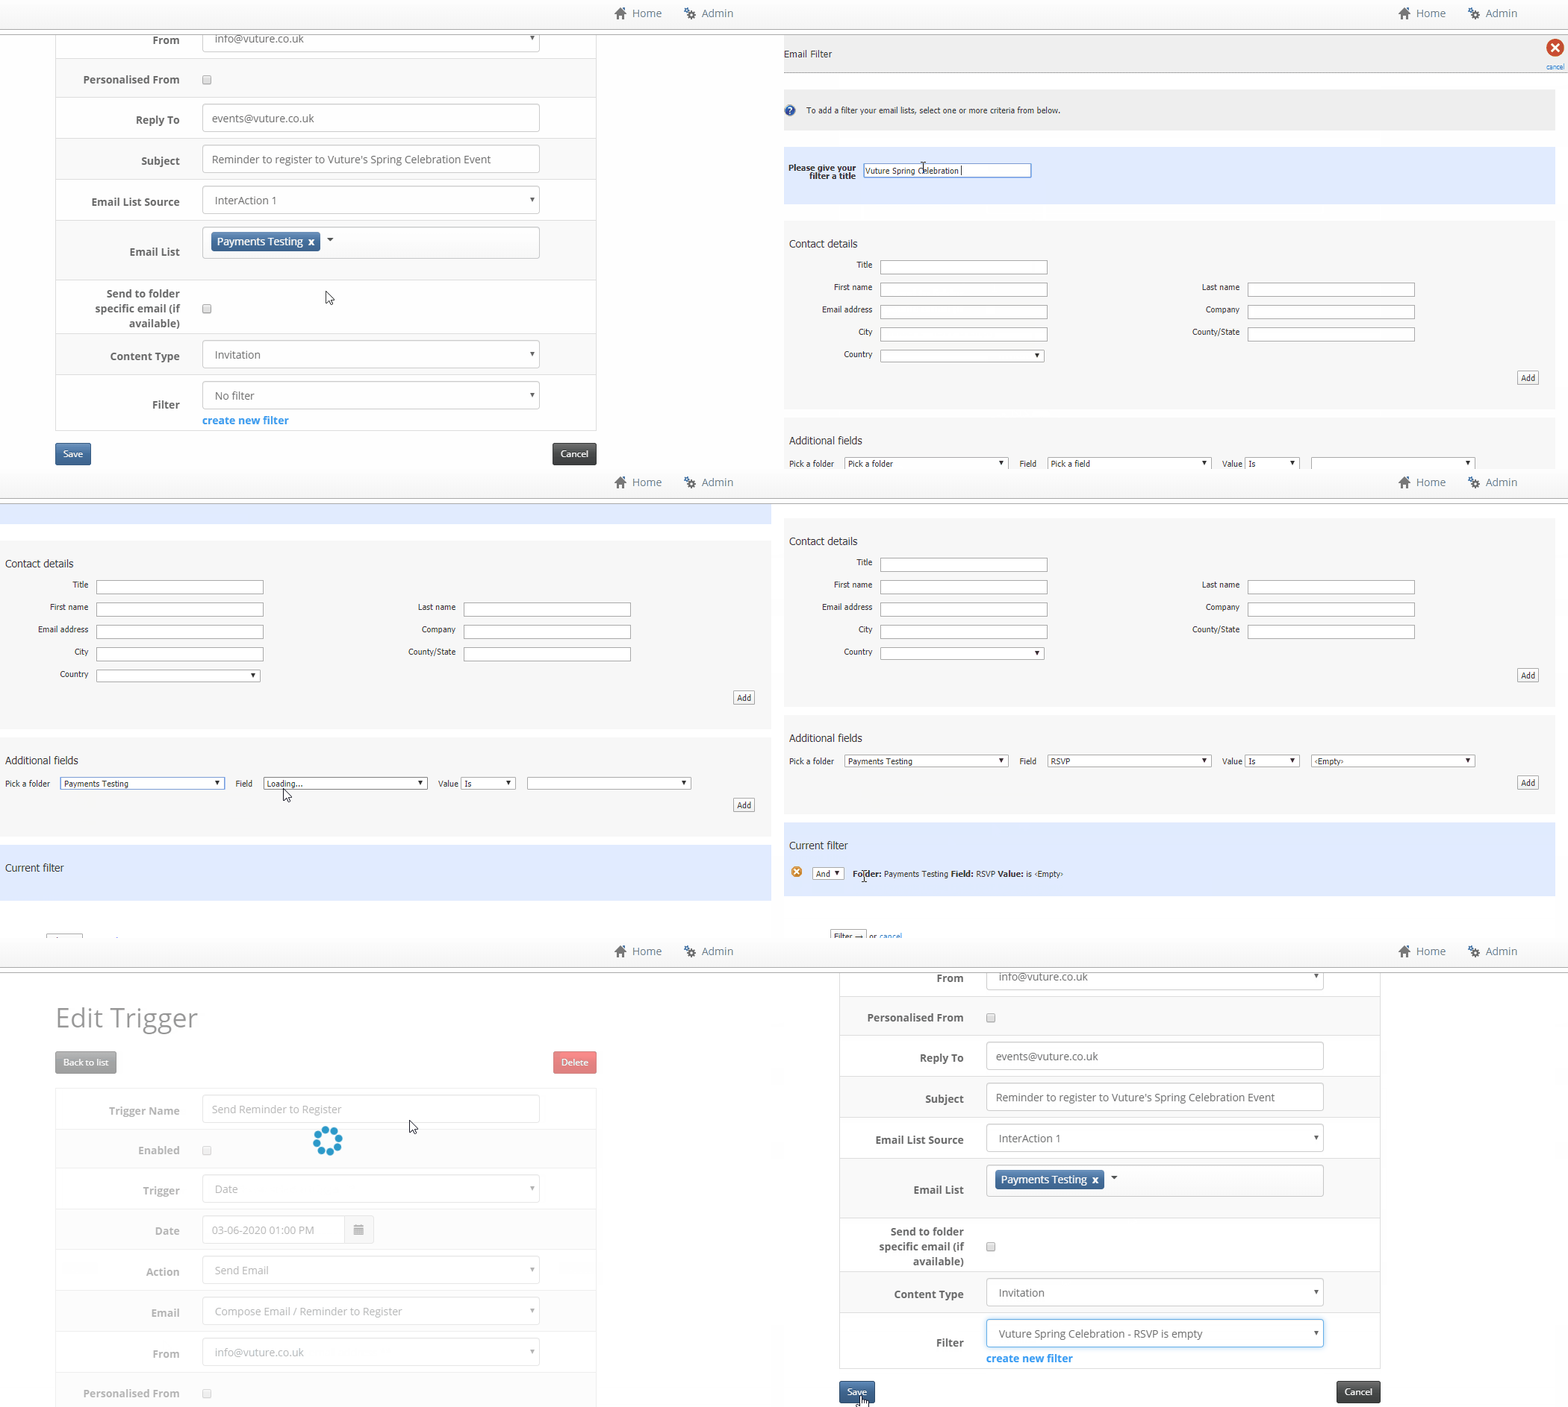
Creating the filter will save where you left off when creating this trigger.
11. With your filter set, click on the blue 'Save' button at the bottom left corner to save your Date Trigger.

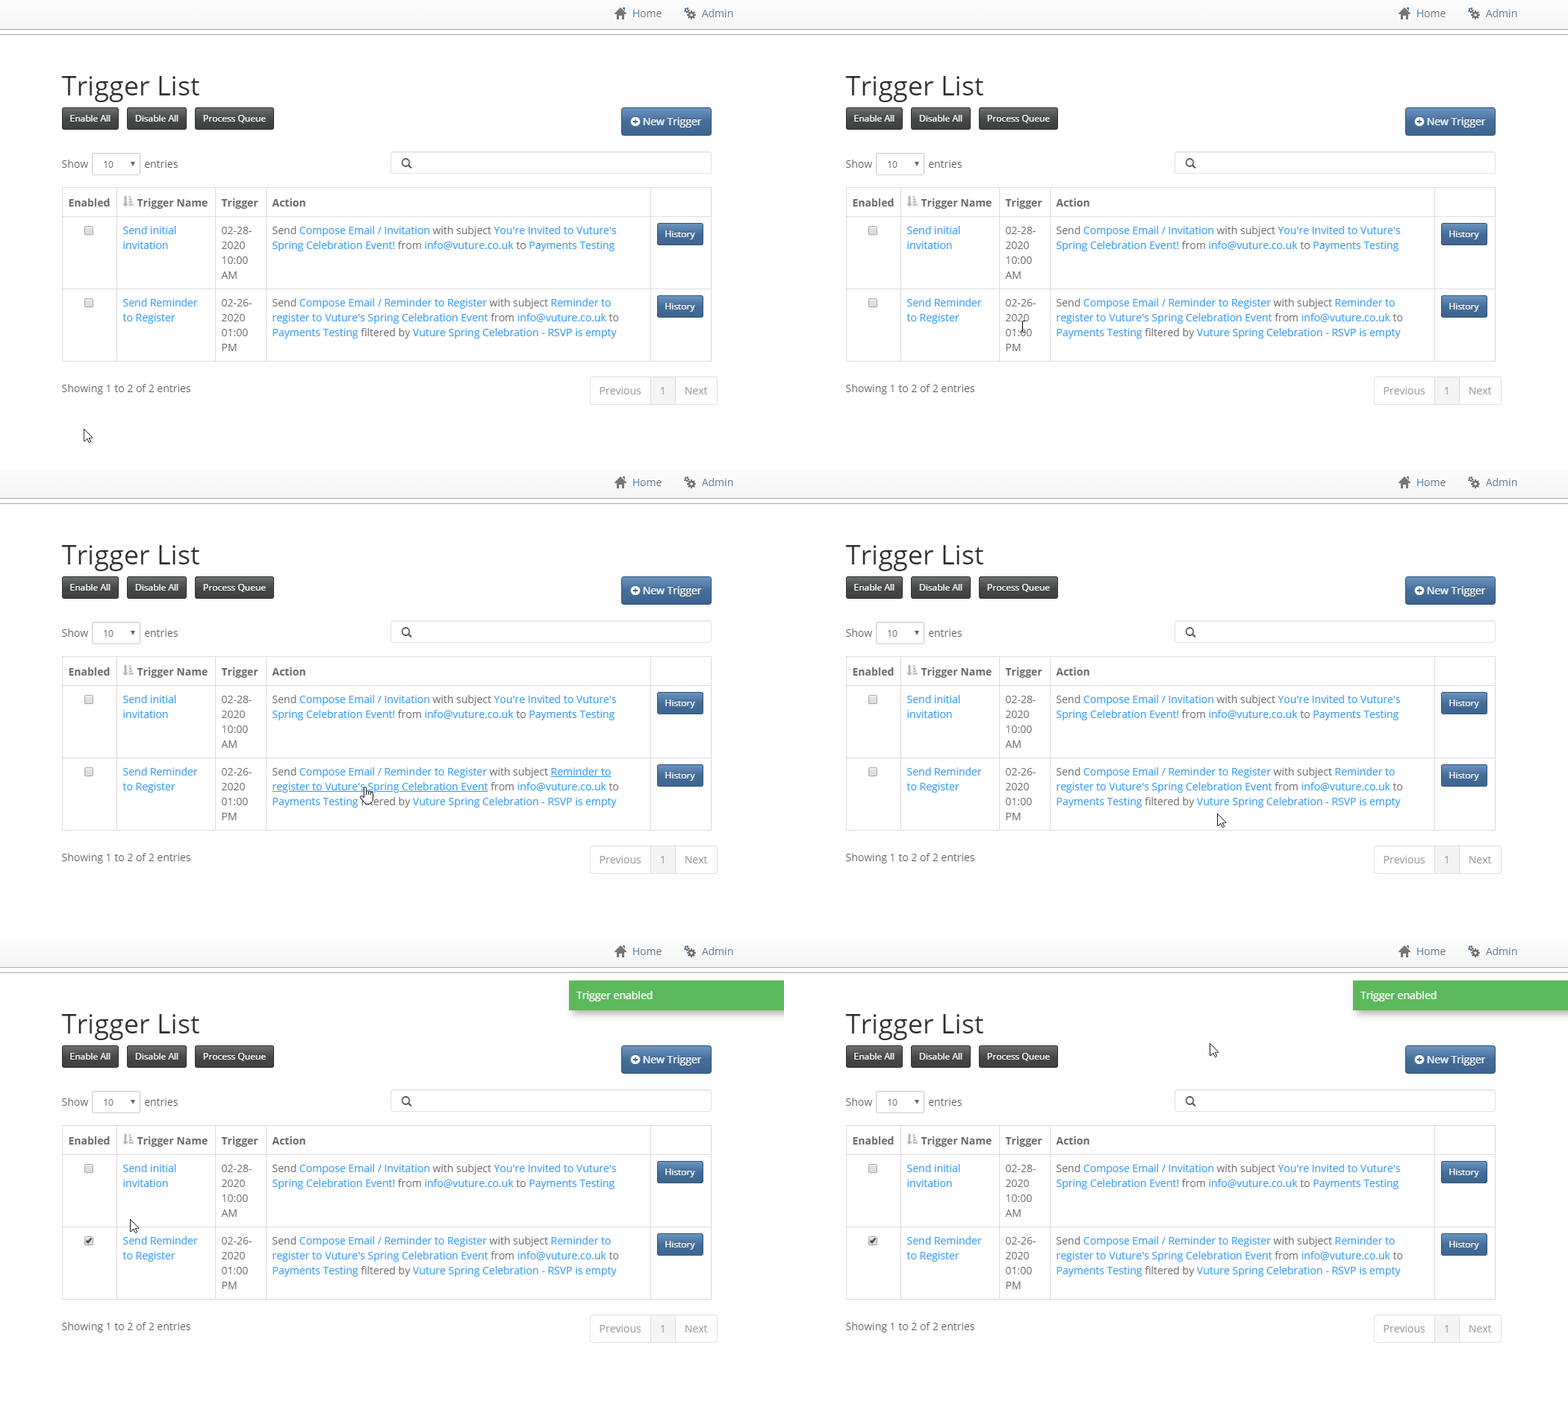
13. Double check that everything is correct (i.e. Date, Time, Email to send, Subject Line, etc.). Then when you're ready, from the Trigger List screen, check the box for 'Enabled' to enable your trigger. Your email will now send at the specified date/time to those who haven't RSVP'd to your event yet.