There is a video to go with this article here.
What is secure file sharing?
Secure File Sharing is the ability to link a file to a Vuture campaign and send it out an email, while ensuring that only the intended recipient can open the linked file. If the email is forwarded to a new recipient, the new contact will be able to see the fact that there is a file link, but they will not be able to open it.
When would I use it?
Typical uses of this feature would be to send attachments to internal users only, or to authenticated external users only, or for sharing sensitive files or files containing sensitive or private information.
How does it work?
To ensure that only the intended recipient can view a file, you can now use Vuture's two-step authentication functionality. This will allow you to securely share files stored in a Vuture Campaign through a link in an email. When a recipient clicks on a link to a file with Automated Access enabled, they will be directed to a customisable, interim landing page, explaining that they have just been sent a temporary access link. They will then receive a second email containing a temporary link to the file. This link is only valid for a predetermined time limit, specified in days.
Prerequisites for setting up secure file sharing
You could set up specific email messages and warning landing pages each time you set up extra security on a file, or you could set up three default pages, with the help of your Account Manager, and use them repeatedly. Your Vuture instance will also require specific setting updates. The process below will take you through the required steps to set up the feature correctly.
Step 1:
Create default pages for the following: (We recommend you create these in a separate, secure container with reduced access, so that they are not tampered with.)
-
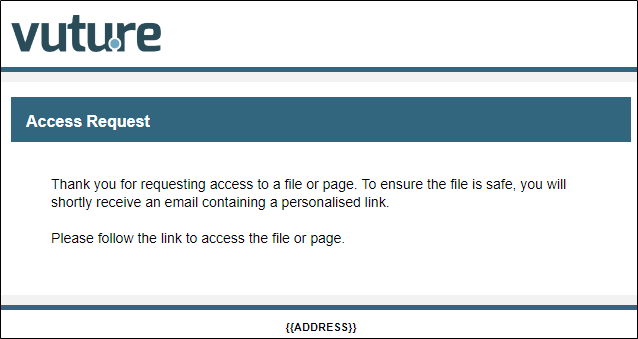
A Warning or Access Requested page: This is the page to which the contact will be directed when they click on the initial email, notifying them of the two-step authentication process
-
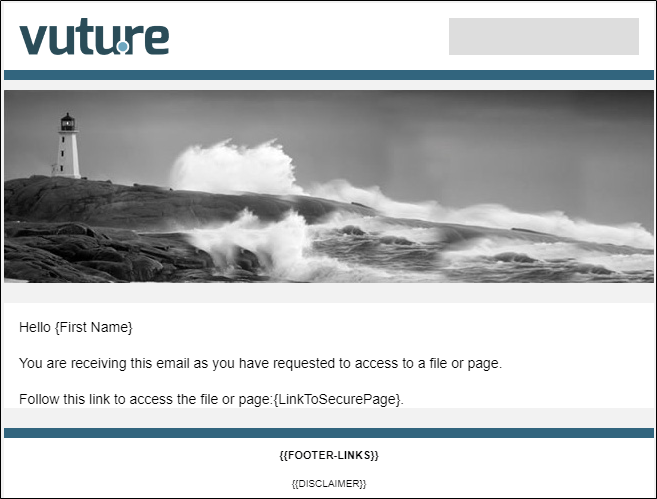
An Email Message page: This is the email that will be sent to the contact when they click on the original link. This email should include a placeholder link {LinkToSecurePage} which will automatically update to become a link to the secure file. Once a contact receives this email their user ID will receive a security token. This will be unseen by the contact but it will allow the contact to open the file.
-
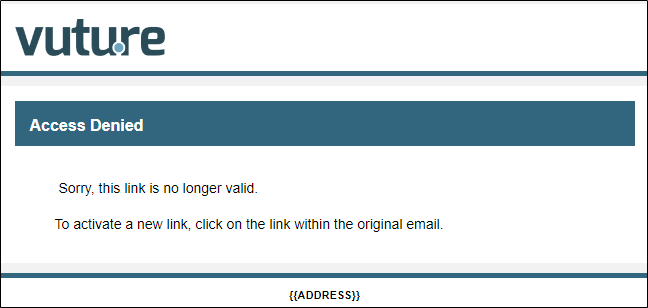
An Invalid Access page: If a person without a security token, or with an expired token, attempts to open the file, they will be directed to the invalid access page
Once you have set them up, please provide the Page ID's to your Account Manager or Project Manager, along with
- Email subject: The subject for the email message containing the link (The default for this message is "Confirmation Email - Access Token"
- Token expiry desired: the number of days for which the token will be valid once it is received
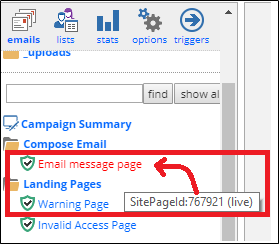
- Page ID's for the three template pages. To get the ID of each page, hover over it in the email campaign. In the example below, the page ID for the Email message page is '767921'.
Step 2: (to be actioned by your Vuture Account Manager or Project Manager)
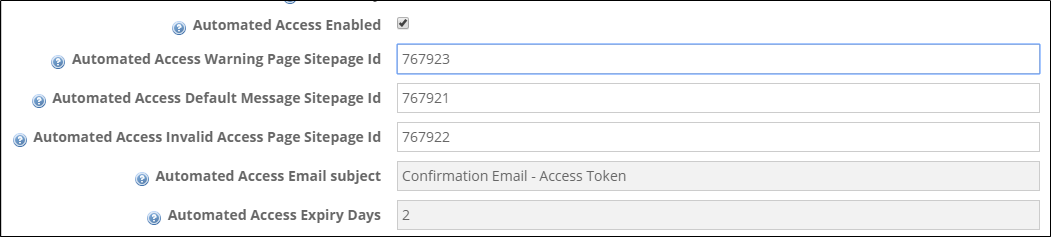
- Set "Admin.System.Versions.Automated Access" to Version 2
- Enable "Admin.System.General.EnableAutomatedAccess
- Add the default link expiry in days in "Admin.System.General.Automated Access Expiry Days"
- Add the default page IDs in:
- "Admin.System.General.Automated Access Warning Page Sitepage Id"
- "Admin.System.General.Automated Access Default Message Sitepage Id"
- "Admin.System.General.Automated Access Invalid Access Page Sitepage Id"
- Add the default Email message subject in "Admin.System.General.Automated Access Email subject"
Configure Automated Access for secure file sharing
Once the settings are updated, you are ready to secure a page or file. This is configurable on a page-by-page basis and Vuture users can complete this for themselves:
- Create the email as normal and add a link to the attachment or file you wish to protect, as normal.
- Select the page or file you wish to protect
- Click the "page options" icon
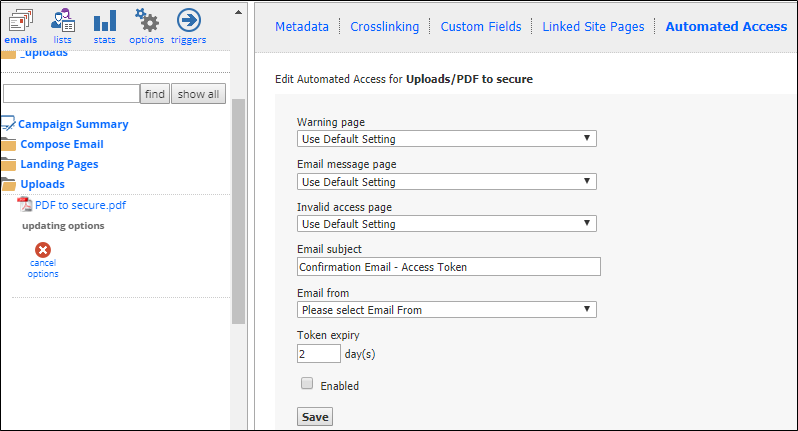
- Click "Automated Access" and then complete the following options and check the "Enable" box.
- Warning page
- Email message page
- Invalid access page
- Email subject
- Email from
- Token expiry
You can either select a specific page from the campaign you are in for each of the options below, or you can choose "Use Default Setting" and the system will use the page IDs you set up in steps 1 and 2.
What sort of files can be protected?
You can add secure, automated access to any landing page in your Vuture campaigns as well as to any file you have previously uploaded to your campaign. If you are unsure about the file types allowed, your Account Manager can find these in "Admin.System.FileUpload.Allowed File Types"
