Overview
This article discusses two, entirely different, methods for replacing one landing page with another at a future date. Neither is “right” or “wrong”, both work but with a different focus.
These instructions apply to users of all CRMs and standalone.
The first method uses a Trigger to redirect a URL. This will likely work best for clients wishing to replace the entire landing page contents. As an example; offer an RSVP Form until a certain date, replaced by a “Sorry, this event is now closed” text page on the future date.
The second method uses a Trigger to publish a page. This would more likely be used when the basic page is to remain the same after the future date but a section of the page or a block of text should appear or disappear. As an example, a piece of News, embargoed until Date X, could appear on the relevant date. Another example could be an invitation to register for a specific event, which disappears after a date in the future, to keep the rest of the remaining page current and relevant.
Method 1: How to Close Event Registrations Using a Link Clicked Trigger
Step by Step Instructions
1. Create your invitation email and RSVP Forms as you normally would. Then create your 'Registration Closed' landing page. On this page, you may wish to include a link to an events page on your organization's website for any upcoming events to help with promotion of these events.
Make sure your landing pages are published. Otherwise click on Publish > Publish Now.
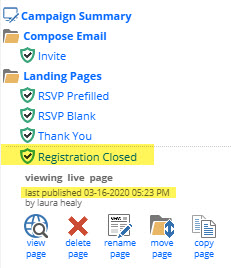
2. Before you start to create the trigger, a useful tip is to click on the 'Registration Closed' Landing page that you created and click on View Page. Then copy the URL. You can do this by highlighting the URL, right click and Copy. This makes it much easier to create that part of the trigger in the next step.
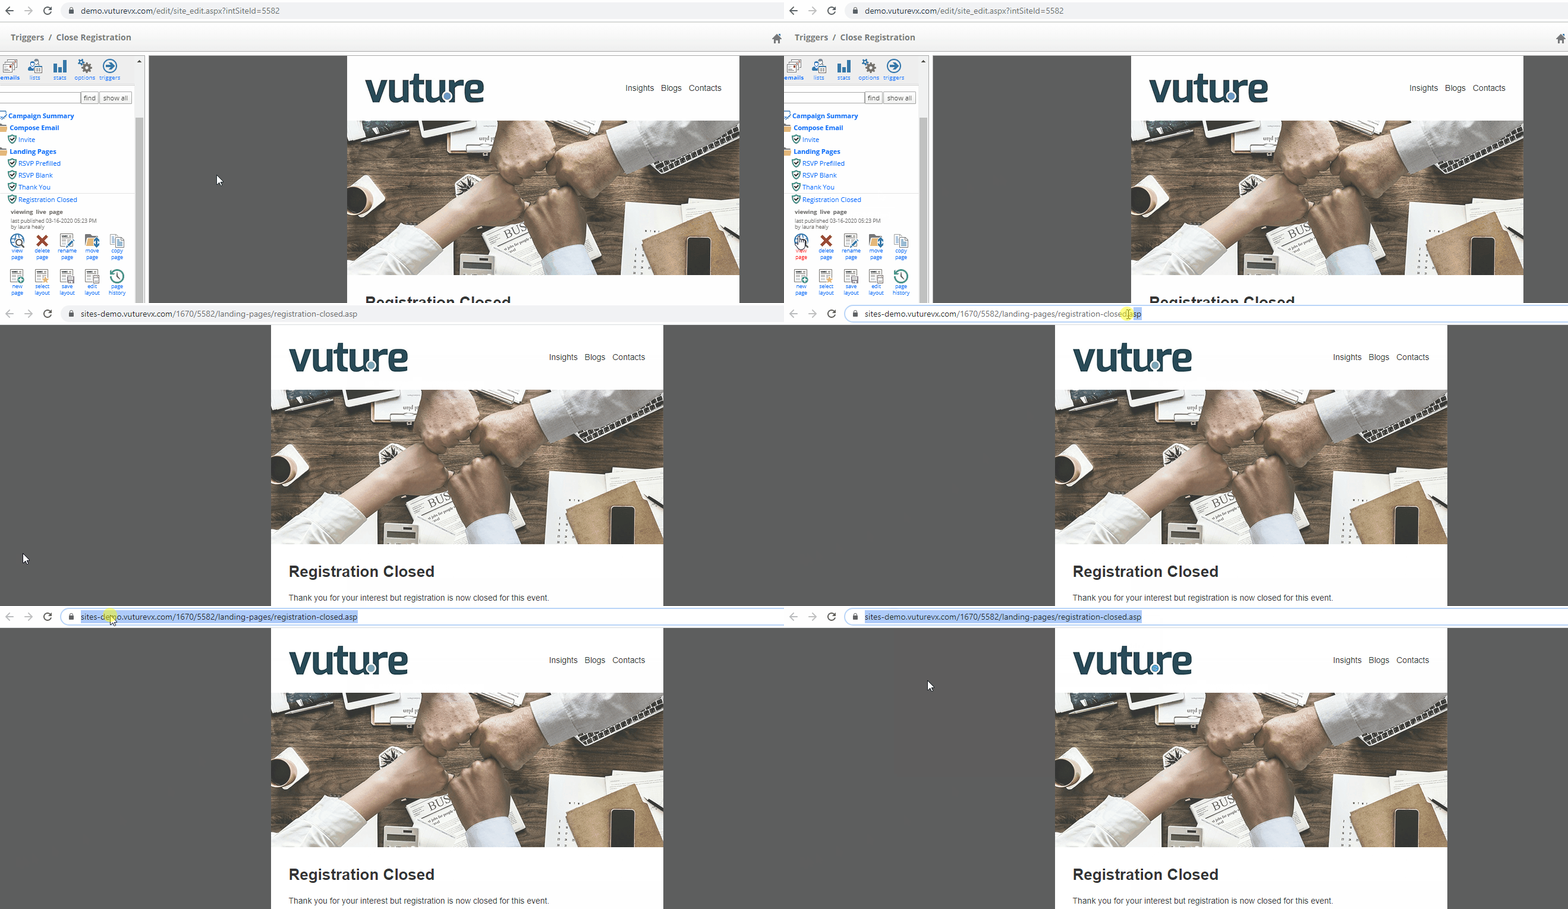
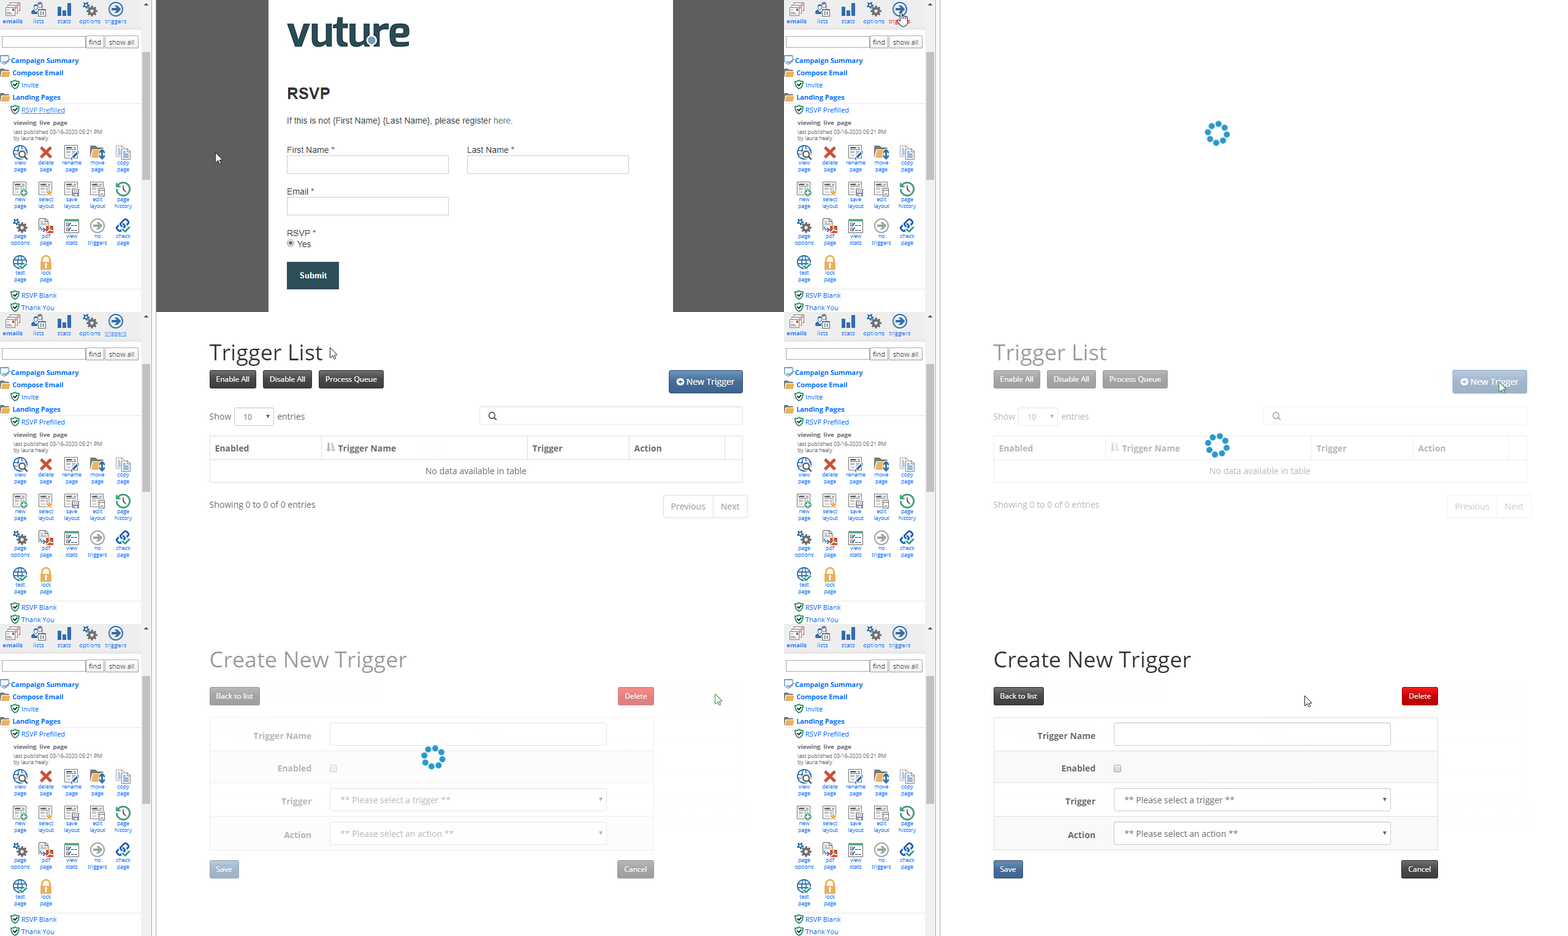
3. Navigate to the Triggers screen and click on '+ New Trigger'.
4. Give your Trigger a clear name for what this Trigger will do for you. For example, if it is going to redirect someone to a new page, name it 'Redirect to [Name of Page]'.
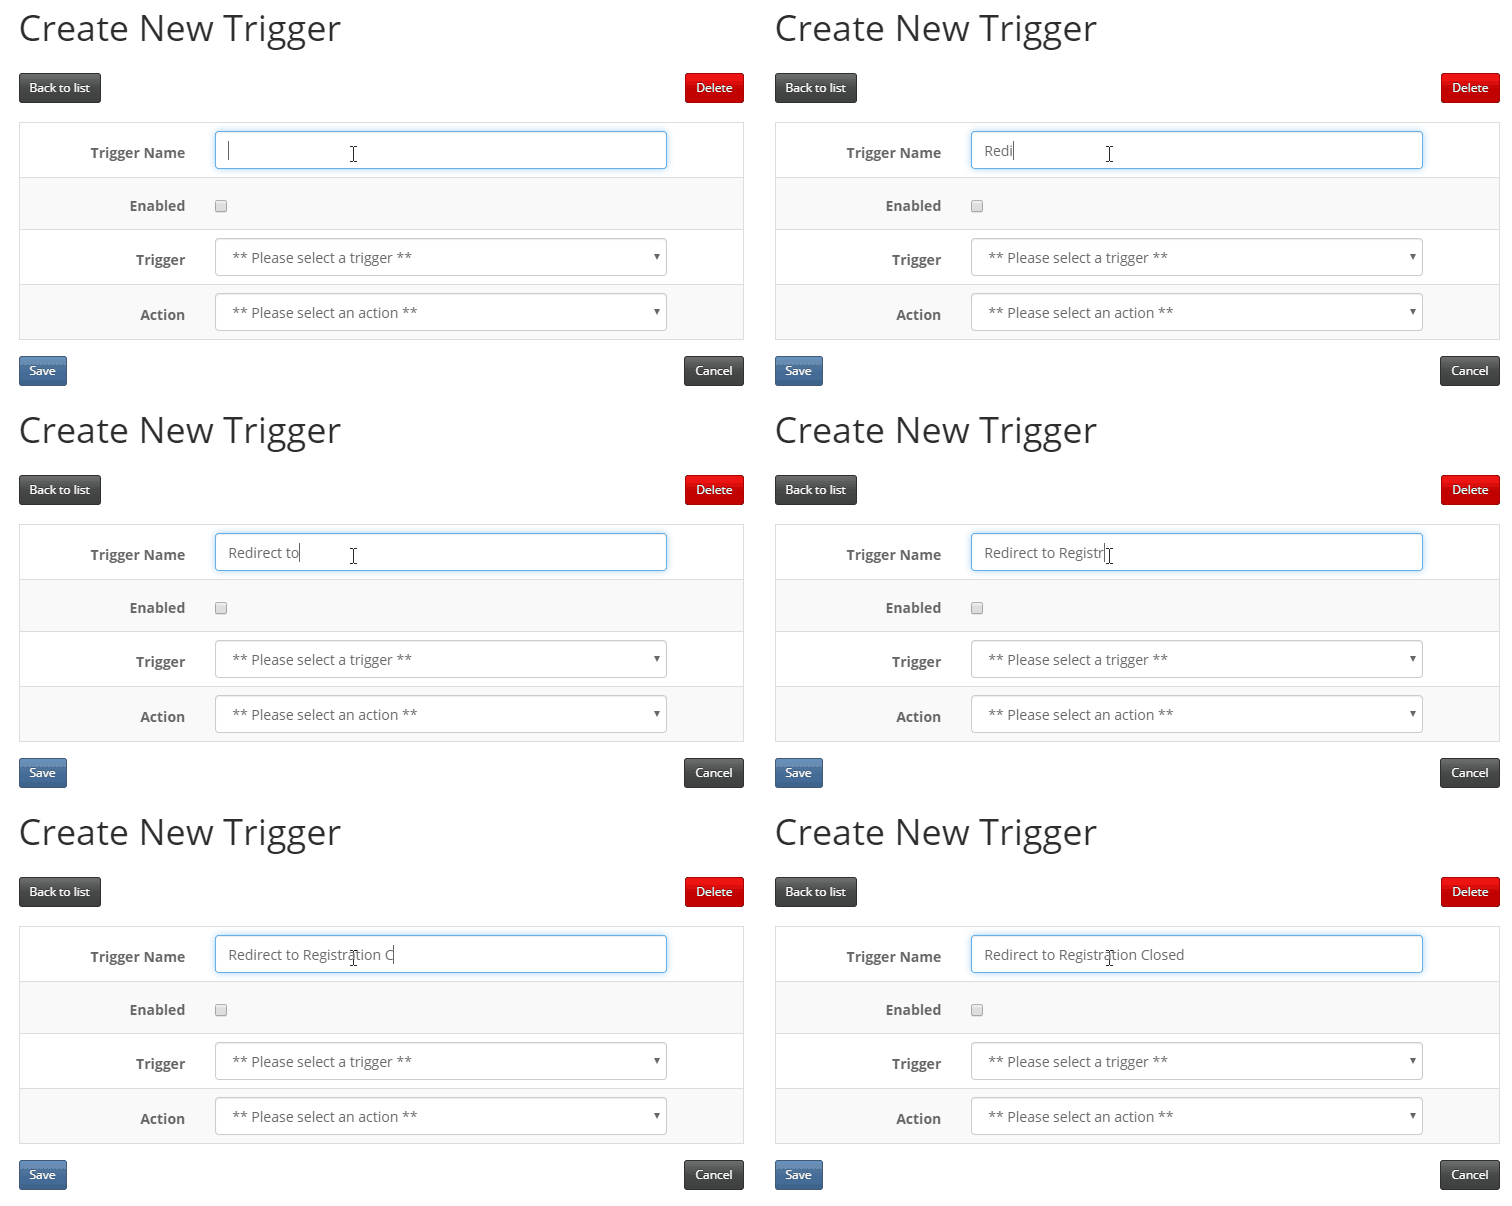
Important: Do not enable the trigger just yet. Wait until this trigger is setup and enable it from the 'Trigger List' screen.
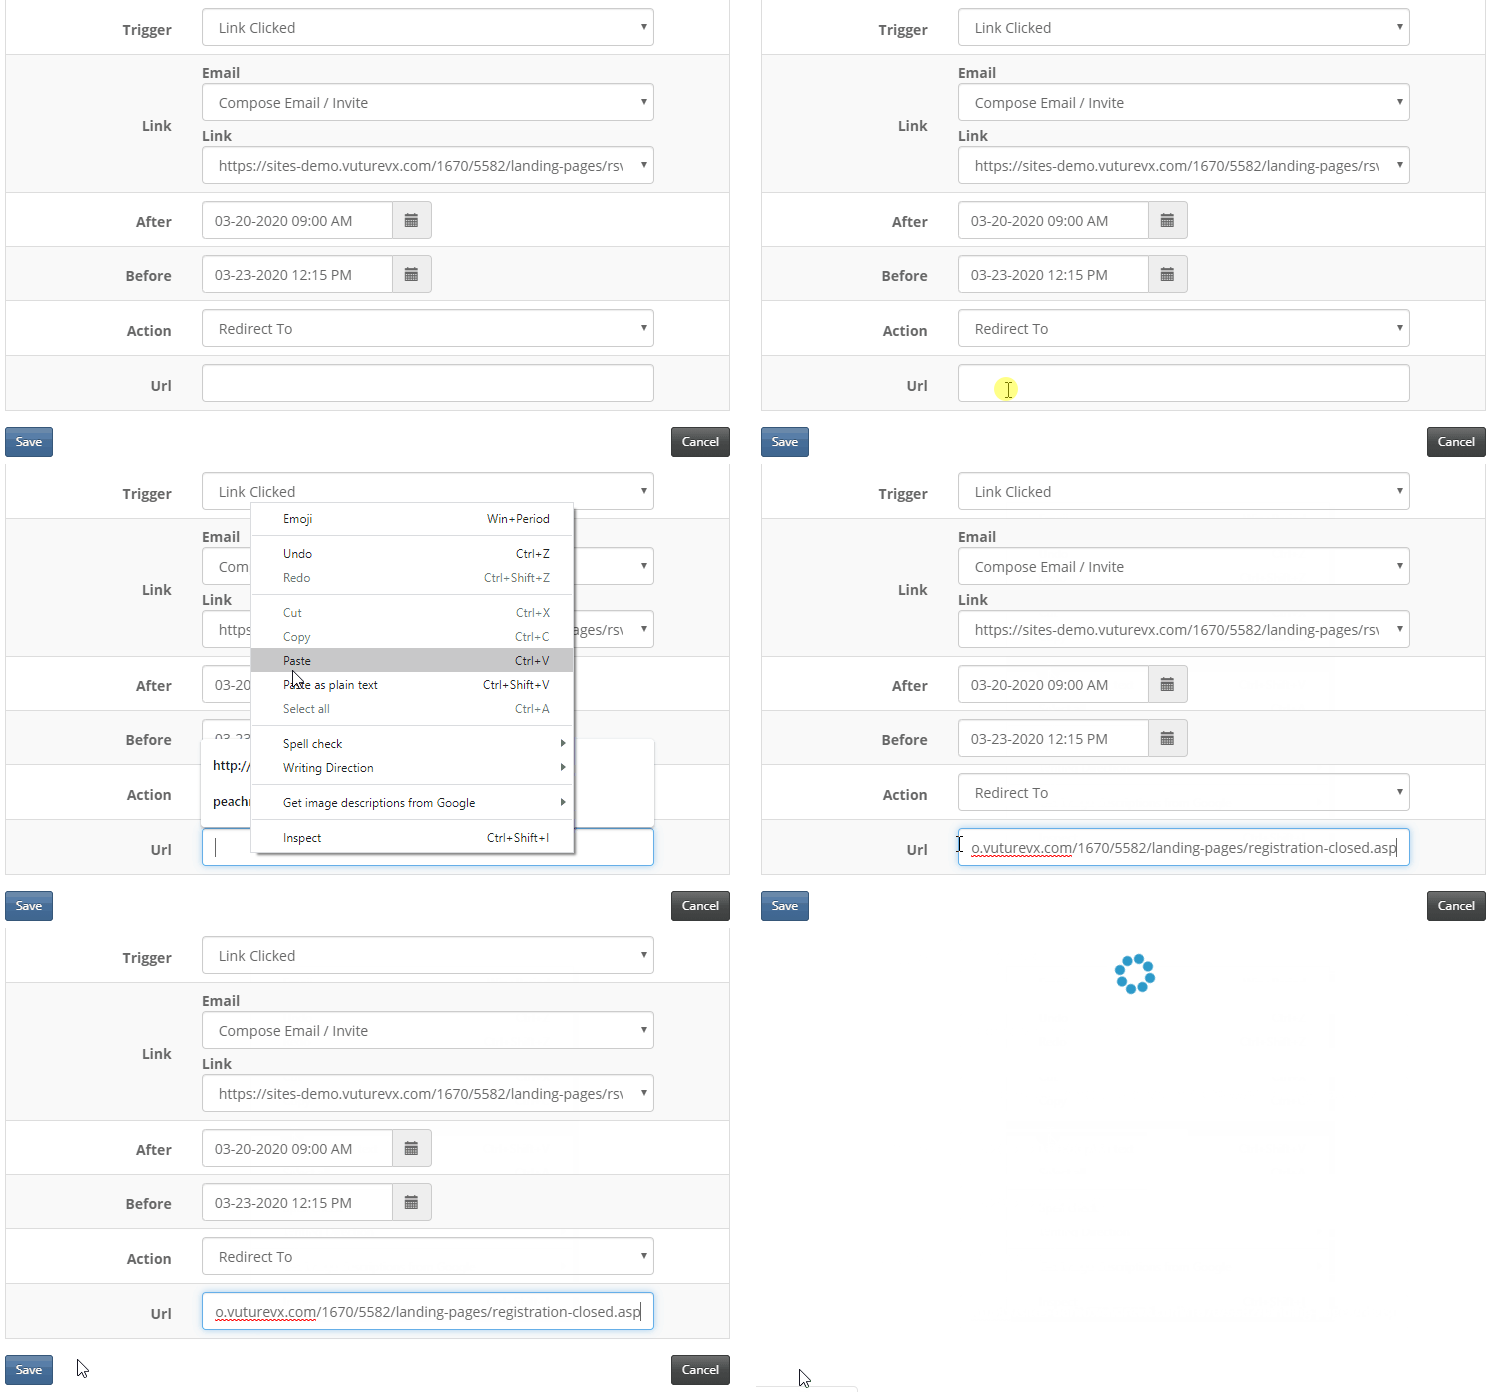
5. Select the 'Link Clicked' Trigger from the 'Trigger' drop-down.
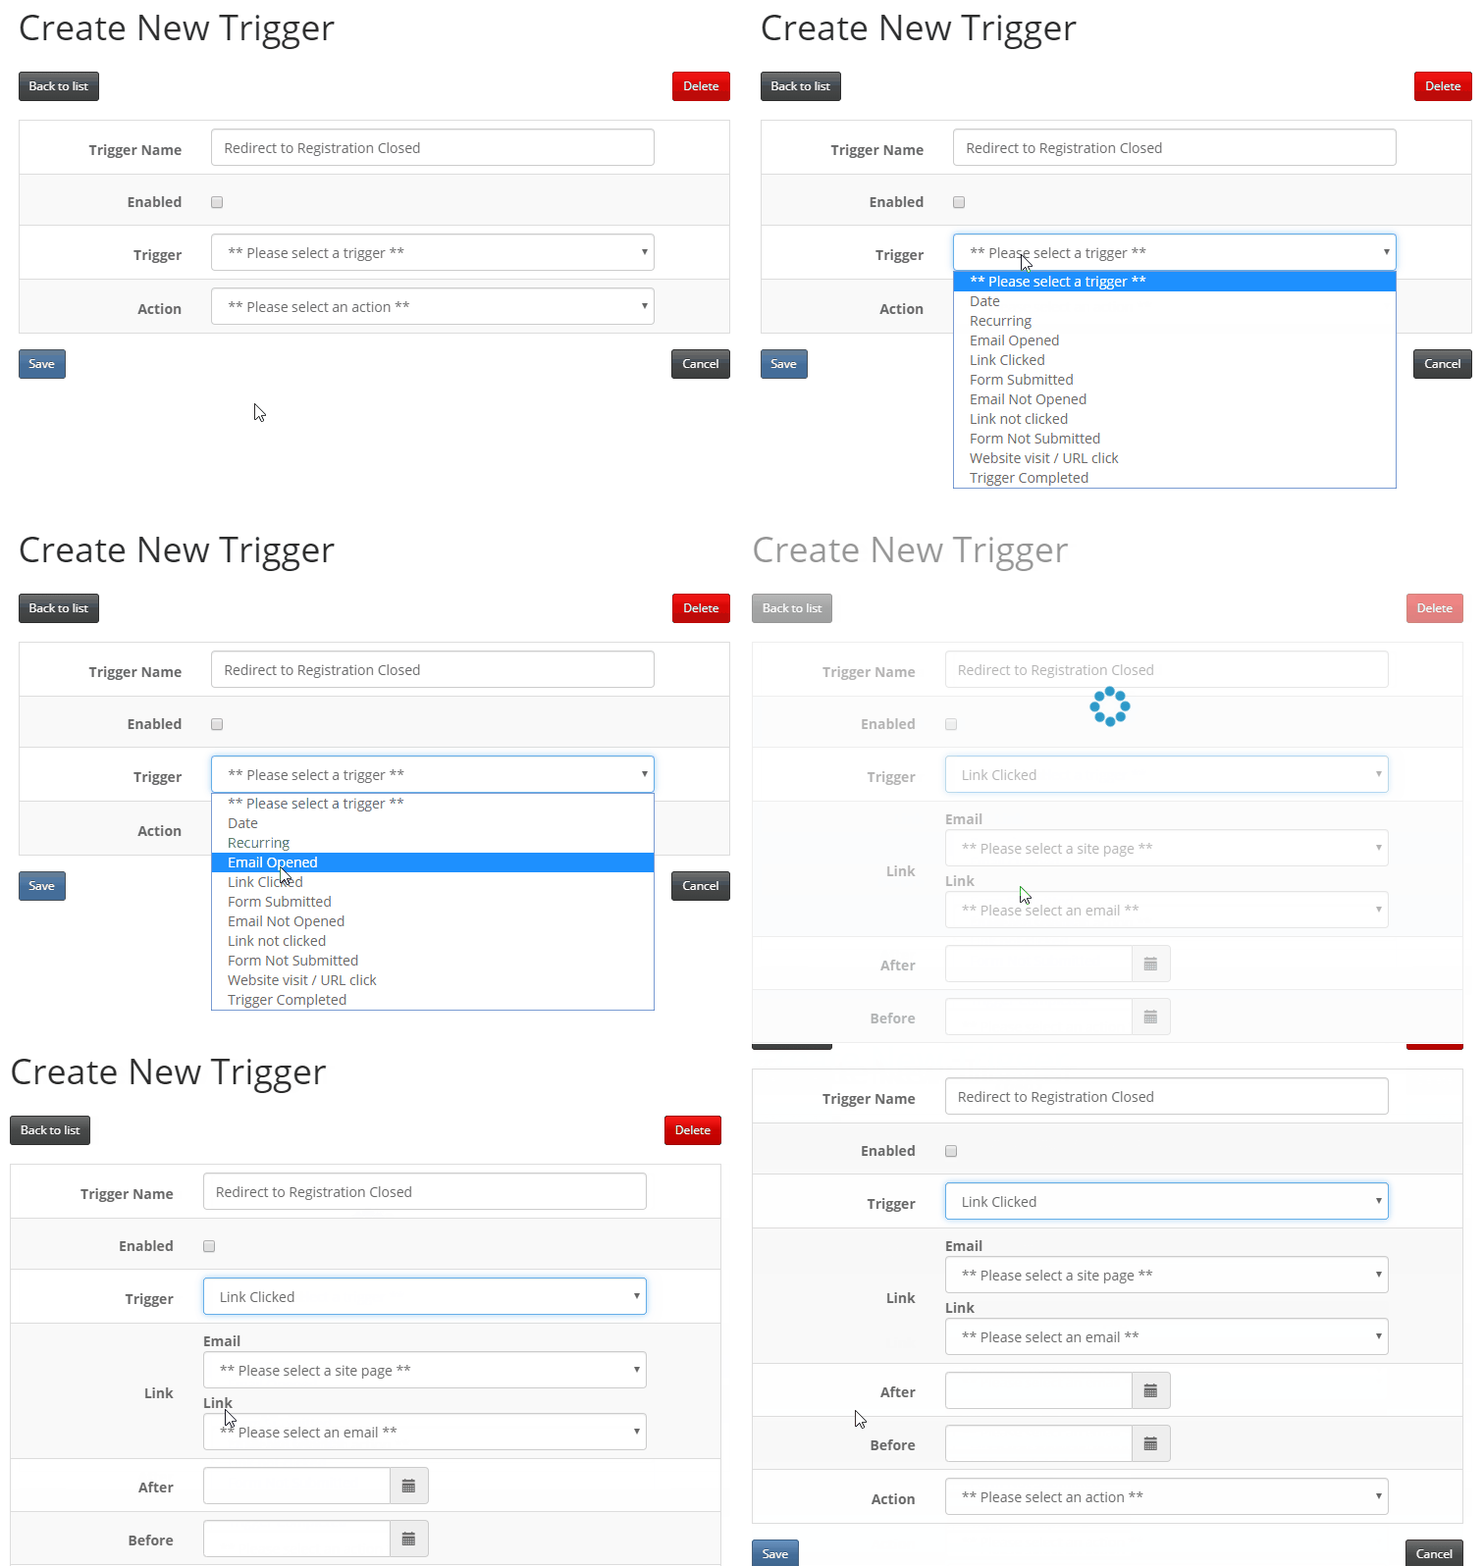
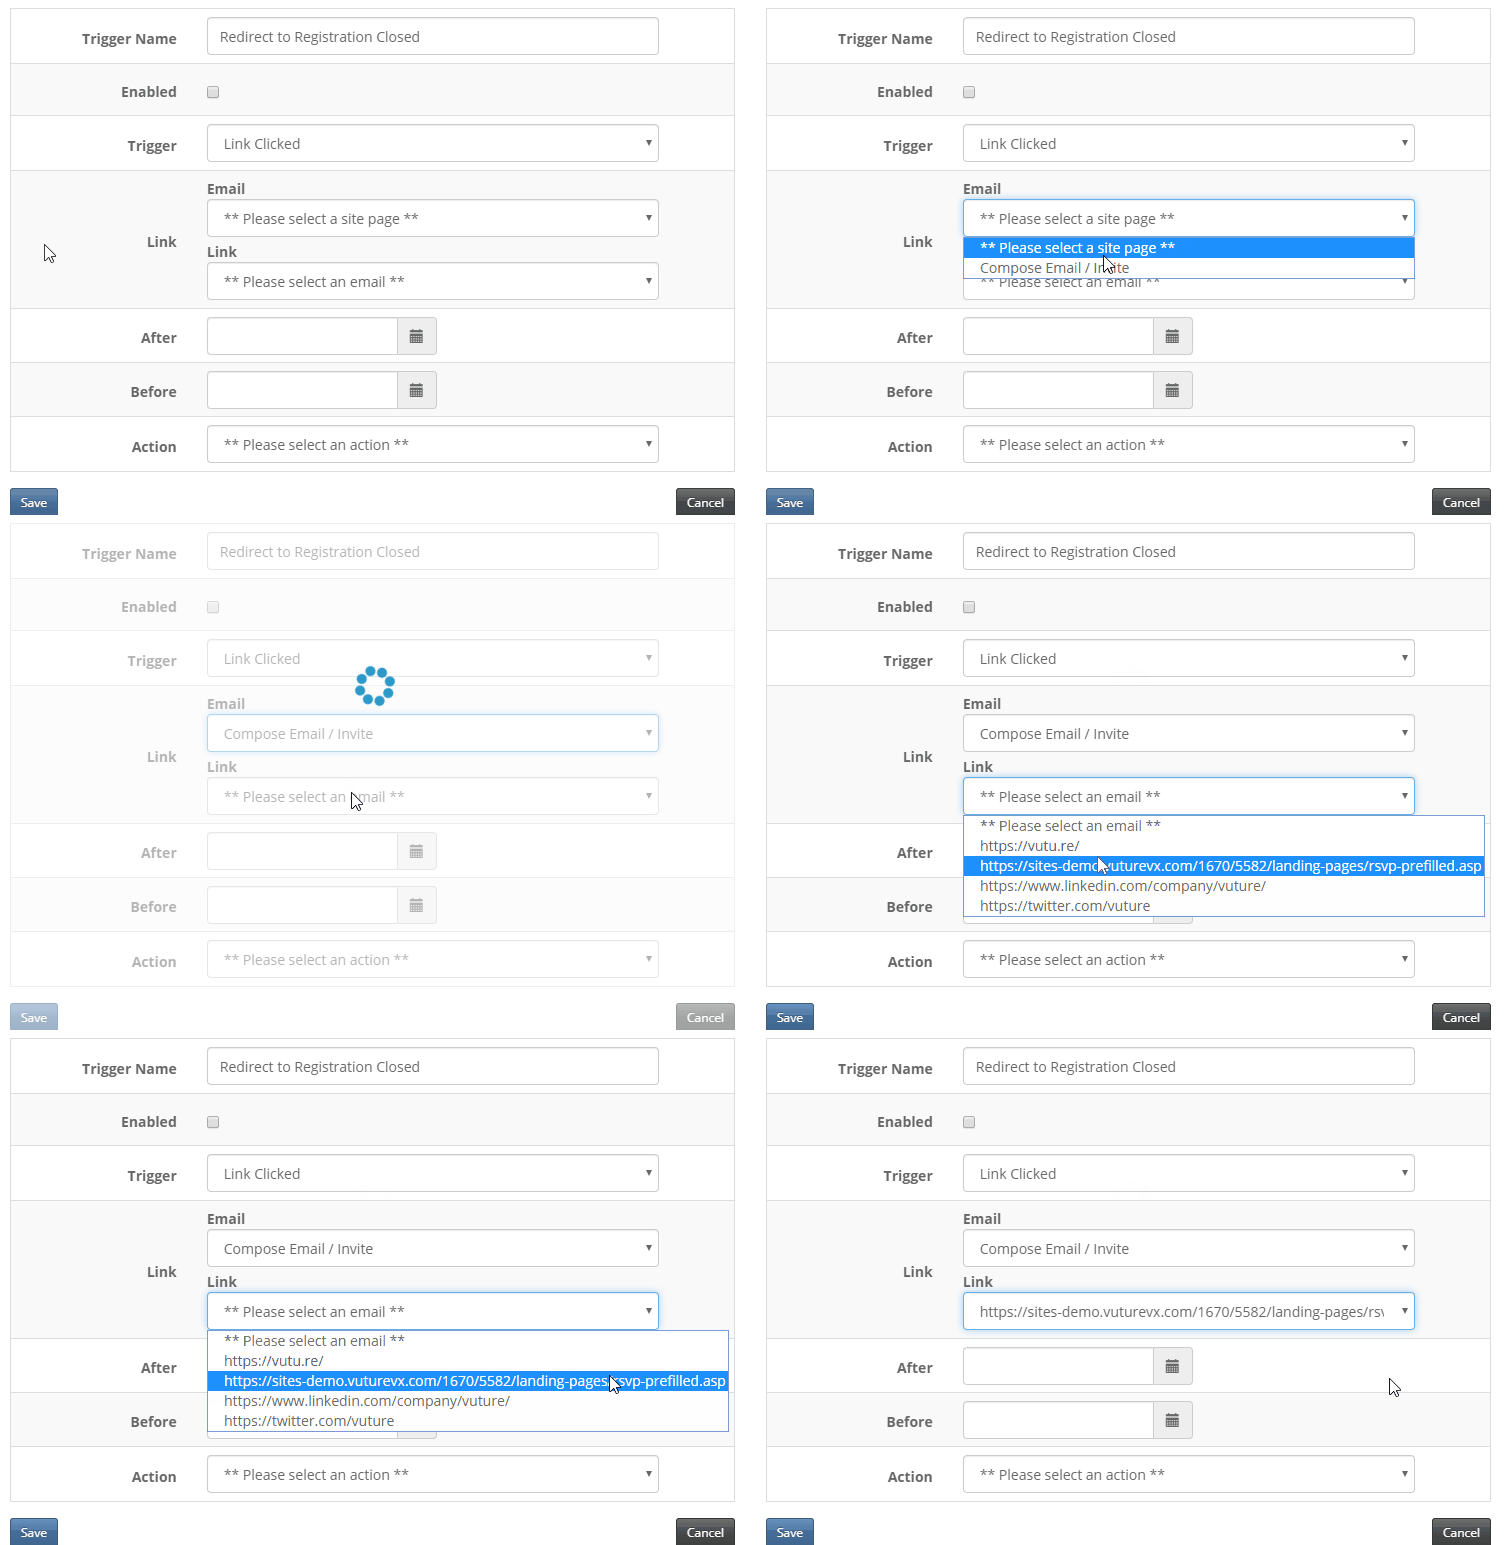
6. Select the email that contains a link to your RSVP Prefilled form (i.e. invitation) from the 'Email' drop-down. Then select the Link you wish to trigger a redirect to once this link is clicked in the email.
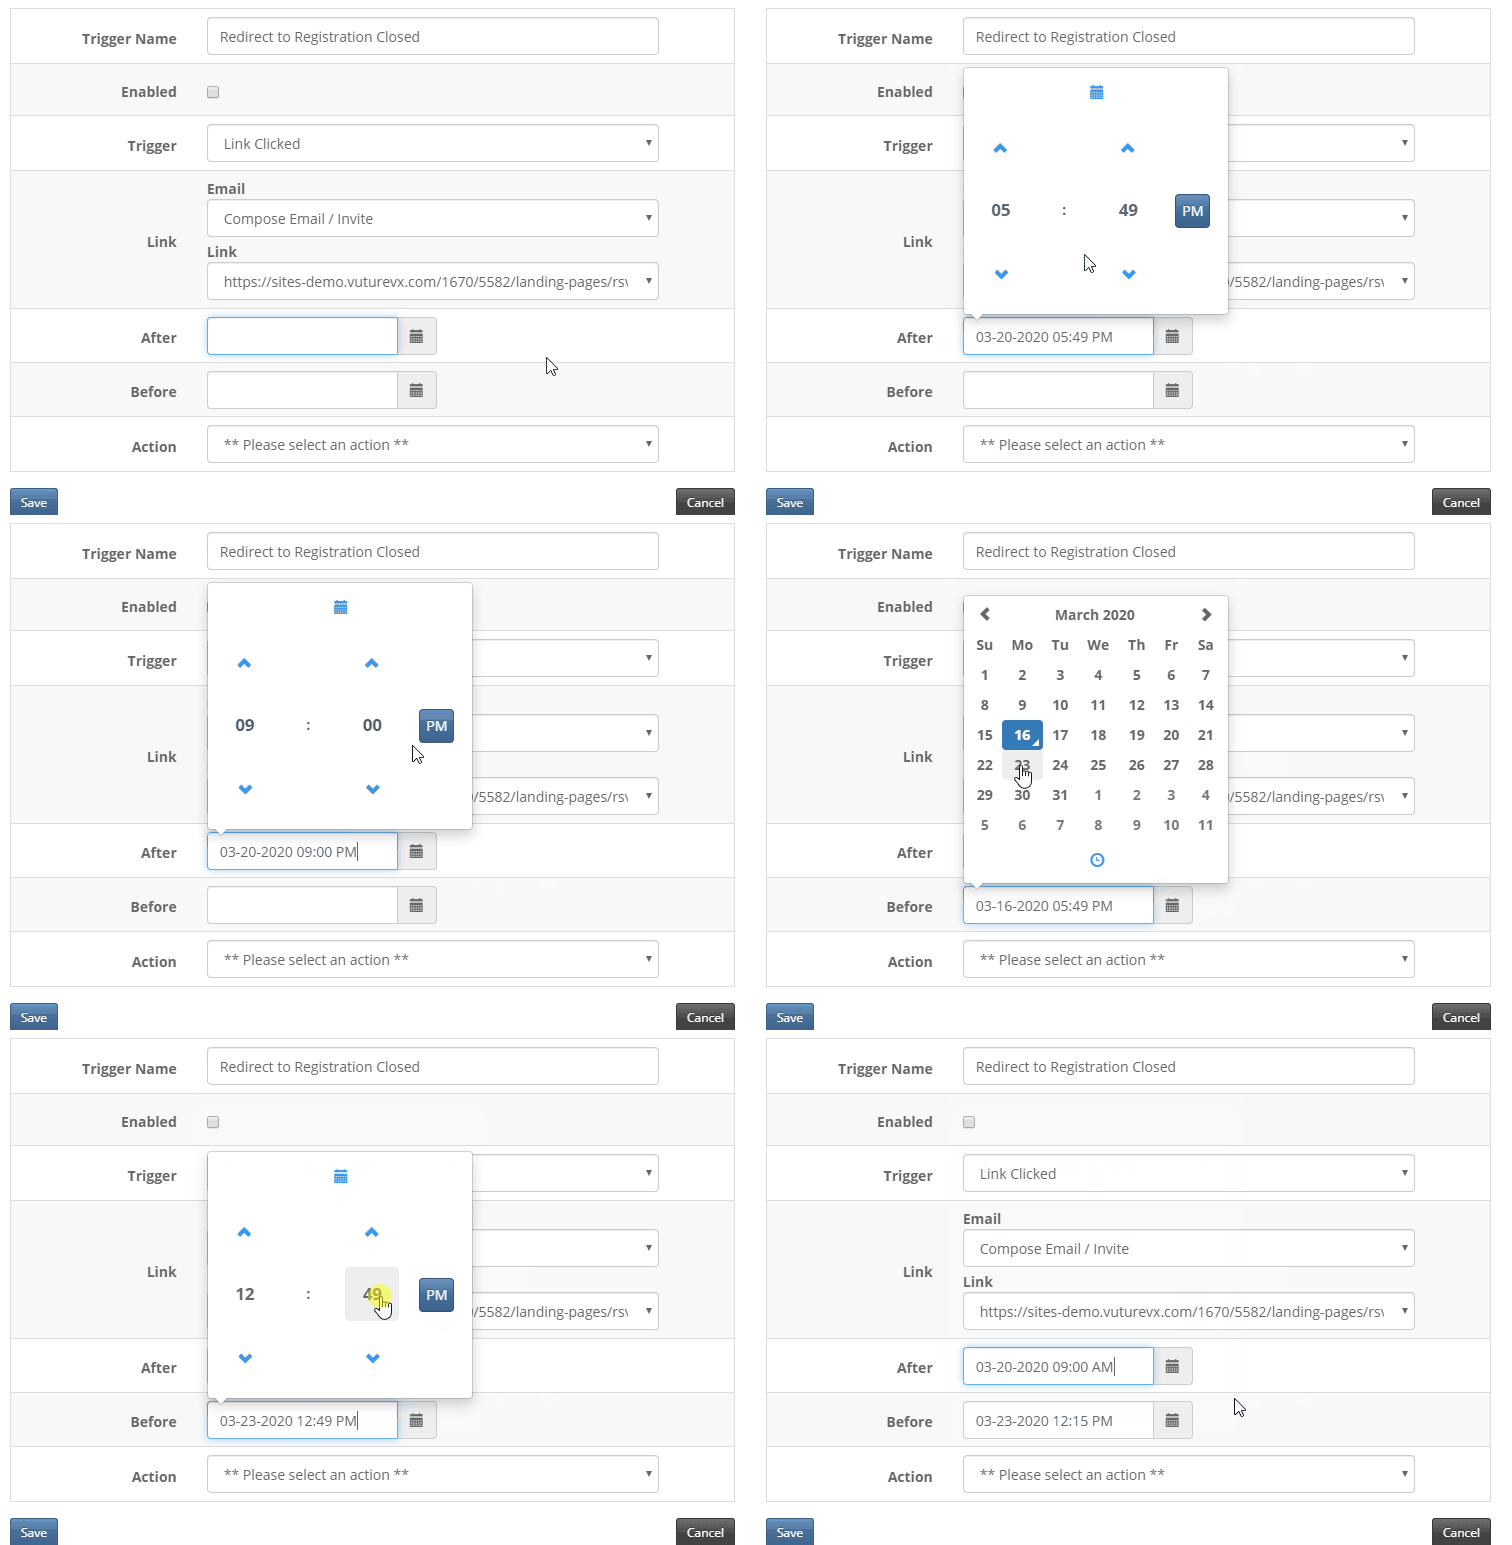
7. Select the 'After' date/time on which the redirect to the new page (i.e. Registration Closed) should happen. Then, select a 'Before' date for when you want this trigger to stop working.
8. From the 'Action' drop-down choose 'Redirect To'. This will redirect someone to a new URL on the 'After' date/time.
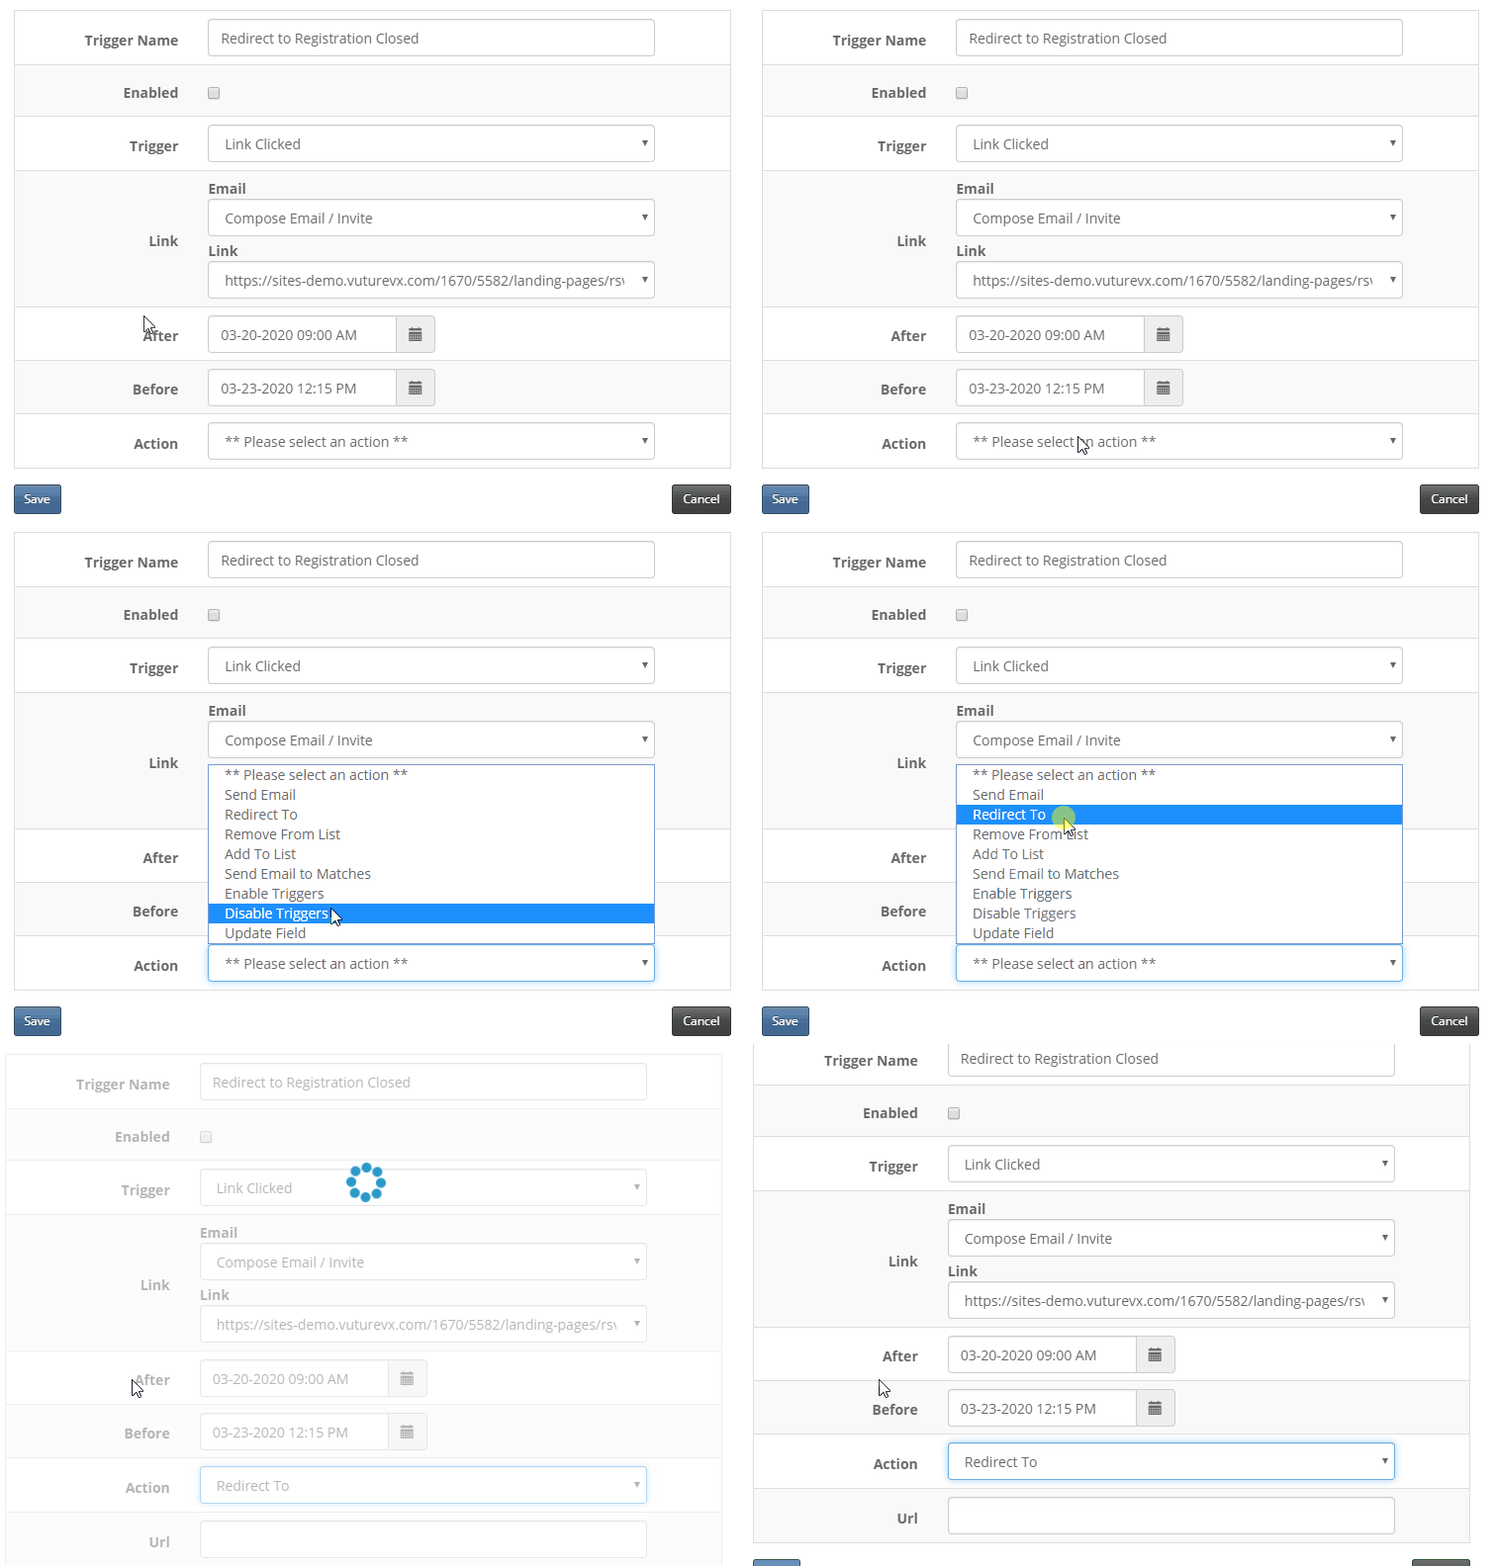
9. Pasted in the URL that you wish to redirect someone to and click on 'Save'.
10. Double check that everything is correct (i.e. Date, Time, URL to redirect, etc.). Then, when you're ready, from the Trigger List screen, check the box for 'Enabled' to enable your trigger. This trigger means that, up until the 'After' date/time you set, the first link you selected (i.e. RSVP Prefilled) will be in effect. Once the 'After' date/time is reached, the redirect will take over and the Redirect URL will become visible instead (i.e. Registration Closed).
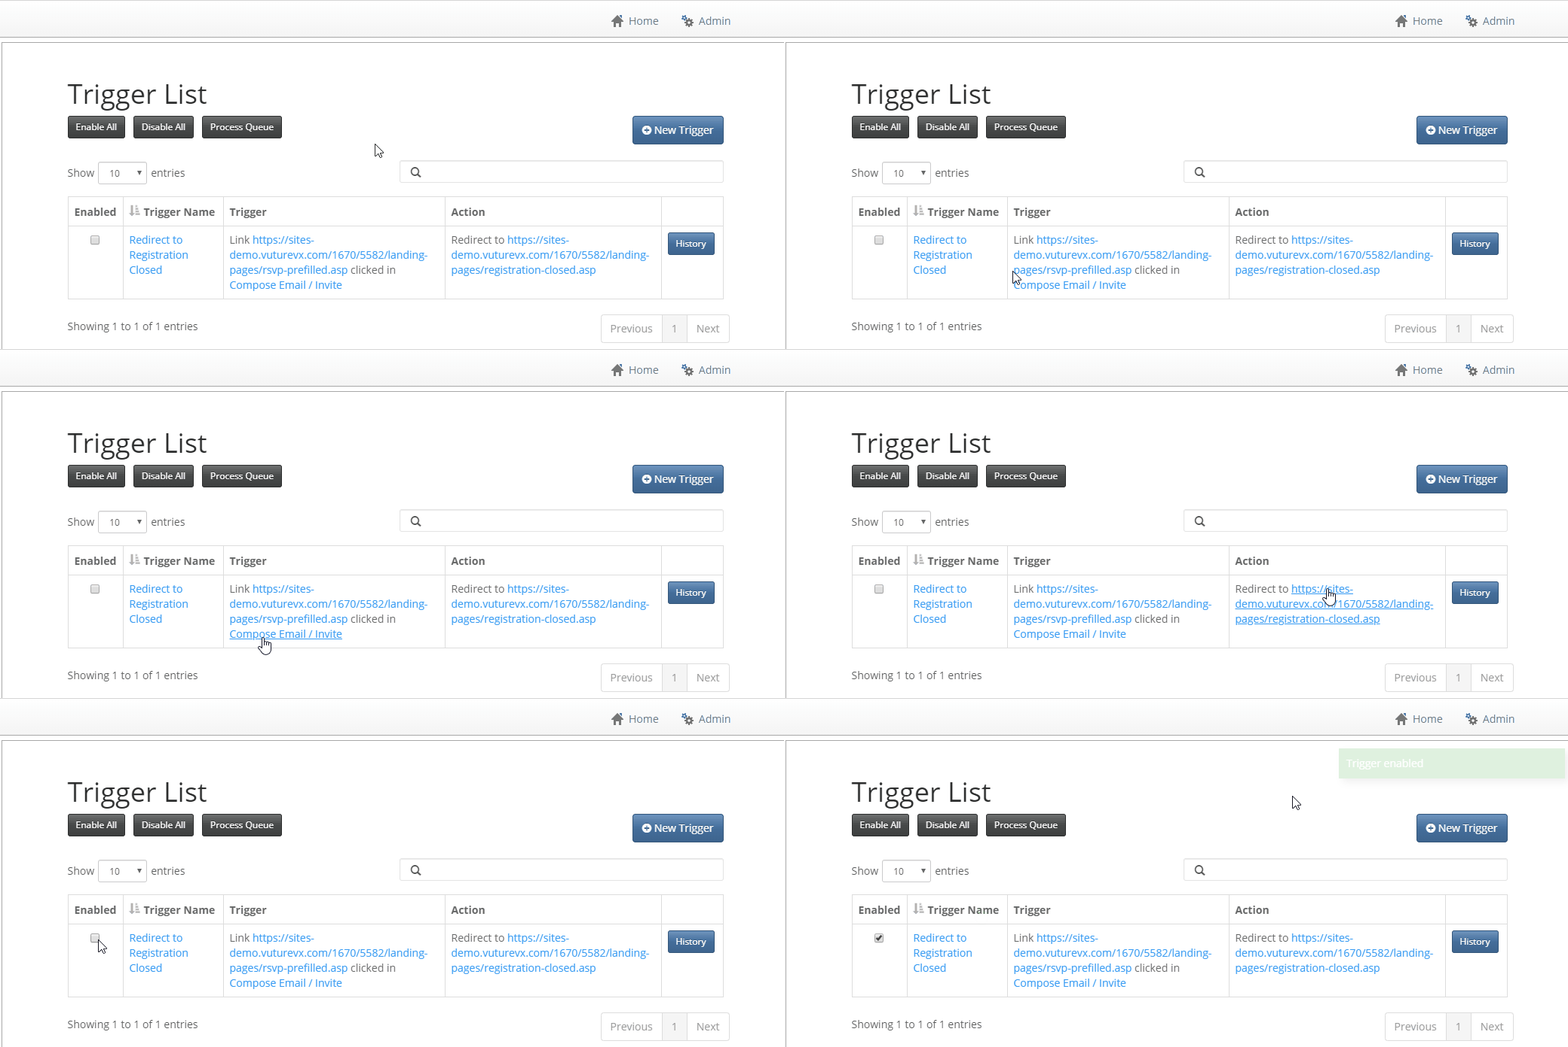
Important: When you are testing this trigger you must SEND the email for the trigger to work. It will not work if you only View the email page and click on the RSVP link. To test it, send the email to yourself or a colleague and click the RSVP link.
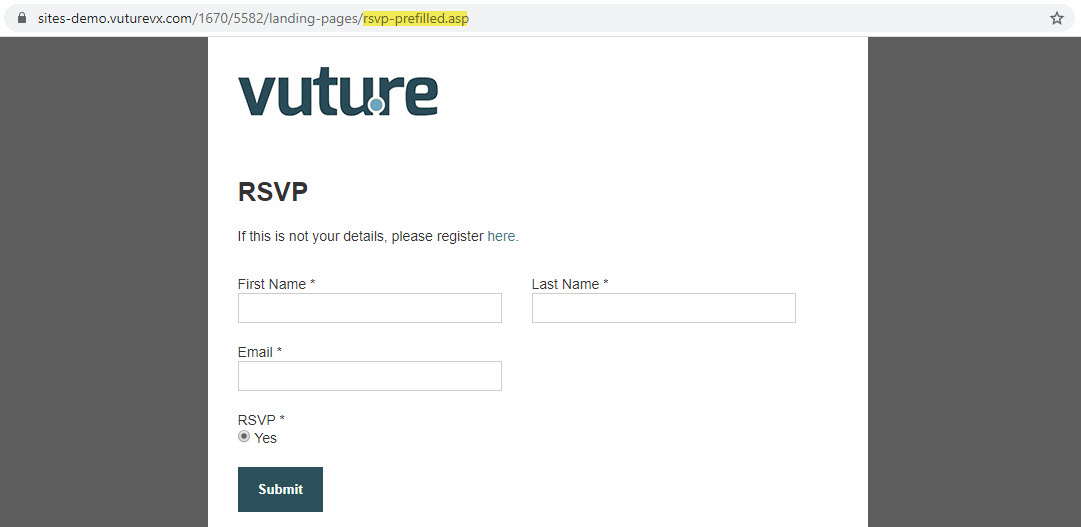
Before the set date/time is reached:
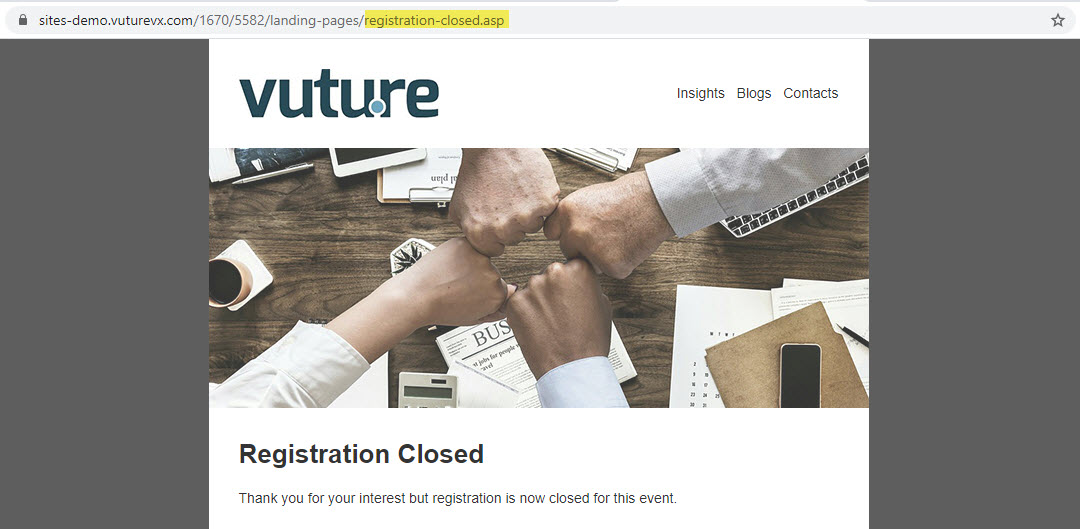
After the set date/time is reached:
Method 2: Publish a Page and at the Same Time Retain an Amended Draft to be Published on a Future Date
Important: This method relies on not publishing an edited page. Publishing the page is an automatic response, almost like a reflex, for many Vuture users. Therefore, you are advised to read this instruction in full before starting.
This method allows you to create a Draft version of the RSVP page(s) and hold that Draft in your campaign until you are ready for it to replace the existing, published RSVP page(s).
For example, your published RSVP Prefilled page would have all the registration details on the form and is what your contacts will see when visiting the form/interacting with the form. You may then edit the page in Vuture to create a new Draft version, where the form is deleted and a message reads, "The registration period for this event is now closed. Please visit our website for upcoming events." As long as this draft is not published, the contacts will still see the full form and be able to register for the event. You can this use a 'Date' Trigger to publish the latest draft of this page, on a future date/time, to display the 'Registration is closed' language and shut down the form. Please follow the below instructions to set this up in your event campaign.
Step by Step Instructions
1. In your campaign, create the RSVP page as you normally do, adding all the additional fields, and publish the page. Check it carefully for any edits or amends because it will be time-consuming to return to it later.
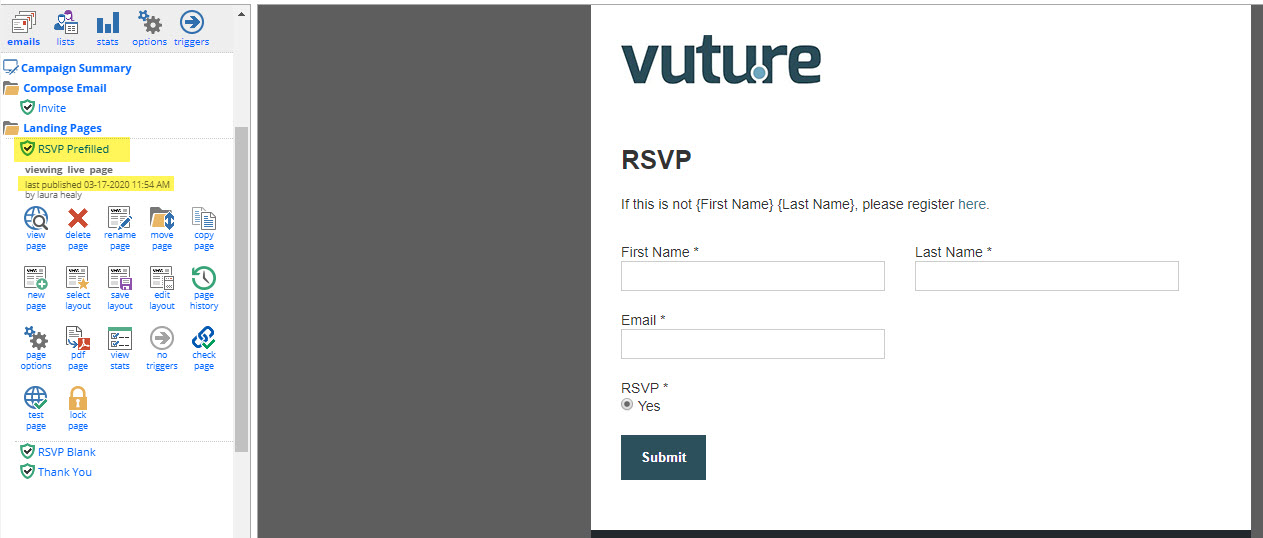
2. Now with the published page selected, choose Edit Layout. Right click in Edit Layout mode and use the Edit Layout drop down menu to remove the form question snippets, leaving only text. Then click on Save Layout.
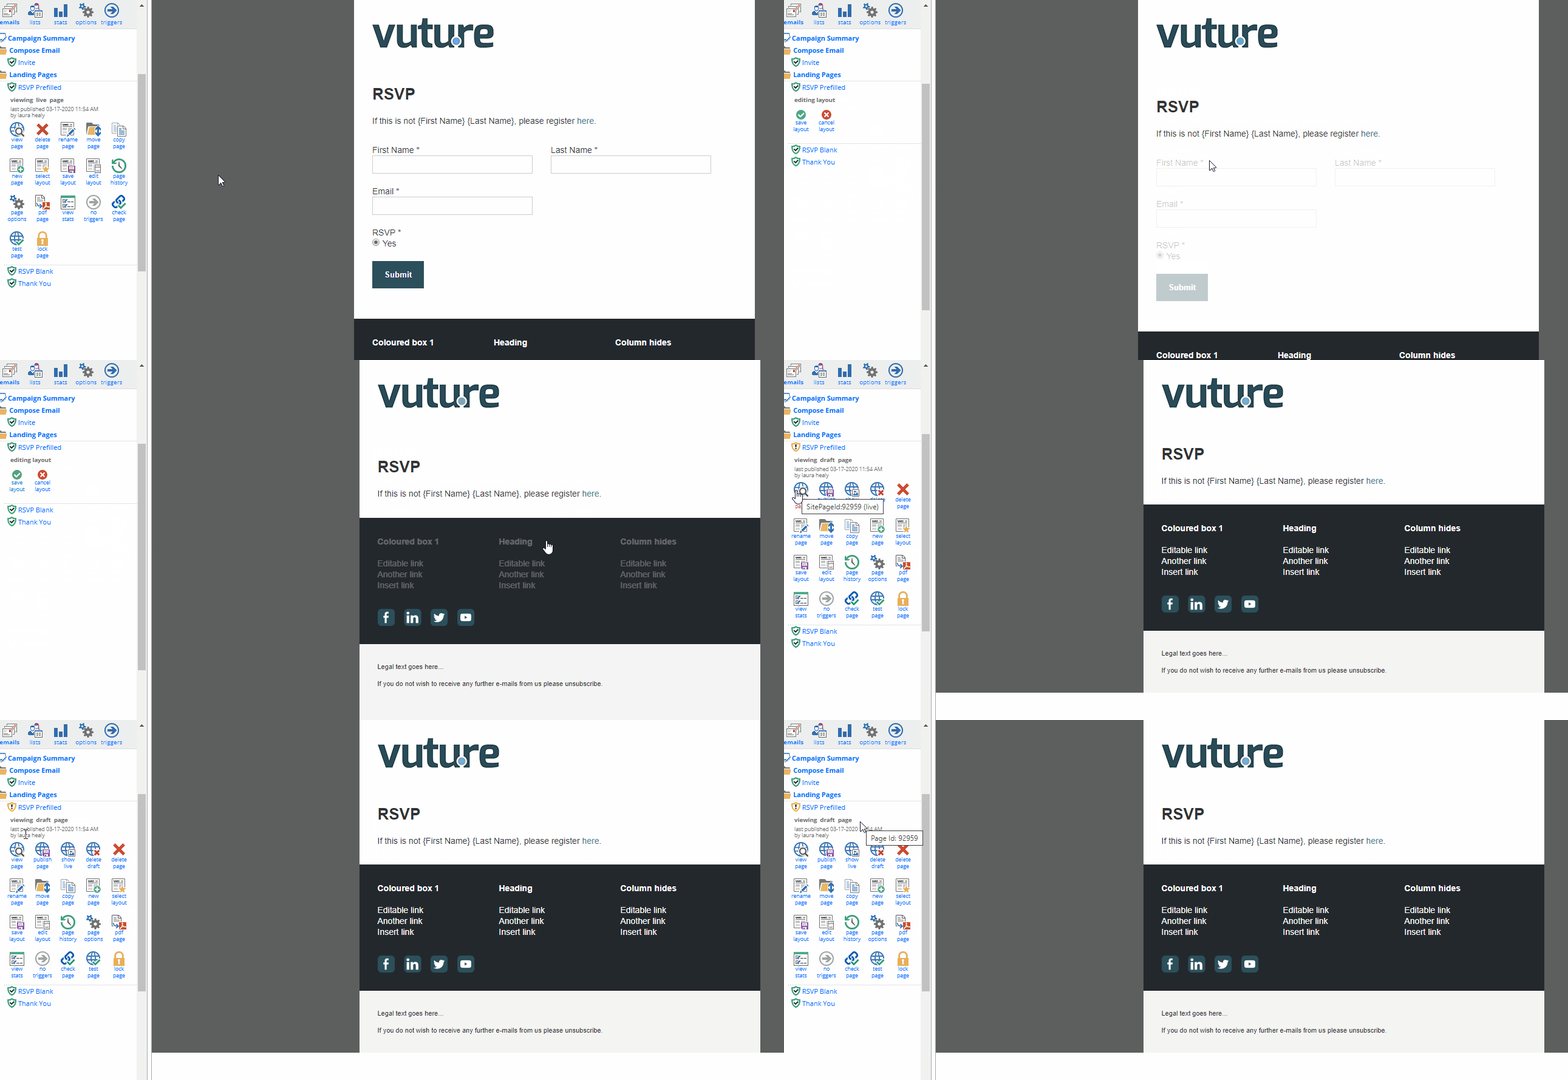
3. Now use the text editor to change the message to “Sorry this event is closed for registrations” or similar.
Important: DO NOT PUBLISH THE PAGE. If you publish at this point you will overwrite your existing RSVP page.
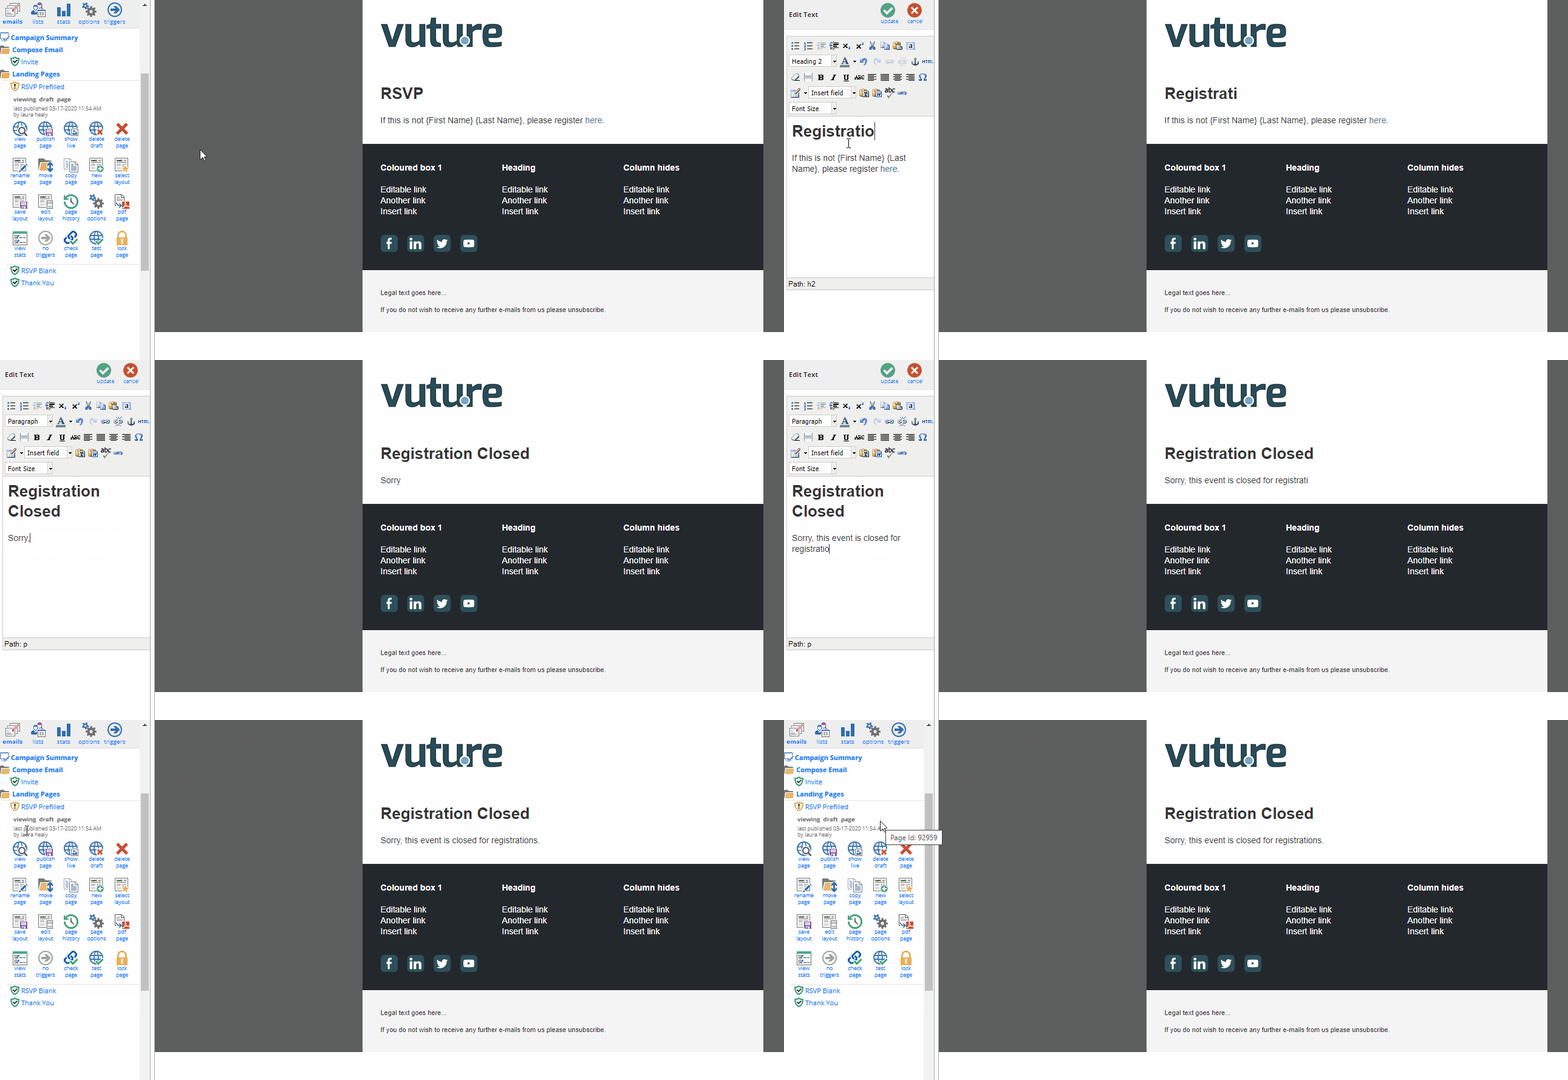
You now have two versions of the page – the original and the draft. As long as you do not publish the draft, clients will see the published RSVP version.
Tell your colleagues not to access the campaign and “helpfully” publish any pages they notice still in the unpublished state.
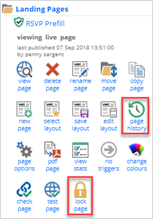
You can lock the page for editing – use the Lock Page icon - to prevent accidental publishing by other users. The Trigger will still work.
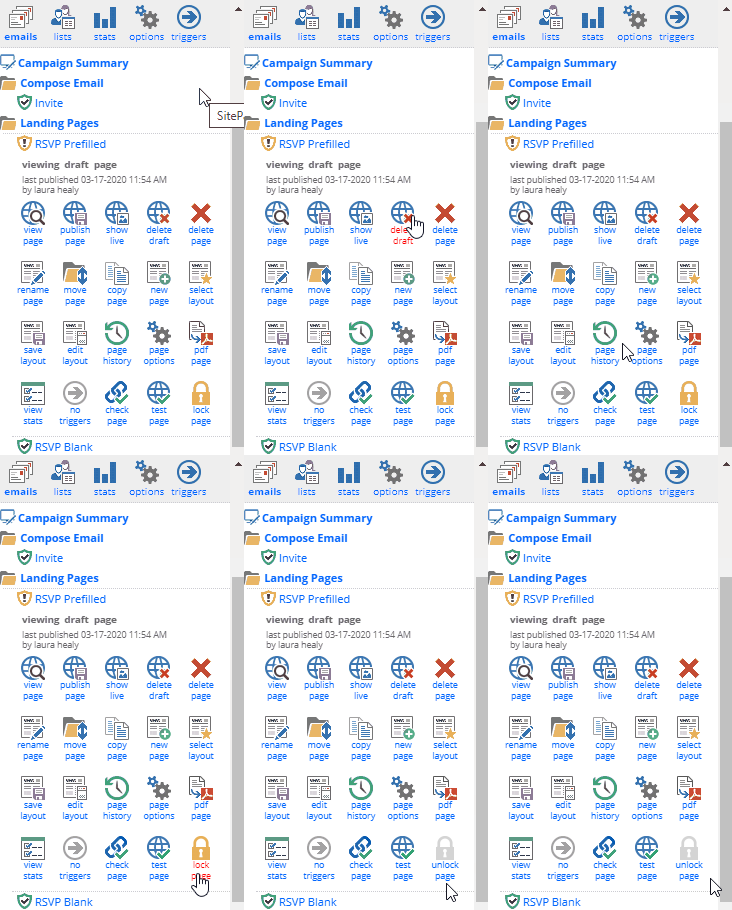
4. Set up a 'Date' Trigger to publish the draft on any date in the future. Follow the instructions below to set this up.
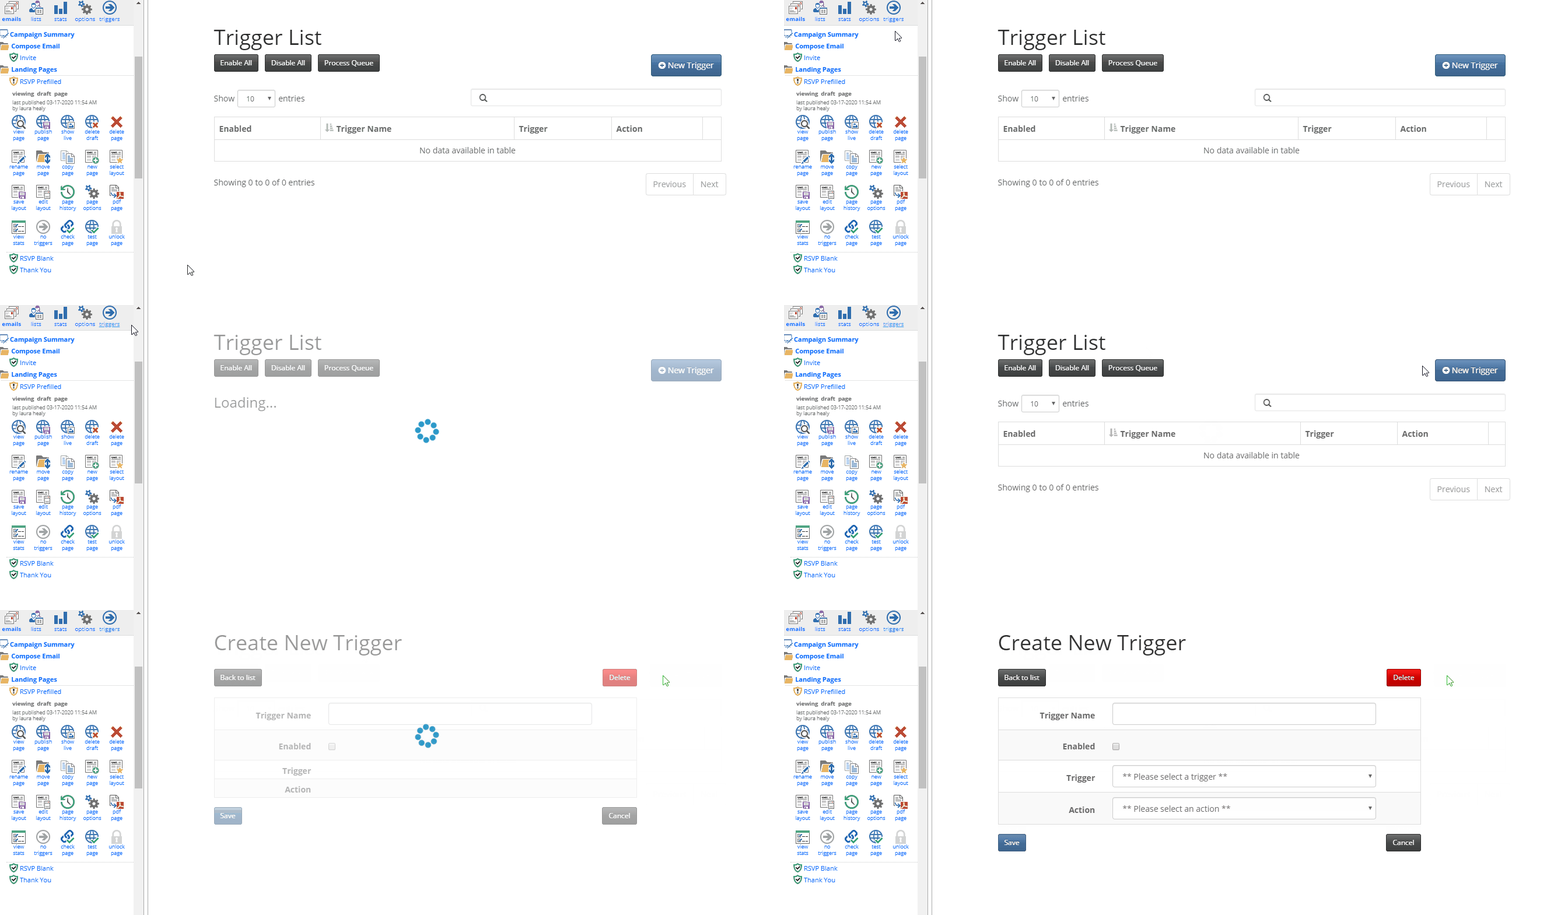
Step 1. Navigate to the Triggers screen and click on '+ New Trigger'.
Step 2. Give your Trigger a clear name for what this Trigger will do for you. For example, if it is going to publish the RSVP Page to close down registration, name it 'Publish RSVP Page to Close Registration'.
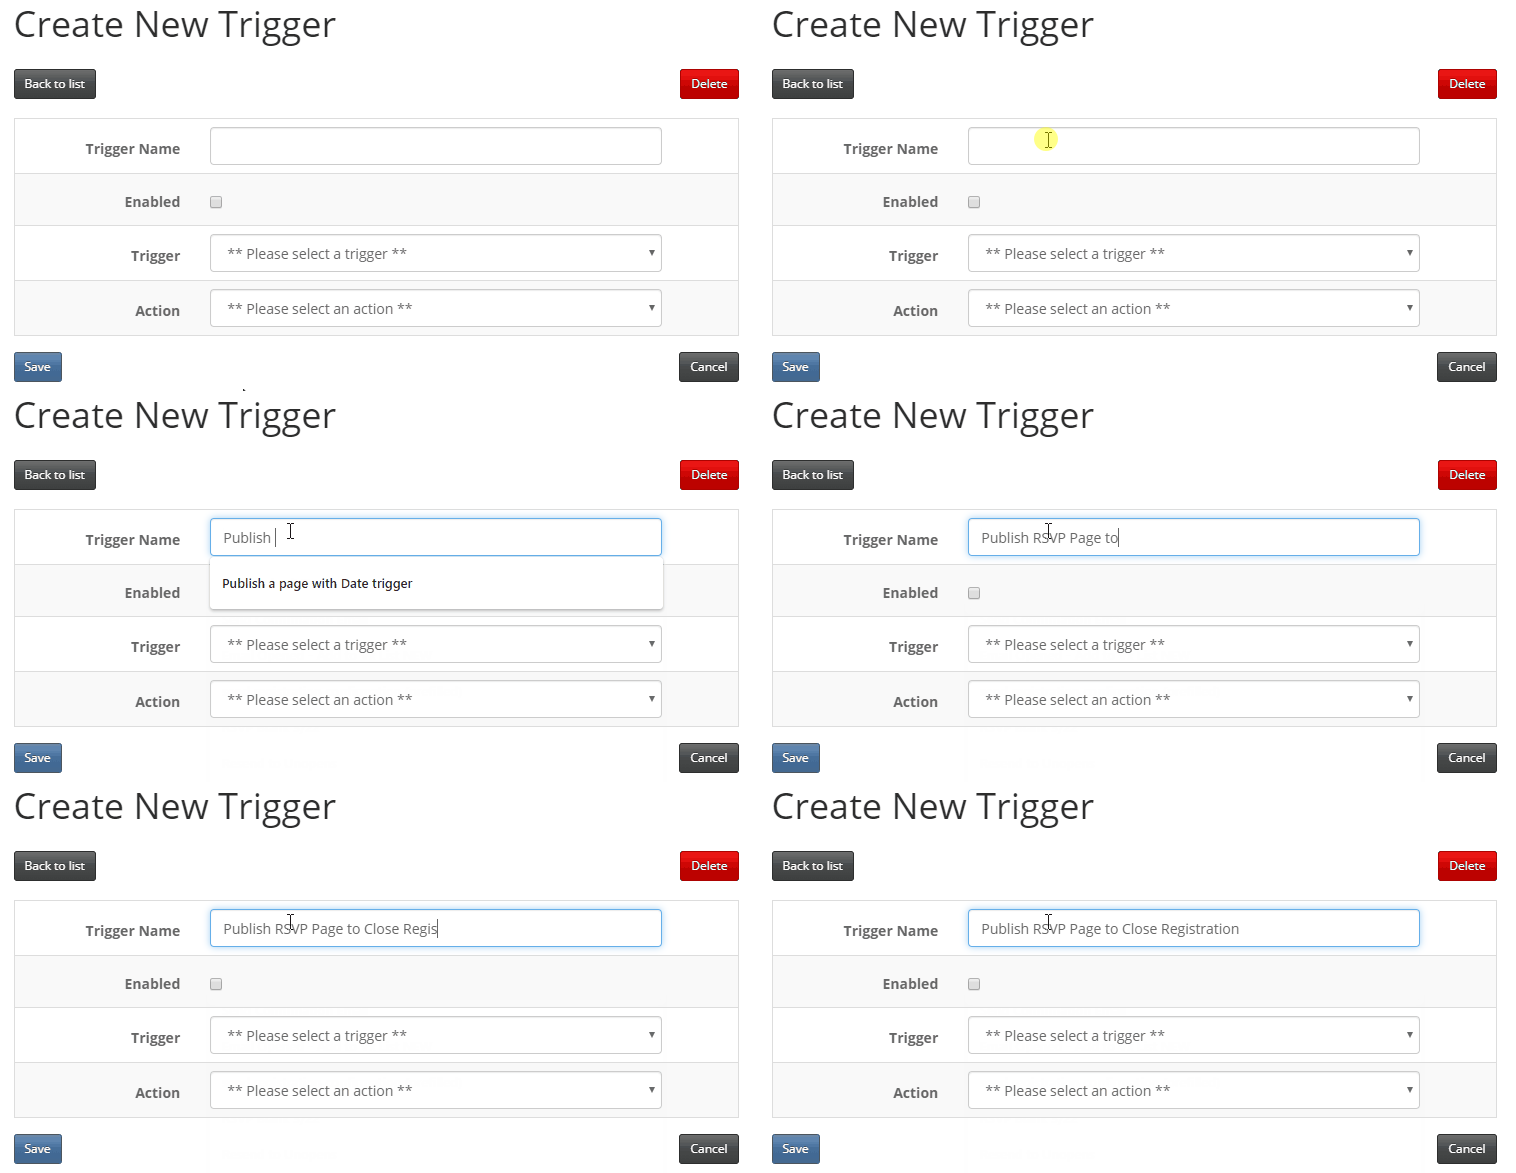
Important: Do not enable the trigger just yet. Wait until this trigger is setup and enable it from the 'Trigger List' screen.
Step 3. Select the 'Date' Trigger from the 'Trigger' drop-down. Then select the specific date/time you'd like to publish the draft of the RSVP Page to close down registration.
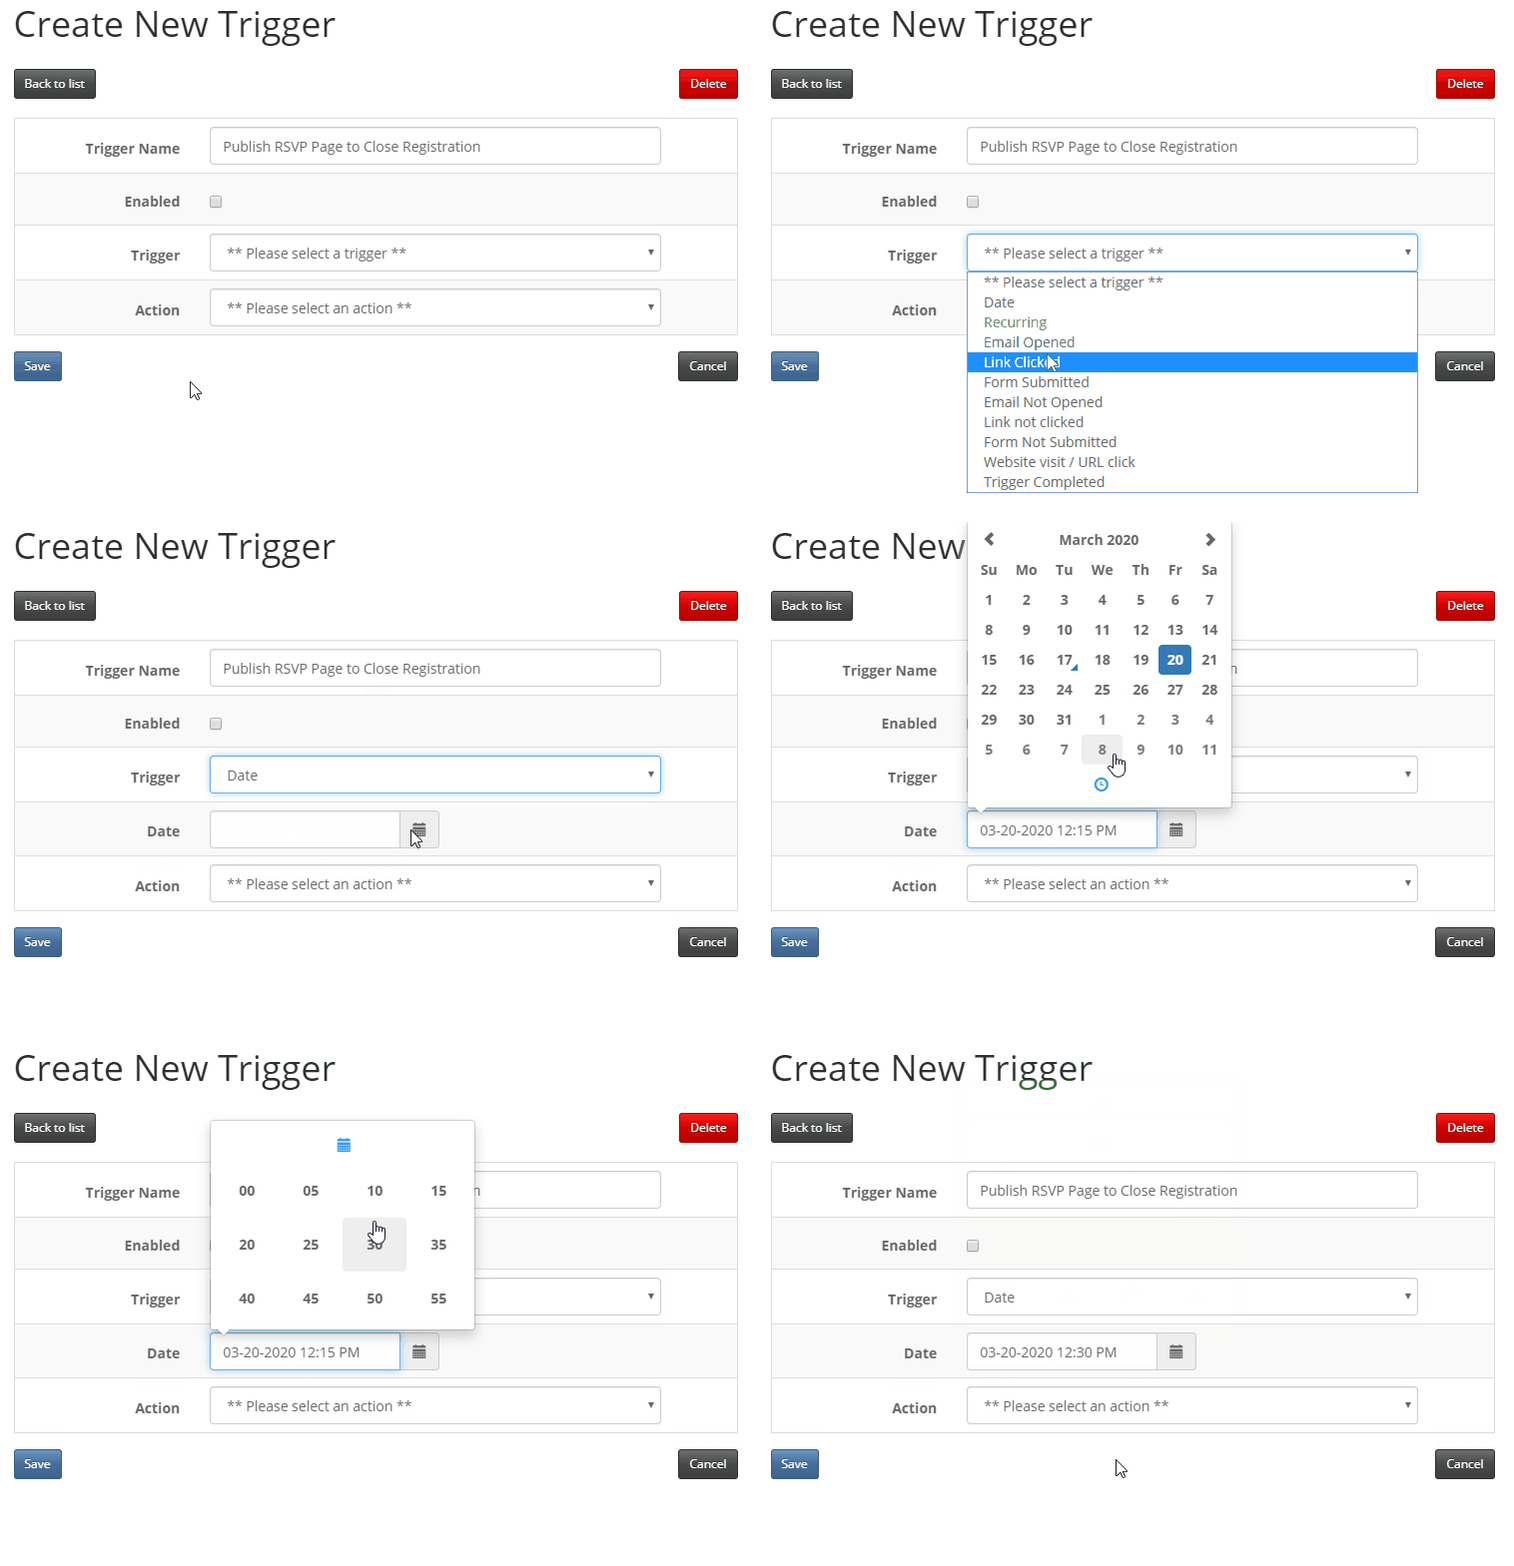
Step 4. Next, select 'Publish Page' from the 'Action' drop-down.
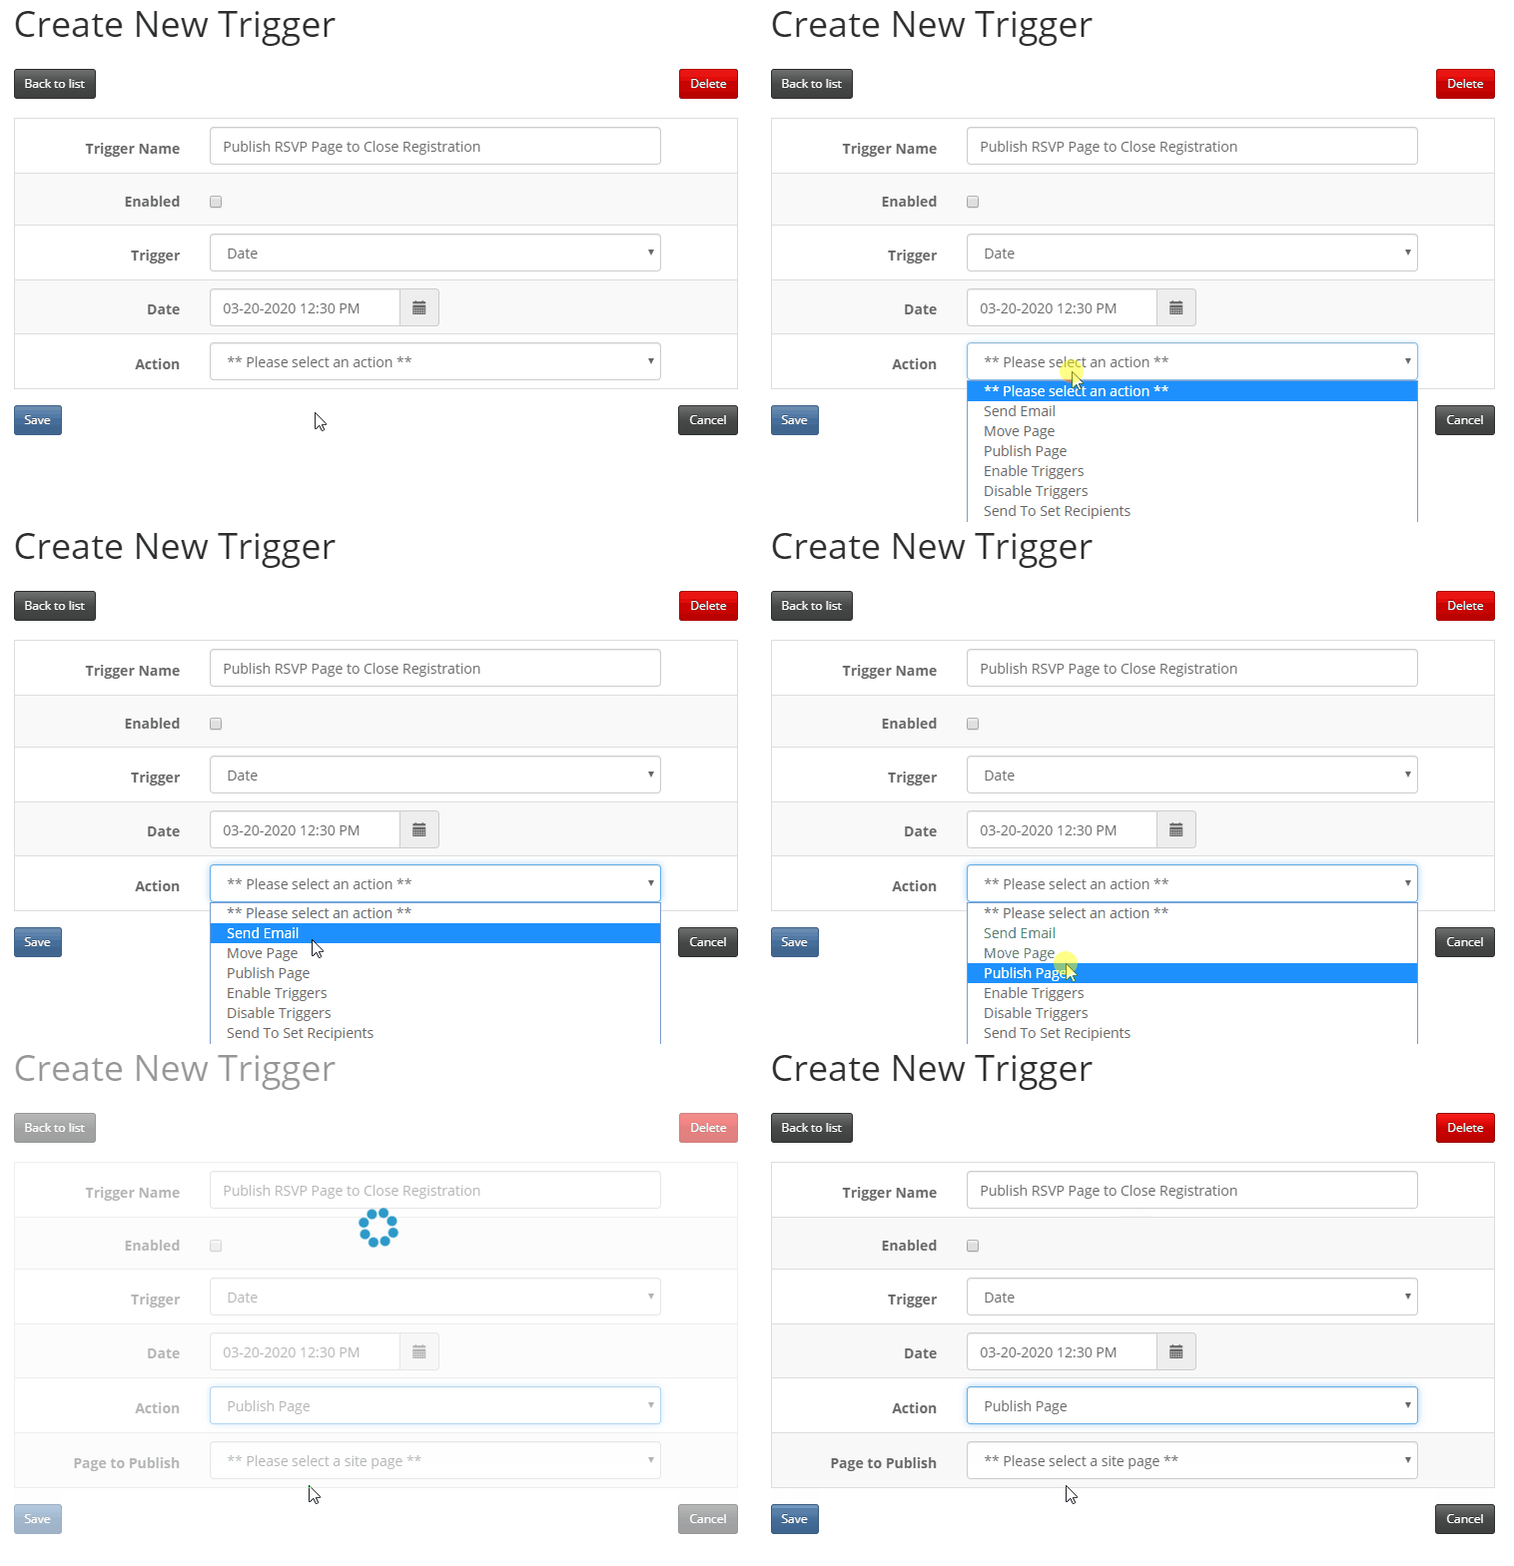
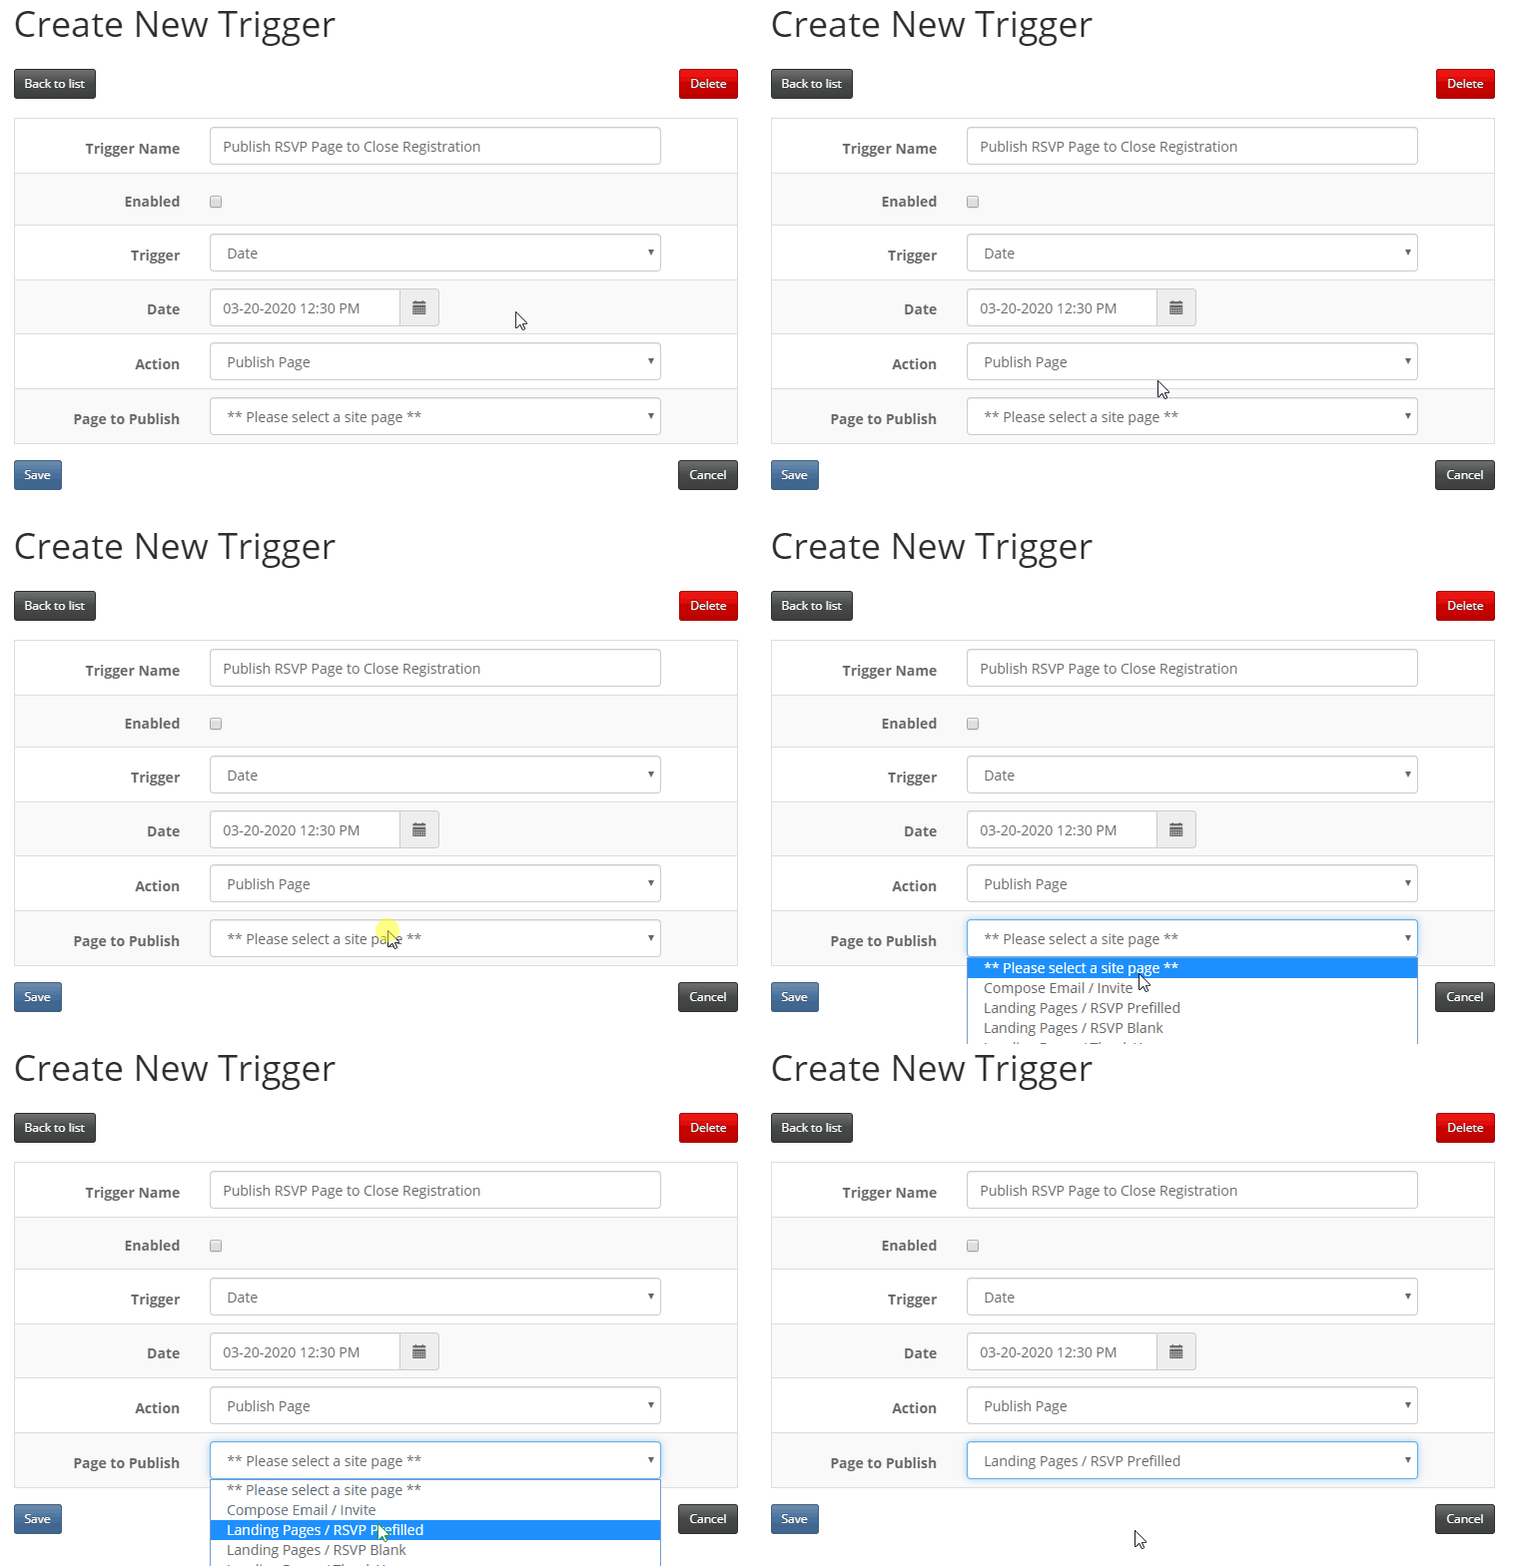
Step 5. Select the landing page you wish to publish (i.e. RSVP Prefilled).
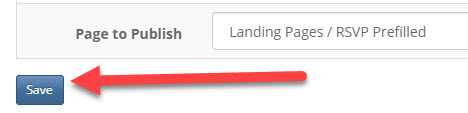
Step 6. Click on the blue Save icon to save your Trigger.
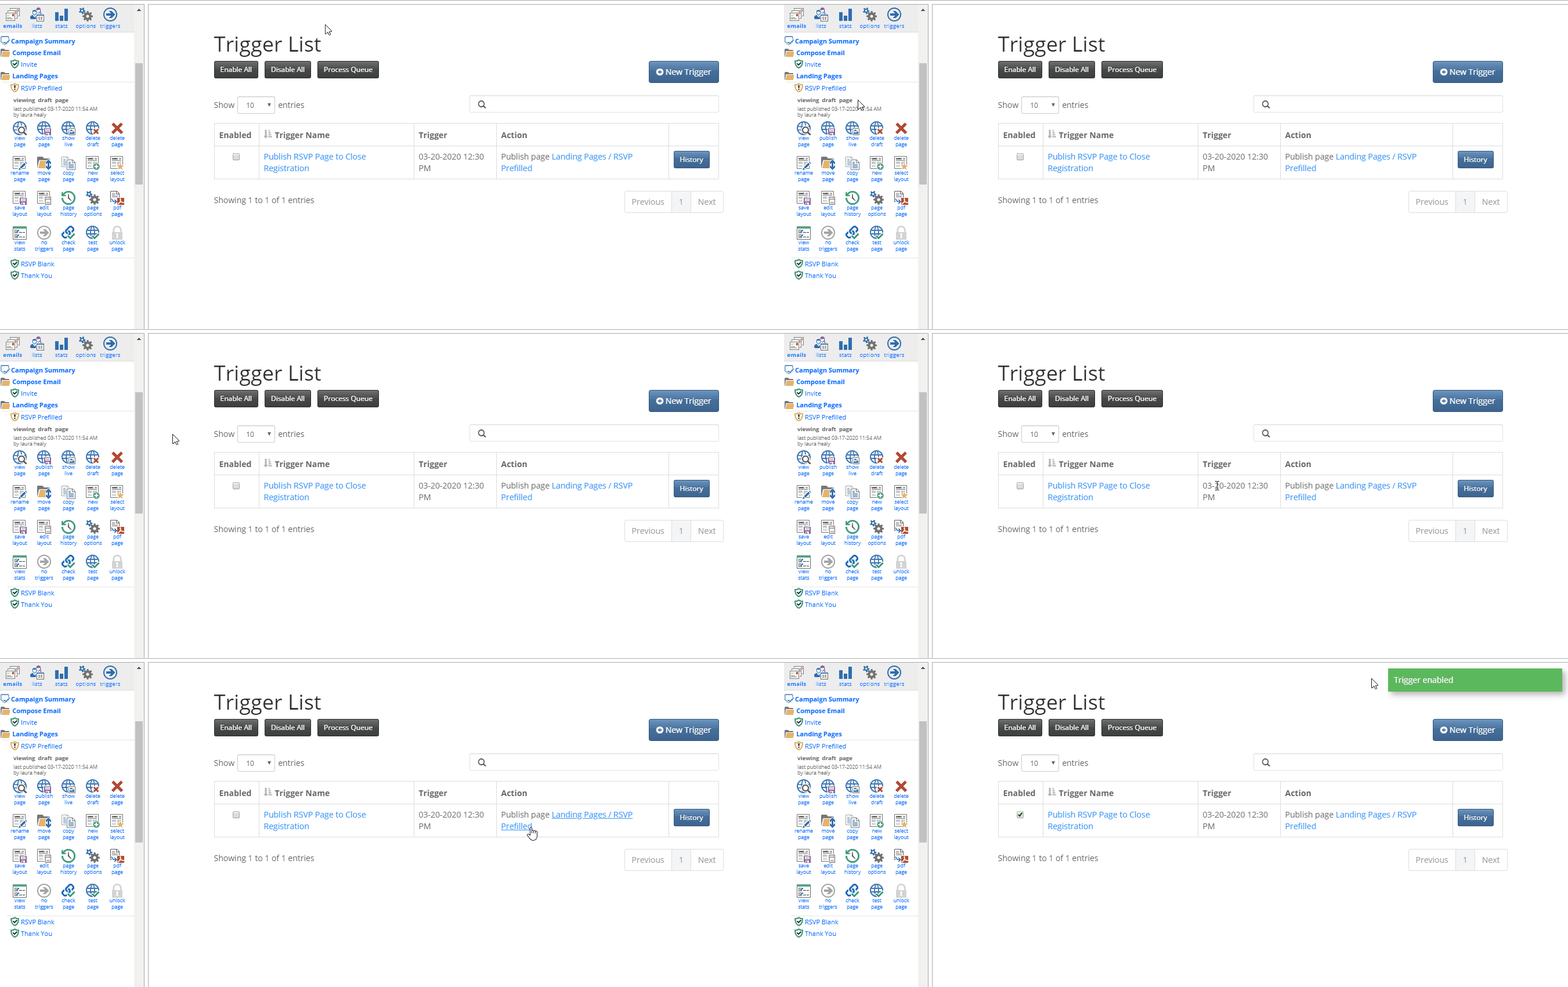
Step 7. Double check that everything is correct (i.e. Date, Time, Page to Publish, etc.). Then, when you're ready, from the Trigger List screen, check the check box for 'Enabled' to enable your trigger. Your landing page will not be published on the date/time you specified in this Trigger. Be sure to keep this page in draft mode until then.
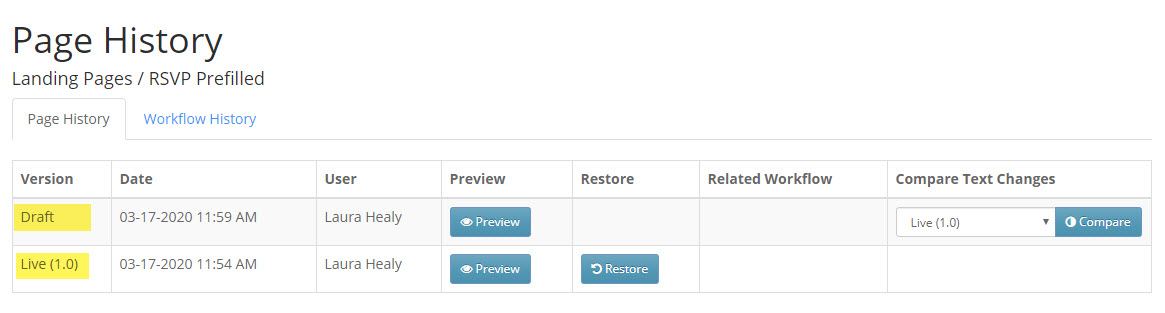
IMPORTANT: If you realize that you have an error on the published RSVP form and you need to change it, you can use the Page History icon to roll back to that version and make your edits. You will then need to repeat the instructions above.
Step 8: Repeat these same steps for the Blank RSVP form.
