Keywords: List access, limit lists, users and roles with limited list visibility, Dynamics v2 integration or Intapp OnePlace integration
Overview
This article describes how, for our Dynamics v2 integration or Intapp OnePlace integration, it is now possible to limit the campaigns and lists that a user will see when they click to Send an Email. This can be useful if your list of available lists is very long, or if you wish to avoid making mistakes when selecting the campaign and list to send to. You can select, for any given container, the campaigns and lists that will be made visible for mailings from that container.
The feature works by enabling "Restrict email list by container" for particular Roles. Once enabled for a Role, users with that Role on a given container will only see the lists you have selected for that container. Users with all other Roles will see all lists.
Contents
Prerequisites
Please make sure the following is done. If you are unsure, please contact your Customer Success Manager.
- Dynamics integration v2
-
or Intapp OnePlace integration
- Either Send Screen v1 or v2
- Enable “Restrict email list by container” in Admin.Roles for the specific role, and Save.

Setup
Go to Admin.Containers and Users
Select the container you wish to edit in the left hand file tree
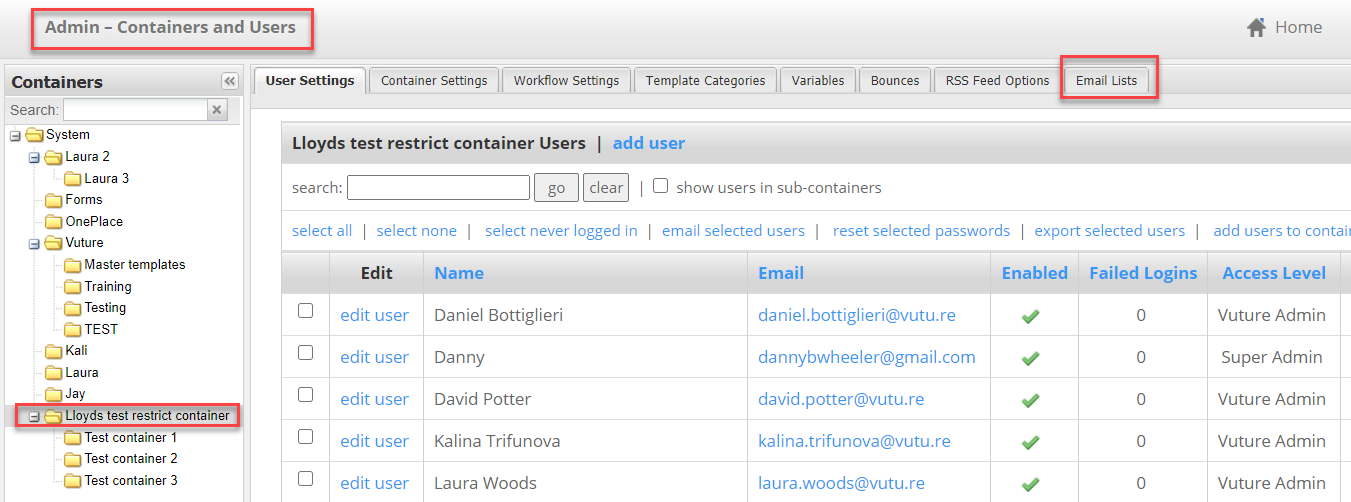
Select the Email Lists tab (top right of your screen).
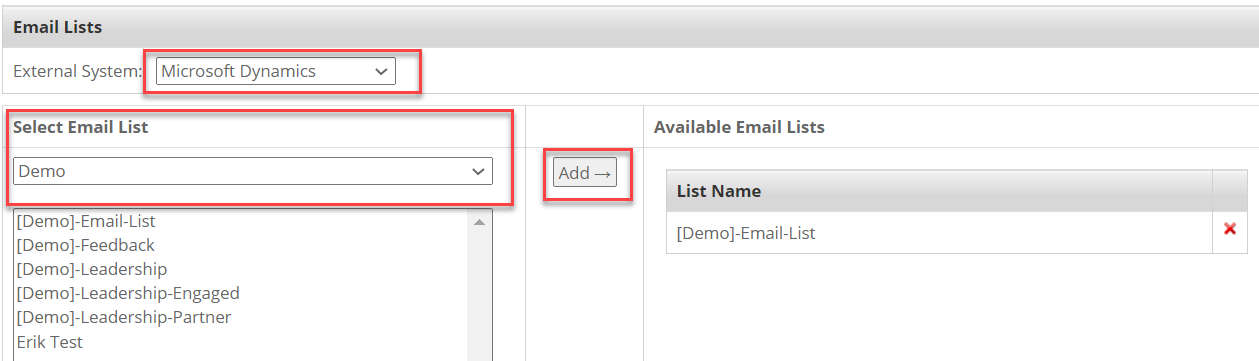
You may select the lists you want your users to access from any of your connected CRMs, or from the native Vuture lists, by choosing the source of the list in the "External System" dropdown.
Select one or more campaigns and lists from the left hand box and then click "Add" to add them to the available lists for that container.
Click on the red cross in right hand box to remove a list.
Testing
For client Super Admins, first change your Role (for that container only) to the limited Role. You can do this by:
- Navigating to Admin.Containers and Users
- Find your own user record and Edit.
- Scroll down to the relevant container and change your Role, for that container only, to the limited Role.
- Save
Next, go to Home and the container you are testing. Then,
- Click on any published campaign
- Select Send Email
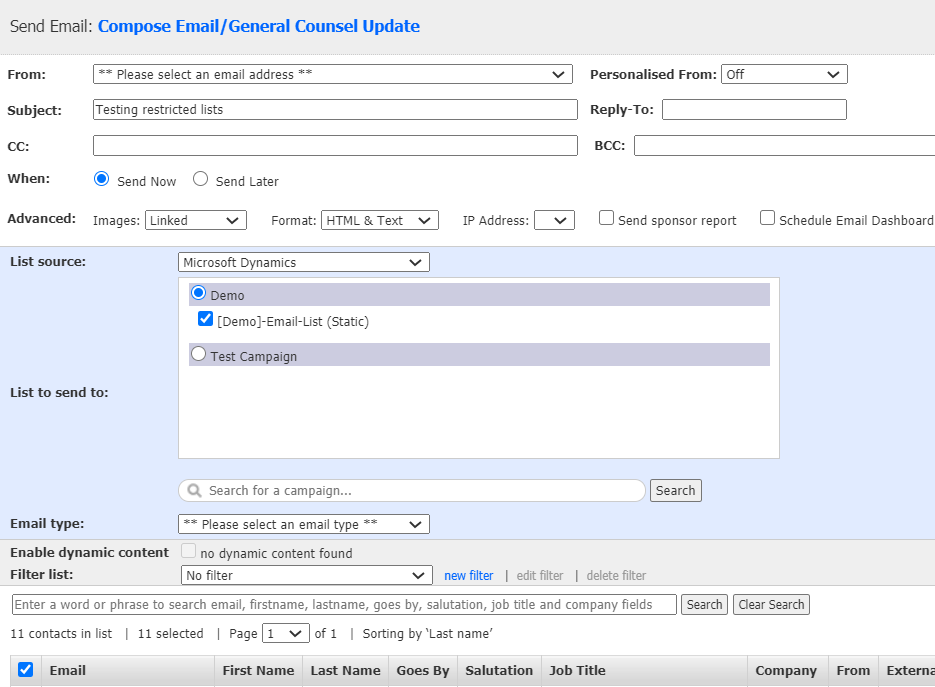
- Choose the list source
- You will see the lists you have made available for that Role in that container.
Friendly Reminder: Remember to return to Admin.Containers and Users and change your Role back to Super Admin for that container.
Important Points to Note
Please keep in mind the following when restricting list access:
- Lists in your CRM can be associated with more than one campaign. If you select a list to be made available at the Send Screen, and it is associated with more than one campaign, all the associated campaigns will appear in the Send Screen.
- If you edit a user's Role to use this feature, but you do not make any lists available in the container, they will not see any lists when they go to Send Email. They will just see a blank screen. Please ensure that if you enable this Role for your users you also add some lists to the relevant containers.
- If you create a new campaign or list in CRM, it will not automatically appear in the list of lists that are available. You will have to add these new lists to the Vuture container manually, each time you create a new list in the CRM.
- The restricted lists will not apply to sub-containers. Therefore if you would like your restricted Role to access lists in different sub-containers you should itemise the lists for each sub-container to be used.
-
WARNING: we recommend enabling this feature only for Roles where you want to restrict list access. If you enable it for every Role, you will be required to go into every container in Vuture and itemise the lists that can be used from that container. This could involve a considerable amount of work and ongoing maintenance as you add more lists to your CRM.
